Introduction
This manual provides instructions for the proper setup, operation, and maintenance of your RadioShack Emergency AM/FM/WX Weather Alert Radio. This portable device is designed to keep you informed and connected during emergencies, offering multiple charging options, weather alerts, a built-in flashlight, and a cell phone charging function.
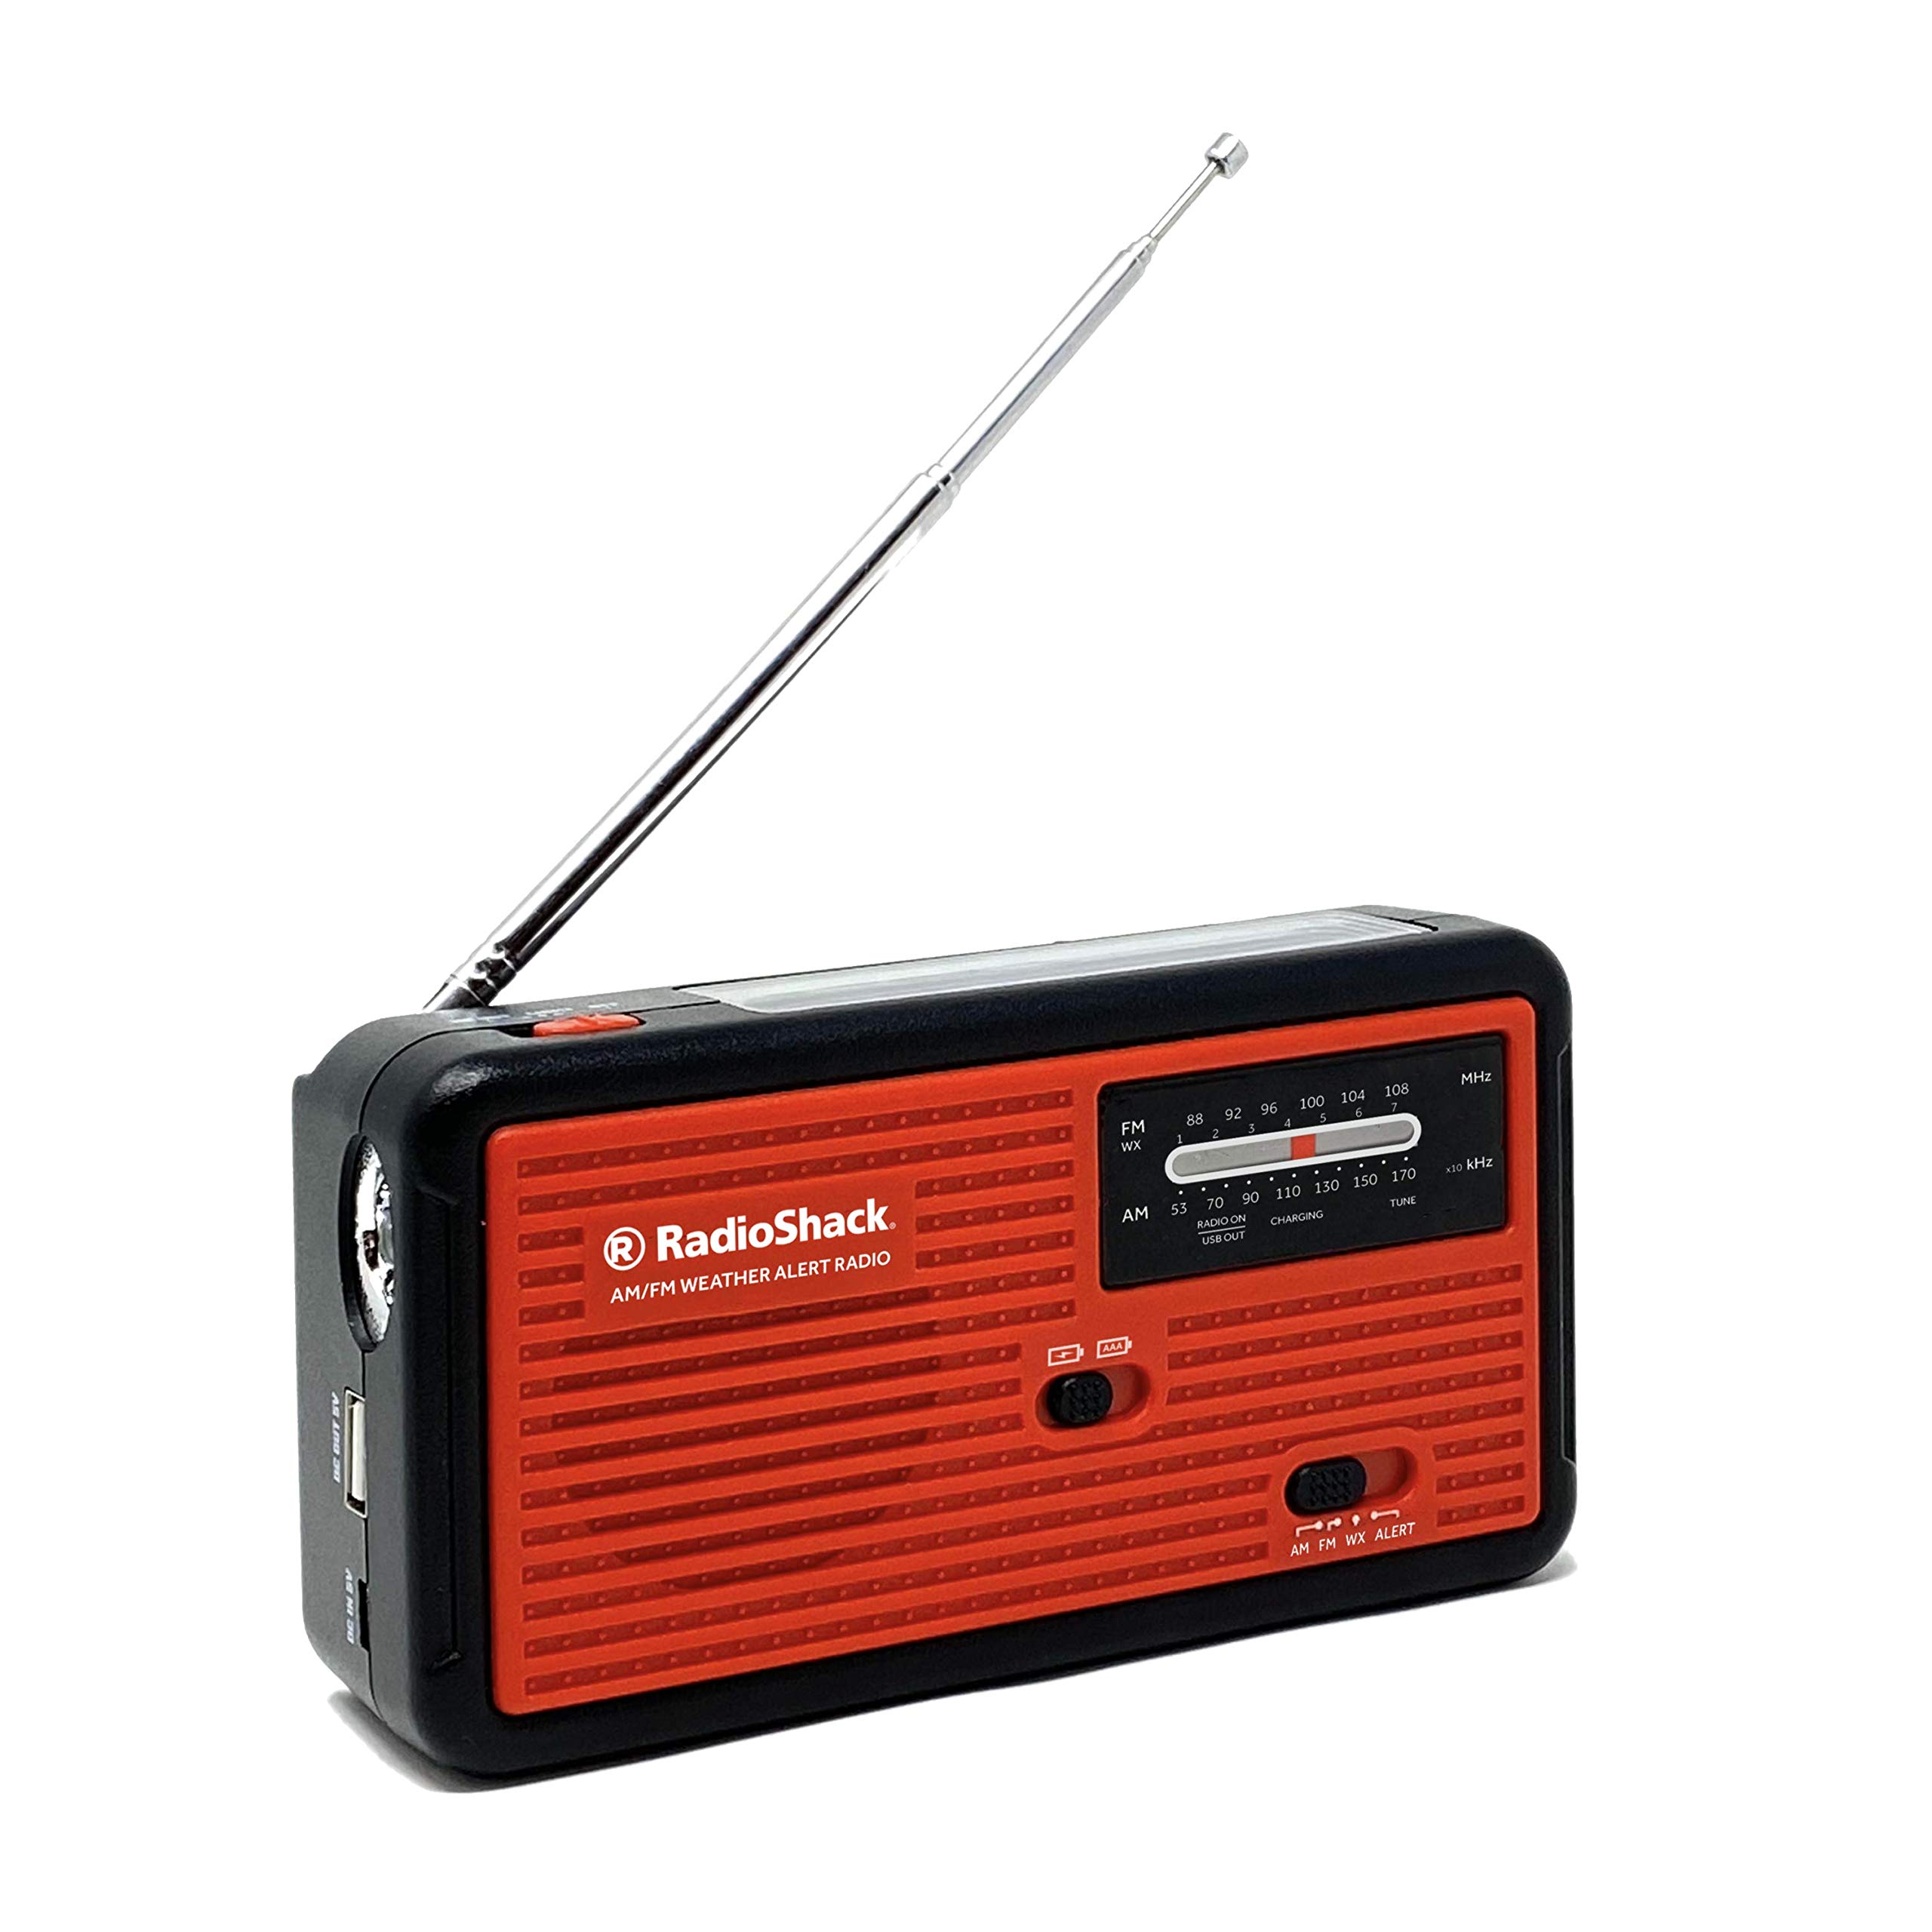
Figure 1: Front view of the RadioShack Emergency Radio.
Product Features
- Multiple Charging Options: Charge the radio using the integrated hand crank, built-in solar panel, USB port, or AAA batteries (not included).
- Emergency Alerts: Receives AM/FM radio and NOAA weather channels, providing 24/7 real-time weather forecasts and emergency notifications.
- Cell Phone Charger: Features a built-in USB port for charging mobile phones, GPS units, digital cameras, and other compatible devices.
- Built-In Flashlight: An integrated LED flashlight serves as a reading lamp or a light source during power outages.
- Compact and Lightweight: Designed for portability, measuring 5.9 inches x 3.1 inches x 1.5 inches and weighing 11 ounces, making it suitable for travel or emergency kits.
Setup
- Unpack: Carefully remove the radio from its packaging.
- Initial Charge: For optimal performance, fully charge the internal battery before first use. Connect the radio to a USB power source using a compatible USB cable (not included) or use the hand crank for an initial charge.
- AAA Battery Installation (Optional): If using AAA batteries, open the battery compartment on the back of the radio and insert 3 AAA batteries (not included), ensuring correct polarity.

Figure 2: Back view of the radio with hand crank and battery compartment.
Operating Instructions
Radio Operation (AM/FM/WX)
- Power On: Locate the power/volume knob on the side of the radio. Rotate it clockwise to turn on the radio and adjust the volume.
- Select Band: Use the band selector switch (AM/FM/WX) to choose your desired radio band.
- Tune Station: Extend the telescopic antenna for better reception. Rotate the tuning knob to find your desired station. The tuning indicator will help you locate strong signals.
- NOAA Weather Alert: Set the band selector to 'WX' to receive NOAA weather broadcasts. The radio can also be set to an 'Alert' mode to automatically activate when a weather alert is broadcast.

Figure 3: Radio tuning dial and band selection.

Figure 4: NOAA Weather Alert feature.
Flashlight Operation
To activate the built-in LED flashlight, locate the flashlight switch on the side or top of the radio and slide it to the 'ON' position. Slide it back to 'OFF' when not in use.
Charging Methods
Your RadioShack Emergency Radio offers four ways to charge its internal battery or power the device:
- Hand Crank: Extend the hand crank from the back of the radio. Rotate the crank clockwise or counter-clockwise at a steady pace for approximately 3-5 minutes to generate power for short-term use or to initiate charging.
- Solar Panel: Place the radio with its solar panel facing direct sunlight. The solar panel will slowly charge the internal battery. This method is ideal for maintaining charge or for extended outdoor use.
- USB Charging: Connect a standard USB charging cable (not included) from a USB power adapter (e.g., wall charger, computer USB port) to the radio's USB input port. The charging indicator light will illuminate.
- AAA Batteries: Insert 3 AAA batteries (not included) into the battery compartment. This provides an alternative power source when other charging methods are unavailable.

Figure 5: Hand crank for manual power generation.

Figure 6: Solar panel for charging in sunlight.
Charging External Devices
To charge an external device (e.g., cell phone) using the radio's internal battery:
- Ensure the radio's internal battery has sufficient charge.
- Connect your external device to the radio's USB output port using its charging cable.
- Slide the USB output switch (if present) to the 'ON' or 'USB OUT' position.
- Monitor your device's charging status.
Maintenance
- Cleaning: Wipe the radio with a soft, dry cloth. Do not use liquid cleaners or solvents.
- Storage: Store the radio in a cool, dry place away from direct sunlight and extreme temperatures.
- Battery Care: If using AAA batteries, remove them if the radio will not be used for an extended period to prevent leakage. Periodically charge the internal battery to maintain its health.
Troubleshooting
| Problem | Possible Cause | Solution |
|---|---|---|
| No power/Radio not turning on | Internal battery depleted; AAA batteries depleted or incorrectly installed. | Charge the internal battery via USB, solar, or hand crank. Check and replace AAA batteries if used. |
| Poor radio reception | Antenna not extended; weak signal area; interference. | Fully extend the telescopic antenna. Reposition the radio for better signal. Avoid sources of electronic interference. |
| External device not charging | Radio's internal battery low; USB output switch off; incompatible cable. | Ensure radio's internal battery is charged. Verify USB output switch is 'ON'. Use a compatible USB cable. |
| Hand crank difficult to turn | Mechanism may be stiff. | Apply gentle, consistent pressure. Do not force. If persistent, contact support. |
Specifications
| Feature | Detail |
|---|---|
| Model Number | 1201850 |
| Dimensions | 5.9 x 3.1 x 1.5 inches |
| Weight | 11.4 ounces |
| Power Sources | Internal Rechargeable Battery, Hand Crank, Solar Panel, USB, 3x AAA Batteries (not included) |
| Radio Bands | AM, FM, WX (NOAA Weather) |
| Connectivity | USB (for charging external devices) |
| Special Features | Built-in LED Flashlight, Cell Phone Charger |
Warranty and Support
For warranty information or technical support, please refer to the product packaging or contact RadioShack customer service. Keep your purchase receipt for warranty claims.