1. Introduction
This manual provides detailed instructions for the installation, operation, and maintenance of your Haofy Smart Dimmer Light Switch. This wall-mounted touch panel controller is designed for RGB, RGBW, and RGB+CCT LED strip lighting, operating on DC 12V-24V systems. Please read this manual thoroughly before installation and use to ensure proper function and safety.

Image: The Haofy Smart Dimmer Light Switch, a wall-mounted touch panel controller.
2. Safety Information
- Ensure power is disconnected at the circuit breaker before installation or maintenance.
- Installation should be performed by a qualified electrician or in accordance with local electrical codes.
- Do not exceed the specified voltage (DC 12V-24V) or current rating (10 Amps).
- Avoid installing in areas with excessive moisture or extreme temperatures.
- Do not attempt to disassemble or modify the device.
3. Product Features
- 1%-100% Dimming: Adjust brightness for RGB, RGBW, and RGB+CCT LED strips.
- Timed Controlling: Automatic 60-second light-off delay.
- Capacitive Touch Panel: Sensitive touch interface.
- 12 Modes: Pre-programmed color, brightness, and CCT changing modes.
- Audible Touch Feedback: Confirmation tone upon touch.
- LED Indicator: ON/OFF button with LED for visibility in dark.
4. Package Contents
Verify that all components are present:
- Smart Dimmer Light Switch (Touch Panel Controller)
- Mounting Bracket
- Mounting Screws
- User Manual (this document)

Image: Haofy Smart Dimmer Light Switch with its mounting bracket and two screws.
5. Installation
5.1 Wiring Diagram
Connect the input and output wires according to the diagram below. Ensure correct polarity for DC 12V-24V power supply and LED strip connections.
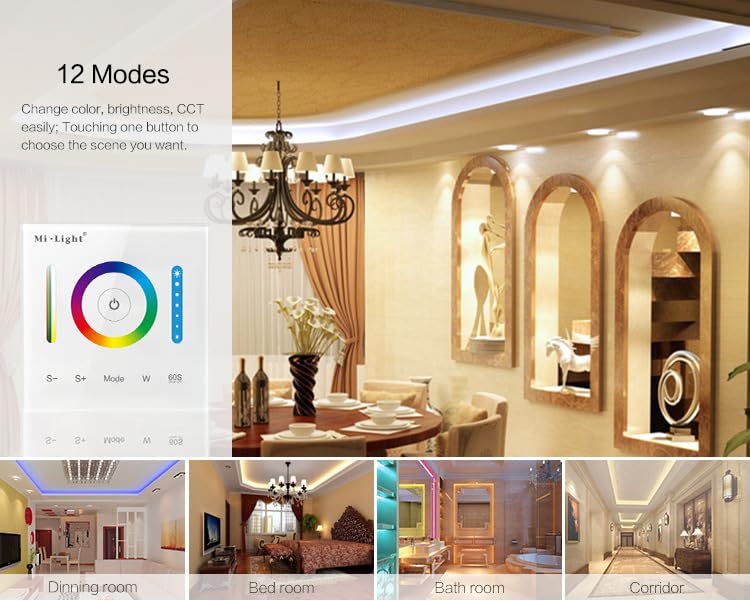
Image: General wiring diagram for the P3 Smart Panel Controller, indicating compatibility with Single Color, CCT, RGB, RGBW, and RGB+CCT LED strips.
5.2 Mounting
- Turn off power at the circuit breaker.
- Install the mounting bracket into the wall box or directly onto the wall using the provided screws. Ensure the bracket is securely fastened.
- Connect the wiring to the terminal blocks on the back of the dimmer switch.
- Carefully align the dimmer switch with the mounting bracket and press firmly until it clicks into place.
- Restore power at the circuit breaker.
5.3 Mode Switching (RGB, RGBW, RGB+CCT)
The controller supports RGB, RGBW, and RGB+CCT versions. To switch between modes:
- When the light is OFF, long press "Mode" and "W" buttons simultaneously for 5 seconds. The controller will sound 3 times, indicating it has switched to RGB version.
- When the light is OFF, long press "W" and "60S" buttons simultaneously for 5 seconds. The controller will sound 4 times, indicating it has switched to RGBW version.
- When the light is OFF, long press "Mode" and "60S" buttons simultaneously for 5 seconds. The controller will sound 5 times, indicating it has switched to RGB+CCT version.
6. Operating Instructions
The touch panel features intuitive controls for managing your LED lighting.

Image: Detailed diagram of the touch panel, labeling ON/OFF, Saturation/CCT slider, Dimming slider, Color Ring, 60S Delay Off, Static white, Speed- (S-), Speed+ (S+), and Mode buttons.
- ON/OFF Button: Touch the central power icon to turn the lights on or off. An LED indicator on the button helps locate it in the dark.
- Color Ring: Touch or slide your finger along the color ring to select a desired color for RGB/RGBW/RGB+CCT lights.
- Dimming Slider: Use the vertical slider on the right to adjust brightness from 1% to 100%.
- Saturation/CCT Slider: Use the vertical slider on the left to adjust color saturation in color mode or Correlated Color Temperature (CCT) in white light mode.
- Mode Button: Press the "Mode" button to cycle through 12 different color changing modes.
- S- / S+ Buttons: When in a dynamic mode, use "S-" to decrease speed and "S+" to increase speed of the effect.
- W Button: Press "W" to switch to static white light mode.
- 60S Delay Off Button: Press "60S" to activate a timed turn-off. The lights will remain on for 60 seconds before automatically switching off.
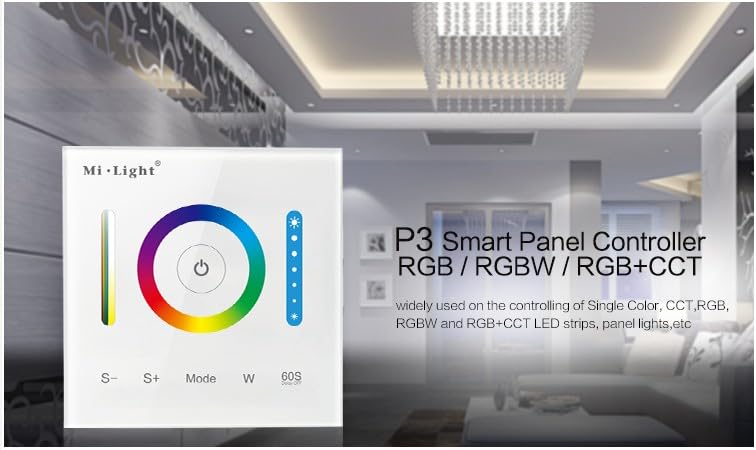
Image: The touch panel with text highlighting the 60-second timed off feature.
6.1 Dynamic Modes
The controller offers 12 pre-programmed dynamic modes for various lighting effects. Press the "Mode" button to cycle through these options.

Image: Visual representation of the 12 available lighting modes and examples of their use in different room settings like dining rooms, bedrooms, and bathrooms.
6.2 Changing Saturation and CCT (Video Demonstration)
Video: This video demonstrates how to change the saturation of RGB LED strips and adjust the Correlated Color Temperature (CCT) for CCT LED strips using the touch panel controller.
6.3 Applicable Scenarios

Image: Examples of the smart dimmer switch in use, showing different lighting effects in a dining room, bedroom, bathroom, and corridor.
7. Maintenance
To ensure the longevity and proper functioning of your dimmer switch:
- Clean the touch panel with a soft, dry cloth. Do not use abrasive cleaners or solvents.
- Ensure the device remains free from dust and debris.
- Periodically check wiring connections for tightness.
8. Troubleshooting
| Problem | Possible Cause | Solution |
|---|---|---|
| Lights do not turn on. | No power, incorrect wiring, faulty LED strip. | Check power supply. Verify wiring connections. Test LED strip with another power source if possible. |
| Dimming/color change not working. | Incorrect mode setting (RGB/RGBW/RGB+CCT), incompatible LED strip. | Ensure the controller is set to the correct mode for your LED strip (refer to Section 5.3). Verify LED strip compatibility. |
| Audible high-frequency whine. | Electrical interference or component resonance. | This can sometimes occur with dimmers at certain brightness levels. Try adjusting the brightness to see if the noise changes or disappears. Ensure proper grounding. |
| Difficulty mounting to drywall. | Mounting screw holes too close to cutout, screw head protrusion. | Ensure the wall cutout is precise and provides sufficient clearance for the mounting screws. Use appropriate wall anchors if mounting directly to drywall without a wall box. Consider professional installation if issues persist. |
9. Specifications
| Specification | Detail |
|---|---|
| Brand | Haofy |
| Model Number | B08DS481WH |
| Operating Voltage | DC 12V-24V |
| Current Rating | 10 Amps |
| Wattage | 180 Watts |
| Operation Mode | Automatically, Off |
| Control Method | Touch |
| Actuator Type | Touch |
| Mounting Type | Wall Mount |
| Connectivity Protocol | Bluetooth |
| International Protection Rating | IP54 |
| Item Dimensions (L x W x H) | 3.39 x 3.39 x 1.18 inches |
| Item Weight | 6.5 ounces |
| Material | Plastic (Acrylonitrile Butadiene Styrene) |
| Upper Temperature Rating | 60 Degrees Celsius |
10. Warranty and Support
For warranty information or technical support, please contact Haofy customer service. Refer to your purchase documentation for specific warranty terms and contact details. If you have any questions, you can reach us by email, and we will provide a satisfactory answer within 24 hours.
You can also visit the official Haofy store for more information: Haofy Store