1. Introduction
Thank you for choosing the ORIDGET Digital Electric Timer Plug Socket. This device is designed to help you automate your home appliances, reduce energy consumption, and simplify your daily routines. It features multiple timing modes including daily ON-OFF, countdown, and a customizable repeat cycle. Please read this manual carefully before use to ensure proper operation and safety.
2. Safety Information
Important Safety Precautions:
- The working current of any appliance connected to this timer must be below the maximum output current of the timer (13A).
- Do not immerse the timer in water or any other liquid.
- Do not disassemble or attempt to repair the timer yourself.
- Ensure the timer is used in a dry indoor environment.
- Keep out of reach of children. The timer includes a child lock function for added safety.
3. Product Overview
The ORIDGET Digital Electric Timer Plug Socket (Model T319) is a compact and user-friendly device. It features a large LCD screen for clear display of time and settings, along with intuitive buttons for programming.

Front View and Controls
This image shows the front of the ORIDGET Digital Electric Timer Plug Socket. Key features visible are the large digital display at the top, showing time settings, and a row of control buttons below it. These buttons include 'SWITCH/OFF', 'HOUR', 'MINUTE', 'ENTER', 'TIMING SETTING', 'CTD SETTING', and 'CYCLE SETTING'. The main UK plug socket is located at the bottom.

Screen Protector Information
This image highlights the screen of the timer, showing a transparent protective film. It notes that the film is for screen protection during production and transit, and minor scratches on it are normal. Users can peel off this film for a clearer view. The screen offers invisible protective film, strong screen adhesion, anti-fingerprint, and anti-scratch properties.

Dimensions and Key Features
This image provides a visual representation of the timer's dimensions (approximately 11cm height, 5.5cm width, 2.5cm depth). It also lists key features: Cycle timer accurate to the second, 3 groups of daily on/off timers, Countdown and turn off/on function, Easy-to-read large screen, and Completely silent for home use.
4. Setup and Initial Use
4.1. First Time Use
- Unpack the timer and remove any protective films from the screen.
- Plug the timer into a standard UK wall socket. The built-in battery will power the display, allowing you to set the time even when not connected to an appliance.
- The timer has a built-in NiMH battery to retain programs during power outages. It may require initial charging for a few minutes when first plugged in.
4.2. Setting the Current Time
- Press the HOUR button to set the current hour.
- Press the MINUTE button to set the current minute.
- Press the ENTER button to confirm the time.
The clock will continue to run even if the timer is unplugged, thanks to its internal battery.
5. Operating Modes and Programming
The ORIDGET timer offers three primary operating modes:
5.1. Daily ON-OFF Timer (Timing Setting)
This mode allows you to set up to 3 daily ON/OFF programs for your appliances. For example, to turn on at 7:30 PM and off at 11:30 PM every day.

Applications for Daily ON-OFF Timer
This image illustrates common uses for the daily ON-OFF timer function, such as controlling Christmas lights, pet lights (e.g., for terrariums), grow lights, and Wi-Fi routers. This feature helps automate daily routines and save energy.
- Press the TIMING SETTING button. The display will show "1 ON".
- Use HOUR and MINUTE buttons to set the desired ON time for program 1. Press ENTER.
- The display will then show "1 OFF". Use HOUR and MINUTE buttons to set the desired OFF time for program 1. Press ENTER.
- Repeat for "2 ON/OFF" and "3 ON/OFF" if needed.
- To exit programming, press the SWITCH/OFF button.
5.2. Countdown and Turn ON/OFF Mode (CTD Setting)
This mode allows the timer to turn an appliance ON or OFF after a specified countdown period. This is useful for limiting charging times or ensuring appliances turn off after a set duration.

Applications for Countdown Mode
This image demonstrates practical uses for the countdown feature, such as controlling UV lights, charging electronic devices (like phones), hair tools, and coffee pots. This mode helps prevent overcharging or leaving appliances on for too long, enhancing safety and extending device lifespan.
- Press the CTD SETTING button. The display will show "CTD" and a time.
- Use HOUR and MINUTE buttons to set the desired countdown duration.
- Press ENTER to start the countdown. The timer will turn the connected appliance ON or OFF once the countdown finishes, depending on its initial state.
- To cancel the countdown, press SWITCH/OFF.
5.3. Repeat Cycle Mode (Cycle Setting)
This advanced mode allows for a customizable ON-OFF repeat cycle, perfect for applications requiring intermittent operation, such as fans or pumps.
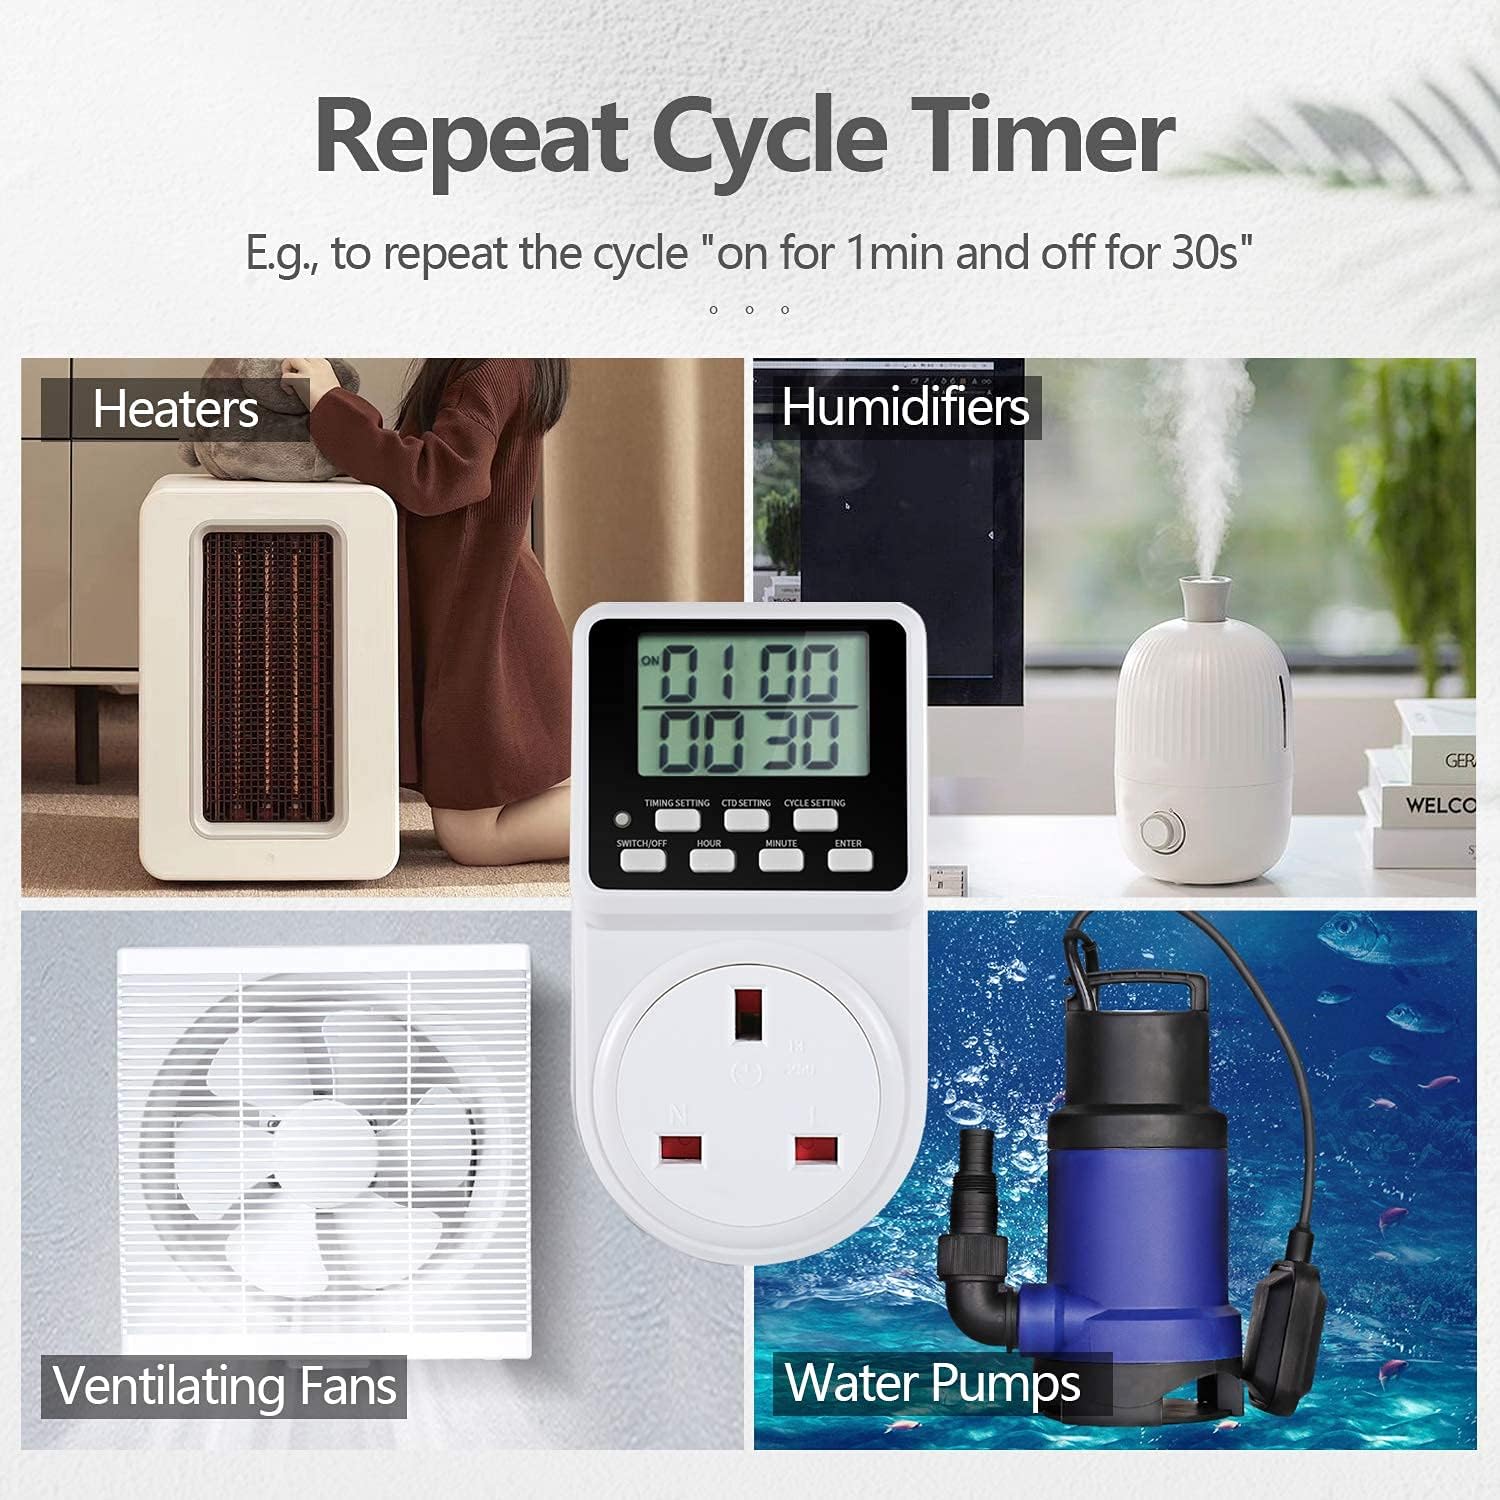
Applications for Repeat Cycle Timer
This image demonstrates the utility of the repeat cycle timer for various appliances, including heaters, humidifiers, ventilating fans, and water pumps. This mode allows for precise control over intermittent operation, such as "on for 1 minute and off for 30 seconds."
- Press the CYCLE SETTING button.
- The display will show "ON" time. Use HOUR and MINUTE buttons to set the duration the appliance should be ON. Press ENTER.
- The display will then show "OFF" time. Use HOUR and MINUTE buttons to set the duration the appliance should be OFF. Press ENTER.
- The cycle will begin automatically. To stop, press SWITCH/OFF.
5.4. Manual Override (SWITCH/OFF Button)
The SWITCH/OFF button allows you to manually turn the connected appliance ON or OFF, overriding any active programs. Pressing it again will return the timer to its programmed state.
6. Maintenance
- Clean the timer with a dry, soft cloth. Do not use abrasive cleaners or solvents.
- Ensure the timer is kept in a dry environment.
- The internal battery is designed for long life and typically does not require replacement.
7. Troubleshooting
| Problem | Possible Cause | Solution |
|---|---|---|
| Timer display is blank. | Not plugged in, or internal battery is fully discharged. | Plug the timer into a live wall socket. Allow a few minutes for the internal battery to charge. |
| Appliance does not turn ON/OFF as programmed. | Incorrect program setting, appliance switch is OFF, or timer is in manual override mode. | Review your program settings. Ensure the appliance's power switch is ON. Press the SWITCH/OFF button to return to programmed mode. |
| Timer makes no sound (compared to mechanical timers). | This is normal. The ORIDGET T319 is designed to be completely silent. | No action required. Enjoy the silent operation. |
| Screen has minor scratches. | Protective film is still on. | Gently peel off the transparent protective film from the screen. |

Silent Operation
This image visually compares the ORIDGET digital timer with a traditional mechanical timer. It highlights that the digital timer is "Completely Silent for Home Use" (indicated by a crossed-out speaker icon), while the mechanical timer is shown with a speaker icon and sound waves, implying it is noisy. This emphasizes a key benefit of the ORIDGET T319 model.
8. Specifications
| Feature | Detail |
|---|---|
| Model Number | T319 |
| Manufacturer | ORIDGET |
| Product Dimensions | 5.59 x 6.78 x 11 cm |
| Item Weight | 138 g |
| Colour | White |
| Material | Plastic |
| Power Source | AC |
| Voltage | 240 Volts |
| Wattage | 3120 watts |
| Amperage Capacity | 13 Amps |
| Plug Format | G - Square plugs. British type. |
| Battery Type (Internal) | NiMH (included) |
9. Warranty and Support
Each ORIDGET Digital Electric Timer Plug Socket is backed by a lifetime support. For any questions, issues, or technical assistance, please contact ORIDGET customer service. Refer to the packaging or product listing for contact details.

Package Contents
This image displays the contents of the ORIDGET Timer Plug Socket package, which includes one ORIDGET Timer Plug and one User Manual. The packaging itself is also shown, featuring the product name and model number T319.


