
Makita DUR190LZX3
Makita DUR190LZX3 18V Li-ion LXT Brushless Line Trimmer
Instruction Manual
Model: DUR190LZX3 | Brand: Makita
1. Introduction
Thank you for choosing the Makita DUR190LZX3 18V Li-ion LXT Brushless Line Trimmer. This manual provides essential information for the safe and effective operation, maintenance, and troubleshooting of your new tool. Please read this manual thoroughly before use and keep it for future reference.
1.1 Important Safety Information
Always observe the following safety precautions:
- Wear protective eyewear and gloves.
- Keep bystanders and children away from the work area.
- Avoid contact with the blade.
- Do not use in wet conditions.
Failure to follow these instructions may result in serious injury or property damage.
2. Product Overview
The Makita DUR190LZX3 is a powerful and efficient 18V Li-ion LXT Brushless Line Trimmer designed for various grass trimming and pruning tasks. It features advanced technologies for enhanced performance and user safety.
2.1 Key Features
- Brushless Motor: Provides increased power, efficiency, and longer tool life.
- Active Feedback Sensing Technology (AFT): Automatically shuts down the tool if the rotation speed suddenly slows down, protecting the user.
- Automatic Torque Drive Technology (ADT): Automatically changes the cutting speed according to the load condition for optimum operation.
- Electric Brake: Increases operator safety by quickly stopping the cutting head.
- Electronic Current Limiter: Provides overload protection for the motor.
- Reverse Switch: Allows for easy removal of tangled grass clippings and weeds from the cutting tool.
- Loop Type Handle: Ergonomically designed for comfortable handling.
- 3 Speed Settings: High, medium, and low options for versatile power management (up to 6,000 rpm).
- 300mm Cutting Diameter: Efficiently covers a wide area.
- Soft Start Feature: Increases speed gradually to eliminate start-up shock.
- Lightweight Design: Weighs approximately 2.9 kg (6.4 lbs) without battery.
2.2 Product Components
Familiarize yourself with the main components of your line trimmer:

Figure 2.1: Makita DUR190LZX3 Line Trimmer with key features highlighted, including Soft Start, 3-Speed Options, Variable Speed Trigger, Electric Brake, Reverse Switch, and Anti-Weed Winding Guard.
- Motor Housing: Contains the brushless motor and electronic controls.
- Shaft: The main body connecting the motor to the cutting head.
- Loop Handle: Adjustable handle for comfortable grip and control.
- Trigger Switch: Activates the trimmer.
- Speed Control Button: Selects between high, medium, and low speeds.
- Reverse Switch Button: Changes the rotation direction of the cutting head.
- Cutting Head: Holds the trimmer line.
- Guard: Protects the user from debris and the cutting line.
- Battery Port: For inserting the 18V LXT Li-ion battery (not included).
3. Setup and Assembly
The Makita DUR190LZX3 requires some assembly before first use. Ensure the battery is removed before performing any assembly or adjustments.
3.1 Attaching the Guard
- Align the guard with the mounting points on the trimmer head.
- Secure the guard using the provided screws and tools. Ensure it is firmly attached and does not wobble.
3.2 Installing the Loop Handle
- Slide the loop handle onto the shaft.
- Position the handle to a comfortable operating height.
- Tighten the handle clamp securely with the provided wrench.
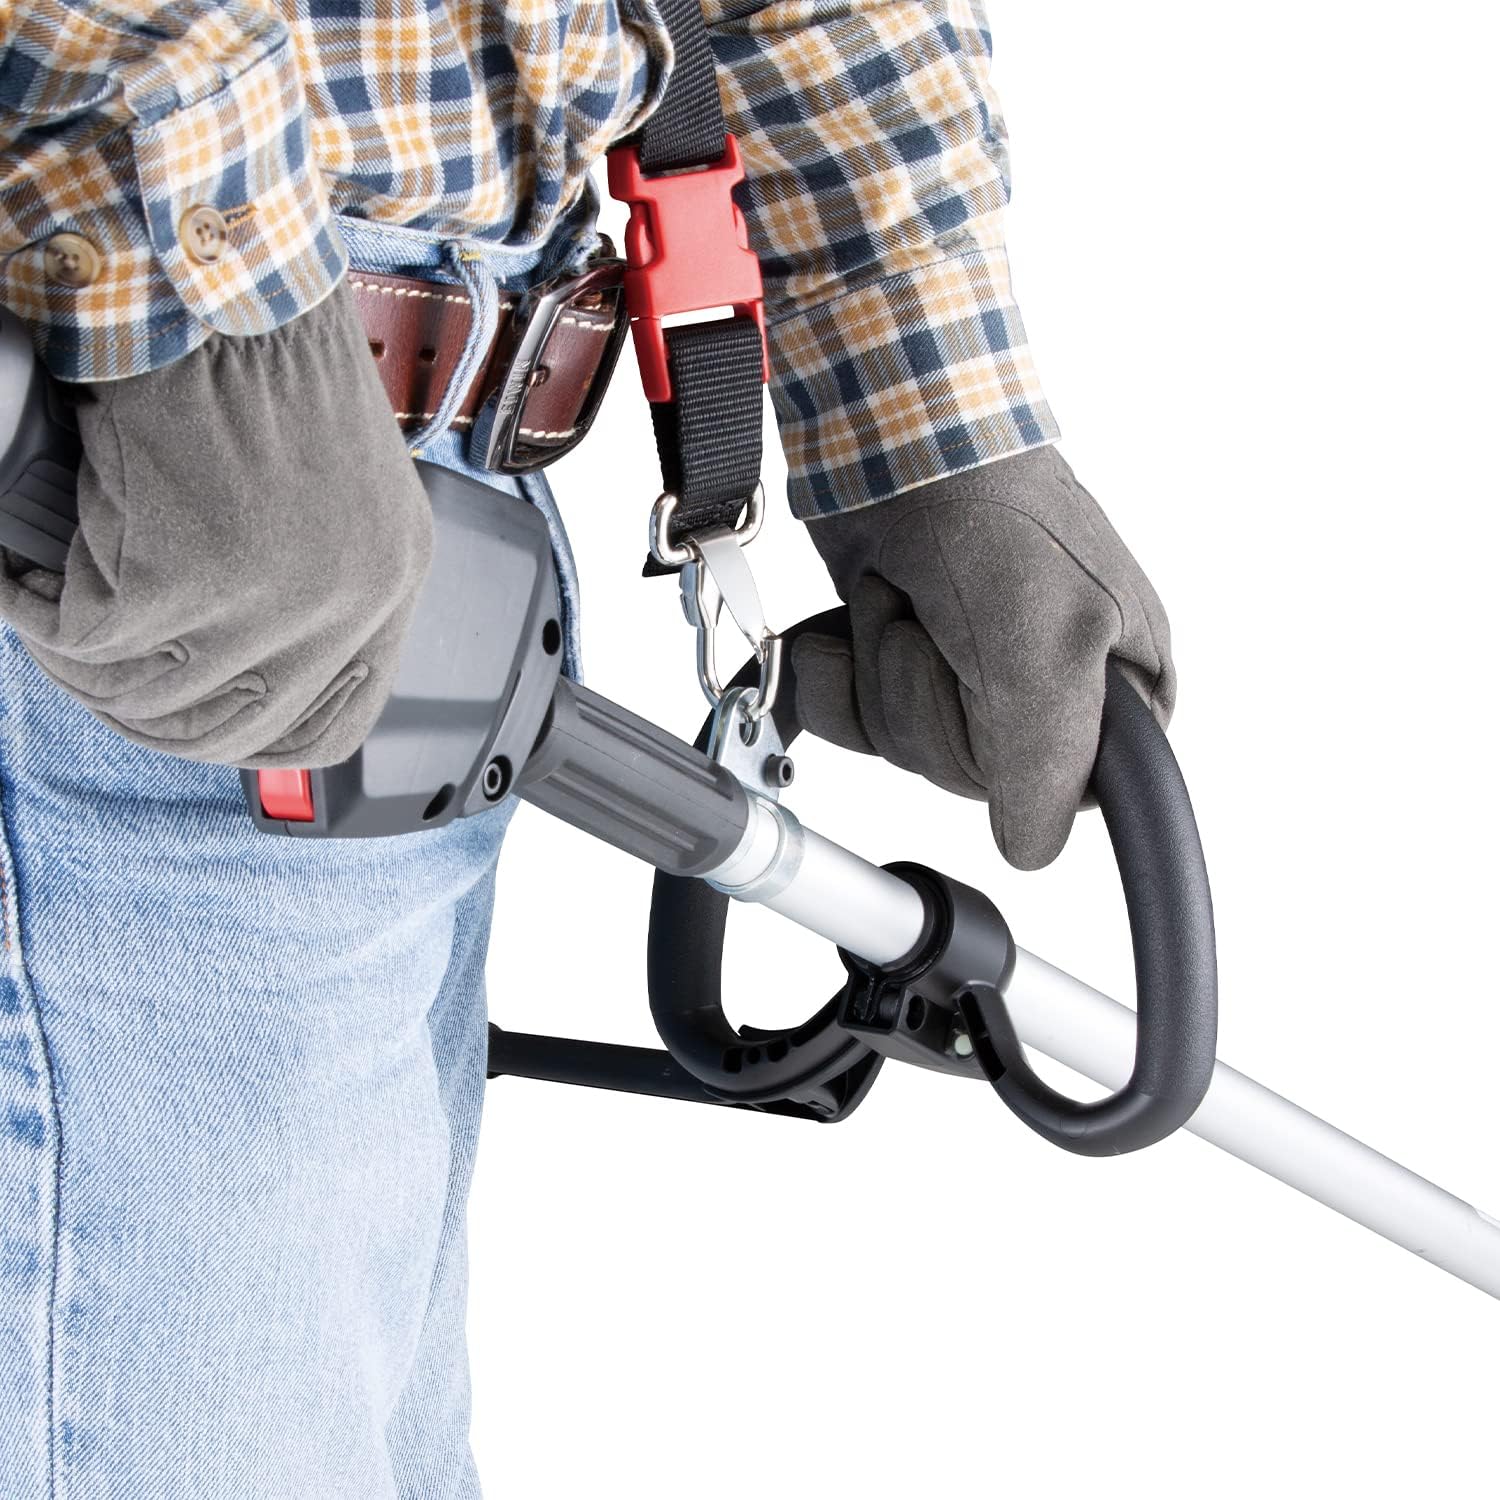
Figure 3.1: Proper grip on the loop handle for optimal control and comfort during operation.
3.3 Inserting the Battery
This tool requires an 18V Li-ion LXT slide-type battery (not included). Ensure the battery is fully charged before use.
- Align the battery with the battery port on the trimmer.
- Slide the battery into the port until it clicks into place.
- To remove, press the release button on the battery and slide it out.
Note: This tool is not compatible with G-Series batteries.
4. Operating Instructions
Always wear appropriate personal protective equipment (PPE) including eye protection, gloves, and sturdy footwear when operating the line trimmer.
4.1 Starting and Stopping the Trimmer
- Ensure the battery is securely inserted.
- Hold the trimmer firmly with both hands.
- Press the lock-off button (if present) and then pull the trigger switch to start the trimmer. The soft start feature will gradually increase speed.
- Release the trigger switch to stop the trimmer. The electric brake will quickly stop the cutting head.
4.2 Adjusting Speed Settings
The trimmer has three speed settings (high, medium, low) for optimal performance based on the task.
- Press the speed control button to cycle through the settings. An indicator light will show the selected speed.
- Use high speed for dense grass and weeds, medium for general trimming, and low for lighter tasks or to conserve battery life.
4.3 Using the Reverse Switch
If grass or weeds become tangled around the cutting head, use the reverse switch to clear them.
- Stop the trimmer by releasing the trigger.
- Press the reverse switch button.
- Pull the trigger switch to operate the cutting head in reverse for a few seconds.
- Release the trigger, then press the reverse switch button again to return to normal forward rotation.
4.4 Trimming Techniques

Figure 4.1: Demonstrating the use of the line trimmer in an overgrown area.
- Sweeping Motion: Move the trimmer in a side-to-side sweeping motion, cutting small amounts of grass with each pass.
- Edging: Hold the trimmer at an angle to trim along edges of sidewalks or flowerbeds.
- Around Obstacles: Use caution when trimming around trees, fences, or other obstacles to avoid damaging the trimmer line or the object.

Figure 4.2: Precision trimming along a garden border with the Makita line trimmer.
5. Maintenance
Regular maintenance ensures the longevity and optimal performance of your Makita line trimmer. Always remove the battery before performing any maintenance.
5.1 Cleaning the Trimmer
- After each use, wipe down the trimmer body with a clean, damp cloth.
- Remove any grass clippings, dirt, or debris from the cutting head and guard. A brush can be used for stubborn areas.
- Ensure ventilation openings are clear of obstructions to prevent overheating.

Figure 5.1: The cutting head after use, emphasizing the need for cleaning to remove debris and moisture.
5.2 Replacing the Trimmer Line
Refer to your cutting head's specific instructions for line replacement. Generally, this involves:
- Remove the cutting head cap.
- Remove any remaining old line.
- Insert new trimmer line according to the arrows or guides on the spool.
- Replace the cap securely.
5.3 Storage
- Store the trimmer in a dry, secure location, out of reach of children.
- Remove the battery before long-term storage.
- Protect the trimmer from direct sunlight and extreme temperatures.
6. Troubleshooting
This section addresses common issues you might encounter with your Makita line trimmer.
| Problem | Possible Cause | Solution |
|---|---|---|
| Trimmer does not start. | Battery not inserted correctly or discharged. Lock-off button not pressed. Tool malfunction. | Ensure battery is fully charged and properly inserted. Press the lock-off button before pulling the trigger. Contact Makita service center. |
| Trimmer stops during operation. | Overload (ADT/AFT activated). Battery discharged. Tangled grass. | Reduce load, allow tool to cool. Recharge or replace battery. Use reverse switch to clear tangles. |
| Poor cutting performance. | Worn or incorrect trimmer line. Too much material being cut at once. | Replace trimmer line with recommended type. Cut smaller sections of grass. |
| Excessive vibration. | Damaged cutting head or unbalanced line. Loose components. | Inspect cutting head and line for damage; replace if necessary. Check all screws and clamps for tightness. |
If the problem persists after attempting these solutions, please contact Makita customer support.
7. Specifications
| Feature | Detail |
|---|---|
| Model Number | DUR190LZX3 |
| Power Source | Battery Powered (18V Li-ion LXT) |
| Motor Type | Brushless |
| Cutting Diameter | 300mm (13 Inches) |
| Speed Settings | 3 (High, Medium, Low) |
| Max Speed | 6000 RPM |
| Spindle Size | M10 x 1.25 L |
| Item Weight (Tool Only) | 3.2 Kilograms (7.04 pounds) |
| Product Dimensions | 69.88 x 13.7 x 9.29 inches |
| Assembly Required | Yes |
| UPC | 088381720328 |
8. Warranty and Support
8.1 Manufacturer's Warranty
The Makita DUR190LZX3 comes with a 1-year manufacturer warranty. This warranty can be extended by an additional 2 years (total 3 years) when the product is registered within 30 days of purchase.
Important: This guarantee does not apply where non-genuine or non-recommended parts or accessories are fitted to the tool. The use of non-genuine or compatible batteries and chargers with Makita tools will invalidate the Makita guarantee for our tools.
8.2 Customer Support
For technical assistance, warranty claims, or to locate an authorized service center, please visit the official Makita website or contact their customer service department. You can also visit the Makita Store on Amazon for more information.
Related documentsDUR190LZX3


Ask a question about this manual
Ask about setup, troubleshooting, compatibility, parts, safety, or missing instructions. Manuals+ will review the question and use this page’s manual context to help answer it.