1. Introduction
Thank you for choosing the Hoffen 4 Step Dive Ladder. This manual provides essential information for the safe and effective use, installation, and maintenance of your new telescopic dive ladder. Please read this manual thoroughly before installation and operation, and retain it for future reference.
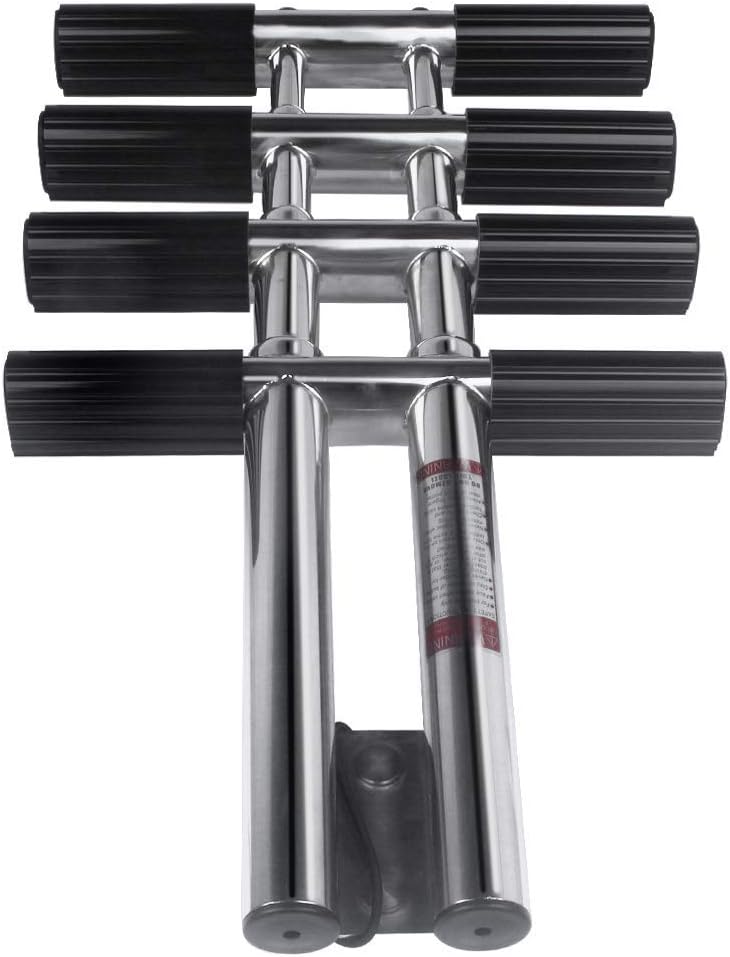
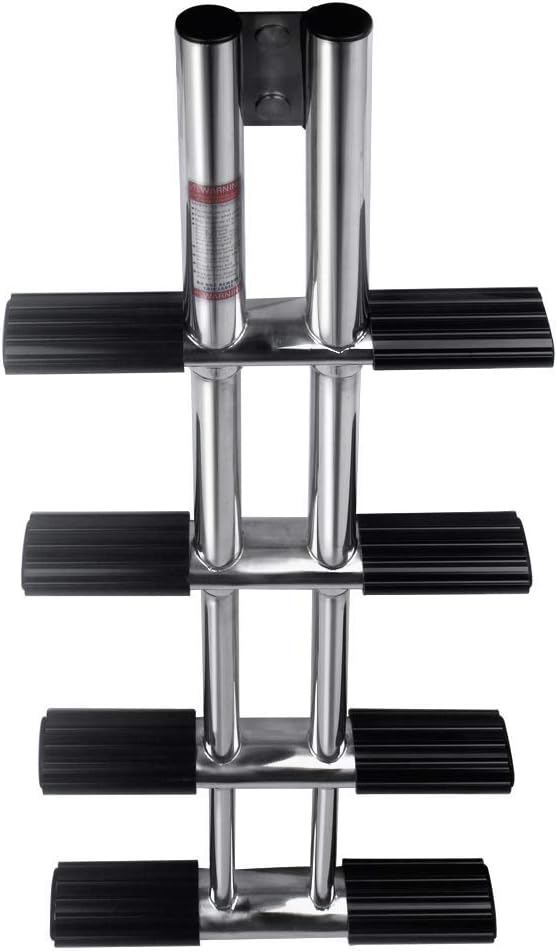
This heavy-duty, all-welded 316 stainless steel pontoon ladder is designed for durability and ease of use, featuring a unique self-supporting design and wide steps for comfortable boarding.
2. Safety Information
Always prioritize safety when installing and using the ladder. Failure to follow these instructions may result in injury or damage to the product.
- Ensure the ladder is securely mounted to a stable surface before use.
- Do not exceed the maximum weight capacity of 600 lbs (272 kg).
- Always face the ladder when ascending or descending.
- Ensure all steps are fully extended and locked into place before use.
- Inspect the ladder for any damage or loose components before each use. Do not use if damaged.
- Keep hands and fingers clear of telescoping sections when extending or retracting the ladder.
- The ladder is designed for marine use. Do not use for purposes other than intended.
3. Package Contents
Verify that all components are present before beginning installation:
- One (1) Hoffen 4 Step Telescopic Dive Ladder
- Mounting Brackets (Quick release)
- Mounting Screws and Hardware (Note: Longer bolts may be required for certain transom thicknesses. Ensure appropriate length for your specific application.)
- 2.56" Transom Mounting Extension Shim (if applicable)

4. Specifications
| Feature | Detail |
|---|---|
| Material | Heavy-duty 316 Stainless Steel |
| Number of Steps | 4 |
| Weight Capacity | 600 lbs (272 kg) |
| Ladder Length (Extended) | 45 inches (1150mm) |
| Ladder Length (Stowed) | 17.3 inches (440mm) |
| Overall Ladder Width (ID) | 13.75 inches (350mm) |
| Step Width | 2 inches (Comfortable, Slip-Proof Plastic Thread) |
| Tube Diameter | 1.5 inches |
| Mounting | Deck Mount, Flips Up, Rear Entry, Quick Release Brackets |

5. Setup and Installation
The Hoffen 4 Step Dive Ladder is designed for easy installation. Follow these steps carefully to ensure secure mounting.
5.1 Choosing a Mounting Location
Select a flat, strong surface on your boat's transom or deck that can support the ladder's weight and the weight of users. Ensure there is sufficient clearance for the ladder to extend fully and flip up when stowed.
5.2 Installation Steps
- Position the Mounting Brackets: Place the quick-release mounting brackets on the desired installation location. Use a pencil or marker to mark the drilling points through the pre-drilled holes in the brackets.
- Drill Pilot Holes: Using an appropriate drill bit for your boat's material, carefully drill pilot holes at the marked locations. Ensure the holes are straight and of the correct diameter for the mounting screws.
- Secure the Brackets: Apply marine-grade sealant around the drilled holes to prevent water intrusion. Secure the mounting brackets using the provided stainless steel screws and nuts. Ensure they are tightened firmly but do not overtighten. Note: If the provided bolts are not long enough for your transom thickness, acquire suitable marine-grade stainless steel bolts of the correct length.
- Attach the Ladder: Align the ladder's top mounting plate with the installed quick-release brackets. Slide the ladder onto the brackets until it clicks securely into place. The quick-release design allows for easy removal when not in use.
- Test Stability: After installation, gently pull on the ladder to ensure it is firmly attached and does not wobble.
6. Operating Instructions
6.1 Extending the Ladder
- Ensure the ladder is in its stowed (folded up) position.
- Gently pull the bottom section of the ladder downwards. The telescopic sections will slide out.
- Continue pulling until all four steps are fully extended and locked into their open position. Ensure each step is securely locked before use.
6.2 Retracting and Stowing the Ladder
- From the water, push the bottom step upwards. The telescopic sections will retract.
- Continue pushing until the ladder is fully retracted and can be flipped up and secured in its stowed position.
- If equipped with a securing strap or clip, use it to hold the ladder firmly in the stowed position during transit.

7. Maintenance
Regular maintenance will prolong the life and ensure the safe operation of your Hoffen Dive Ladder.
- Rinse After Use: After each use, especially in saltwater environments, rinse the ladder thoroughly with fresh water to remove salt, dirt, and debris. This helps prevent corrosion.
- Inspect Regularly: Periodically inspect all components, including welds, steps, mounting brackets, and hardware, for signs of wear, damage, or corrosion.
- Check Fasteners: Ensure all mounting screws and bolts remain tight. Retighten if necessary.
- Lubrication: Apply a marine-grade lubricant to the telescoping sections and pivot points annually or as needed to ensure smooth operation.
- Step Treads: Check the slip-proof plastic treads on each step. If they become loose or damaged, they may need to be re-secured or replaced to maintain safety.
- Cleaning: For stubborn stains or light corrosion on the stainless steel, use a stainless steel cleaner and polish according to the product's instructions. Avoid abrasive cleaners or tools that could scratch the finish.
8. Troubleshooting
| Problem | Possible Cause | Solution |
|---|---|---|
| Ladder difficult to extend/retract | Buildup of salt/debris; lack of lubrication; minor bending. | Thoroughly rinse with fresh water. Apply marine-grade lubricant to telescoping sections. Check for obstructions or damage. |
| Ladder feels wobbly after installation | Mounting hardware loose; improper installation; mounting surface not strong enough. | Check and tighten all mounting screws/bolts. Ensure brackets are securely fastened to a reinforced area of the boat. Re-install if necessary. |
| Slip-proof treads on steps are loose or falling off | Wear and tear; adhesive failure (if applicable). | Re-secure treads using appropriate marine-grade adhesive or fasteners. Replace treads if severely damaged. |
| Rust spots appearing on stainless steel | Exposure to harsh elements; lack of rinsing; "tea staining" (surface corrosion). | Clean with a stainless steel cleaner designed for marine use. Ensure regular rinsing with fresh water after saltwater exposure. |
9. Warranty Information
The Hoffen 4 Step Dive Ladder comes with a 5-year Limited Warranty. This warranty covers defects in materials and workmanship under normal use and service. It does not cover damage resulting from misuse, abuse, accident, unauthorized modifications, or improper installation.
For warranty claims, please retain your proof of purchase and contact Hoffen customer service.
10. Customer Support
If you have any questions, suggestions, or require assistance with your Hoffen 4 Step Dive Ladder, please do not hesitate to contact our customer service team. Your satisfaction is our priority.
For contact information, please refer to the Hoffen official website or your purchase documentation. You can also visit the Hoffen Store on Amazon for more products and information.


