1. Introduction
Thank you for purchasing the GoolRC 2" 52mm Car Tachometer. This device is designed to accurately display your vehicle's engine RPM (Revolutions Per Minute) with a clear dial and pointer, enhanced by a blue LED backlight for easy readability in low-light conditions. It is compatible with 4, 6, and 8-cylinder gasoline and diesel engines. This manual provides comprehensive instructions for the proper installation, operation, and maintenance of your new tachometer to ensure optimal performance and longevity.

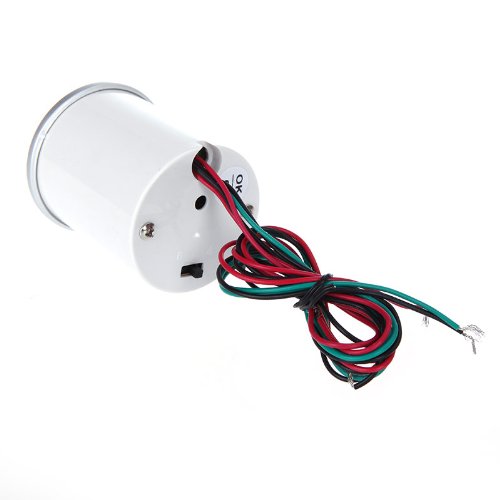
Figure 1: GoolRC 2" 52mm Car Tachometer with blue LED backlight, showing the dial and pointer.
2. Safety Information
Please read all safety warnings and instructions carefully before installing or operating the tachometer. Failure to follow these instructions may result in electric shock, fire, and/or serious injury.
- Always disconnect the vehicle's battery before performing any electrical work to prevent short circuits and electrical hazards.
- Ensure all wiring connections are secure and properly insulated to prevent accidental contact and short circuits.
- Do not install the tachometer in a location that obstructs your view of the road or interferes with the safe operation of the vehicle.
- Consult a qualified automotive technician if you are unsure about any part of the installation process.
- This product is designed for 12V DC vehicle electrical systems only. Do not connect to other voltage sources.
3. Package Contents
Verify that all items listed below are present in your package. If any items are missing or damaged, please contact your retailer.
- 1 x GoolRC Tachometer
- 1 x Hose (likely for mounting/cable routing)
- 2 x Screws
- 1 x Gauge Holder
- 1 x Rubber Ring

Figure 2: Typical package contents for the GoolRC Tachometer.
5. Setup & Installation
Proper installation is critical for accurate readings and safe operation. Follow these steps carefully.
5.1. Pre-Installation Checklist
- Ensure the vehicle's ignition is off and the battery's negative terminal is disconnected.
- Gather necessary tools: wire strippers, crimpers, electrical tape or heat shrink tubing, multimeter, drill (if mounting requires new holes).
- Identify a suitable mounting location that does not obstruct driving visibility or airbag deployment.
- Confirm your vehicle's engine type (4, 6, or 8 cylinders) as this tachometer supports all three.
5.2. Wiring Diagram and Connections
The tachometer typically has four wires for connection:
- Red Wire: Connect to a switched 12V DC power source (e.g., ignition switch, accessory circuit) that is active when the ignition is on.
- Black Wire: Connect to a reliable chassis ground point on the vehicle.
- Green Wire: Connect to the engine's ignition coil negative terminal (for gasoline engines) or the tachometer signal wire (for diesel engines or vehicles with electronic ignition modules). Consult your vehicle's service manual for the correct tachometer signal wire location.
- White Wire: Connect to the vehicle's headlight switch or a 12V DC power source that activates with the headlights. This wire powers the blue LED backlight.
Important: Ensure all connections are secure and insulated to prevent short circuits. Use appropriate connectors (crimp terminals, solder) and insulate with electrical tape or heat shrink tubing.
5.3. Mounting the Tachometer
- Attach the tachometer to the provided gauge holder using the included screws.
- Position the gauge holder in your desired location. Common locations include the dashboard or A-pillar.
- Mark the mounting points for the gauge holder.
- Drill pilot holes if necessary, ensuring no existing wiring or components are damaged.
- Secure the gauge holder to the mounting surface using the provided screws.
- Route the wiring neatly and securely, away from moving parts or heat sources, using cable ties if needed.
Once installation is complete, reconnect the vehicle's battery negative terminal.
6. Operating Instructions
The GoolRC Tachometer is designed for straightforward operation.
- Power On: Turn the vehicle's ignition to the "ON" or "ACC" position. The tachometer will power on, and the pointer may briefly sweep to its maximum reading before returning to zero.
- Reading RPM: Start the engine. The pointer will move to indicate the current engine RPM. The scale is marked in thousands (x1000 RPM), so a reading of "2" signifies 2000 RPM.
- Backlight: When the vehicle's headlights are turned on, the blue LED backlight will illuminate, providing clear visibility of the gauge face in low-light conditions.
The tachometer provides high sensitivity and simple operation, accurately measuring engine revolutions.
7. Maintenance
The GoolRC Tachometer requires minimal maintenance to ensure its longevity and continued performance.
- Cleaning: Use a soft, dry cloth to wipe the gauge face and casing. Do not use abrasive cleaners, solvents, or harsh chemicals, as these can damage the display or finish.
- Connections: Periodically check all wiring connections to ensure they remain secure and free from corrosion.
- Environmental Protection: While designed for automotive use, avoid exposing the tachometer to extreme temperatures, direct prolonged sunlight, or excessive moisture, which could affect its performance or lifespan.
10. Warranty & Support
GoolRC products are manufactured to high-quality standards. Specific warranty terms and conditions may vary by region and retailer. Please retain your proof of purchase for any warranty claims.
For technical support, troubleshooting assistance beyond this manual, or warranty inquiries, please contact the retailer from whom you purchased the product or visit the official GoolRC website for contact information. When contacting support, please have your product model number (K1069-GBFBMX) and purchase details ready.