1. Introduction
This manual provides detailed instructions for the installation, configuration, and operation of your SMONET Wireless Security Camera System. This system features 5-megapixel high-resolution cameras, a 12-inch IPS monitor, two-way audio, AI human detection, IP67 weatherproofing, and a pre-installed 1TB hard disk drive for reliable surveillance.
2. Safety Information
Please read and understand all safety warnings and instructions before installing and operating this product. Failure to follow these instructions may result in electric shock, fire, or serious injury.
- Ensure all power connections are secure and correctly rated for the device.
- Do not expose the monitor to extreme temperatures or direct sunlight.
- Cameras are IP67 rated for outdoor use, but ensure all cable connections are properly sealed to prevent water ingress.
- Avoid placing the camera in locations where it may be subject to strong vibrations or impact.
- Keep the product away from children.
- Installation and home maintenance are not covered under warranty.
3. Package Contents
Verify that all items listed below are included in your package. If any items are missing or damaged, please contact customer support.
- 1 x 12-inch IPS Monitor (with 8-channel NVR and 1TB HDD integrated)
- 2 x 5MP Wireless Cameras
- 1 x Monitor Power Adapter
- 2 x Camera Power Adapters
- 1 x USB Mouse
- 1 x HDMI Cable
- 1 x LAN Cable
- 2 x Camera Antennas
- Mounting Screws and Wall Plugs for Cameras
- 1 x User Manual (Japanese)
- 2 x Warning Stickers

4. Product Overview
4.1. 5MP Wireless Camera Features
- 5-Megapixel High Resolution: Captures clear and detailed images.
- IP67 Weatherproof: Designed for outdoor use, resistant to dust and water.
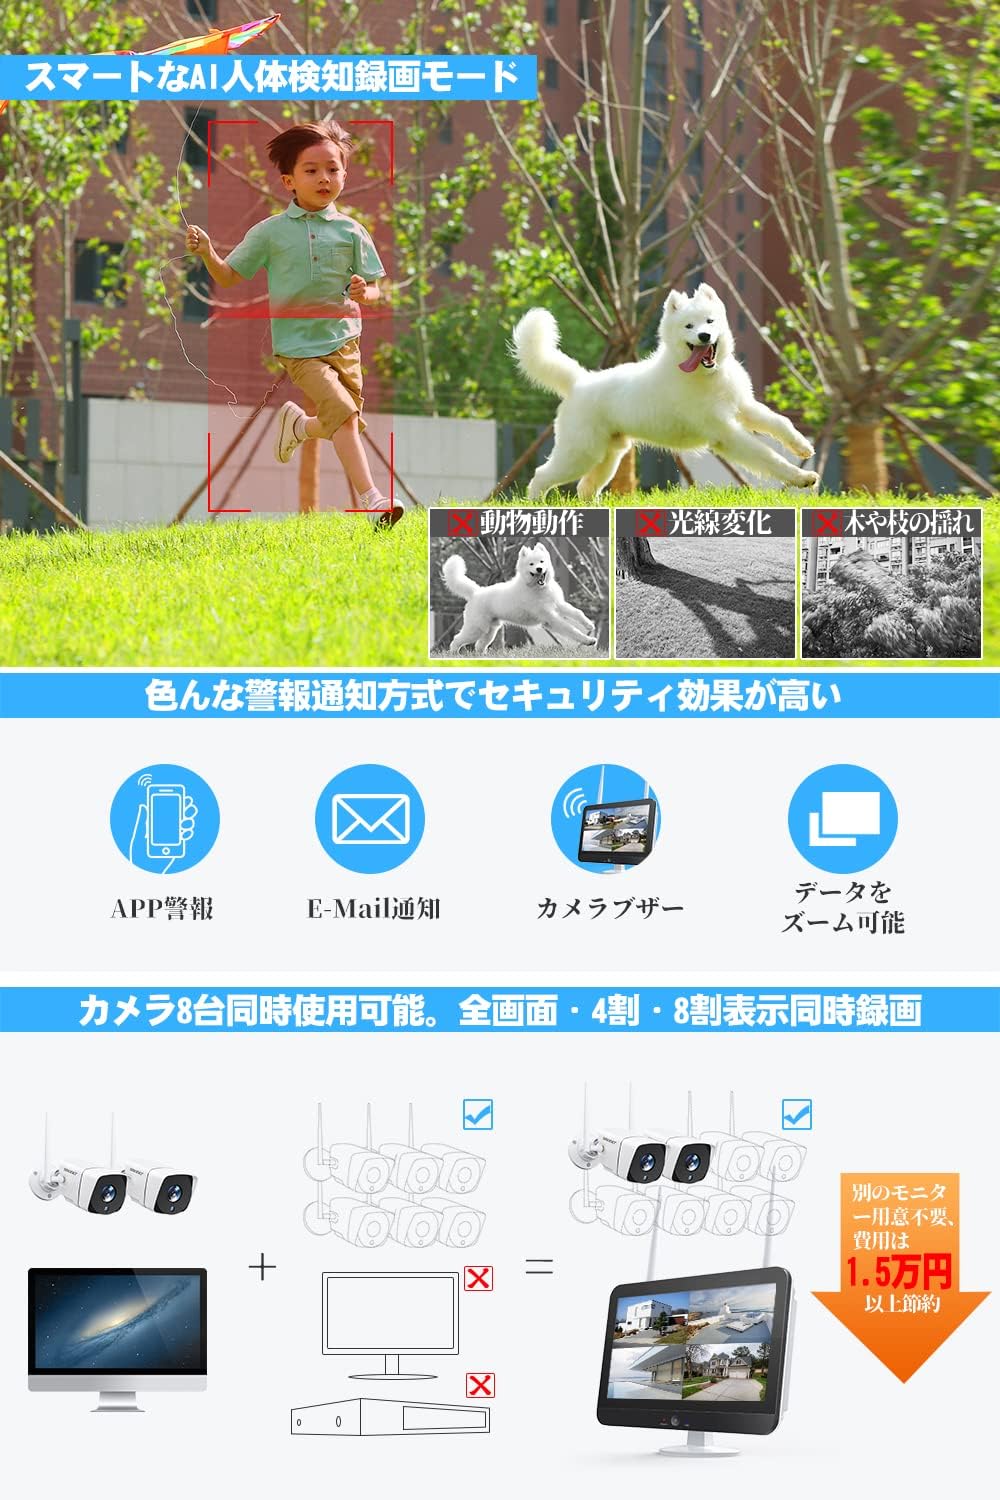
- AI Human Detection: Reduces false alarms by distinguishing human shapes from other moving objects.
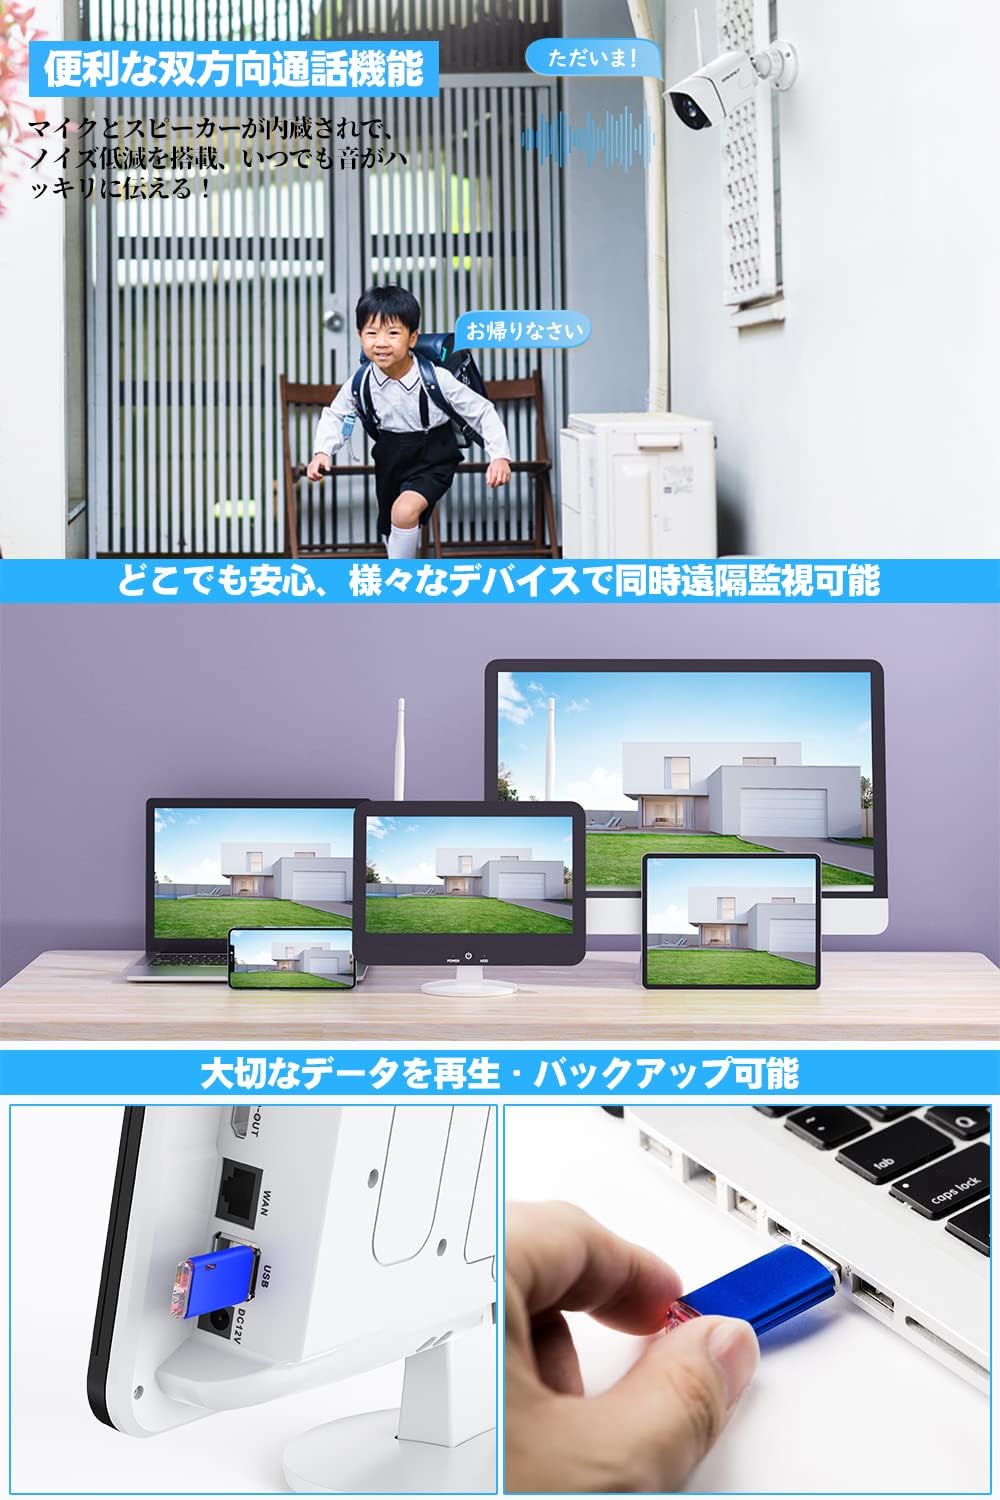
- Two-Way Audio: Built-in microphone and speaker for communication.
- Infrared Night Vision: Automatic day/night mode for clear surveillance in low light.
- 360-degree Adjustable Mount: Ball-type metal mount allows flexible positioning.
- Repeater Mode: Extends Wi-Fi signal range for stable connection over larger areas.

4.2. 12-inch IPS Monitor (NVR) Features
- 12-inch IPS Display: Provides a wide viewing angle and vibrant colors, reducing eye strain.
- Integrated 8-Channel NVR: Supports up to 8 cameras simultaneously.
- 1TB HDD Pre-installed: Ample storage for continuous recording.
- H.265+ Compression: Efficiently stores video, extending recording time and improving wireless stability.
- Multiple Recording Modes: Schedule recording, continuous recording, and motion-activated recording.
- Remote Viewing: Compatible with Android, iOS, Mac, and Windows devices for live view and playback.
- Connectivity: Features HDMI, USB, LAN ports, and Wi-Fi.
5. Setup Instructions
5.1. Initial Power-up and Connection
- Install Camera Antennas: Carefully screw the antennas onto the designated ports on each camera.
- Connect Camera Power: Plug each camera's power adapter into a power outlet and connect it to the camera. The camera's lights will illuminate upon successful power-up.
- Connect Monitor Power: Plug the monitor's power adapter into a power outlet and connect it to the monitor. The monitor will power on automatically.
- Connect USB Mouse: Plug the USB mouse into one of the USB ports on the monitor.
- Automatic Pairing: The cameras and monitor are pre-paired at the factory. They should automatically connect and display video feeds within a few minutes.

Video Guide: For a visual guide on unboxing and initial setup, please refer to the video below.
5.2. Network Configuration
The system can operate wirelessly without an internet connection for local viewing. For remote monitoring via smartphone or PC, an internet connection is required.
- Wired Connection: Connect the provided LAN cable from the monitor's LAN port to your router.
- Wireless Connection:
- Right-click on the monitor screen with the mouse.
- Navigate to "Network Settings" or a similar option.
- Select "Wireless Network" and choose your Wi-Fi network.
- Enter your Wi-Fi password to connect.
Video Guide: For a visual guide on connecting the monitor to your network, please refer to the video below.
5.3. Smartphone App Setup
To enable remote viewing and receive alerts, download the companion app to your smartphone.
- Download App: On the monitor, right-click and navigate to the "Wizard" or "App Download" section. Scan the QR code displayed on the screen with your smartphone to download the "EseeCloud" app (or similar, as indicated by the QR code).
- Create Account: Open the app and create a new user account if you don't have one.
- Add Device: In the app, click the "+" button to add a new device. Select "Kit" or "NVR" and scan the device ID QR code displayed on the monitor. Enter the NVR's password (default is usually blank or 'admin' if not set).
- Live View: Once added, you can view live feeds from your cameras and access other features remotely.
5.4. Camera Installation
The cameras can be mounted indoors or outdoors. Ensure the mounting surface is stable and provides a clear view of the desired surveillance area.
- Choose Location: Select a suitable location for each camera, considering power access and Wi-Fi signal strength.
- Mark Drilling Points: Use the camera's base as a template to mark the drilling points on the wall or ceiling.
- Drill Holes: Drill pilot holes and insert the provided wall plugs if necessary.
- Mount Camera: Secure the camera base to the surface using the provided screws.
- Adjust Angle: Adjust the camera's angle using the 360-degree ball-type mount to cover the desired area.
Video Guide: For a visual guide on camera installation, please refer to the video below.
6. Operating Instructions
6.1. Live View and Multi-Screen Display
The 12-inch IPS monitor can display live feeds from all connected cameras simultaneously. You can switch between single-camera view, 4-split screen, or 8-split screen modes (if more cameras are added) using the NVR interface.

6.2. Two-Way Audio
Each camera is equipped with a microphone and speaker, allowing for two-way communication. You can speak through the camera using the smartphone app or the monitor interface.

6.3. Recording Modes
The NVR supports various recording options:
- Continuous Recording: Records 24/7, utilizing the 1TB HDD.
- Schedule Recording: Set specific times for recording.
- Motion Detection Recording: Records only when motion is detected, saving storage space.
- AI Human Detection Recording: Advanced motion detection that only triggers recording for human shapes.
6.4. Remote Monitoring and Alerts
With the smartphone app, you can monitor your property from anywhere. The system also provides various alert notifications:
- App Push Notifications: Receive instant alerts on your smartphone when motion or human detection is triggered.
- Email Alerts: Get email notifications with snapshots of events.
- Buzzer Alarm: The NVR can sound an audible alarm.
- Customizable Detection Areas: Define specific areas for motion detection to avoid unnecessary alerts (e.g., excluding public roads).
6.5. Playback
You can easily review recorded footage on the monitor or via the smartphone app.
- Smart Playback: Quickly find specific events using the timeline.
- Date/Time Selection: Select specific dates and times to review recordings.
- Backup: Important data can be backed up via USB.
6.6. Night Vision
The cameras automatically switch to night vision mode in low-light conditions, providing clear black-and-white images. The 5MP sensor and large infrared LED lights ensure detailed capture even in darkness.

7. Maintenance
- Cleaning: Use a soft, dry cloth to clean the camera lens and monitor screen. Avoid abrasive cleaners.
- Firmware Updates: Periodically check the manufacturer's website or app for firmware updates to ensure optimal performance and security.
- Hard Drive Management: The 1TB HDD will automatically overwrite the oldest footage when full. Back up important recordings regularly.
- Power Off Monitor: Use the power OFF button on the monitor to extend its lifespan when not in active use.
8. Troubleshooting
| Problem | Possible Cause | Solution |
|---|---|---|
| No video displayed on monitor. | Power issue, camera not paired, weak signal. | Check power connections for both monitor and cameras. Ensure cameras are within range and properly paired. Restart the system. |
| Cannot connect to Wi-Fi. | Incorrect password, router issues, weak signal. | Verify Wi-Fi password. Ensure router is functioning correctly. Move monitor closer to the router or use repeater mode. |
| App alerts not received. | App notifications disabled, network issue, incorrect settings. | Check app notification settings on your phone. Ensure the NVR is connected to the internet. Verify motion detection settings. |
| Poor night vision quality. | Obstruction, dirty lens, insufficient IR light. | Clear any obstructions in front of the camera. Clean the camera lens. Ensure IR LEDs are not blocked. |
9. Specifications
| Feature | Detail |
|---|---|
| Brand | SMONET |
| Model Number | SMJP-W823M1TM-002 |
| Camera Resolution | 5 Megapixels |
| Monitor Size | 12-inch IPS Panel |
| NVR Channels | 8 Channels |
| Hard Disk Drive | 1TB (Pre-installed) |
| Video Compression | H.265+ |
| Waterproof Rating | IP67 |
| Connectivity | Wi-Fi, LAN |
| Ports | HDMI, USB, LAN |
| Power Source | DC |
| Material | Metal (camera case) |
| Operating Temperature | -10°C to 50°C (implied from A+ content) |
10. Warranty and Support
SMONET provides a one-year warranty for this product. In case of any defects or issues during the warranty period, please contact our customer support for exchange or refund. We also offer lifetime technical support.
A detailed Japanese instruction manual is included in the package. For further assistance, please contact our dedicated after-sales service team via phone, email, Line, or Skype.
Note: Installation and home maintenance services are not covered under warranty.