
Introduction
This manual provides comprehensive instructions for the NETUM NT-1698W Wireless Barcode Scanner. It covers setup, operation, maintenance, and troubleshooting to ensure optimal performance of your device. The NT-1698W offers both 2.4G wireless and USB wired connectivity for versatile use with computers and laptops.
Package Contents
Please verify that all items are present in the package:
- NETUM NT-1698W Barcode Scanner
- Adjustable Stand
- USB Charging/Data Cable
- 2.4G Wireless USB Receiver
- User Manual (this document)

Image: The NETUM NT-1698W barcode scanner assembled with its adjustable stand, alongside the USB charging/data cable and the 2.4G wireless USB receiver.

Image: The NETUM NT-1698W barcode scanner in handheld mode, with the USB cable and 2.4G wireless receiver displayed.
Setup
1. Charging the Scanner
Before first use, fully charge the scanner. Connect the USB charging cable to the scanner's charging port and the other end to a USB power adapter or a computer's USB port. The indicator light will show charging status.
2. Connection Modes
The NT-1698W supports two connection modes: 2.4G Wireless and USB Wired.

Image: Illustration of the two connection methods: wireless via a 2.4GHz USB receiver and wired via a USB cable.
2.1. 2.4G Wireless Connection
- Insert the 2.4G wireless USB receiver into an available USB port on your computer.
- Turn on the barcode scanner. It will automatically attempt to pair with the receiver.
- A successful connection is indicated by a specific sound or light pattern on the scanner.

Image: Visual representation of the scanner's wireless range, showing effective distances for indoor and outdoor use.
2.2. USB Wired Connection
- Connect the USB cable directly from the scanner to a USB port on your computer.
- The scanner will be recognized as a HID keyboard device and will function immediately without driver installation.
3. Assembling the Stand
The adjustable stand allows for hands-free scanning. Attach the scanner to the flexible arm of the stand, ensuring it is securely fastened. Adjust the angle as needed for comfortable operation.

Image: The adjustable stand component, designed to hold the barcode scanner for hands-free operation.
Operating Instructions
1. Basic Scanning
Point the scanner's laser beam at the barcode you wish to scan. Press the trigger button. A successful scan will typically be indicated by a beep and the data appearing in your active application (e.g., a text editor, spreadsheet, or POS software).
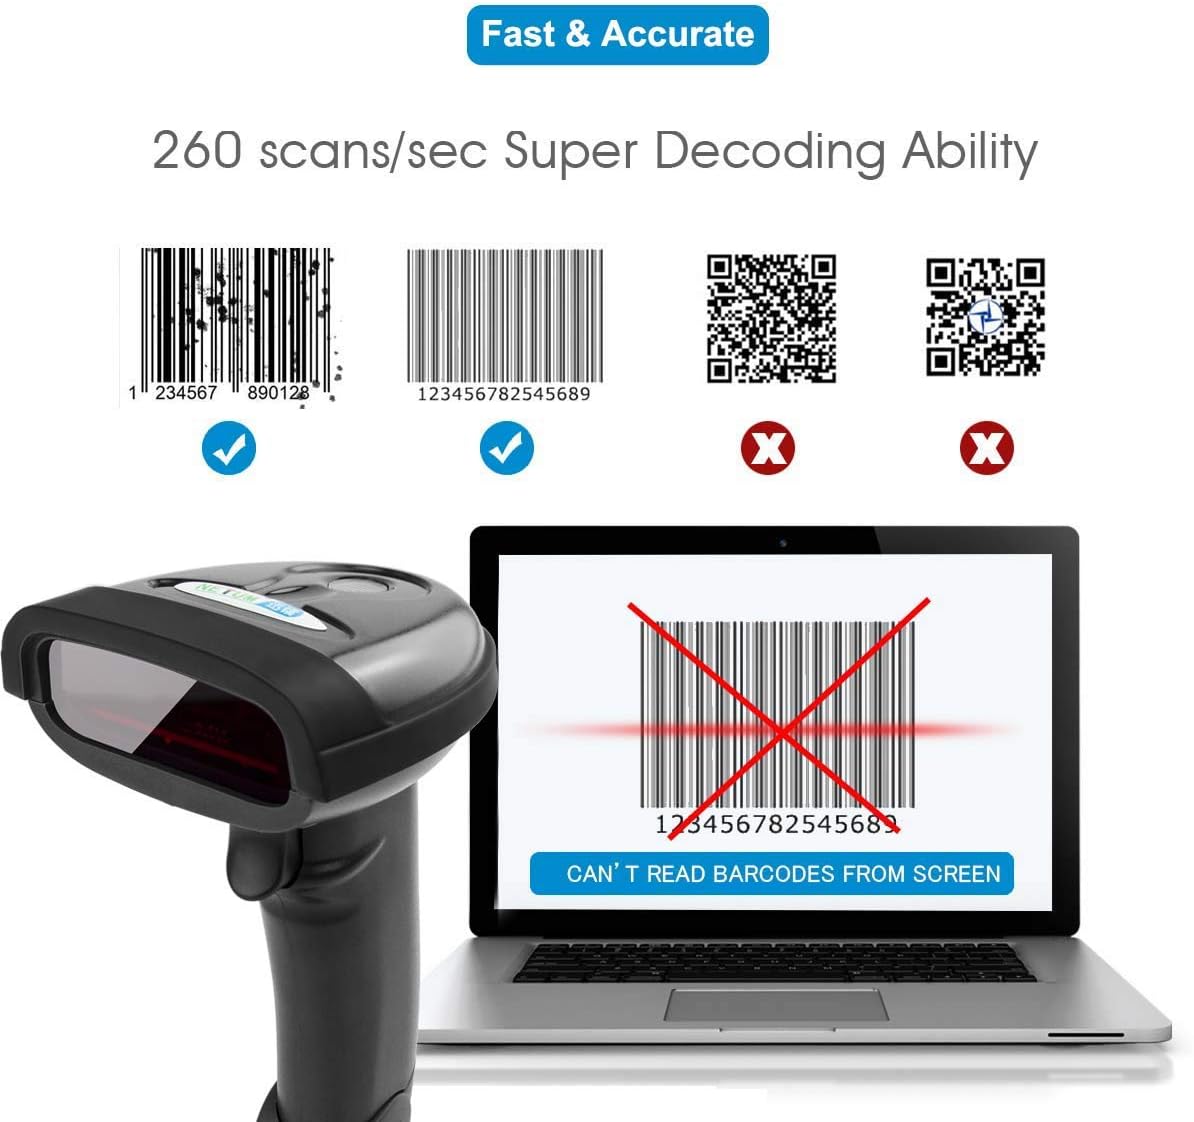
Image: This scanner is designed for 1D barcodes, demonstrating its capability to read common 1D formats like Code 128 and EAN-13 at a high speed. It does not support 2D barcodes such as QR codes or Data Matrix.
2. Upload Modes
The NT-1698W supports two data upload modes:
- Instant Upload Mode: Scanned data is transmitted to the connected device immediately. This is the default mode.
- Collection Upload Mode (Storage Mode): Scanned data is stored in the scanner's internal memory. You can upload the collected data in batches later by scanning a specific command barcode (refer to the full programming guide for details).

Image: Explanation of the scanner's two data upload modes: storing data for batch upload or transmitting it instantly, highlighting the wireless range for instant uploads.
3. Advanced Barcode Programming
The scanner can be configured using special programming barcodes to customize its behavior, including:
- Prefix & Suffix Settings: Add custom characters before or after scanned data.
- Insert/Delete Characters: Modify the scanned data by inserting or deleting specific characters at designated positions.
- Other settings such as volume, sleep time, and symbology enablement/disablement.
Refer to the complete programming manual (usually a separate document or available online) for a full list of configuration barcodes and instructions.

Image: The scanner in use, demonstrating its advanced programming capabilities such as adding prefixes/suffixes and modifying characters within scanned data.
Maintenance
- Cleaning: Use a soft, dry cloth to clean the scanner's exterior. For the scanning window, use a lens cleaning cloth to avoid scratches. Do not use abrasive cleaners or solvents.
- Storage: Store the scanner in a cool, dry place away from direct sunlight and extreme temperatures.
- Battery Care: To prolong battery life, avoid fully discharging the battery frequently. Charge the scanner regularly, even if not in constant use.
Troubleshooting
| Problem | Possible Cause | Solution |
|---|---|---|
| Scanner not reading barcodes. |
|
|
| No data transmitted to computer. |
|
|
| Scanner beeps but no data appears. |
|
|
Specifications
| Feature | Detail |
|---|---|
| Model | NT-1698W |
| Connectivity | 2.4G Wireless, USB Wired |
| Scan Type | 1D Laser Barcode Reader |
| Scan Speed | Up to 260 scans/second |
| Compatible Devices | Desktop, Laptop (Windows, macOS) |
| Power Source | Rechargeable Battery, Corded Electric (via USB) |
| Wireless Range | Up to 50m (164ft) indoors, 100m (330ft) outdoors (barrier-free) |
| ASIN | B08DCXLXTR |
Warranty and Support
NETUM products typically come with a standard manufacturer's warranty. Please refer to the warranty card included with your product or visit the official NETUM website for detailed warranty terms and conditions.
For technical support, troubleshooting assistance, or inquiries regarding your NETUM NT-1698W barcode scanner, please contact NETUM customer service through their official website or the contact information provided in your product packaging.


