1. Introduction
Thank you for purchasing the BYINTEK R19 Portable 3D Smart LED DLP Projector. This manual provides essential information for the safe and efficient operation of your device. Please read it thoroughly before use and retain it for future reference.

Image 1.1: The BYINTEK R19 Portable 3D Smart LED DLP Projector.
2. Safety Information
Observe the following safety precautions to prevent damage to the projector and ensure user safety:
- Do not look directly into the projector lens when the lamp is on.
- Ensure proper ventilation around the projector to prevent overheating.
- Do not expose the projector to rain, moisture, or extreme temperatures.
- Use only the power adapter supplied with the projector.
- Avoid placing the projector on unstable surfaces.
- Do not attempt to disassemble or repair the projector yourself. Contact qualified service personnel.
3. Package Contents
Verify that all items are present in the package:
- BYINTEK R19 Projector
- Remote Control
- Power Adapter
- User Manual (this document)
- HDMI Cable (may vary by region/package)

Image 3.1: The BYINTEK R19 projector shown with its remote control.
4. Product Overview
4.1. Projector Components

Image 4.1: Diagram illustrating the projector's components and ports.
- Lens: Projects the image onto the screen.
- IR Receiver: Receives signals from the remote control.
- Speaker (4Ω 5W x2): Provides audio output.
- Universal Bracket Hole (d=1/4 inch, 6mm): For mounting on tripods or ceiling mounts.
4.2. Input/Output Ports
- DC-in (19V): Power input port.
- USB1 / USB2: USB ports for connecting external storage or peripherals.
- HD-in: HDMI input for connecting video sources.
- Network: Ethernet port for wired internet connection.
- TF Card: Slot for TransFlash (MicroSD) cards.
- Audio-out: 3.5mm audio jack for external speakers or headphones.
- AV: Audio/Video input port.
5. Setup
5.1. Placement
Position the projector on a stable, flat surface or mount it using the universal bracket hole. Ensure the projector is perpendicular to the projection surface for optimal image geometry. The throw distance determines the screen size:
- Throw Range: 30-300 inches
- Throw Distance: 1-6 meters
- Approximately 2.15m for 84 inches, 2.5m for 100 inches, 3.1m for 120 inches, 3.86m for 150 inches.

Image 5.1: Illustration of throw distances for various screen sizes and different mounting methods (tabletop, tripod, ceiling).
5.2. Power Connection
Connect the supplied power adapter to the DC-in port (19V) on the projector and then plug it into a power outlet.
5.3. Initial Power On
Press the Power ON/OFF button on the projector or the remote control to turn on the device. The projector will boot into the Android OS interface.
5.4. Focus Adjustment
Use the "Focus+" and "Focus-" buttons on the projector or the remote control to adjust the image clarity until it is sharp and clear on the screen.
6. Operating Instructions
6.1. Remote Control Functions
The remote control allows for convenient navigation and control of the projector's features.

Image 6.1: The remote control for the BYINTEK R19, highlighting the one-button 3D switching function.
- Power Button: Turns the projector on/off.
- Navigation Pad (OK button): For menu navigation and selection.
- Back Button: Returns to the previous screen.
- Home Button: Returns to the main Android OS interface.
- Volume Buttons: Adjusts audio volume.
- Focus Buttons: Adjusts image focus.
- 3D Button: One-touch switching for 3D mode (DLP-LINK shutter 3D, TNB, SBSH).
6.2. Android OS Navigation
The projector runs on an Android operating system, providing access to various applications and settings. Use the remote control's navigation pad to browse the interface.
6.3. Connecting Devices
- HDMI (HD-in): Connect laptops, Blu-ray players, gaming consoles, or other HDMI-enabled devices.
- USB: Insert USB drives for media playback.
- TF Card: Insert a MicroSD card for media playback.
- Wi-Fi: Connect to a wireless network via the Android OS settings for internet access and online streaming.
- Wireless Screen Share: Utilize the built-in screen sharing feature to mirror content from compatible smartphones or PCs.
- AV: Connect older devices using an AV cable.
6.4. 3D Mode Activation
The BYINTEK R19 supports 3D content. To activate 3D mode, ensure you are playing compatible 3D content and press the dedicated 3D button on the remote control. The projector supports DLP-LINK shutter 3D, TNB (Top and Bottom), and SBSH (Side-by-Side Half) formats. Active shutter 3D glasses (not included) are required for viewing 3D content.
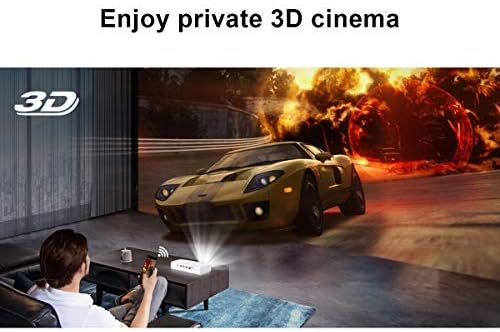
Image 6.2: A user experiencing a private 3D cinema with the BYINTEK R19 projector.
6.5. Screen Size and Usage
The projector can produce a large screen size up to 300 inches, offering an immersive viewing experience. It is suitable for various applications, including home theater, gaming, and presentations, particularly in dim light environments.

Image 6.3: Visual comparison demonstrating the large 300-inch projection size achievable with the BYINTEK R19, compared to a typical 50-inch television.

Image 6.4: Examples of the BYINTEK R19 projector in various settings, including business presentations, outdoor movie nights, home gaming, and home cinema.
7. Maintenance
7.1. Cleaning the Lens
Gently wipe the projector lens with a soft, lint-free cloth specifically designed for optical surfaces. Do not use abrasive cleaners or solvents.
7.2. Cleaning the Casing
Wipe the projector casing with a soft, dry cloth. For stubborn marks, slightly dampen the cloth with water, then wipe dry immediately.
7.3. Storage
When not in use for extended periods, store the projector in a cool, dry place, away from direct sunlight and excessive dust. Use the original packaging or a protective case if available.
8. Troubleshooting
| Problem | Possible Cause | Solution |
|---|---|---|
| No image projected | Power cable disconnected; Projector not powered on; Input source not selected. | Check power connection; Press power button; Select correct input source (HDMI, USB, etc.). |
| Image is blurry | Focus not adjusted; Projector too close/far from screen. | Adjust focus using "Focus+" / "Focus-" buttons; Adjust projector distance. |
| No sound | Volume too low; Muted; External speakers not connected properly. | Increase volume; Unmute; Check external speaker connection or use internal speakers. |
| Remote control not working | Batteries depleted; Obstruction between remote and IR receiver. | Replace batteries; Ensure clear line of sight to IR receiver. |
| Wi-Fi connection issues | Incorrect password; Router too far; Network interference. | Verify password; Move projector closer to router; Check for network interference. |
9. Specifications
| Feature | Detail |
|---|---|
| Brand | BYINTEK |
| Model | R19 |
| Display Technology | LED, DLP |
| Native Resolution | 1920 x 1080 (Full HD) |
| Maximum Supported Resolution | 3840 x 2160 (4K) |
| Form Factor | Portable |
| Special Features | Portable, 3D-Ready, Wi-Fi Ready, Android OS |
| Throw Range | 30-300 inches |
| Throw Distance | 1-6 meters |
| Mounting Type | Tabletop Mount (also tripod/ceiling compatible) |
| Color | White |
| Controller Type | Remote Control |
| Compatible Devices | Laptop, Smartphone, Gaming Console, Blu-ray Player |
| Item Weight | 7.94 g (Note: This weight appears unusually low and may be a data entry error in the source specifications.) |
| Package Dimensions | 16.93 x 12.1 x 7.09 cm |
10. Warranty and Support
For information regarding warranty coverage, technical support, or service inquiries, please refer to the warranty card included with your product or visit the official BYINTEK website. Keep your purchase receipt as proof of purchase.


