
1. Introduction
Thank you for choosing the Tech Drive Bathroom Fan with LED Light. This manual provides essential information for the safe installation, operation, and maintenance of your new ventilation fan. Please read these instructions thoroughly before installation and retain them for future reference.
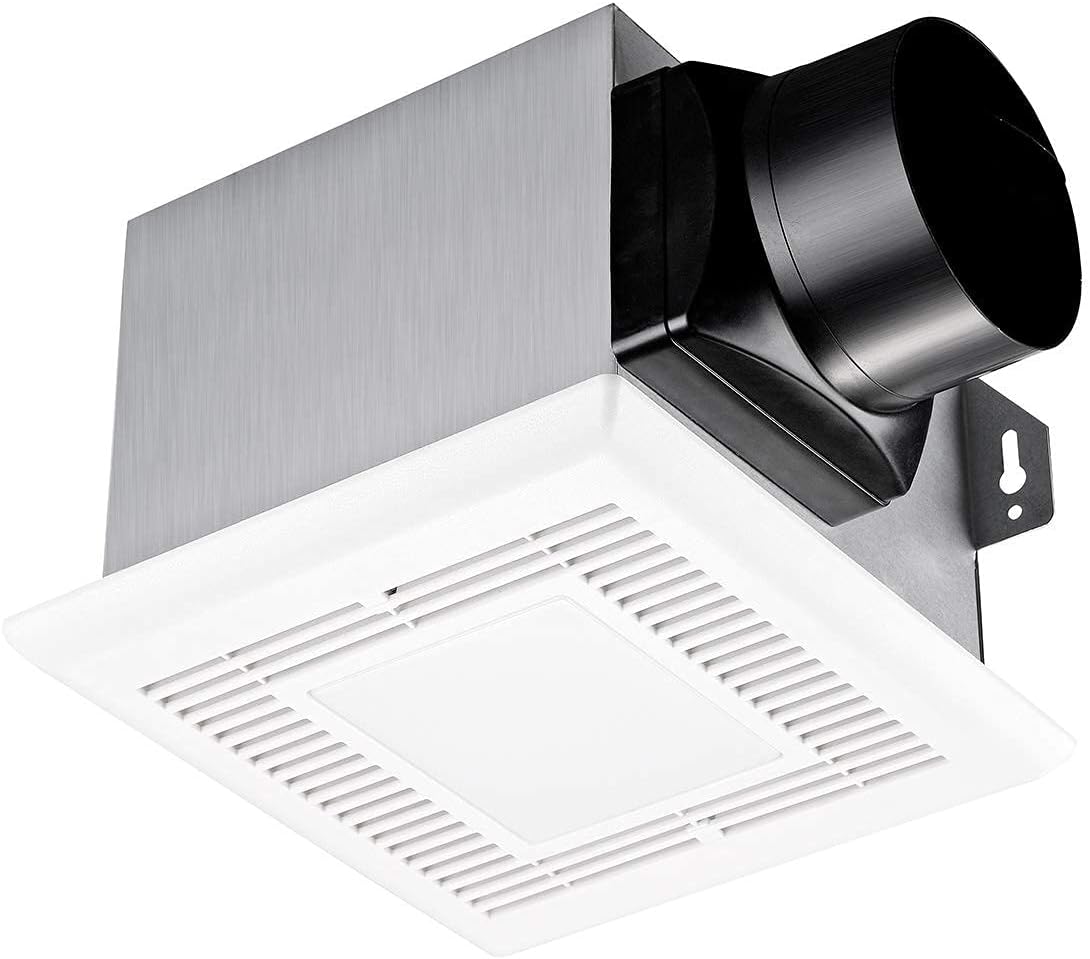
This unit is designed to provide efficient ventilation and illumination for bathrooms up to 85 sq. ft., featuring a quiet 2.0 Sone operation, 80 CFM airflow, and an integrated 4000K 600LM LED light. Its design allows for installation without requiring attic access.

2. Safety Information
To reduce the risk of fire, electric shock, or injury to persons, observe the following:
- Installation work and electrical wiring must be done by qualified person(s) in accordance with all applicable codes and standards, including fire-rated construction codes and standards.
- Always disconnect power at the service panel before wiring or servicing the unit.
- This unit is UL and HVI certified, ensuring performance and safety standards are met.
- Acceptable for use over a bathtub or shower when connected to a GFCI-protected branch circuit.
- Do not use this fan with any solid-state speed control device.
- Duct work must be installed with a minimum number of turns and runs to ensure optimal airflow.
- Never place an object into the fan grille.
3. Package Contents
Verify that all components listed below are included in your package. If any parts are missing or damaged, please contact Tech Drive customer support.
- Fan Housing Assembly
- LED Light Grille
- Mounting Screws (typically 4)
- Instruction Manual

4. Specifications
Refer to the table below for detailed product specifications:
| Feature | Specification |
|---|---|
| Model Name | TD-BF-09L |
| Air Flow Capacity | 80 CFM (Cubic Feet Per Minute) |
| Noise Level | 2.0 Sones |
| LED Light Output | 600 Lumens |
| LED Color Temperature | 4000K |
| Wattage | 22 Watts |
| Voltage | 120 Volts |
| Housing Dimensions (D x W x H) | 7.5" x 7.25" x 6" |
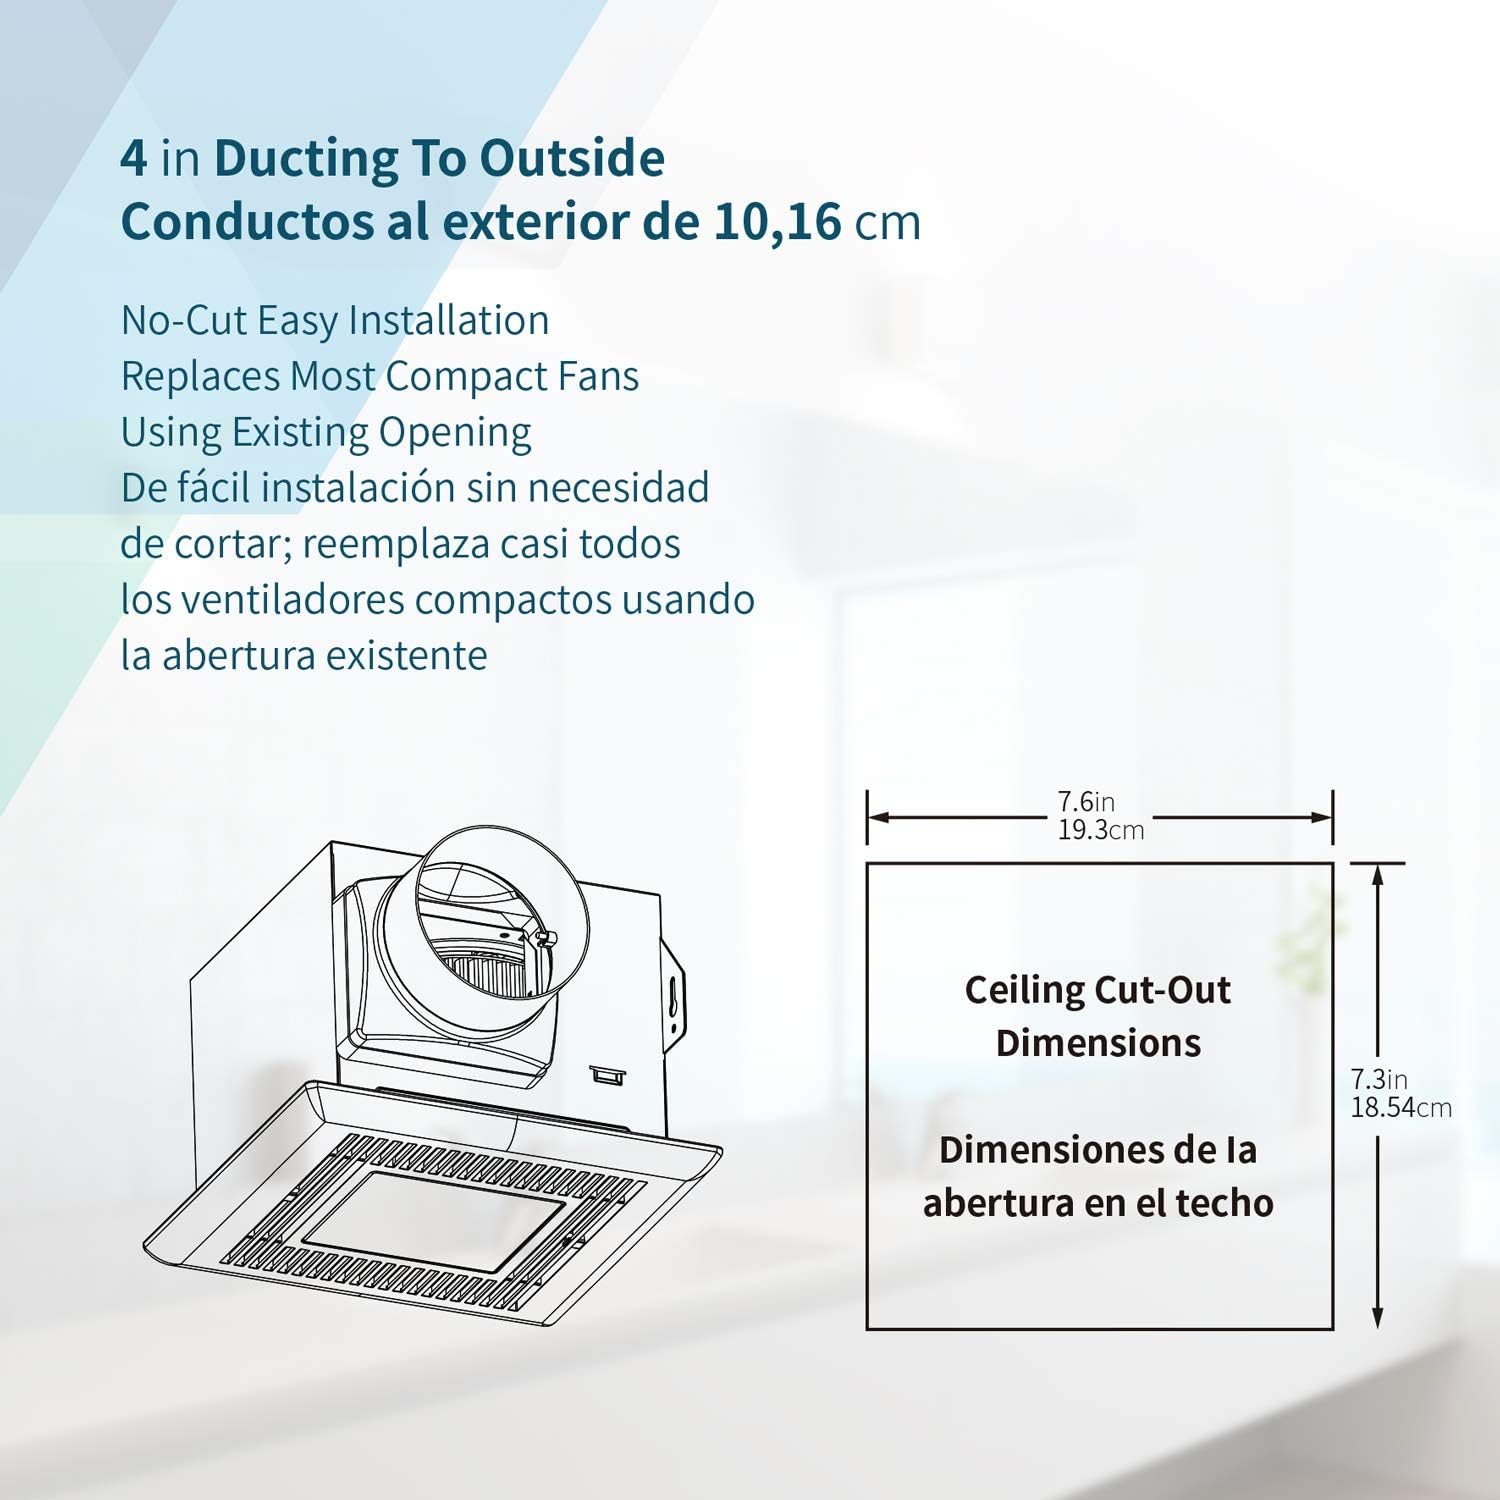
| Ceiling Mounting Opening | 7.6" x 7.3" |
| LED Grille Size | 8.67" x 8.67" |
| Duct Size | 4 inches |
| Control Method | Touch (via wall switch, not included) |
| Certifications | UL, HVI Certified |

5. Installation
This fan is designed for easy installation without the need for attic access, making it suitable for existing construction. Installation can be performed entirely from the room-side of the ceiling.
5.1 Pre-Installation Considerations
- Ensure the power supply is disconnected at the circuit breaker before beginning installation.
- Verify that the ceiling opening dimensions (7.6" x 7.3") are appropriate for your installation. If replacing an older fan, confirm that the existing opening and ceiling depth (minimum 6 inches for housing height) are compatible.
- Prepare a 4-inch duct for connection to the fan's exhaust port.

5.2 Installation Steps (Room-Side)
- Prepare Ceiling Opening: If replacing an old fan, remove it. Ensure the ceiling opening matches the required 7.6" x 7.3" dimensions.
- Connect Ducting: Attach the 4-inch duct to the fan's exhaust port. Secure it with a clamp (not included) to ensure an airtight seal.
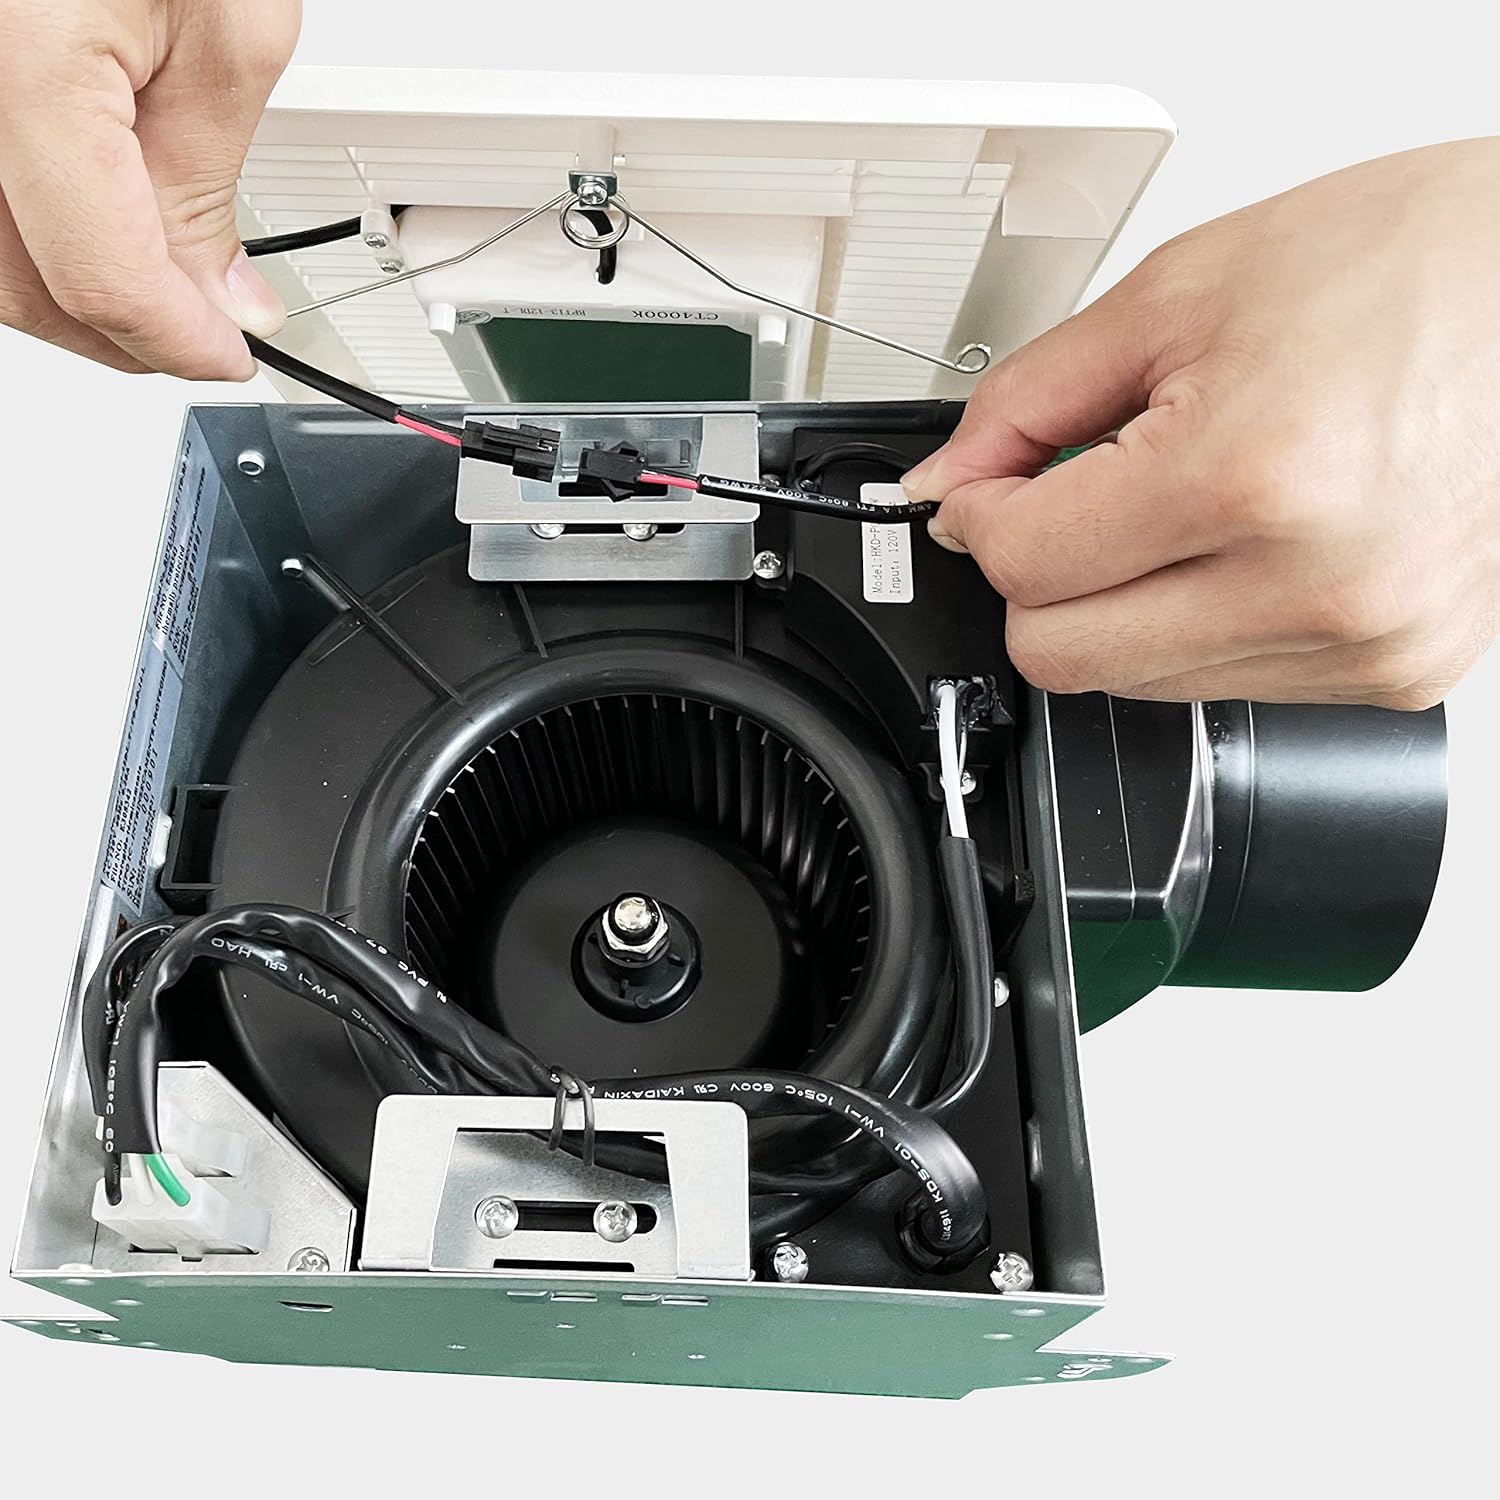
- Electrical Connection: Open the wiring compartment cover on the fan housing. Connect the household wiring to the fan's wiring (black to black, white to white, green/bare to ground) using appropriate wire connectors. Ensure all connections are secure.
- Mount Fan Housing: Insert the fan housing into the ceiling opening. The housing features mounting tabs that can be secured to a ceiling joist using the provided screws. For existing openings, the fan is designed to fit without cutting the housing.
- Attach Grille: Connect the LED light wire from the grille to the receptacle inside the fan housing. Secure the grille to the fan housing using the spring clips. Gently push the grille up until it sits flush against the ceiling.
6. Operation
The Tech Drive Bathroom Fan with LED Light operates via a standard wall switch (not included). It is recommended to use a single-pole switch for basic on/off control of both the fan and light simultaneously, or a dual-function switch if separate control is desired (requires additional wiring).
- Fan Function: Activates the 80 CFM exhaust fan to remove moisture and odors from the bathroom.
- LED Light Function: Provides 600 Lumens of 4000K bright white illumination.

7. Maintenance
Regular maintenance ensures optimal performance and longevity of your fan. Always disconnect power at the service panel before performing any maintenance.
7.1 Cleaning the Grille and Fan Housing
- Turn off power to the fan at the circuit breaker.
- Gently pull down the grille to disengage the spring clips. Disconnect the LED light wire.
- Wash the grille in warm soapy water, rinse, and dry thoroughly.
- Wipe the fan housing and motor assembly with a damp cloth. Do not allow water to enter the motor.
- Reconnect the LED light wire and reattach the grille by pushing it up until the spring clips engage.
7.2 Motor Lubrication
The fan motor is permanently lubricated and requires no additional oiling.
8. Troubleshooting
If you experience issues with your Tech Drive Bathroom Fan, refer to the following troubleshooting guide:
| Problem | Possible Cause | Solution |
|---|---|---|
| Fan does not operate / Light does not turn on | No power supply Loose wiring connection Faulty wall switch | Check circuit breaker and wall switch. Ensure all electrical connections are secure (power off first). Test wall switch. |
| Fan operates, but light does not turn on | Loose LED light connection Faulty LED module | Ensure LED light wire is securely connected to the receptacle. Contact customer support if LED module is faulty. |
| Fan is noisy or vibrates excessively | Loose mounting screws Obstruction in fan blades Ducting issues (too restrictive, loose) | Check and tighten mounting screws. Turn off power and inspect fan blades for obstructions. Verify ducting is properly installed and free of kinks. |
| Poor air movement | Restricted ducting Dirty fan blades/grille Improper fan size for room | Check ducting for obstructions or kinks. Clean fan blades and grille as per maintenance section. Ensure fan CFM is appropriate for room size. |
9. Warranty and Support
For warranty information, please refer to the documentation included with your product at the time of purchase or visit the official Tech Drive website. If you require technical assistance or have questions regarding your Tech Drive Bathroom Fan, please contact Tech Drive customer support.
Tech Drive Customer Support: Please refer to the contact information provided on the product packaging or the official Tech Drive website.
