
Homedics TIE-240
HoMedics Non-Contact Infrared Forehead Thermometer User Manual
Model: TIE-240
Brand: HoMedics
Introduction
Thank you for choosing the HoMedics Non-Contact Infrared Forehead Thermometer. This device is designed to provide fast, accurate, and non-contact temperature readings for individuals, rooms, food, and liquids. Its advanced infrared technology ensures hygienic and reliable measurements, making it an essential tool for home use.
Please read this manual thoroughly before using the thermometer to ensure proper operation and to maximize its lifespan. Keep this manual for future reference.
Important Safety Information
- This thermometer is intended for household use only. It is not intended to replace a visit to a doctor.
- Do not immerse the thermometer in water or other liquids.
- Keep the device away from direct sunlight, dust, and extreme temperatures.
- Do not drop the thermometer or subject it to strong shocks.
- Always ensure the sensor lens is clean before taking a reading.
- If the device is not used for a long period, remove the batteries to prevent leakage.
- Consult a medical professional if you have concerns about temperature readings or symptoms.
Product Overview
The HoMedics Non-Contact Infrared Forehead Thermometer features a user-friendly design for quick and easy temperature measurement.
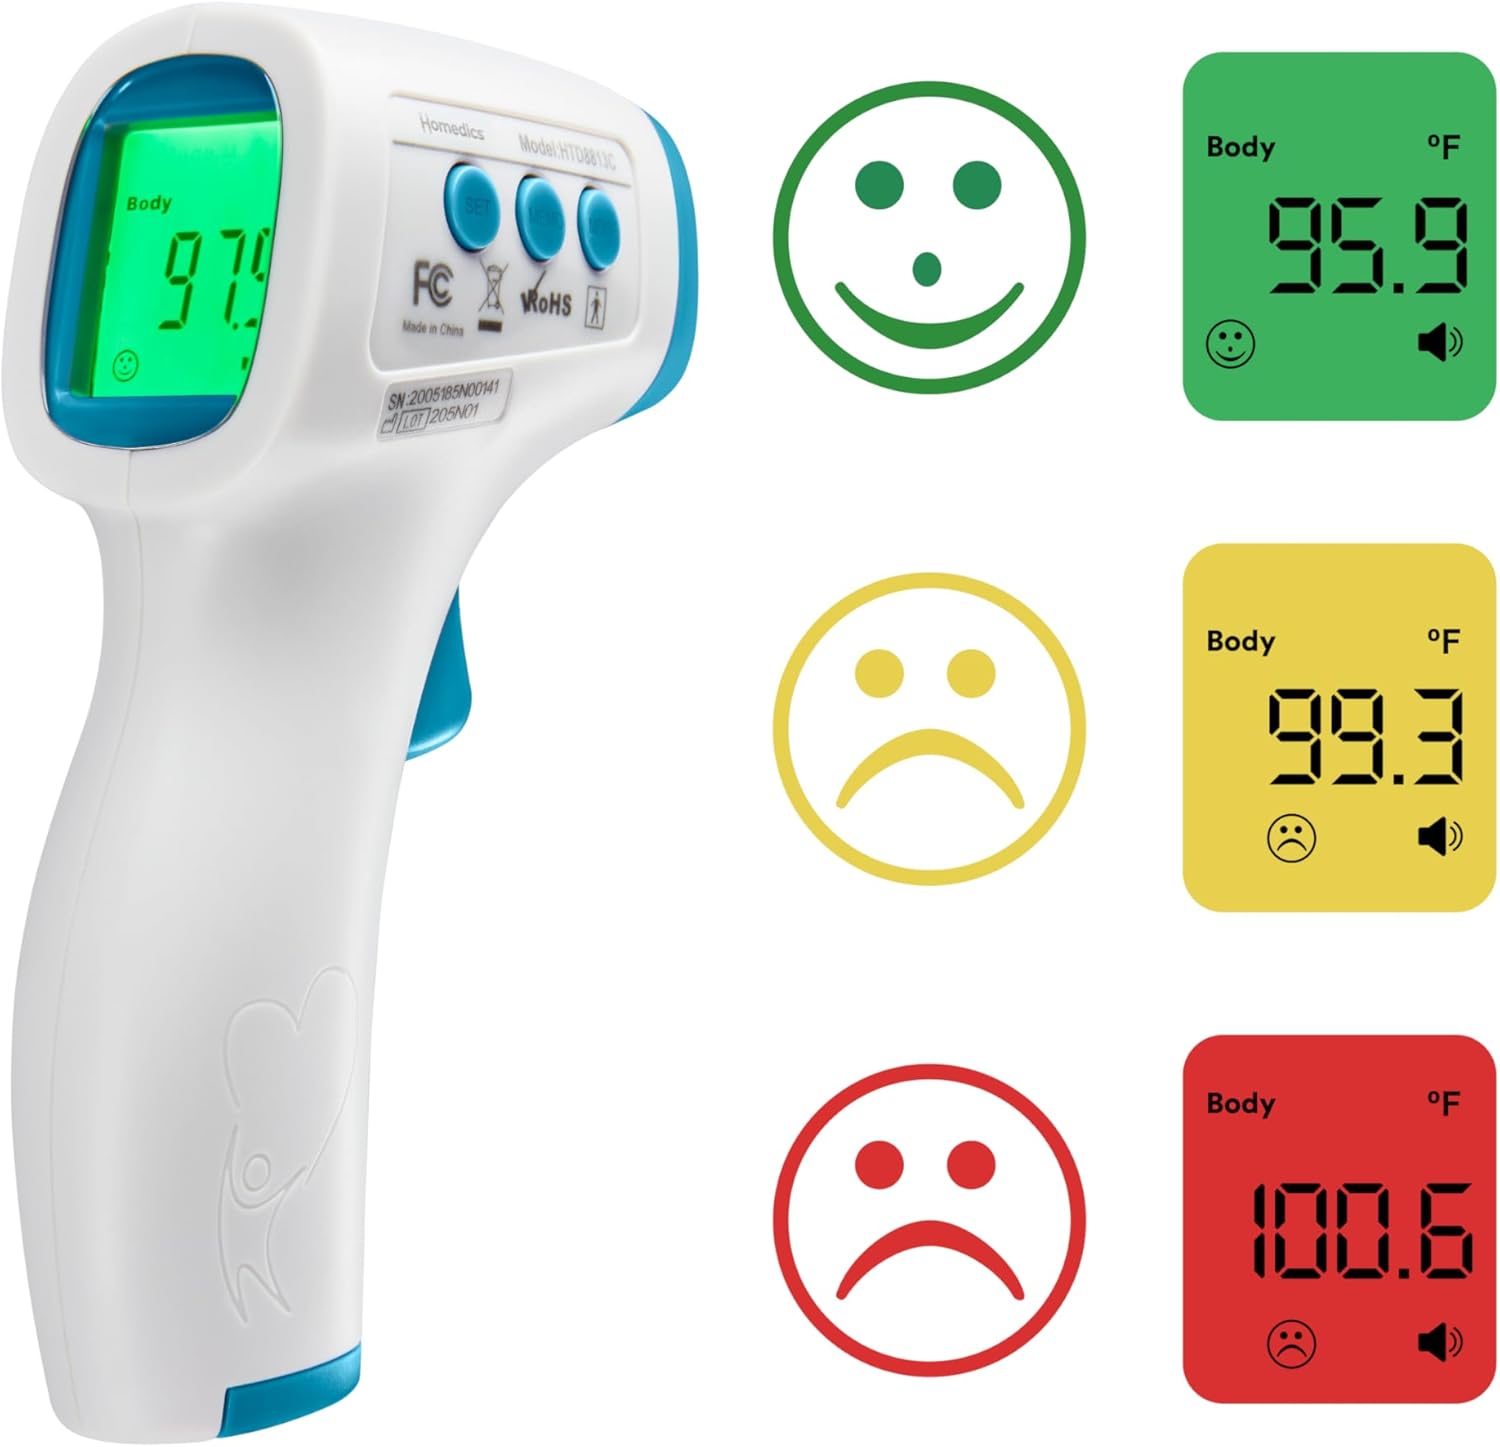
Figure 1: HoMedics Non-Contact Infrared Forehead Thermometer and its display indicators.
Key Components:
- Infrared Sensor: For non-contact temperature measurement.
- LCD Display: Shows temperature readings, mode, and other indicators.
- SET Button: Used for settings adjustments.
- MEMO Button: Accesses memory recall.
- MODE Button: Switches between measurement modes (Body, Object, Room).
- Measurement Trigger: Activates temperature reading.
- Battery Compartment: Located at the base of the handle.

Figure 2: Dimensions of the HoMedics Thermometer.
Setup
Battery Installation:
The thermometer requires 2 AAA batteries (not included). Follow these steps to install them:
- Locate the battery compartment cover at the bottom of the thermometer handle.
- Slide the cover open in the direction indicated by the arrow.
- Insert two AAA batteries, ensuring the correct polarity (+ and -) as marked inside the compartment.
- Close the battery compartment cover until it clicks securely into place.
The thermometer will power on automatically once batteries are installed or when the measurement trigger is pressed.
Operating Instructions
Taking a Body Temperature Reading:

Figure 3: Taking a non-contact body temperature reading.
- Ensure the thermometer is in "Body" mode. If not, press the MODE button to cycle through modes until "Body" is displayed.
- Hold the thermometer approximately 1-2 inches (2.5-5 cm) from the center of the forehead.
- Press and release the measurement trigger.
- The temperature reading will appear on the LCD display within 2 seconds.
- The backlight color will indicate the temperature range:
- Green: Normal temperature.
- Yellow: Low-grade fever.
- Red: High fever (accompanied by an audible alert).

Figure 4: Easy-to-read temperature results with color-coded backlight.
Taking Object/Liquid/Room Temperature Readings:

Figure 5: Measuring liquid temperature with the thermometer.
The thermometer can also measure the temperature of objects, liquids, and rooms.
- Press the MODE button to switch to "Object" or "Room" mode. The icon on the display will change accordingly.
- For objects/liquids, hold the thermometer approximately 1-2 inches (2.5-5 cm) from the surface. For room temperature, simply place the thermometer in the desired area.
- Press and release the measurement trigger.
- The temperature reading will be displayed.
Caution: When measuring liquids like soups or baby milk, stir vigorously before taking a measurement to ensure an accurate reading of the internal temperature.

Figure 6: The thermometer's multiple uses for body, object, and surface temperatures.
Memory Function:
The thermometer can store up to 50 previous temperature readings.
- To recall previous readings, press the MEMO button.
- Each press of the MEMO button will cycle through the stored readings, from most recent to oldest.
- To exit memory mode, press the measurement trigger or wait for the device to automatically power off.
Changing Temperature Units (Celsius/Fahrenheit):
To switch between Celsius (°C) and Fahrenheit (°F):
- With the thermometer powered on, press and hold the SET button for a few seconds until the unit symbol (°C or °F) starts flashing.
- Press the MODE button to toggle between °C and °F.
- Press the SET button again to confirm your selection and exit the setting.
Maintenance
Cleaning the Thermometer:
- Use a soft, dry cloth to clean the thermometer body.
- For the infrared sensor lens, gently wipe with a cotton swab lightly moistened with alcohol. Allow to dry completely before use.
- Do not use abrasive cleaners or immerse the device in water.
Storage:
- Store the thermometer in a cool, dry place, away from direct sunlight and extreme temperatures.
- If not in use for an extended period, remove the batteries to prevent corrosion.
Troubleshooting
| Problem | Possible Cause | Solution |
|---|---|---|
| No display/Thermometer won't turn on. | Batteries are dead or incorrectly installed. | Check battery polarity or replace with new AAA batteries. |
| Inaccurate readings. | Sensor lens is dirty; incorrect measurement distance; environmental factors. | Clean the sensor lens. Ensure proper distance (1-2 inches). Avoid drafts or direct sunlight during measurement. Allow thermometer to acclimate to room temperature for 30 minutes if moved from a different environment. |
| "Lo" or "Hi" displayed. | Temperature is outside the measurable range. | Ensure the thermometer is used within its specified operating temperature range. |
| High fever alert (red backlight) for normal temperature. | Thermometer is in "Object" or "Room" mode instead of "Body" mode. | Press the MODE button to switch to "Body" mode. |
Specifications
- Model Number: TIE-240
- Brand: HoMedics
- Product Dimensions: 3.5 x 1.5 x 5.63 inches
- Item Weight: 5.61 ounces
- Power Source: 2 AAA batteries (required)
- Measurement Type: Non-Contact Infrared
- Display Type: Digital with 3-color backlight
- Measurement Time: 2 seconds
- Memory Storage: Up to 50 readings
- Temperature Units: Celsius (°C) / Fahrenheit (°F)
- Special Features: High Accuracy, High-Fever Alert, 4-in-1 Readings (Personal, Room, Food, Liquid)
- Material: Plastic
- Color: White
- Manufacturer: HoMedics
- Country of Origin: China
Warranty and Support
This HoMedics Non-Contact Infrared Forehead Thermometer comes with a 1-Year Warranty from the date of purchase.
For warranty claims, technical support, or any questions regarding your product, please contact HoMedics customer service. Refer to the contact information provided on the product packaging or the official HoMedics website for the most up-to-date support details.
Online Support: Visit the official Homedics Store on Amazon for more information and product resources.
Related Documents - TIE-240
 |
HoMedics HTD8813C Non-Contact Infrared Body Thermometer Instruction Manual User manual for the HoMedics HTD8813C Non-Contact Infrared Body Thermometer, providing comprehensive instructions on its operation, safety precautions, technical specifications, troubleshooting, and maintenance. |
 |
HoMedics HTD8813C Non-Contact Infrared Body Thermometer Instruction Manual User manual for the HoMedics HTD8813C Non-Contact Infrared Body Thermometer, detailing operation, safety, and specifications for home and primary care use. |
 |
Homedics HTD8813C Non-Contact Infrared Body Thermometer: Instruction Manual and Warranty Comprehensive user manual for the Homedics HTD8813C non-contact infrared body thermometer. Includes detailed instructions on operation, safety precautions, technical specifications, troubleshooting, cleaning, care, storage, and warranty information. |
 |
HoMedics TE-200-EU No Touch Infrared Thermometer User Manual User manual for the HoMedics TE-200-EU No Touch Infrared Thermometer, detailing features, operation, safety information, and specifications for accurate and quick non-contact temperature readings. |
 |
HoMedics Non-Contact Infrared Body Thermometer User Manual and Operating Instructions User manual for the HoMedics Non-Contact Infrared Body Thermometer (Model HTD8816C, TE-350-EU). Learn about its features, operation, safety guidelines, technical specifications, and troubleshooting for accurate, hygienic temperature readings. Includes a 2-year guarantee information. |
 |
HoMedics Thera-P Non-Contact Infrared Body Thermometer User Manual User manual for the HoMedics Thera-P Non-Contact Infrared Body Thermometer (Models HTD8816C, HTD8818C, TE-450-EU), covering operation, features, and safety guidelines for accurate temperature measurement. |
Ask a question about this manual
Ask about setup, troubleshooting, compatibility, parts, safety, or missing instructions. Manuals+ will review the question and use this page’s manual context to help answer it.