1. Product Overview
The Munchkin 59S UV Cleaning Bag is a portable device designed to clean various items using UV-C light technology. It provides a chemical-free, water-free, and heat-free cleaning solution for everyday objects.

Figure 1: The Munchkin 59S UV Cleaning Bag in its closed state.
1.1 Key Features
- UV-C LED Technology: Utilizes 21 gold LED beads for effective cleaning, offering over 3,000 hours of use.
- Versatile Cleaning: Suitable for toys, stuffed animals, dolls, nursery items, mobile phones, tablets, and other personal belongings.
- Chemical-Free: Operates without the need for harsh chemicals, water, or heat.
- Portable Design: Folds down to a compact size for easy storage and transport.
- Rechargeable Power: Powered by a rechargeable power bank for convenience.
1.2 How it Works
The bag uses UV-C light to clean surfaces. UV-C light is a proven technology used in various applications for its cleaning properties. The process is quick and leaves no residue.
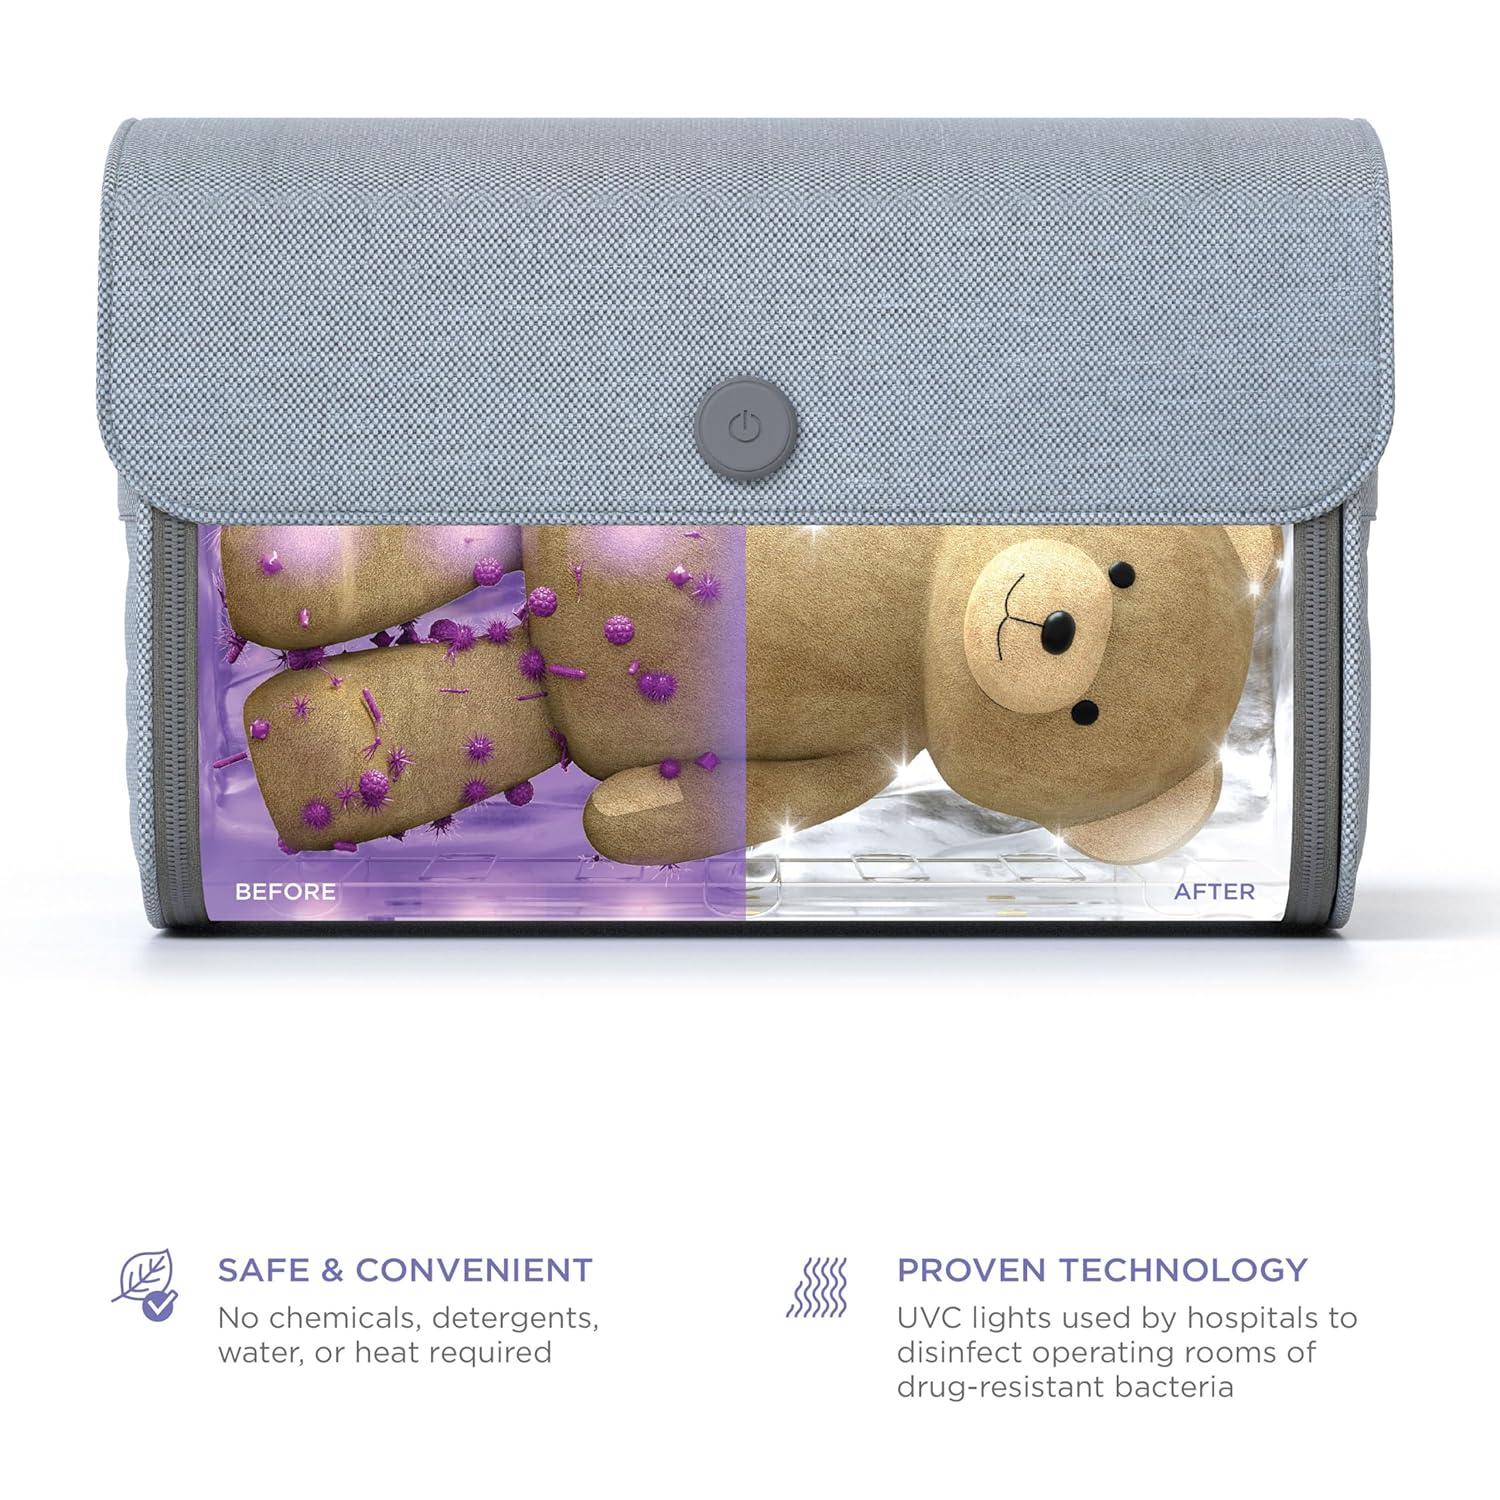
Figure 2: Visual representation of items before and after UV-C cleaning.
2. Important Safety Information
Please read and understand all safety instructions before using the Munchkin 59S UV Cleaning Bag. Failure to follow these instructions may result in injury or damage to the product.
- UV Light Exposure: WARNING: Do not expose skin or eyes directly to UV-C light. UV-C light is harmful to eyes and skin. The device is designed with child-safety magnetic switches to prevent operation when the lid is not fully closed.
- Intended Use: This device is intended for cleaning surfaces of items. It is not a medical device and should not be used for medical sterilization.
- Water Immersion: Do not immerse the bag in water or any other liquids. This product is not waterproof.
- Cleaning the Bag: Refer to the Maintenance section for proper cleaning instructions.
- Children: Keep out of reach of children when not in use. Adult supervision is recommended during use.
3. Setup Instructions
Follow these steps to set up your Munchkin 59S UV Cleaning Bag for first use.
- Unpack the Bag: Carefully remove the UV Cleaning Bag from its packaging.
- Prepare the Interior: Zip both side flaps closed from the inside. Insert the wire rack into the Nursery Sterilizer.
- Adjust the Lid: Open the lid and gently bend the edge of the lid slightly inward. This may be necessary to achieve proper alignment due to packaging during transit.
- Flatten the Front Edge: Push out the front edge of the Nursery Sterilizer from the inside until the front (shaded in gray) becomes flat.
- Secure the Lid: Close the lid and ensure the entire flap lies flat against the front edge of the Nursery Sterilizer. This action activates the child-safety magnetic switches, allowing the device to operate.
- Connect Power: Locate the power bank in the back pocket of the bag. Connect the Nursery Sterilizer to the power bank using the provided USB cable.

Figure 3: Ensure the magnetic flap sits completely flush against the base.

Figure 4: Power bank located in the back pocket.

Figure 5: Inserting the power bank into the side pocket.
4. Operating Instructions
Once the bag is set up and powered, follow these steps to clean your items.
- Place Items Inside: Open the lid and carefully place the items you wish to clean onto the wire rack inside the bag. Ensure items are not overlapping excessively to allow UV light to reach all surfaces.
- Close the Lid: Close the lid completely, ensuring the magnetic flap is flush with the front edge of the bag. The safety switches must be engaged for the device to operate.
- Start Cleaning Cycle: Press the power button located on the front flap. The UV-C LEDs will illuminate, indicating the cleaning cycle has begun. A typical cycle lasts approximately 5 minutes.
- Monitor Cleaning (Optional): The bag includes a test paper that turns visible after UV-C exposure and fades after about 1 minute. This can be used to verify UV-C light emission.
- Cycle Completion: The UV-C LEDs will automatically turn off after the cycle is complete.
- Remove Items: Open the lid and carefully remove your cleaned items.
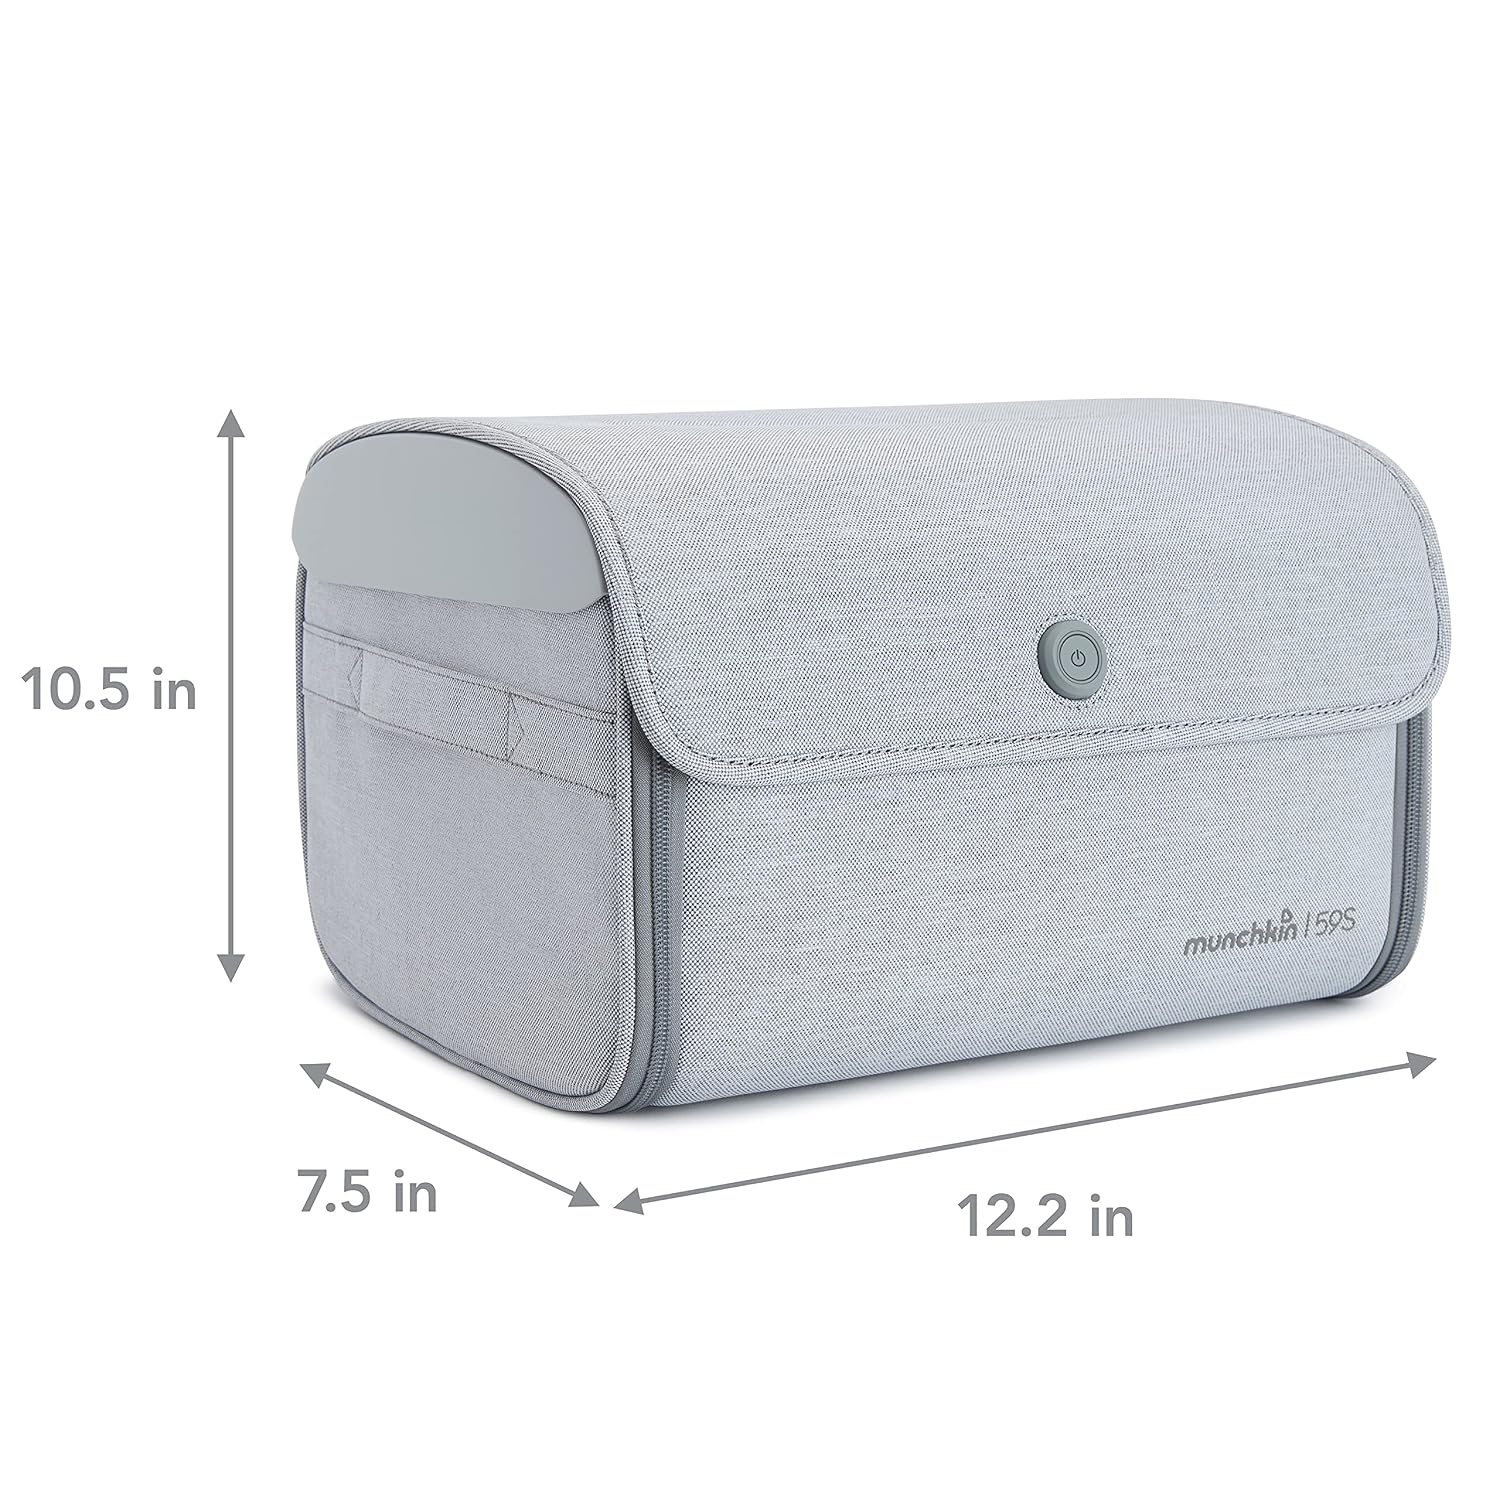
Figure 6: Placing an item inside the UV Cleaning Bag.

Figure 7: Interior features and UV test paper.
5. Maintenance
Proper care and maintenance will ensure the longevity and effective operation of your UV Cleaning Bag.
- Cleaning the Bag Exterior: Surface wash with a clean, damp cloth.
- Drying: Air-dry the bag completely. Do not iron.
- Avoid Immersion: Do not immerse the bag in water or any other liquids.
- LED Longevity: The 21 gold LED beads are designed for over 3,000 hours of use and do not require replacement under normal operating conditions.
- Storage: When not in use, the bag can be folded down for compact storage.

Figure 8: The UV Cleaning Bag folded for storage.
6. Troubleshooting
If you encounter any issues with your Munchkin 59S UV Cleaning Bag, please refer to the following common problems and solutions.
| Problem | Possible Cause | Solution |
|---|---|---|
| Device does not turn on. |
|
|
| Items do not appear to be thoroughly cleaned. |
|
|
7. Specifications
| Model Number | 21275 |
| Product Dimensions (Exterior) | 12.2 x 7.5 x 10.5 inches (31 x 19 x 26.7 cm) |
| Interior Dimensions | Approximately 11" x 12.4" x 8" (28 x 31.5 x 20 cm) |
| Material Composition | Polyester |
| Item Weight | 2.33 pounds (1.06 kg) |
| UV Source | 21 Gold LED Beads |
| LED Lifespan | 3,000+ hours |
| Power Source | Rechargeable Power Bank (USB-powered) |

Figure 9: Exterior dimensions of the UV Cleaning Bag.
8. Warranty and Support
For information regarding product warranty, returns, or technical support, please refer to the official Munchkin website or contact their customer service directly. Specific warranty details may vary by region and purchase location.
You can visit the Munchkin Store on Amazon for additional product information.


