
Introduction
The FoodSaver FM3943 Vacuum Sealer is designed to preserve the freshness and flavor of your food by removing air and sealing it in specialized bags or containers. This premium model features moisture control, a marinate function, a built-in handheld sealer, and integrated roll storage with a cutter. By following the instructions in this manual, you can maximize the benefits of your vacuum sealer, extending food freshness up to five times longer than conventional storage methods.
Package Contents
Carefully unpack all items and ensure you have received the following components:
- FoodSaver FM3943 Main Unit x1
- FoodSaver Pack Roll (28cm width) x1
- FoodSaver Vacuum Bags (Size S) x3
- FoodSaver Vacuum Bags (Size L) x2
- FoodSaver Zipper Bags (Size S) x3
- Retractable Handheld Sealer (built-in to main unit) x1

Setup
- Placement: Place the FoodSaver FM3943 on a flat, stable, and dry surface. Ensure there is enough space around the unit for proper operation and ventilation.
- Power Connection: Plug the power cord into a standard 100V electrical outlet.
- Roll Installation (for custom bags):
- Open the lid of the vacuum sealer.
- Insert the FoodSaver roll into the designated roll storage area.
- Pull out enough material from the roll to create a bag of the desired length.
- Use the built-in roll cutter to cut the material.
- Place one end of the cut material into the sealing strip area and press the 'Seal' button to create the bottom seal of your custom bag.

Operating Instructions
1. Vacuum Sealing with Bags
- Prepare the Bag: Place the food item into a FoodSaver vacuum bag. Ensure the open end of the bag is clean, dry, and flat. Leave at least 7-10 cm of space between the food and the top of the bag.
- Position the Bag: Open the lid of the vacuum sealer. Place the open end of the bag into the vacuum channel, ensuring it lies flat across the sealing strip. Close the lid firmly until it clicks into place.
- Select Mode (if applicable): For moist foods, select the 'Moist' setting. For dry foods, select the 'Dry' setting. This optimizes the sealing process.
- Start Sealing: Press the 'Vacuum & Seal' button. The machine will automatically remove air from the bag and then heat-seal it. The indicator light will turn off when the process is complete.
- Release: Once the light turns off, press the release buttons (usually on the sides) to open the lid and remove your sealed bag.


2. Using the Handheld Sealer for Zipper Bags and Containers
- Prepare Item: Place food into a FoodSaver zipper bag or a FoodSaver vacuum container. Close the zipper bag or container lid securely.
- Attach Handheld Sealer: Pull out the retractable handheld sealer hose from the side of the main unit. Attach the accessory hose to the vacuum port on the zipper bag or container.
- Start Vacuuming: Press the 'Accessory' button on the main unit. The machine will remove air until a proper vacuum is achieved.
- Detach: Once vacuuming is complete, detach the handheld sealer from the bag/container and retract the hose back into the unit.

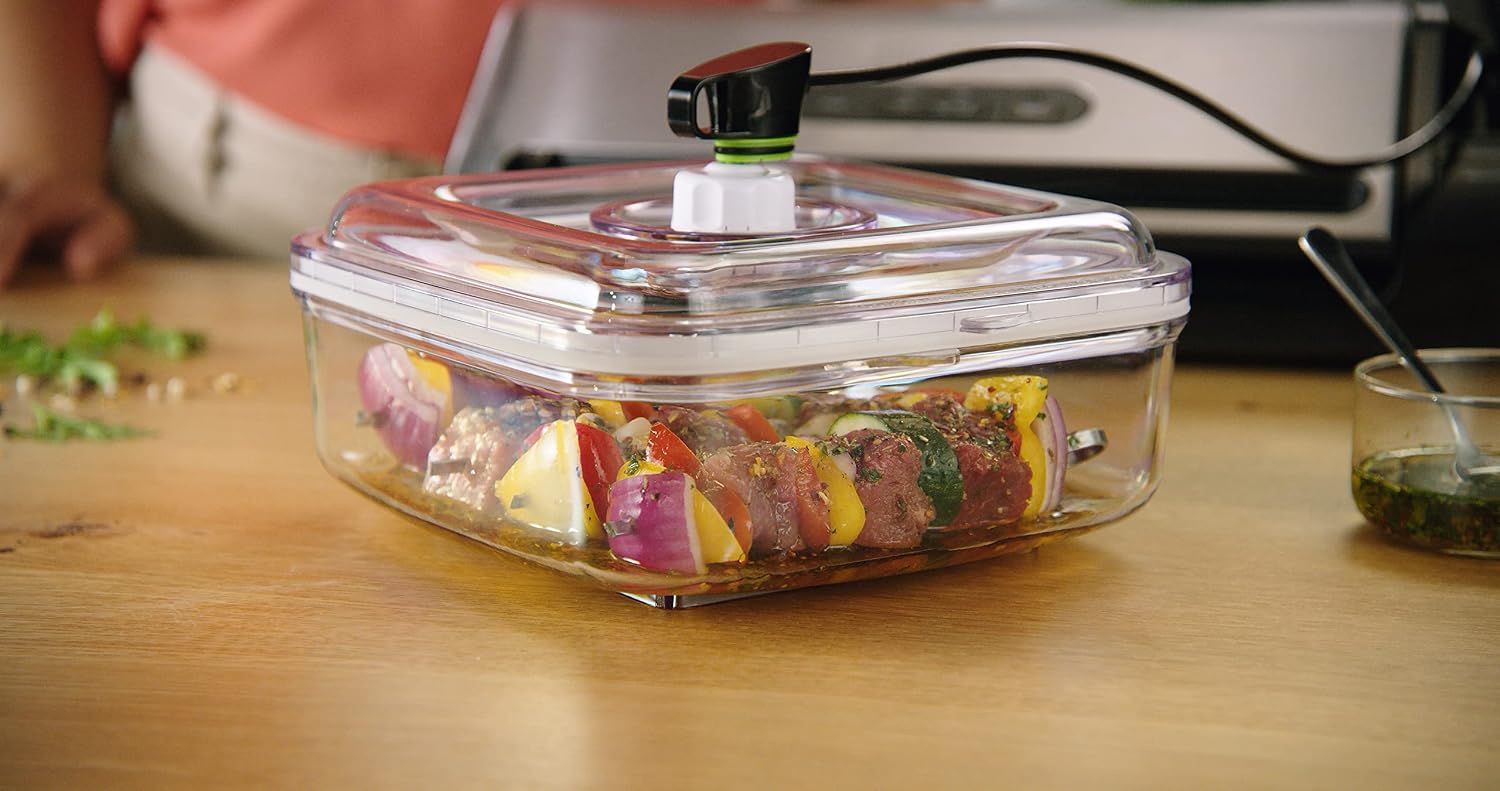
3. Marinate Function
The marinate function uses intermittent vacuum cycles to infuse marinades into food quickly.
- Prepare Food: Place food and marinade into a FoodSaver vacuum container. Secure the lid.
- Connect: Attach the handheld sealer hose to the container's vacuum port.
- Start Marinating: Press the 'Marinate' button on the main unit. The machine will cycle through vacuum and release phases for a set period (typically 10-20 minutes).
- Finish: Once the cycle is complete, detach the hose and release the vacuum from the container before opening.

Maintenance
Regular cleaning and maintenance ensure the longevity and optimal performance of your FoodSaver FM3943.
- Cleaning the Drip Tray: The drip tray collects excess liquids during vacuum sealing. It is removable and should be cleaned after each use, especially when sealing moist foods. Wash with warm, soapy water and dry thoroughly.
- Cleaning the Sealing Strip: Wipe the sealing strip and vacuum channel with a damp cloth to remove any food particles or moisture. Ensure these areas are completely dry before next use.
- Exterior Cleaning: Wipe the exterior of the unit with a soft, damp cloth. Do not immerse the unit in water or use abrasive cleaners.
- Storage: Store the unit with the lid unlatched to prevent compression of the gaskets, which can affect sealing performance over time.
Troubleshooting
If you encounter issues with your FoodSaver FM3943, refer to the following common problems and solutions:
| Problem | Possible Cause | Solution |
|---|---|---|
| Machine does not turn on. | Power cord not properly connected; no power from outlet. | Ensure power cord is securely plugged in. Test outlet with another appliance. |
| Bag does not vacuum properly. | Bag not positioned correctly; bag opening is wet or wrinkled; food too close to opening; vacuum channel or gaskets are dirty. | Reposition bag, ensuring it's flat and centered. Wipe bag opening dry. Leave sufficient space from food. Clean vacuum channel and gaskets. |
| Bag does not seal. | Sealing strip is dirty or wet; sealing strip is worn; bag material is incorrect. | Clean and dry the sealing strip. Ensure you are using genuine FoodSaver bags. If issue persists, contact customer support. |
| Handheld sealer not vacuuming. | Hose not properly attached; container/zipper bag not sealed; vacuum port on bag/container is blocked. | Ensure hose is firmly attached to both unit and accessory. Check container lid/zipper bag seal. Clear any blockages. |
Specifications
| Feature | Detail |
|---|---|
| Brand | FOODSAVER |
| Model Number | FM3943040 |
| Material | AS Resin |
| Color | Silver |
| Item Weight | 2.56 kg |
| Power Source | Corded Electric |
| Voltage | 100 V |
| Power Consumption | 130 W |
| Product Type | Vacuum Pack Machine |
Warranty and Support
The FoodSaver FM3943 Vacuum Sealer comes with a 1-year manufacturer's warranty from the date of purchase. This warranty covers defects in materials and workmanship under normal use.
For warranty claims, technical support, or any questions regarding your product, please contact FoodSaver customer service. Keep your proof of purchase for warranty validation.
For more information and support, visit the official FoodSaver website or refer to the contact details provided in your product packaging.


