
1. Introduction
This manual provides essential instructions for the safe and effective use of your ChunHee Wireless Emergency Call System. This system is designed to provide timely assistance for individuals who may require quick help, such as seniors, children, individuals with disabilities, pregnant women, or those who are ill. Please read this manual thoroughly before installation and operation.
The system includes one receiver and two transmitters (call buttons).
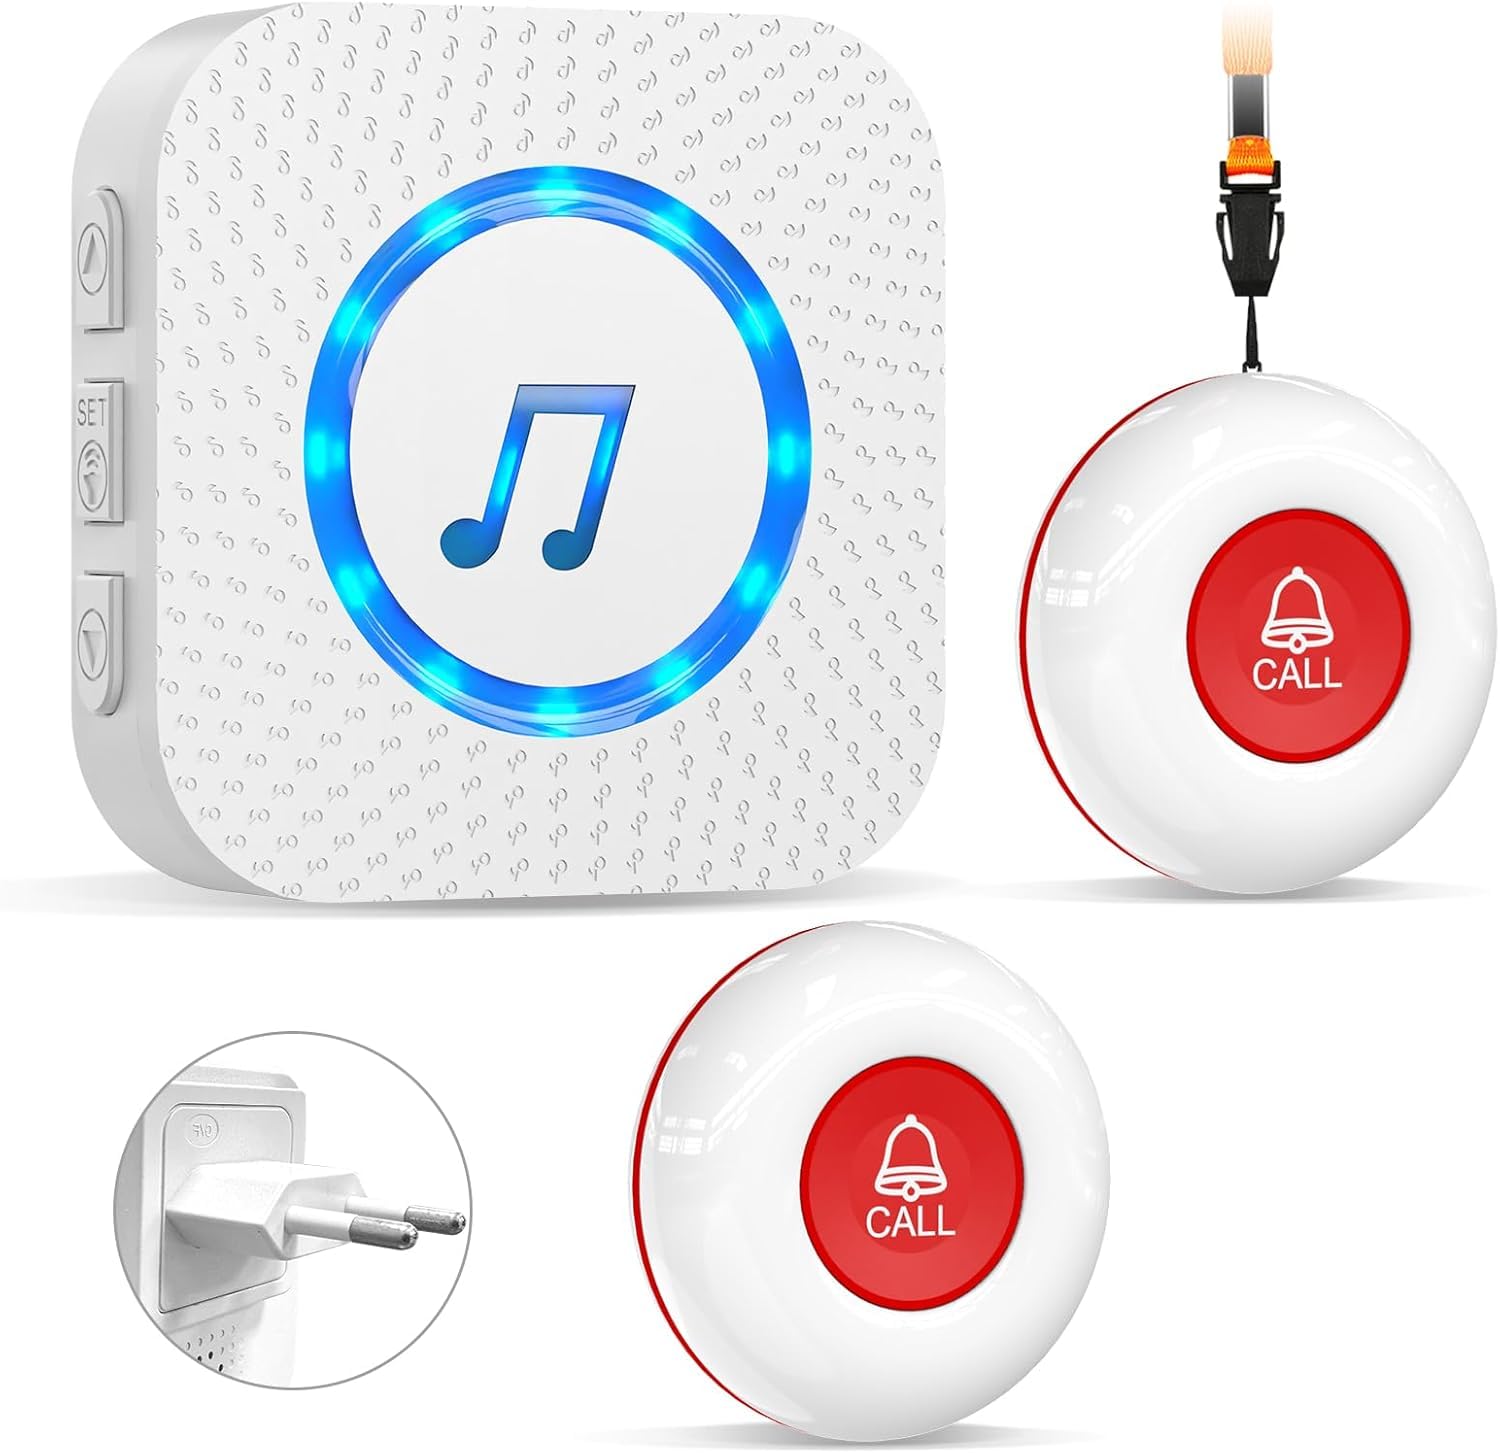
Figure 1: ChunHee Wireless Emergency Call System (1 Receiver + 2 Transmitters)
2. Product Components and Features
The ChunHee Wireless Emergency Call System consists of a plug-in receiver and two portable call buttons. Key features include:
- Wireless Operation: No complex wiring required.
- Long Range: Up to 150 meters (500 feet) reception range in open areas.
- Adjustable Volume: 5 levels from 0 dB to 110 dB.
- Multiple Ringtones: 55 selectable melodies.
- Waterproof Transmitter: Suitable for use in bathrooms or near water.
- Expandable System: Supports pairing with multiple receivers and transmitters.

Figure 2: Receiver and Transmitter Components
Receiver: Features a European plug, speaker, LED light, and buttons for melody selection and volume adjustment.
Transmitter (Call Button): Compact and portable, with an SOS call button, indicator lights, and a lanyard for wearing around the neck or attaching to a convenient location.
Video: Functions and Use of the Pagers
This video demonstrates the various functions and typical usage scenarios of the ChunHee emergency call system, including pairing and app connectivity.
3. Setup Instructions
3.1 Powering the Receiver
- Plug the receiver into a standard electrical outlet.
- The receiver will emit a short sound and its LED indicator will light up, indicating it is powered on.
3.2 Pairing Transmitters with the Receiver
The transmitters are typically pre-paired with the receiver. If re-pairing is needed or if you are adding new transmitters:
- Press and hold the 'Set' button on the receiver for approximately 5 seconds until the SOS indicator lights up red and the side light flashes.
- Briefly press the call button on the transmitter you wish to pair. The receiver will emit a 'DiDi' sound, indicating successful pairing.
- Repeat for any additional transmitters.
- Release the 'Set' button on the receiver to exit pairing mode.
3.3 App Connection (for WiFi models)
For models with WiFi functionality, you can connect the system to a smartphone app for remote notifications:
- Ensure your smartphone's Bluetooth and WiFi (2.4Ghz network) are enabled.
- Download and install the 'Tuya Smart' or 'Smart Life' app from your app store.
- Open the app and create an account or log in.
- In the app, tap 'Add Device' or the '+' icon.
- Press and hold the setting button on the receiver for 5 seconds until the indicator light flashes.
- Follow the on-screen instructions in the app to connect the device to your WiFi network.
- Once connected, you will receive notifications on your phone when a call button is pressed.
Video: Tuya WiFi Smart SOS Emergency Alarm Setup
This video illustrates the process of connecting the ChunHee emergency call system to the Tuya Smart app for remote alerts.
3.4 Placement of Components
Consider the following for optimal placement:
- Receiver: Place in a central location where the alert can be easily heard by the caregiver. Ensure it is plugged into a stable power source.
- Transmitters: Can be worn around the neck using the lanyard, placed in a pocket, or fixed to a wall (e.g., bedside, bathroom) using double-sided adhesive tape.
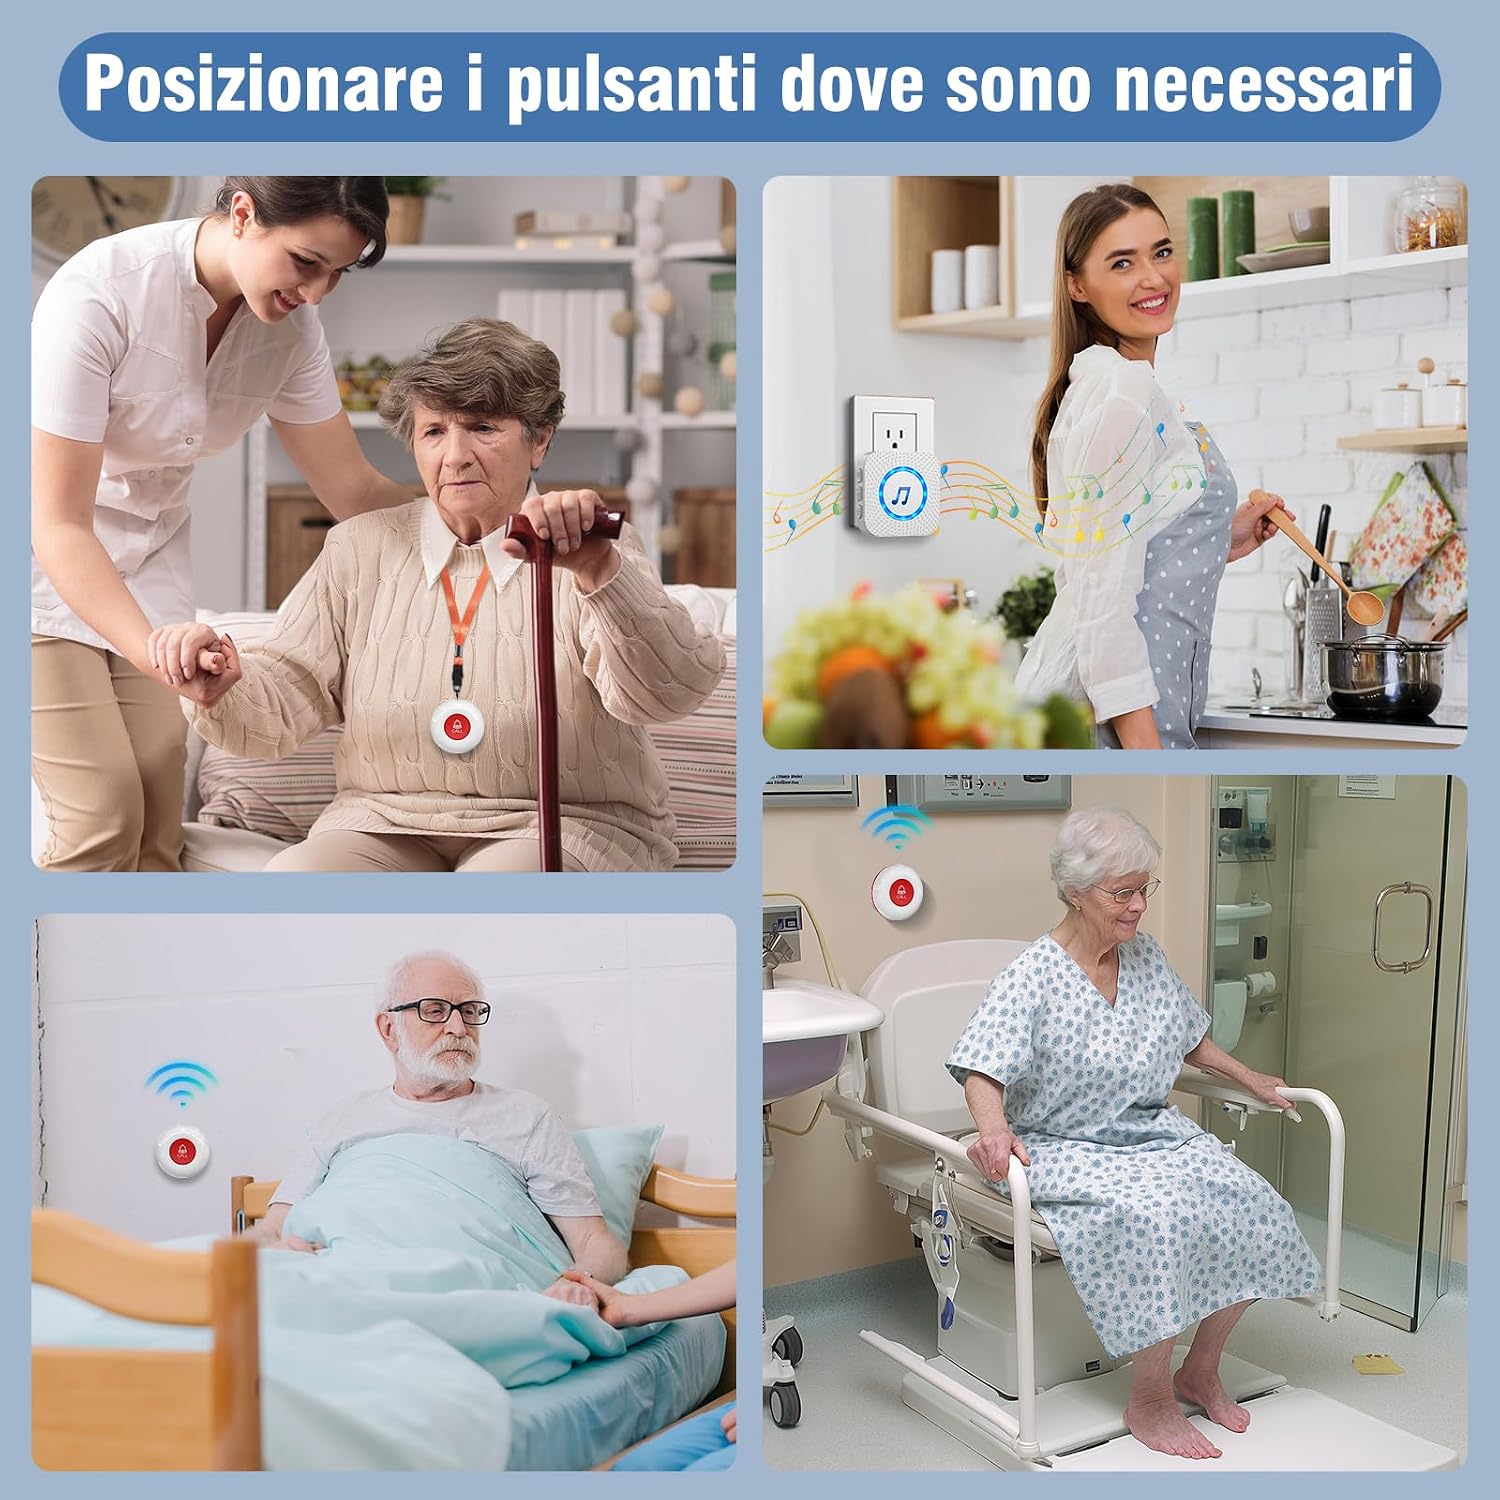
Figure 3: Recommended Placement for Call Buttons

Figure 4: Wireless Range Illustration
4. Operating Instructions
4.1 Initiating an Emergency Call
To send an alert, simply press the large 'CALL' button on the transmitter. The transmitter's indicator light will flash, and the receiver will sound an alarm.
4.2 Adjusting Volume and Ringtones
The receiver allows you to customize the alert sound and volume:
- Volume Adjustment: Press the volume buttons on the side of the receiver to cycle through 5 different volume levels (0 dB to 110 dB).
- Ringtone Selection: Use the melody selection buttons on the side of the receiver to choose from 55 available ringtones.
Video: Adjusting Volume and Ringtone
This video demonstrates how to adjust the volume and select different melodies on the receiver unit.
4.3 Waterproof Transmitter
The call button is designed to be waterproof (IP55 rated), making it safe for use in environments where it might be exposed to splashes, such as bathrooms or kitchens.

Figure 5: Waterproof Transmitter in Use
5. Maintenance
5.1 Battery Replacement for Transmitters
The transmitters are powered by 2 AAA batteries (included). When the battery is low, the call button's indicator light will flash red 5 times upon pressing.
- Using a small screwdriver, carefully open the back cover of the transmitter.
- Remove the old batteries and insert new AAA batteries, ensuring correct polarity.
- Close the back cover securely.
Video: Replacing Transmitter Battery
This video provides a visual guide on how to replace the battery in the emergency call transmitter.
5.2 Cleaning
Wipe the devices with a soft, dry cloth. Do not use abrasive cleaners or immerse the receiver in water.
6. Troubleshooting
| Problem | Possible Cause | Solution |
|---|---|---|
| Receiver does not sound when button is pressed. | 1. Receiver not powered on. 2. Transmitter battery low/dead. 3. Devices out of range. 4. Devices not paired. | 1. Ensure receiver is plugged in and powered. 2. Replace transmitter batteries. 3. Move devices closer together. 4. Re-pair the transmitter with the receiver (see Section 3.2). |
| Short alert sound. | Default alert duration. | The system is designed for a short alert. Continuous alerts are not a standard feature. |
| Difficulty connecting to app. | Incorrect WiFi password or 5Ghz network. | Ensure correct 2.4Ghz WiFi password is used. Keep device close to router during setup. |
7. Specifications
- Model Number: CE01
- Product Dimensions: 10.8 x 8.4 x 8 cm
- Item Weight: 210 grams
- Power Source: Battery Powered (Transmitters), AC Plug-in (Receiver)
- Battery Type (Transmitter): 2 x AAA Alkaline batteries (included)
- Voltage: 12 Volts
- Control Method: Touch
- Noise Level: 110 Decibels (max)
- Mounting Type: On door (Transmitter, with adhesive)
- Sensor Technology: Button Sensor
- Wireless Range: Up to 150 meters (500 feet) in open area
8. Warranty and Support
For warranty information and customer support, please refer to the product packaging or contact your retailer. Specific warranty details are not provided in this manual.