
Introduction
This manual provides detailed instructions for the installation, operation, and maintenance of your Signature Hardware Wall Mounted Tub Filler Faucet with Hand Shower. This product features a classic design, durable brass construction, and includes a hand shower for added convenience. Please read this manual thoroughly before installation and use to ensure proper function and longevity of your faucet.
Safety Information
- Always turn off the main water supply before beginning any plumbing work.
- Wear appropriate personal protective equipment, such as safety glasses and gloves, during installation.
- If you are unsure about any part of the installation process, consult a qualified plumber.
- Ensure all connections are secure and watertight to prevent leaks.
- Do not overtighten connections, as this can damage the product.
- Keep small parts away from children.
Package Contents
Verify that all components are present before beginning installation:
- Wall Mounted Tub Filler Faucet Assembly (Brass construction)
- Hand Shower with Hose (60" length)
- Cross Handles (2)
- Lever Diverter
- 2" Wall Couplers (2)
- Rough-in Valve
- Mounting Hardware
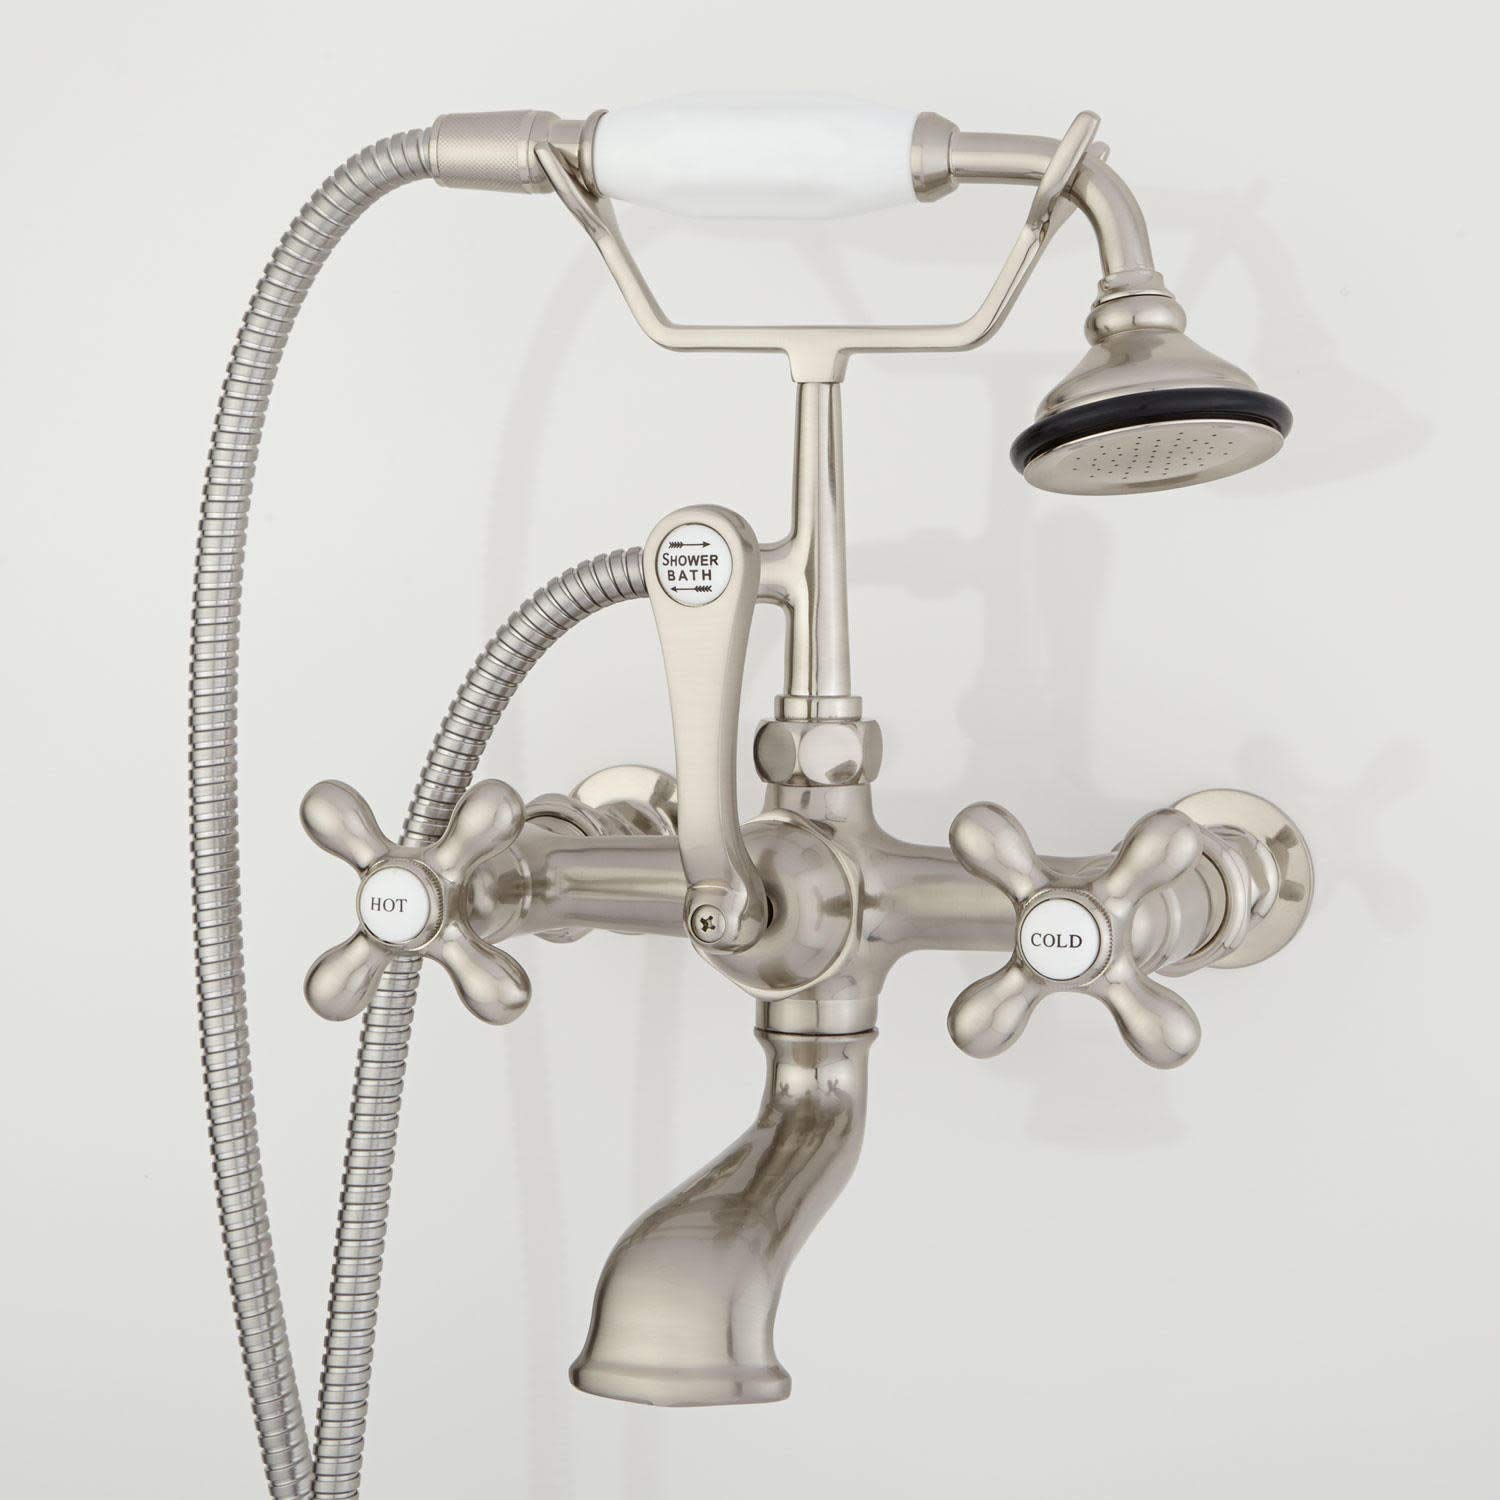
Image: Complete Signature Hardware Wall Mounted Tub Filler Faucet assembly in Brushed Nickel, showing the main body, handles, spout, hand shower, and hose.
Setup and Installation
This faucet is designed for bridge widespread wall-mounted installation with 2-hole faucet centers at 7 inches. A rough-in valve is included. Professional installation is recommended.
- Prepare the Installation Area: Ensure the wall surface is clean, dry, and structurally sound. Turn off the main water supply to the installation area.
- Install Rough-in Valve: Mount the included rough-in valve securely within the wall, ensuring it is properly aligned with the desired faucet centers (7 inches). Connect the hot and cold water supply lines to the appropriate inlets on the rough-in valve.
- Attach Wall Couplers: Thread the 2-inch wall couplers onto the outlets of the rough-in valve, extending through the finished wall surface. Ensure they are flush and securely tightened.
- Mount the Faucet Body: Position the main faucet body onto the wall couplers. Secure the faucet body to the wall couplers using the provided nuts or fasteners. Ensure the faucet is level and firmly attached.
- Install Handles: Attach the cross handles to their respective valve stems on the faucet body. Tighten the set screws (if applicable) to secure them.
- Connect Hand Shower and Hose: Connect one end of the 60-inch hand shower hose to the designated outlet on the faucet body. Connect the other end of the hose to the hand shower head. Place the hand shower in its cradle.
- Test for Leaks: Slowly turn on the main water supply. Check all connections for leaks. If leaks are detected, tighten the connections carefully.
- Flush the System: Run both hot and cold water through the faucet and hand shower for a few minutes to flush out any debris from the water lines.

Image: Side view of the faucet, illustrating the wall-mounted connection points and the hand shower hose attachment.
Operating Instructions
Your tub filler faucet is designed for simple and intuitive operation.
- Water Flow and Temperature:
- Turn the "HOT" cross handle counter-clockwise to increase hot water flow.
- Turn the "COLD" cross handle counter-clockwise to increase cold water flow.
- Adjust both handles to achieve the desired water temperature and flow rate from the main spout.
- Diverting Water to Hand Shower:
- To divert water from the main tub spout to the hand shower, pull the lever diverter upwards.
- To return water flow to the main tub spout, push the lever diverter downwards.
- The hand shower provides a single function spray pattern.


Images: Detail of the "HOT" handle and the lever diverter, indicating their functions.
Maintenance
Proper care and cleaning will help maintain the finish and performance of your faucet.
- Cleaning the Finish: Clean the faucet regularly with a soft, damp cloth. Avoid abrasive cleaners, harsh chemicals, or scouring pads, as these can damage the brushed nickel finish. Mild soap and water are generally sufficient.
- Cleaning the Hand Shower Nozzles: If water flow from the hand shower becomes restricted, mineral deposits may be blocking the nozzles. Gently rub the rubber nozzles to dislodge any buildup. For stubborn deposits, a solution of equal parts white vinegar and water can be used, applied with a soft cloth.
- Checking for Leaks: Periodically inspect all connections for any signs of leaks. Address any leaks promptly to prevent water damage.

Image: Detail of the hand shower head, showing the nozzles that may require cleaning.
Troubleshooting
| Problem | Possible Cause | Solution |
|---|---|---|
| Low Water Flow |
|
|
| Leaks at Connections |
|
|
| Water Not Diverting to Hand Shower |
|
|
Specifications
| Brand | Signature Hardware |
| Model Number | 314174 (Manufacturer Part Number), 917398-2 (Product Model Number) |
| Material | Brass |
| Finish Type | Brushed Nickel |
| Installation Type | Bridge Widespread Wall Mounted, 2-Hole |
| Faucet Centers | 7 inches |
| Number of Handles | 2 (Cross Handles) |
| Spout Height | 4-1/4 inches (deck to spout outlet) |
| Spout Reach | 7-3/8 inches (center of faucet body to center of spout outlet horizontally) |
| Overall Height | 11 inches (bottom to top of faucet) |
| Hand Shower Flow Rate | 1.8 gallons-per-minute |
| Hand Shower Hose Length | 60 inches |
| Item Weight | 8.94 Pounds |
| UPC | 781889548608 |
Warranty Information
This Signature Hardware tub filler faucet is covered under Signature Hardware's 25-year limited warranty. This warranty covers defects in material and workmanship under normal use and service. For full details regarding warranty terms, conditions, and claims, please refer to the official Signature Hardware website or contact their customer support.
Support
If you have any questions, require technical assistance, or need to order replacement parts, please contact Signature Hardware customer support. You can typically find contact information, FAQs, and additional resources on the official Signature Hardware website: