1. Introduction
Thank you for choosing the Poafamx 1/3 HP Aquarium Chiller. This device is designed to maintain a stable and optimal water temperature for various aquatic environments, including freshwater and saltwater aquariums, as well as hydroponic systems. It features an energy-efficient compressor and circulation refrigeration technology to provide consistent cooling.
This manual provides essential information for the safe and efficient operation, installation, and maintenance of your chiller. Please read it thoroughly before use and retain it for future reference.
2. Safety Information
Always observe the following safety precautions to prevent injury or damage to the product.
- Ensure the power supply matches the chiller's requirements (110 Volts).
- Do not operate the chiller if the power cord or plug is damaged.
- Keep the chiller away from direct sunlight, heat sources, and flammable materials.
- Ensure adequate ventilation around the unit. Maintain at least 6 inches of space on all sides for proper heat dissipation.
- Do not immerse the chiller unit in water.
- Disconnect power before performing any maintenance or cleaning.
- This appliance is not intended for use by persons with reduced physical, sensory, or mental capabilities, or lack of experience and knowledge, unless they have been given supervision or instruction concerning use of the appliance by a person responsible for their safety.
3. Package Contents
Verify that all components are present and in good condition upon unpacking.
- Water Chiller Unit
- Water Pump
- Hose Connectors
- Hose Clamp
- Hose Suction Cup
- User Manual (this document)
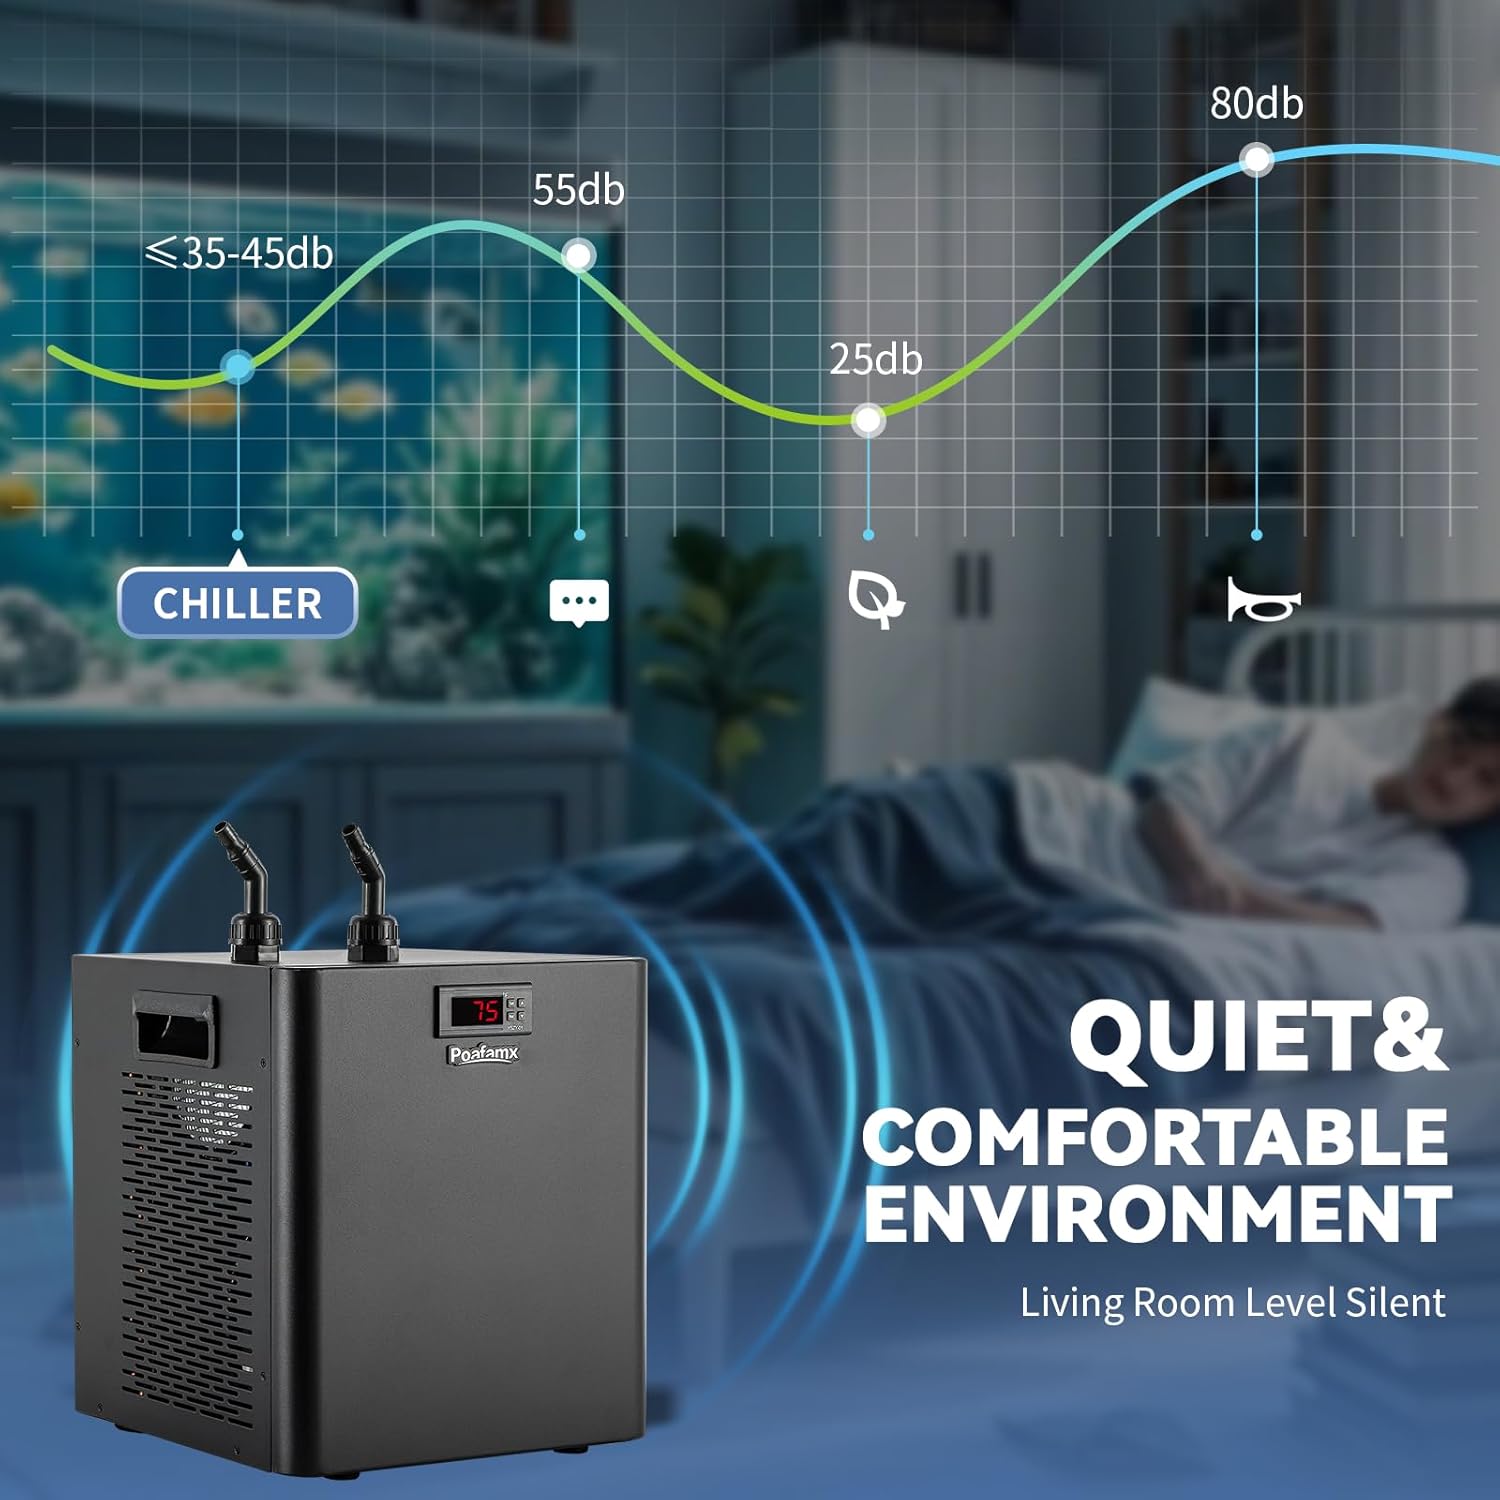
Image: The Poafamx 1/3 HP Aquarium Chiller shown with its included accessories: water pump, hoses, and connectors.
4. Setup Instructions
Follow these steps to set up your Poafamx Aquarium Chiller.
- Placement: Position the chiller on a stable, level surface. Ensure there is at least 6 inches (15 cm) of clear space around all sides of the unit to allow for proper airflow and heat dissipation. Avoid placing it in enclosed spaces or near heat sources.
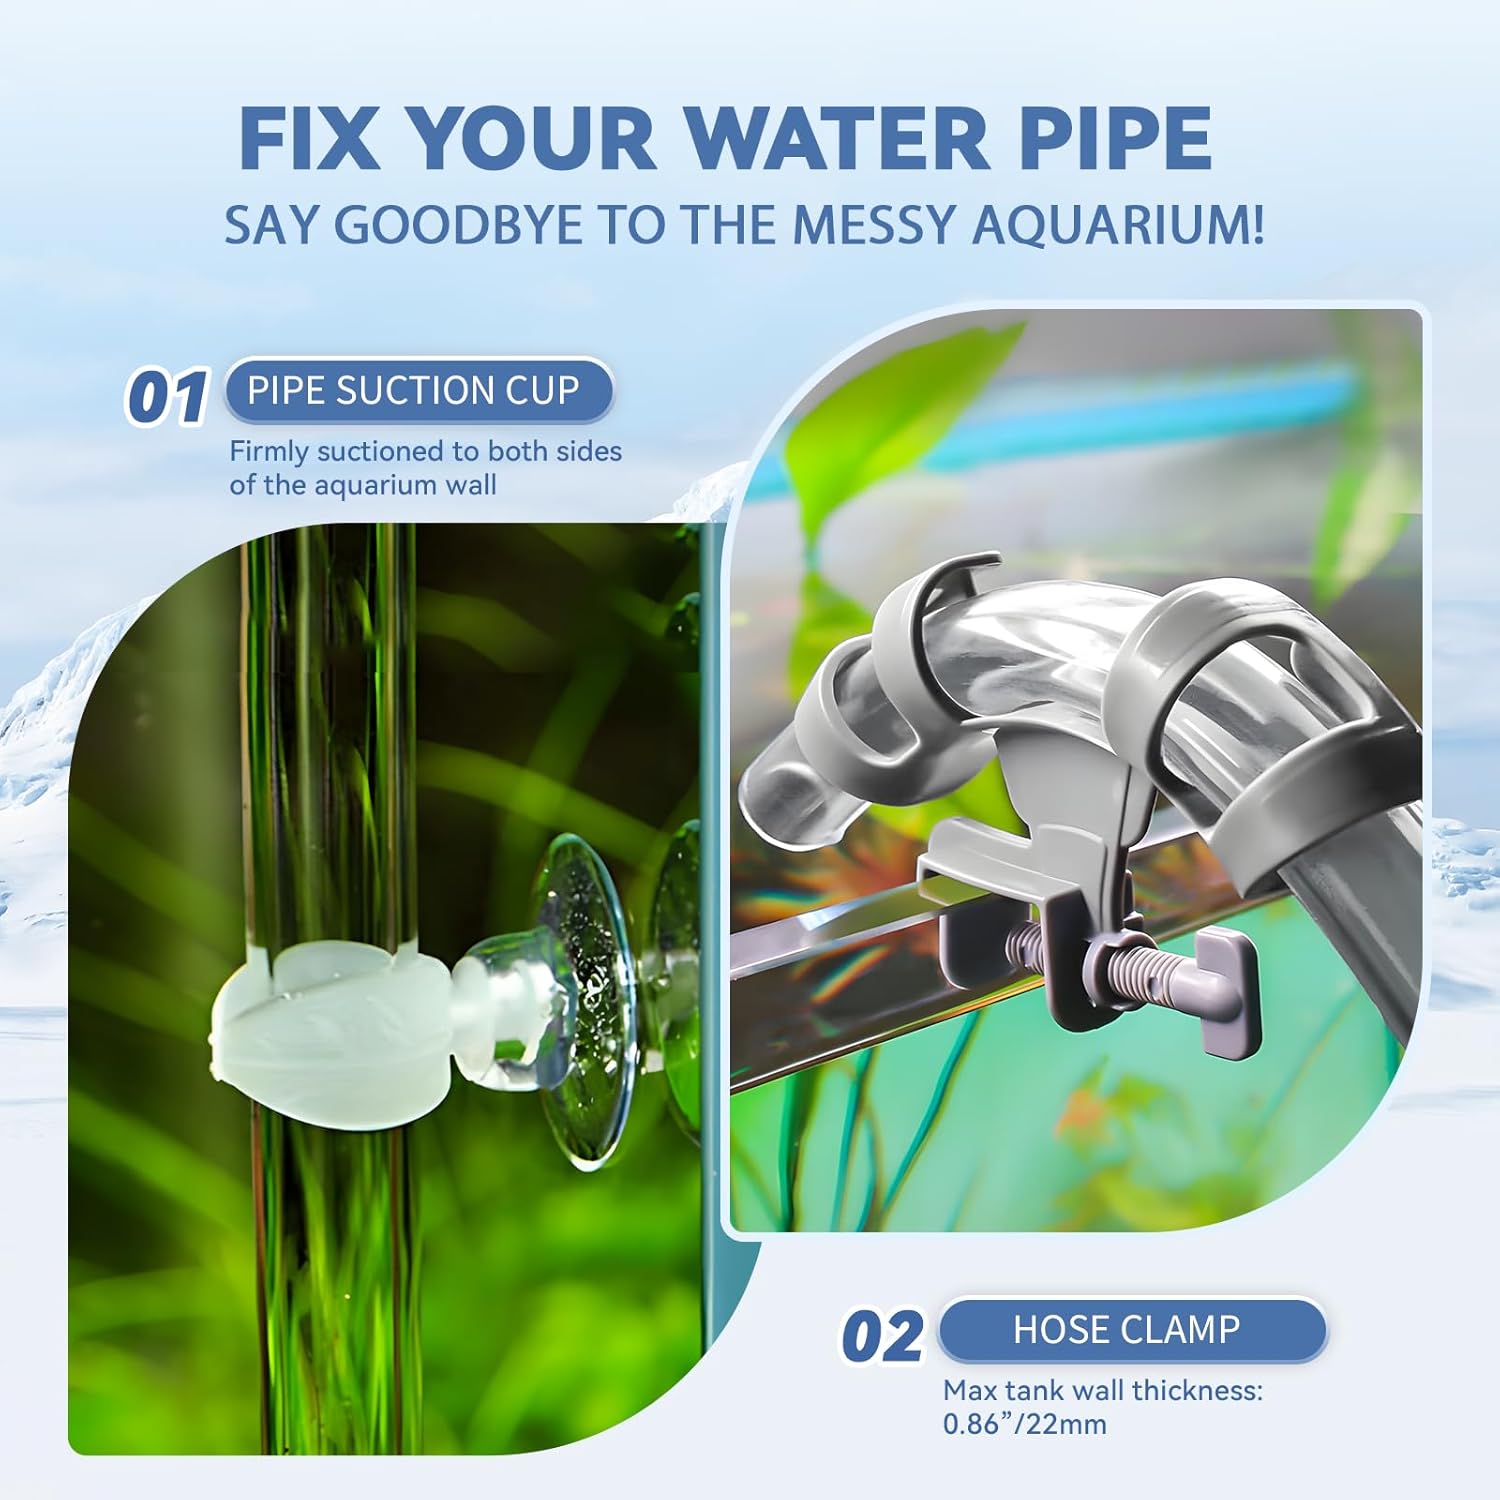
Image: Rear view of the chiller showing cooling fans and ventilation holes, emphasizing the need for adequate space.
- Connect Water Pump: Attach the water pump to the appropriate hose and place the pump inside your aquarium or hydroponic reservoir. Ensure the pump is fully submerged.

Image: Illustration of the water pump connected and circulating water through the chiller and back into the tank.
- Connect Hoses: Connect the water hoses to the chiller's inlet and outlet ports. The chiller's ports are interchangeable (no distinctions). Secure the hoses with the provided hose clamps to prevent leaks. Use the hose suction cups to neatly route and secure the hoses along the aquarium wall.
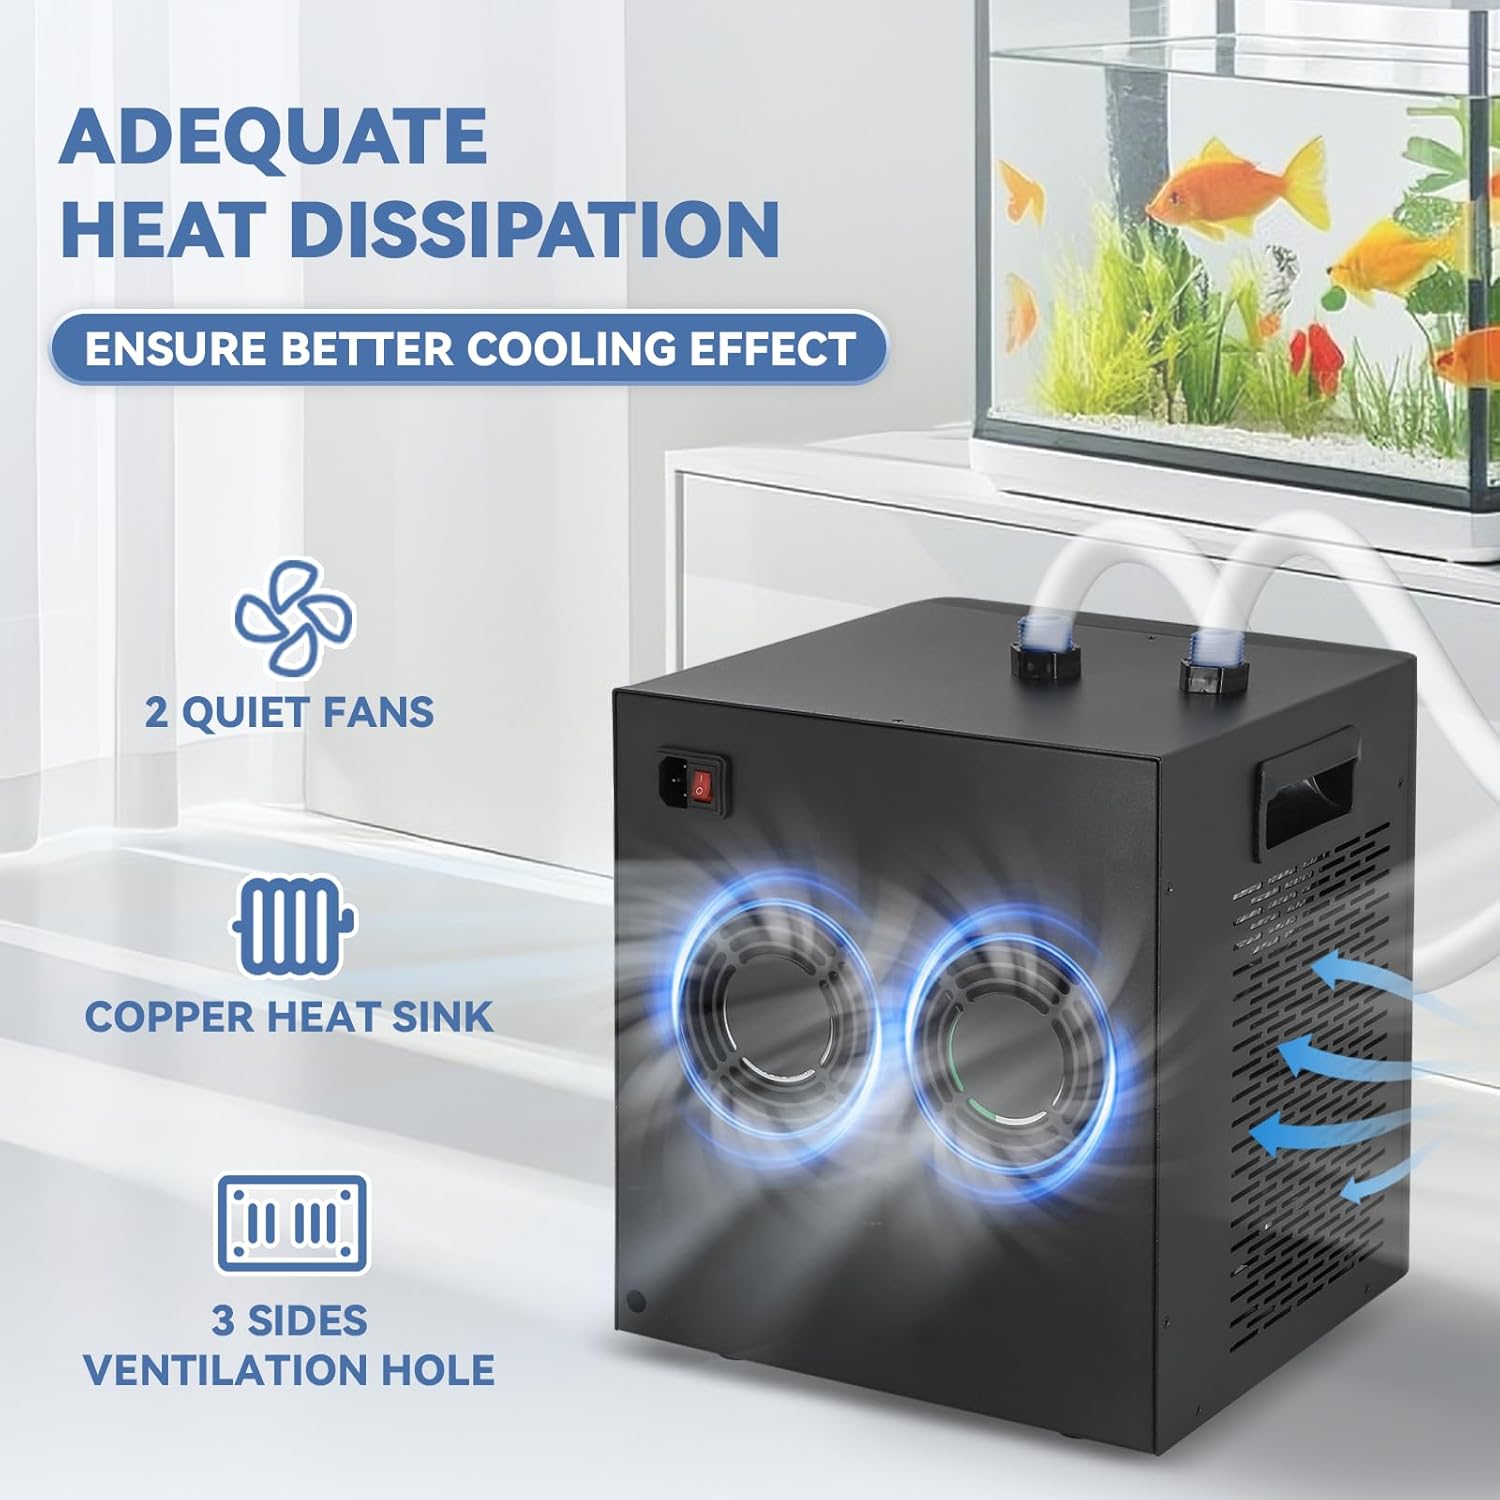
Image: Detail of the chiller's water inlet/outlet ports with hoses connected.

Image: A hose suction cup and clamp demonstrating how to secure the water pipe to the aquarium wall.
- Fill System: Ensure the aquarium or reservoir is filled with water and the pump is fully submerged before powering on the chiller.
- Power Connection: Plug the chiller into a grounded 110V electrical outlet.
5. Operating Instructions
The chiller features an easy-to-use digital display for temperature control.
- Power On/Off: Use the "One key switch" located on the unit to turn the chiller on or off. The digital display will illuminate.
- Set Target Temperature:
- Press the SET button once. The current target temperature will flash on the display.
- Use the Up (▲) and Down (▼) buttons to adjust the temperature to your desired setting.
- Press SET again to confirm the setting, or wait a few seconds for it to save automatically.
- Set Temperature Difference (F1 Code): This setting determines the temperature range within which the chiller operates, preventing frequent on/off cycling.
- Long press the SET button until "F1" appears on the display.
- Press SET again to enter the F1 setting.
- Use the Up (▲) and Down (▼) buttons to adjust the temperature difference. A common setting is 3-5 degrees Fahrenheit. For example, if your target is 75°F and F1 is set to 5, the chiller will activate when the water reaches 80°F and cool down to 75°F.
- Press SET to confirm and exit.

Image: Step-by-step guide on setting the target temperature and the F1 temperature difference on the chiller's digital display.
- Cooling Operation: Once the settings are configured, the chiller will automatically begin cooling when the water temperature exceeds the set target temperature plus the F1 difference. It will stop cooling once the target temperature is reached.
6. Maintenance
Regular maintenance ensures optimal performance and extends the lifespan of your chiller.
- Clean Air Vents: Periodically inspect and clean the air intake and exhaust vents to prevent dust and debris buildup, which can hinder heat dissipation. Use a soft brush or vacuum cleaner.
- Check Hoses and Connections: Regularly inspect hoses for kinks, cracks, or leaks. Ensure all connections are secure.
- Water Pump Maintenance: Clean the water pump regularly according to its own instruction manual to ensure unobstructed water flow.
- Environmental Conditions: Maintain the recommended 6-inch clearance around the chiller for efficient operation. Avoid placing it in excessively humid or dusty environments.
7. Troubleshooting
If you encounter issues with your chiller, refer to the following common problems and solutions.
| Problem | Possible Cause | Solution |
|---|---|---|
| Chiller not cooling or insufficient cooling. |
|
|
| Chiller is noisy. |
|
|
| Water leaks from connections. |
|
|
| Digital display shows error code. | Refer to the specific error code in the full manual (if available) or contact customer support. | Contact Poafamx customer support for assistance. |
8. Specifications
Key technical specifications for the Poafamx 1/3 HP Aquarium Chiller.
- Model: 1/3 HP (AL-300)
- Recommended Tank Volume: Up to 79 Gallons (300 Liters)
- Power: 600W
- Voltage: 110V
- Refrigerant: R290 (Freon-free)
- Item Weight: Approximately 37 lbs (17 kg)
- Product Dimensions: 12.6 x 12.6 x 7.28 inches (32 x 32 x 18.5 cm) - Note: Other dimensions 11.8"L x 11.4"W x 13"H are also listed, please refer to the physical product for exact measurements.
- Material: Stainless Steel
- Water Pump Flow: 1200 L/H
- Applicable Water Pipe: 12/16mm inner diameter pipe
- Noise Level: Approximately 50dB or less
- Special Features: Rust Resistant, Easy to Use, Powerful
Image: A diagram detailing the product parameters including model, voltage, power, weight, and dimensions.
9. Warranty and Support
The Poafamx 1/3 HP Aquarium Chiller comes with a 1-year quality assurance warranty from the date of purchase.
For warranty claims, technical support, or any questions regarding your product, please contact Poafamx customer service.
- Refer to your purchase documentation for specific contact details.
- You may also visit the official Poafamx brand store for more information: Poafamx Brand Store


