
1. Safety Information
- Always operate the unit in a well-ventilated area.
- Soldering irons and hot air guns reach high temperatures. Avoid direct contact with skin.
- Use appropriate personal protective equipment (PPE) such as safety glasses and heat-resistant gloves.
- Do not use the unit near flammable materials or gases.
- Ensure the unit is properly grounded.
- Disconnect power before performing any maintenance or changing accessories.
- The power supply section is for low voltage DC applications only. Do not connect to AC power or devices exceeding 35V.
- The soldering iron contains a motion sensor. A slight wobbling noise is normal and not a defect.
2. Package Contents
Verify that all items are present in the package:
- YIHUA 853D USB 3A Main Unit
- Soldering Iron
- Hot Air Gun
- Soldering Iron Holder (with wool ball)
- 4 x Hot Air Nozzles
- 10 x Assorted Soldering Iron Tips
- 1 x IC Extractor
- 1 x Desoldering Pump (golden)
- 1 x ESD-Safe Tweezers
- 1 x Lead-free Solder (0.8mm 35g)
- Power Cord
3. Product Overview
The YIHUA 853D USB 3A integrates three essential tools: a soldering station, a hot air rework station, and a DC power supply.
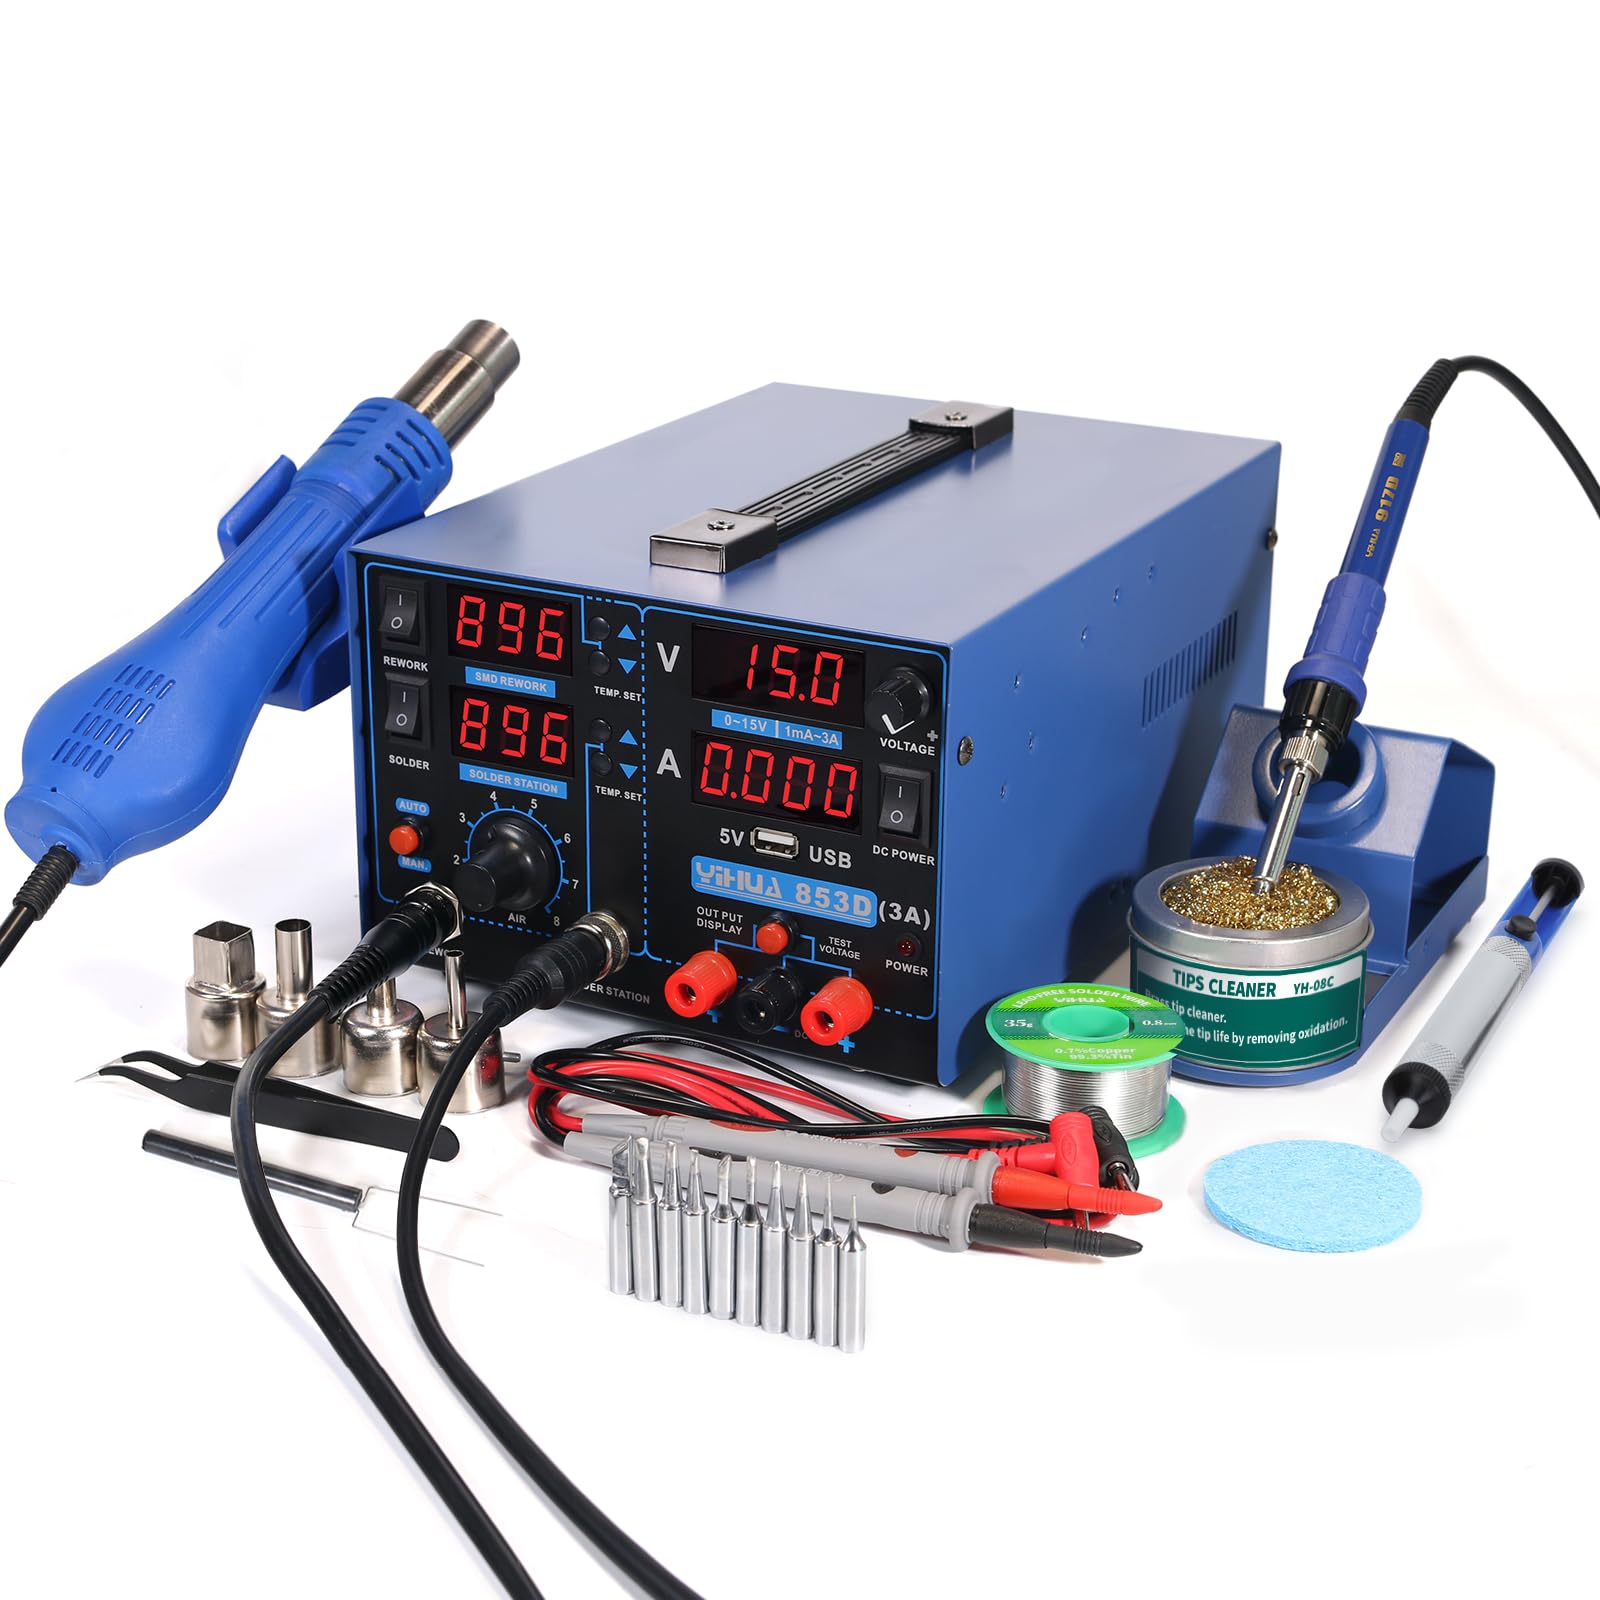
Image: Front view of the YIHUA 853D USB 3A station, showing the soldering iron, hot air gun, and control panel with digital displays for temperature, voltage, and current.

Image: The YIHUA 853D USB 3A unit with its dimensions indicated: Length 9.96 inches, Width 7.32 inches, Height 4.88 inches.
4. Setup
- Unpacking: Carefully remove all components from the packaging.
- Placement: Place the main unit on a stable, heat-resistant, and well-ventilated surface. Ensure adequate clearance around the unit for airflow.
- Connect Soldering Iron: Plug the soldering iron cable into the designated "SOLDER STATION" port on the front panel. Secure the soldering iron in its holder.
- Connect Hot Air Gun: Plug the hot air gun cable into the "REWORK" port. Place the hot air gun in its stand.
- Attach Hot Air Nozzles: Select the appropriate hot air nozzle and attach it securely to the hot air gun.
- Power Connection: Connect the power cord to the unit's power inlet and then to a standard 110-127V AC power outlet.
- Initial Power On: Flip the main power switch located on the front panel to the "ON" position. The digital displays will illuminate.

Image: The hot air gun with four different sized nozzles, demonstrating the variety available for different rework tasks.
5. Operating Instructions
5.1. Soldering Station
- Power On: Press the "SOLDER" power button to activate the soldering iron.
- Temperature Adjustment: Use the "TEMP. SET" up/down buttons for the soldering station to adjust the desired temperature. The display shows the set temperature and actual temperature.
- Temperature Units: The unit supports both Celsius (°C) and Fahrenheit (°F) display. Refer to the manual's settings section for switching between units.
- Sleep Function: The soldering iron features a sleep mode. When placed in its holder, it will automatically enter sleep mode after a set period to conserve energy and extend tip life. It will rapidly heat up when picked up.

Image: A guide illustrating recommended soldering temperatures. For lead-free solder (Sn-Ag-Cu) with a melting point of 220°C, a set temperature of 370°C is suggested (220°C + 50°C for better connection + 100°C for thermal recovery).

Image: A user performing soldering on a circuit board using the soldering iron from the YIHUA 853D USB 3A station.
5.2. Hot Air Rework Station
- Power On: Press the "REWORK" power button to activate the hot air gun.
- Temperature Adjustment: Use the "TEMP. SET" up/down buttons for the rework station to adjust the desired hot air temperature.
- Airflow Adjustment: Use the "AIR" knob to control the airflow intensity.
- Automatic Shut-down: The hot air gun will automatically cool down and shut off when placed in its stand, extending the heating element's lifespan.
- Manual Mode: A "MAN" button allows the hot air gun to run continuously, bypassing the automatic shut-down feature when in the stand.

Image: A close-up view of a hot air gun being used to rework a component on a circuit board, with tweezers holding the component.
5.3. DC Power Supply
- Power On: Press the "POWER" button in the DC Power section to activate the power supply.
- Voltage Adjustment: Use the "VOLTAGE" knob to set the desired output voltage (0-15V).
- Current Adjustment: Use the "CURRENT" knob to set the desired current limit (0-3A).
- Output/Test Modes: The power supply has "OUTPUT DISPLAY" and "TEST VOLTAGE" modes.
- Output Display: Connect your device to the "OUTPUT DISPLAY" terminals. The display will show the actual voltage and current being drawn.
- Test Voltage: Connect test leads to the "TEST VOLTAGE" terminals to measure external DC voltage (up to 35V).
Note:
The testing section functions are integrated; use ONLY one at a time. Do not use the voltmeter for AC devices or voltages greater than 35V. - USB Port: A dedicated 5V 0.5A USB port is available for powering small devices like smartphones. Avoid using it for devices with large power requirements.

Image: A user testing a circuit board using the DC power supply function of the YIHUA 853D USB 3A station, with test leads connected.
6. Maintenance
Regular maintenance ensures the longevity and optimal performance of your YIHUA 853D USB 3A station.
- Soldering Iron Tip Cleaning: Regularly clean the soldering iron tip using the included brass wool cleaner or a damp sponge. This prevents oxidation and ensures efficient heat transfer.
- Replacing Soldering Tips: When a tip becomes worn or damaged, replace it with a new one. Ensure the iron is cool before changing tips.
- Hot Air Nozzle Cleaning: Clean hot air nozzles as needed to prevent blockages.
- General Cleaning: Keep the main unit clean and free of dust and debris. Use a soft, dry cloth. Do not use abrasive cleaners or solvents.
- Storage: When not in use, store the unit in a dry, dust-free environment.

Image: A collection of soldering accessories including a desoldering pump, lead-free solder wire, cleaning sponge, tweezers, IC extractor, various hot air nozzles, and assorted soldering iron tips.
7. Troubleshooting
This section addresses common issues you might encounter.
| Problem | Possible Cause | Solution |
|---|---|---|
| Soldering iron not heating | Not powered on; faulty heating element; loose connection | Ensure "SOLDER" button is pressed. Check cable connection. Contact support if element is faulty. |
| Hot air gun not blowing or heating | Not powered on; airflow knob set too low; faulty heating element/fan | Ensure "REWORK" button is pressed. Adjust "AIR" knob. Contact support if element/fan is faulty. |
| Power supply shows 0V/0A | Not powered on; voltage/current knobs set to zero; no load connected | Ensure "POWER" button is pressed. Adjust voltage/current knobs. Connect a load to test. |
| Inaccurate temperature readings | Sensor issue; calibration needed | Refer to the digital calibration section in the full manual (if available) or contact support. |
| Soldering iron wobbling noise | Normal operation of gravitational motion sensor | This is normal and not a defect. No action required. |
8. Specifications
| Feature | Detail |
|---|---|
| Brand | YIHUA |
| Model Number | 853D USB 3A |
| Input Voltage | 110-127V |
| Display Type | LED |
| Soldering Iron Temperature Stability | 18°F |
| Number of Channels | 3 |
| Hot Air Gun Temperature Range | 392°F to 896°F (200°C to 480°C) |
| DC Power Supply Output | 0-15V, 0-3A |
| USB Output | 5V, 0.5A |
| Product Dimensions (D x W x H) | 7.32" x 9.96" x 4.88" |
| Item Weight | 4.82 Kilograms |
9. Warranty and Support
YIHUA provides a 12-month US-exclusive manufacturer technical coverage for this product.
For technical assistance or warranty claims, please contact YIHUA customer support through Amazon's platform.
For more information, visit the official YIHUA store.


