
1. Introduction
The Fafeicy PC-102B is a practical electronic device designed for testing the pH and chlorine (CL2) levels in swimming pools and spas. This tester provides a convenient and efficient way to monitor water quality, helping to ensure safe, comfortable, and corrosion-free conditions for your pool or spa. Its large display allows for easy and accurate reading of test results.
2. Safety Information
- Keep the device away from direct sunlight and extreme temperatures.
- Do not immerse the main unit in water. Only the probes are designed for water contact.
- Ensure the battery compartment is securely closed to prevent water ingress.
- Remove batteries if the device will not be used for an extended period to prevent leakage.
- Keep out of reach of children.
3. Package Contents
Please check the package contents upon receipt to ensure all items are present:
- 1 x Fafeicy PC-102B CL2 Chlorine and pH Analysis Meter with Probe
- 1 x User Manual
4. Product Overview
The PC-102B tester consists of a main unit with a large analog display and a connected probe with two metal electrodes. The device features a switch to select between CL2 (Chlorine) and pH testing modes.
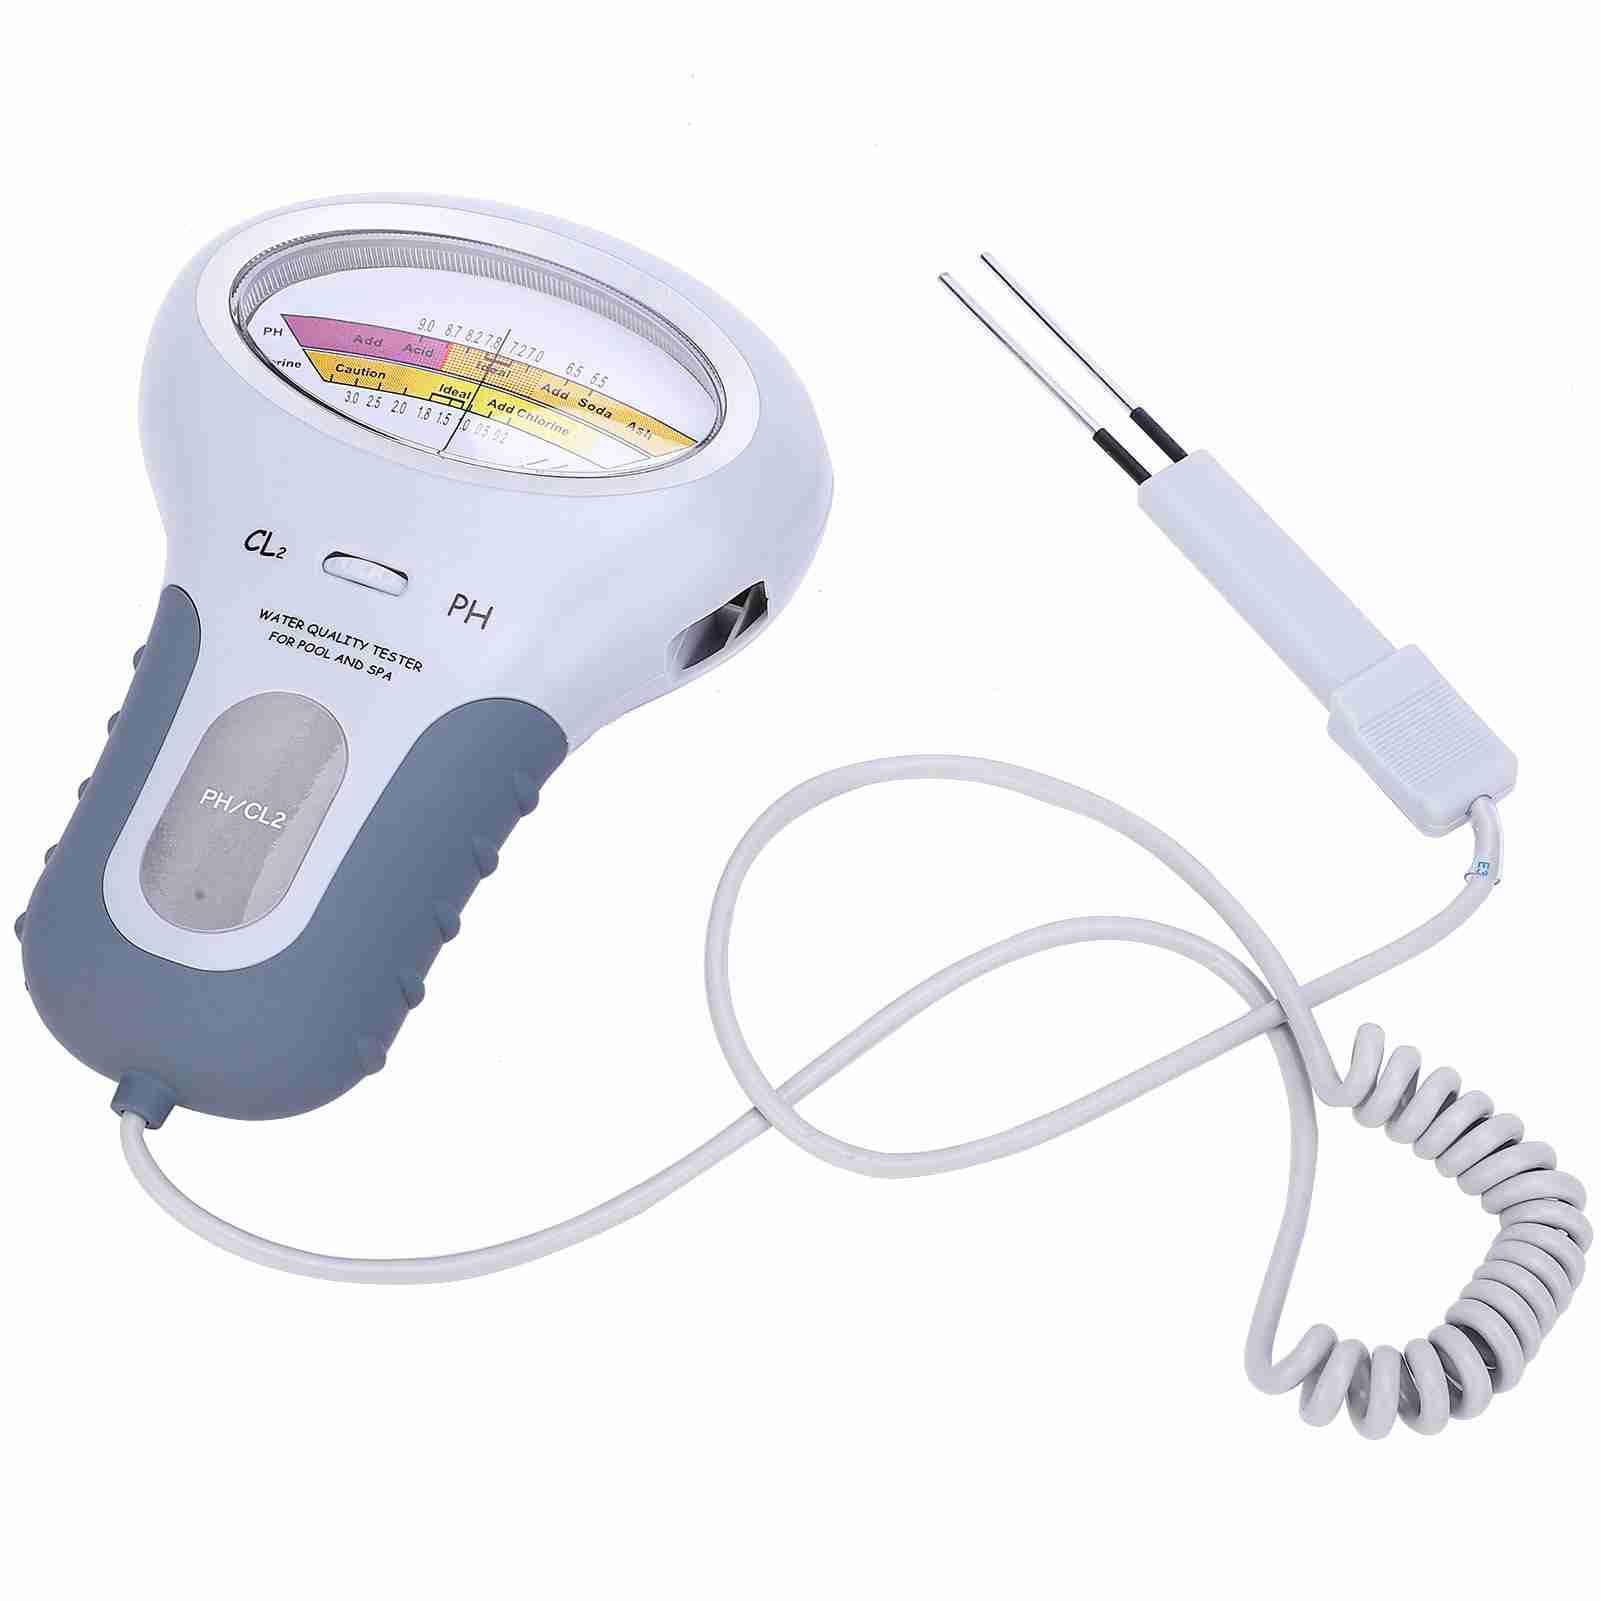
Image 1: The Fafeicy PC-102B CL2 Chlorine and pH Water Quality Tester main unit with its connected probe.

Image 2: The dimensions of the PC-102B tester, showing its compact size for easy handling.

Image 3: A close-up view of the two metal probes, which are inserted into the water for testing.

Image 4: The PC-102B tester showing the main unit and the probe connected via a coiled cable, highlighting its design.

Image 5: A detailed view of the analog display dial, indicating both chlorine and pH scales for reading results.

Image 6: The PC-102B tester being held, demonstrating its ergonomic design for ease of use.

Image 7: A comparison image showing potential variations between new and old models of the PC-102B tester, indicating random shipment of types.

Image 8: The open battery compartment of the PC-102B tester, showing where the AA battery is inserted.
5. Setup
5.1 Battery Installation
- Locate the battery compartment on the back of the main unit.
- Open the battery cover.
- Insert one (1) AA 1.5V alkaline battery, ensuring correct polarity (+/-).
- Close the battery cover securely.
5.2 Probe Connection
The probe is typically pre-connected to the main unit. Ensure the cable connection is firm and free from damage before use.
6. Operating Instructions
6.1 Preparing for Test
- Ensure the device has a fresh battery installed.
- Clean the probes with a soft cloth before first use and after each test.
6.2 Testing Chlorine (CL2) Level
- Switch the selector to the 'CL2' position.
- Immerse the probes into the pool or spa water up to the black belt on the probe.
- Allow a few moments for the reading to stabilize on the display.
- Read the chlorine level from the CL2 scale on the analog display.
- Refer to pool/spa guidelines for ideal chlorine levels.
6.3 Testing pH Level
- After testing CL2, switch the selector to the 'pH' position.
- Keep the probes immersed in the water.
- Allow a few moments for the reading to stabilize on the display.
- Read the pH level from the pH scale on the analog display.
- The ideal pH range for pools and spas is typically 7.2-7.6.
7. Calibration
Accurate calibration is essential for reliable readings.
- Chlorine Calibration: You must prepare a 1.5 PPM chlorine solution in pool water for initial calibration. If you are unsure of the chlorine content or cannot find a calibration point, use traditional test strips to verify the 1.5 PPM level.
- Once the pool is calibrated, it is not necessary to recalibrate unless you change the pool water or use the device to measure a different pool.
- pH Calibration: The manual does not specify a separate pH calibration procedure. It is generally assumed to be factory calibrated or to rely on the chlorine calibration for overall accuracy.
8. Maintenance
8.1 Cleaning
- After each use, gently wipe the probes with a clean, soft cloth to remove any water residue or contaminants.
- Do not use abrasive cleaners or solvents on the device or probes.
8.2 Storage
- Store the device in a cool, dry place, away from direct sunlight and extreme temperatures.
- Ensure the probes are dry before storage.
- If storing for an extended period, remove the battery to prevent leakage and potential damage to the device.
9. Troubleshooting
| Problem | Possible Cause | Solution |
|---|---|---|
| Inaccurate readings | Improper calibration; dirty probes; low battery. | Perform calibration as per Section 7. Clean probes. Replace battery. |
| Device does not turn on | Dead or incorrectly installed battery. | Check battery polarity. Replace with a new AA 1.5V alkaline battery. |
| Reading fluctuates excessively | Water movement; air bubbles on probes; electrical interference. | Ensure water is still. Gently agitate probes to remove bubbles. Test away from other electronics. |
10. Specifications
- Material: Plastic
- Weight: 298g (10.5 oz)
- Main Body Size: 190 x 120 mm (7.5 x 4.7 inches)
- Handle Probe Length: 150 mm (5.9 inches)
- Probe Length (excluding black belt): 48 mm (1.9 inches)
- Cable Length: 130 mm (5.1 inches)
- Power Supply: 1 x AA 1.5V Alkaline Battery (not included)
- pH Range: 7.2 - 7.6 (Ideal range indicated on display)
11. Warranty and Support
For warranty information, technical support, or service inquiries, please contact your retailer or the manufacturer directly. Please retain your proof of purchase for any warranty claims.