1. Important Safety Instructions
Please read all instructions carefully before using the Toyomi EWP 747 Electric Water Dispenser. Retain this manual for future reference.
- Always ensure the appliance is placed on a stable, level, heat-resistant surface, away from the edge of the countertop.
- Do not immerse the appliance, cord, or plug in water or any other liquid.
- Keep out of reach of children. Close supervision is necessary when the appliance is used near children.
- Do not operate the appliance with a damaged cord or plug, or after the appliance malfunctions or has been damaged in any manner.
- Unplug from the outlet when not in use and before cleaning. Allow to cool before putting on or taking off parts, and before cleaning the appliance.
- Do not use outdoors. This appliance is for household use only.
- Avoid contact with moving parts.
- Do not place on or near a hot gas or electric burner, or in a heated oven.
- Always fill the water tank with cold water only.
- Exercise extreme caution when dispensing hot water to prevent burns.
2. Product Overview
The Toyomi EWP 747 is a 7.0L electric water dispenser designed to provide both hot and warm water. It features a stainless steel inner pot and multiple safety mechanisms for reliable operation.
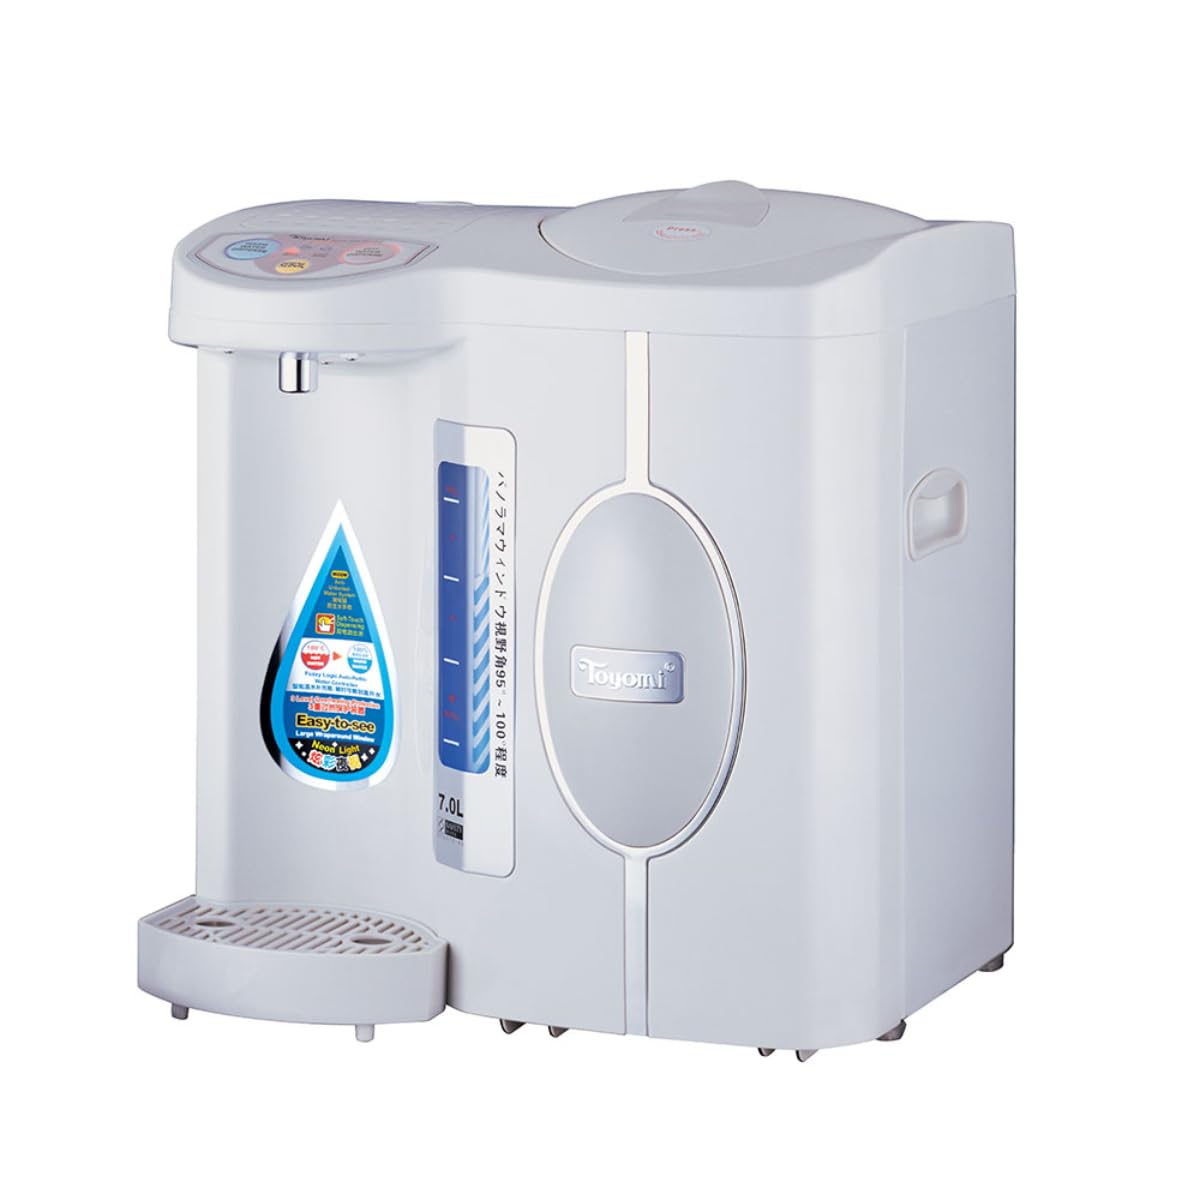
Figure 2.1: Front view of the Toyomi EWP 747 Electric Water Dispenser. This image shows the overall design of the unit, including the water level indicator and dispensing area.
Key Components:
- Control Panel: Located on the top, with buttons for various functions.
- Water Tank: Internal 7.0L capacity for water storage.
- Water Level Indicator: Transparent window to monitor water volume.
- Dispensing Spouts: Separate spouts for hot and warm water.
- Drip Tray: Removable tray to catch spills.
- Power Cord: For connecting to an electrical outlet.
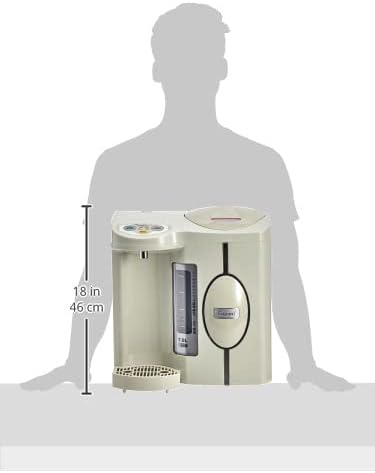
Figure 2.2: Close-up of the control panel on the Toyomi EWP 747. This image highlights the 'Warm Water Dispense', 'Boil/Reboil', 'Keep Warm', 'Hot Water Dispense', and 'Reboil' buttons.
3. Setup
- Unpacking: Carefully remove the water dispenser from its packaging. Retain packaging materials for future transport or storage.
- Placement: Place the appliance on a firm, level, and heat-resistant surface. Ensure there is adequate ventilation around the unit and keep it away from walls or other appliances. Do not place it near heat sources or in direct sunlight.
- Initial Cleaning: Before first use, clean the inner pot and exterior. Refer to the 'Maintenance and Cleaning' section for detailed instructions. It is recommended to boil and discard at least two full tanks of water to remove any manufacturing residues.
- Filling the Water Tank: Open the lid and fill the inner pot with fresh, cold drinking water up to the 'MAX' fill line. Do not overfill. Close the lid securely.
- Power Connection: Plug the power cord into a grounded electrical outlet (230V). The unit will enter standby mode.
4. Operating Instructions
Initial Boil:
After filling the water tank and plugging in the unit, the dispenser will automatically begin the boiling process. The 'BOIL/REBOIL' indicator light will illuminate. Once boiling is complete, the unit will switch to 'KEEP WARM' mode, and the corresponding indicator light will turn on.
Dispensing Hot Water:
- Place a cup or container under the 'HOT WATER DISPENSE' spout.
- Press and hold the HOT WATER DISPENSE button. Hot water will flow from the spout.
- Release the button to stop dispensing.
Dispensing Warm Water:
- Place a cup or container under the 'WARM WATER DISPENSE' spout.
- Press and hold the WARM WATER DISPENSE button. Warm water will flow from the spout.
- Release the button to stop dispensing.
Reboil Function:
If the water has been kept warm for an extended period or if you wish to reboil the water, press the REBOIL button. The unit will reboil the water to the desired temperature and then return to 'KEEP WARM' mode.
Safety Features:
- Fuzzy Logical Auto-Refill Water Control: Automatically manages water levels.
- Anti-Unboiled-Water System Micro-Switch: Prevents dispensing of unboiled water.
- 3 Level Overheating Protection: Ensures safe operation by preventing the unit from overheating.
5. Maintenance and Cleaning
Regular cleaning and maintenance will ensure the longevity and optimal performance of your water dispenser.
- Before Cleaning: Always unplug the appliance from the power outlet and allow it to cool completely before cleaning.
- Exterior Cleaning: Wipe the exterior surface with a soft, damp cloth. Do not use abrasive cleaners, scouring pads, or harsh chemicals, as these can damage the finish.
- Inner Pot Cleaning: The stainless steel inner pot can be cleaned with a soft sponge and mild dish soap. Rinse thoroughly. Ensure no water enters the electrical components.
- Drip Tray: Remove and empty the drip tray regularly. Wash it with warm, soapy water and rinse thoroughly before reattaching.
- Descaling: Over time, mineral deposits (limescale) may build up in the inner pot, especially in areas with hard water. To descale:
- Fill the inner pot with a mixture of water and white vinegar (1:1 ratio) or a descaling solution designed for kettles.
- Allow the solution to soak for several hours or overnight, depending on the severity of the limescale.
- Boil the solution (if using vinegar, ensure good ventilation).
- Drain the solution and rinse the inner pot thoroughly several times with fresh water to remove any residue and odor.
- Perform a few cycles of boiling and discarding fresh water before resuming normal use.
- Storage: If storing the appliance for an extended period, ensure it is clean, dry, and unplugged. Store it in a cool, dry place.
6. Troubleshooting
If you encounter issues with your water dispenser, please refer to the following common problems and solutions:
| Problem | Possible Cause | Solution |
|---|---|---|
| Appliance does not turn on. | No power supply. | Check if the power cord is securely plugged into a working outlet. |
| Water is not heating. | Unit not plugged in or power issue. Faulty heating element. | Ensure power is connected. If problem persists, contact customer support. |
| Water dispensing slowly or not at all. | Low water level. Dispensing spout clogged. Limescale buildup. | Check water level and refill if necessary. Clean the dispensing spout. Perform descaling as per maintenance instructions. |
| Water has an unusual taste or odor. | New appliance residue. Limescale buildup. Stale water. | Perform initial cleaning and boil/discard water cycles. Descale the unit. Use fresh water. |
If the problem persists after attempting these solutions, please contact Toyomi customer support for assistance.
7. Specifications
Technical details for the Toyomi EWP 747 Electric Water Dispenser:

Figure 7.1: Toyomi EWP 747 Electric Water Dispenser with approximate dimensions shown. The unit measures approximately 41 cm (16.1 in) in width, 30.5 cm (12 in) in depth, and 45 cm (17.7 in) in height.
| Brand | Toyomi |
| Model | EWP 747 |
| Capacity | 7.0 Liters |
| Voltage | 230 Volts |
| Wattage | 800 Watts |
| Material | Stainless Steel (Inner Pot) |
| Product Dimensions (L x W x H) | 41 x 30.5 x 45 cm |
| Weight | 4.6 kg |
| Power Source Type | Corded Electric |
8. Warranty and Support
This Toyomi EWP 747 Electric Water Dispenser comes with a manufacturer's warranty. Please refer to the warranty card included with your purchase for specific terms and conditions, including the warranty period and coverage details.
For technical support, service, or warranty claims, please contact your retailer or the official Toyomi customer service. Keep your proof of purchase (receipt) handy as it may be required for warranty validation.
Contact information for Toyomi customer support can typically be found on the manufacturer's website or on the product packaging.


