1. Introduction
This manual provides instructions for the installation, operation, and maintenance of the 10L0L Golf Cart Run Tow Switch Kit. This switch is designed to prevent potential damage to the golf cart's motor and controller when the vehicle is being towed or serviced. It also facilitates free movement of the vehicle in the towing position.
Please read this manual thoroughly before installation and use to ensure proper function and safety.
2. Safety Precautions
- Always disconnect the main battery pack before performing any electrical work on your golf cart. Failure to do so can result in serious injury or damage to the vehicle.
- Ensure the golf cart is on a level surface and the parking brake is engaged before beginning installation.
- Wear appropriate personal protective equipment, including safety glasses and gloves.
- If you are unsure about any step of the installation process, consult a qualified golf cart technician.
- Do not operate the golf cart with a damaged or improperly installed run/tow switch.
3. Package Contents
Verify that all components are present before beginning installation:
- 1 x Run-Tow Switch with pre-attached wiring
- 1 x Rubber Boot (for switch protection)
- 2 x Waterproof Butt Splice Connectors

Image 1: Overview of the 10L0L Golf Cart Run Tow Switch Kit, including the switch, wiring, butt splices, and packaging.
4. Compatibility
This Run Tow Switch Kit is compatible with the following golf cart models:
- EZGO RXV Electric (2008-up)
- EZGO 2Five Electric (2010-up)
This kit replaces EZGO part number: 608900.
5. Installation Instructions
Follow these steps carefully to install the Run Tow Switch Kit:
- Prepare the Golf Cart: Ensure the golf cart is turned off and the main battery pack is disconnected. Engage the parking brake.
- Locate the Installation Area: The run/tow switch is typically located near the controller or battery compartment. Refer to your golf cart's service manual for the exact location if needed.
- Remove Existing Switch (if applicable): If replacing an existing switch, carefully disconnect its wiring and remove the old switch from its mounting location.
- Mount the New Switch: Insert the new run/tow switch into the designated panel opening. Secure it with the provided nut and washer. Place the rubber boot over the switch handle for protection.
- Wire the Switch: Connect the wires from the new run/tow switch to the golf cart's wiring harness using the waterproof butt splice connectors. Ensure a secure and tight connection for each wire. Match the wire colors or follow the wiring diagram specific to your golf cart model.
- Verify Connections: Double-check all wiring connections to ensure they are correct and secure.
- Reconnect Battery: Once installation is complete and verified, reconnect the main battery pack.
- Test Functionality: Test the switch by toggling between 'Run' and 'Tow' positions. Ensure the golf cart operates correctly in 'Run' mode and can be freely moved in 'Tow' mode (with power off).

Image 2: An illustrative diagram indicating the typical location and connection point for the run/tow switch within a golf cart's electrical system.

Image 3: The run/tow switch and the included waterproof butt splice connectors, ready for wiring.
6. Operating Instructions
The Run Tow Switch has two primary positions:
- RUN Position: In this position, the golf cart's electrical system is active, allowing for normal operation. The motor and controller are engaged.
- TOW Position: In this position, the golf cart's electrical system, including the motor and controller, is disengaged. This prevents damage when the cart is being towed or when performing maintenance that requires the wheels to turn freely without power.
Important: Always switch to the 'TOW' position before towing the golf cart or performing any maintenance that involves rotating the wheels or working on the electrical system. Switch back to 'RUN' for normal driving.
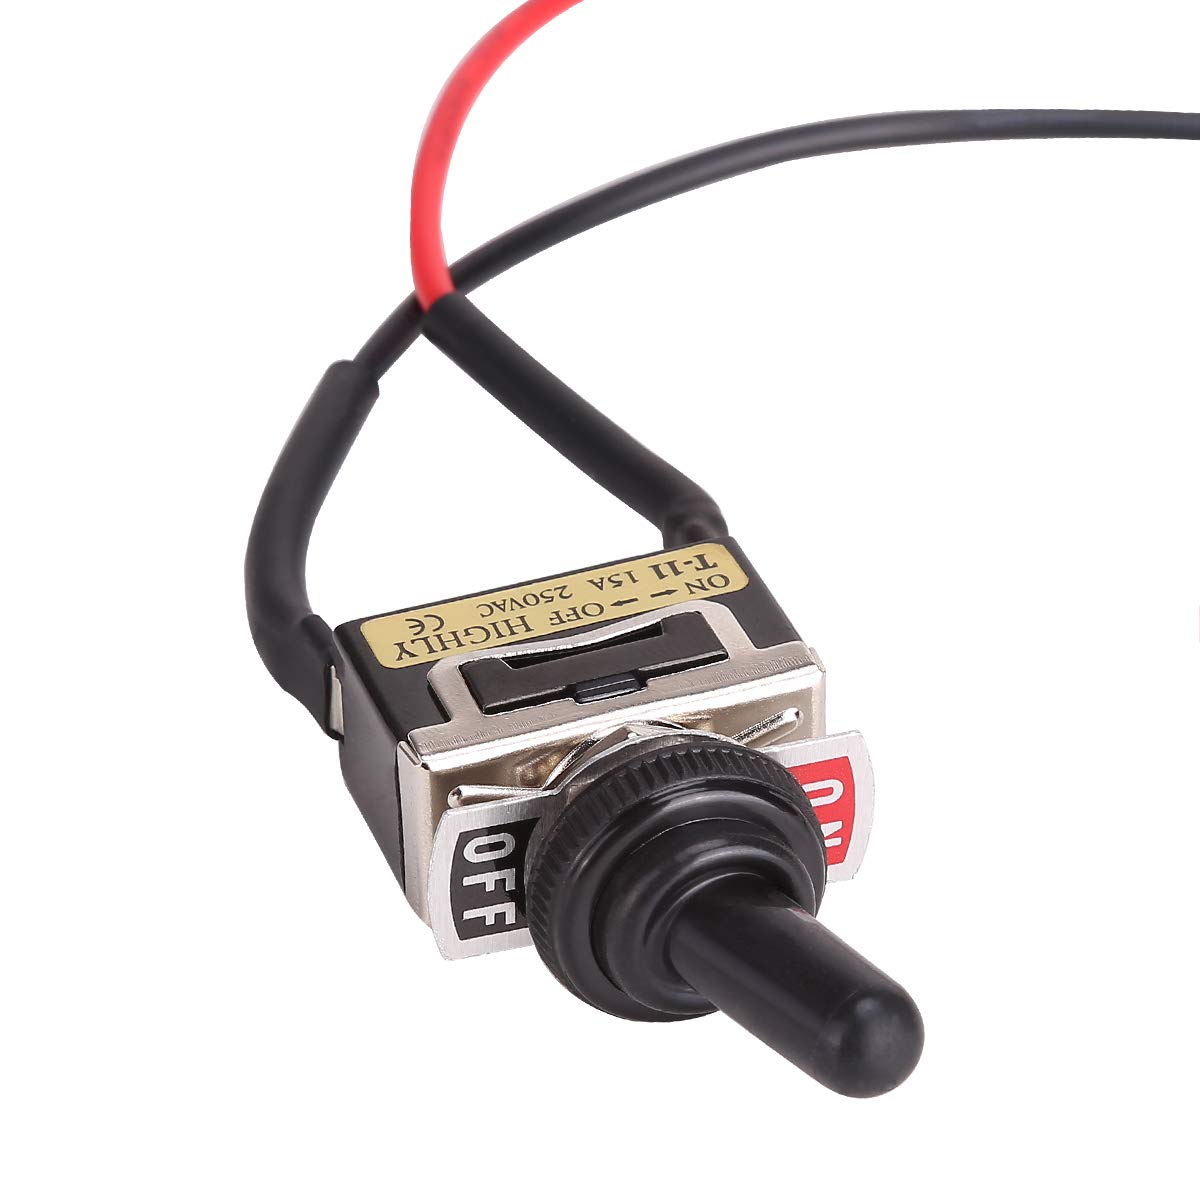
Image 4: Detailed view of the switch lever and its 'ON' (Run) and 'OFF' (Tow) markings.
7. Maintenance
The 10L0L Run Tow Switch Kit is designed for durability and requires minimal maintenance. However, periodic checks are recommended:
- Inspect Wiring: Periodically check the wiring and connections for any signs of wear, corrosion, or looseness. Ensure the butt splices remain sealed.
- Clean Switch: Keep the switch and rubber boot free from dirt, debris, and moisture. Use a clean, dry cloth for cleaning.
- Functionality Check: Test the switch's operation regularly to ensure it toggles smoothly between 'Run' and 'Tow' positions and performs its intended function.
8. Troubleshooting
If you encounter issues with your run/tow switch, consider the following:
| Problem | Possible Cause | Solution |
|---|---|---|
| Golf cart does not power on in 'RUN' position. | Loose or corroded wiring connections. Switch malfunction. Main battery disconnected or low charge. | Check all wiring connections. Ensure battery is connected and charged. Test switch continuity with a multimeter. Replace switch if faulty. |
| Golf cart still has power in 'TOW' position. | Switch malfunction. Incorrect wiring. | Verify wiring connections against the golf cart's diagram. Test switch continuity. Replace switch if faulty. |
| Switch lever is stiff or difficult to move. | Dirt or debris accumulation. Damaged switch mechanism. | Clean the switch thoroughly. If stiffness persists, the internal mechanism may be damaged, requiring replacement. |
9. Specifications
- Brand: 10L0L
- Model: OEM# 608900
- Compatibility: EZGO RXV 2008-up Electric, EZGO 2Five 2010-up Electric
- Operation Mode: ON-OFF (Run-Tow)
- Contact Material: Brass
- Material: Rubber (boot)
- Mounting Type: Panel Mount
- Package Dimensions: 2.52 x 2.52 x 2.48 inches
- Weight: 2.08 ounces
10. Warranty and Support
For warranty information or technical support, please refer to the product packaging or contact 10L0L customer service through their official channels. Keep your purchase receipt for warranty claims.


