
GIGABYTE B450M
Contents
GIGABYTE B450M DS3H WiFi Motherboard User Manual
Model: B450M
Introduction
This user manual provides detailed instructions for the installation, operation, and maintenance of your GIGABYTE B450M DS3H WiFi Motherboard. Please read this manual thoroughly before beginning installation to ensure proper setup and optimal performance. This motherboard supports AMD 3rd Gen Ryzen/ 2nd Gen Ryzen/ 1st Gen Ryzen/ 2nd Gen Ryzen with Radeon Vega Graphics/ 1st Gen Ryzen with Radeon Vega Graphics/ Athlon with Radeon Vega Graphics Processors.
1. Setup and Installation
Proper installation is crucial for the stability and performance of your system. Always handle the motherboard by its edges to avoid static discharge.
1.1 Package Contents
Verify that all components are present in the package:
- GIGABYTE B450M DS3H WiFi Motherboard
- SATA Cables
- WiFi Antennas
- I/O Shield
- User Manual (this document)
- Driver CD/DVD (or link to drivers online)

Image: The GIGABYTE B450M DS3H WiFi Motherboard shown alongside its retail packaging, highlighting the product and its branding.
1.2 Motherboard Layout
Familiarize yourself with the key components and connectors on the motherboard.
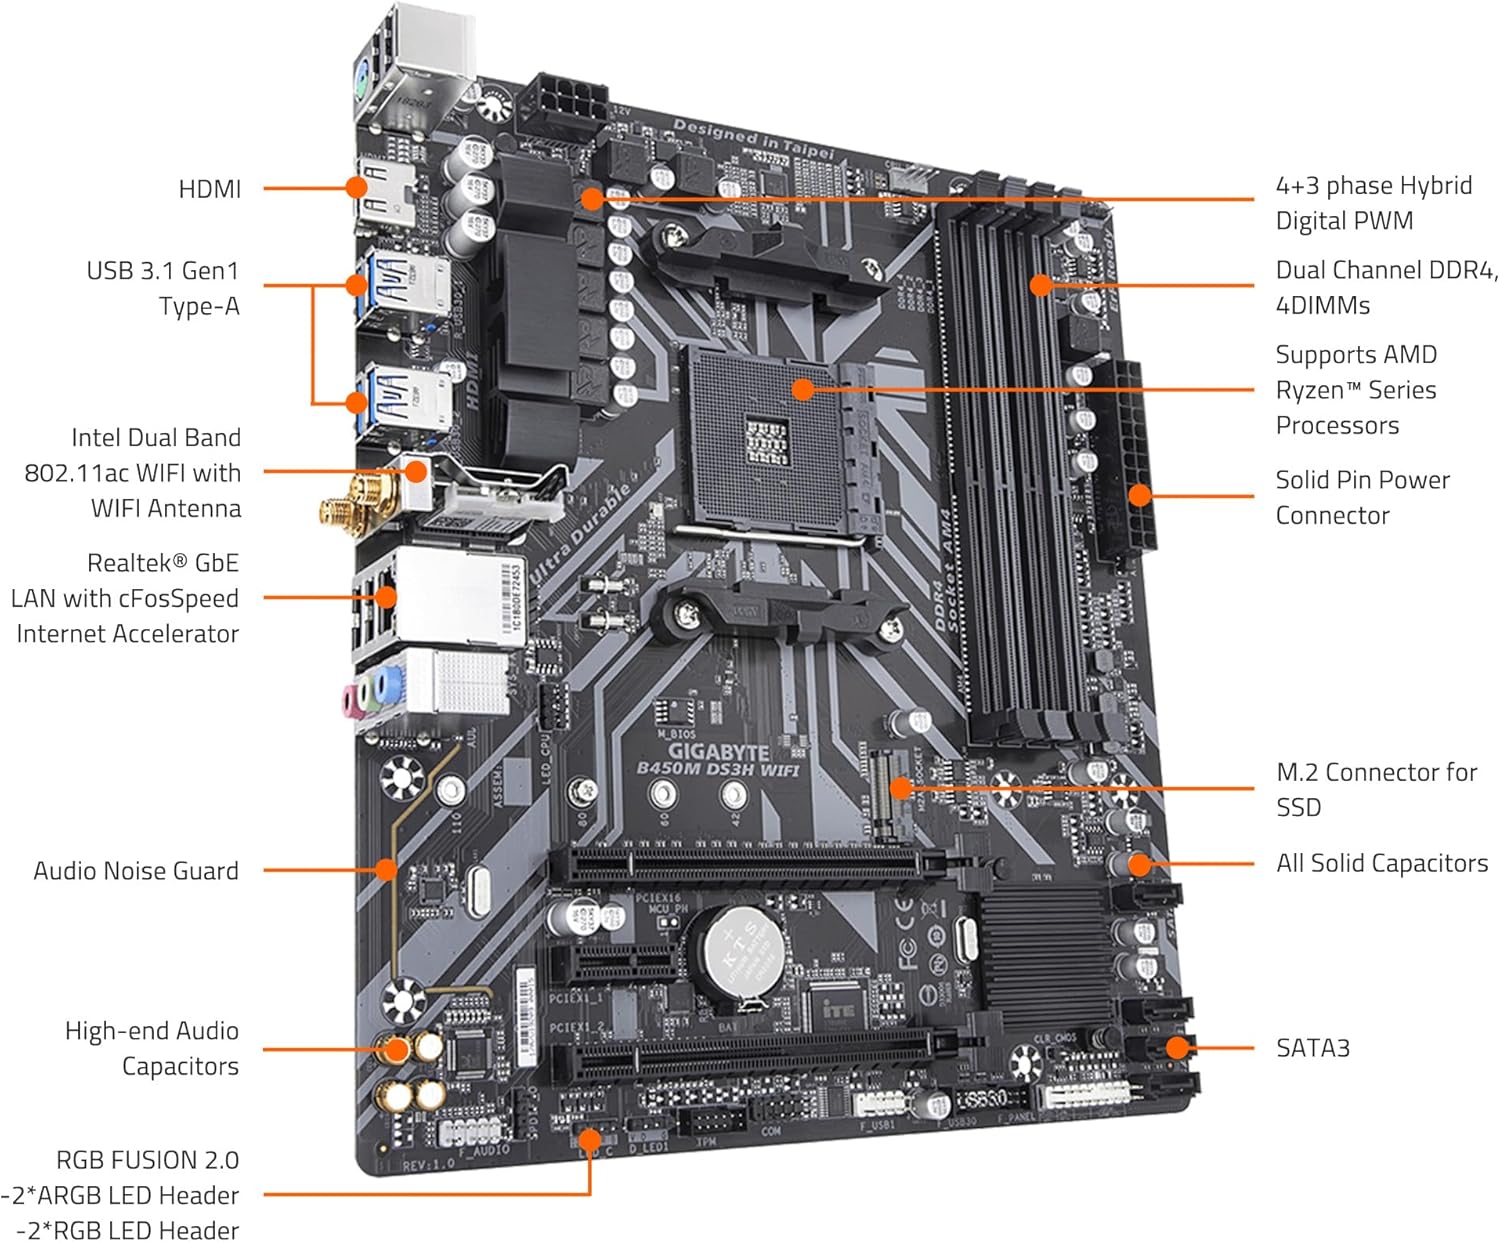
Image: An annotated diagram of the GIGABYTE B450M DS3H WiFi Motherboard, pointing out key features such as the CPU socket, DDR4 DIMM slots, PCIe slots, M.2 connector, SATA ports, and various headers.
1.3 CPU Installation
- Locate the AM4 CPU socket on the motherboard.
- Lift the load lever on the side of the socket.
- Carefully align the triangular mark on your AMD Ryzen processor with the mark on the socket.
- Gently place the CPU into the socket. Do not force it.
- Lower the load lever to secure the CPU.
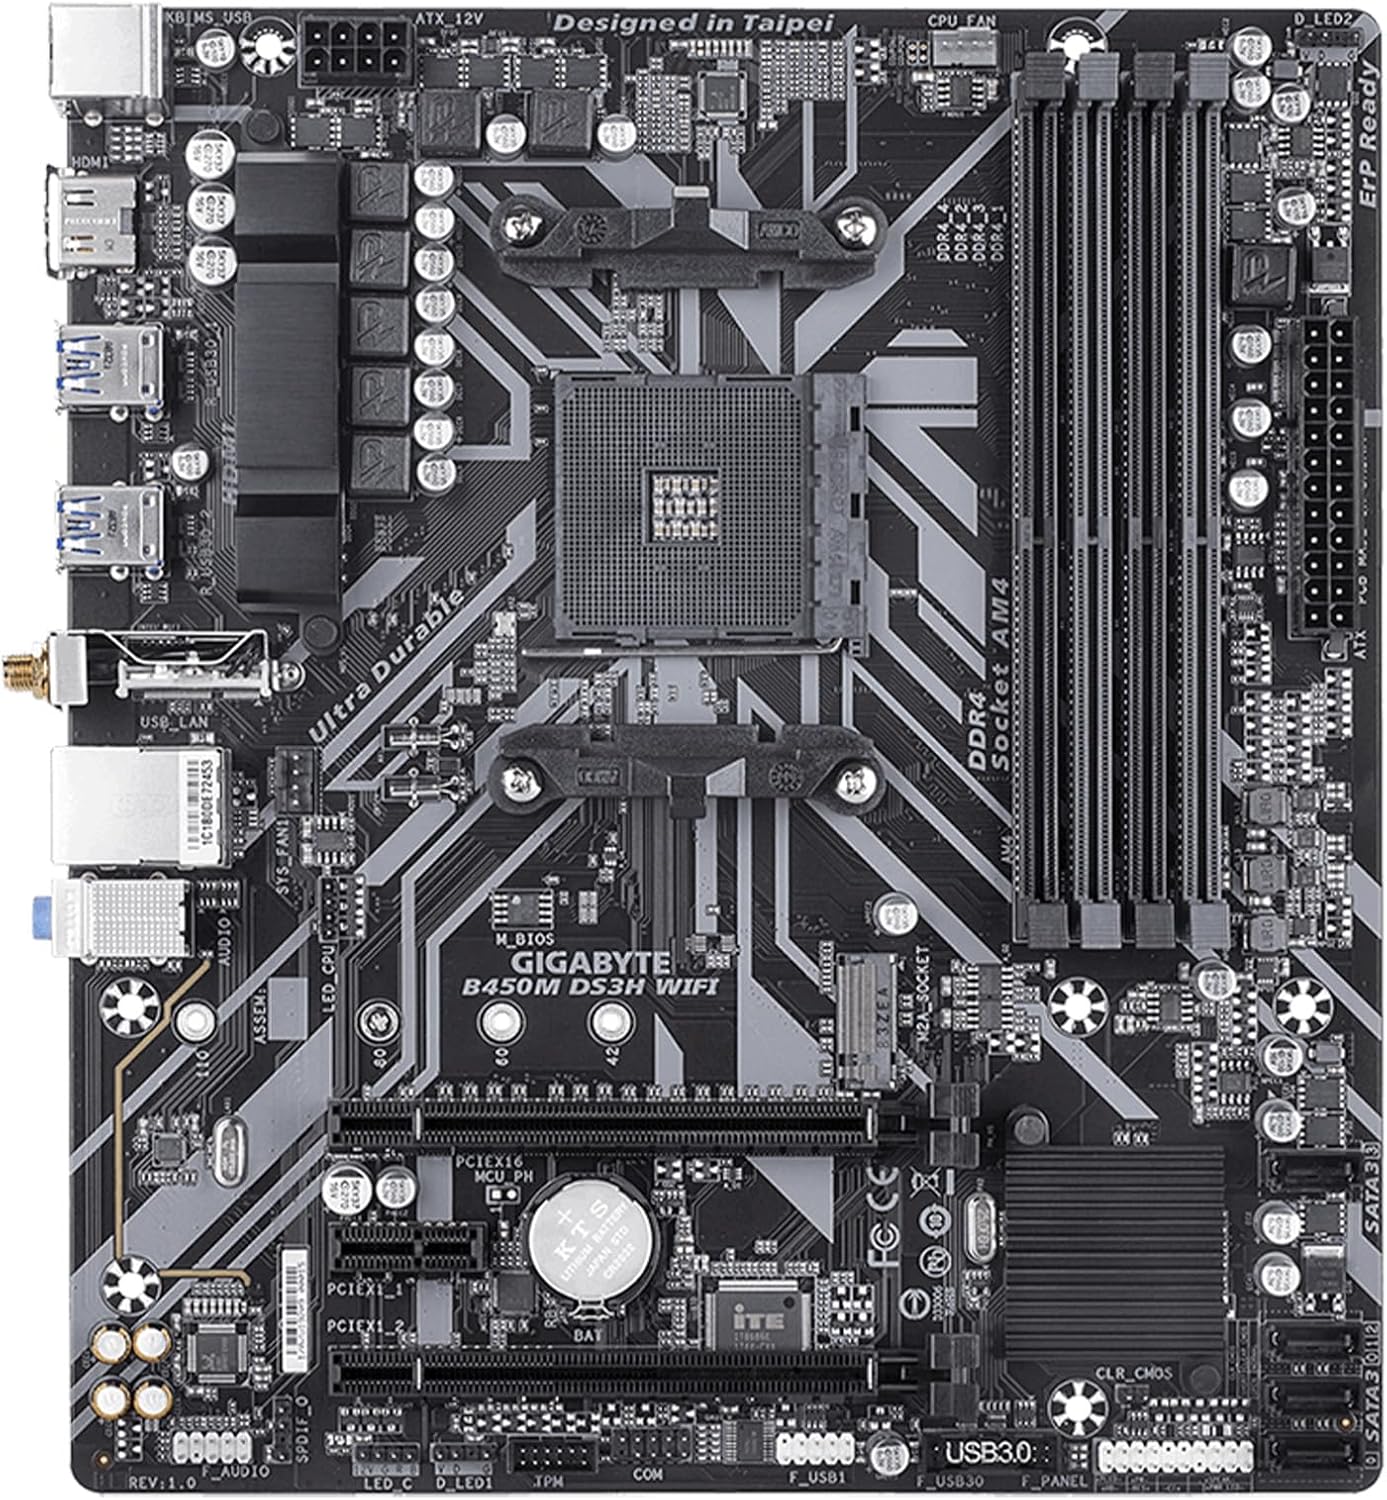
Image: A direct overhead view of the GIGABYTE B450M DS3H WiFi Motherboard, clearly showing the AM4 CPU socket and surrounding components.
1.4 Memory (RAM) Installation
This motherboard supports Dual Channel Non-ECC Unbuffered DDR4, 4 DIMMs.
- Open the clips at both ends of the DIMM slot.
- Align the notch on the DDR4 memory module with the key in the DIMM slot.
- Insert the memory module firmly into the slot until the clips snap into place.
- For dual-channel configuration, install memory modules into matching colored slots (e.g., DDR4_1 and DDR4_2).
1.5 Storage Device Installation (M.2 and SATA)
The motherboard features Ultra-Fast PCIe Gen3 x4 M.2 with PCIe NVMe & SATA mode support, and multiple SATA 6GB/s ports.
- M.2 SSD: Insert the M.2 SSD into the M.2 slot and secure it with the provided screw.
- SATA Drives: Connect SATA data cables from your storage drives (HDDs/SSDs) to the SATA 6GB/s ports on the motherboard. Connect SATA power cables from your power supply to the drives.
1.6 Graphics Card (GPU) Installation
Insert your graphics card into the primary PCIe x16 slot. Ensure it clicks securely into place and is fastened with a screw to the case.
1.7 Power Connections
Connect the 24-pin ATX main power connector and the 8-pin ATX 12V power connector from your power supply to the corresponding ports on the motherboard.
1.8 Connecting Peripherals and Front Panel
Connect USB devices, audio jacks, and the front panel connectors (power button, reset button, LED indicators) to their respective headers on the motherboard. Refer to the motherboard layout diagram for precise locations.
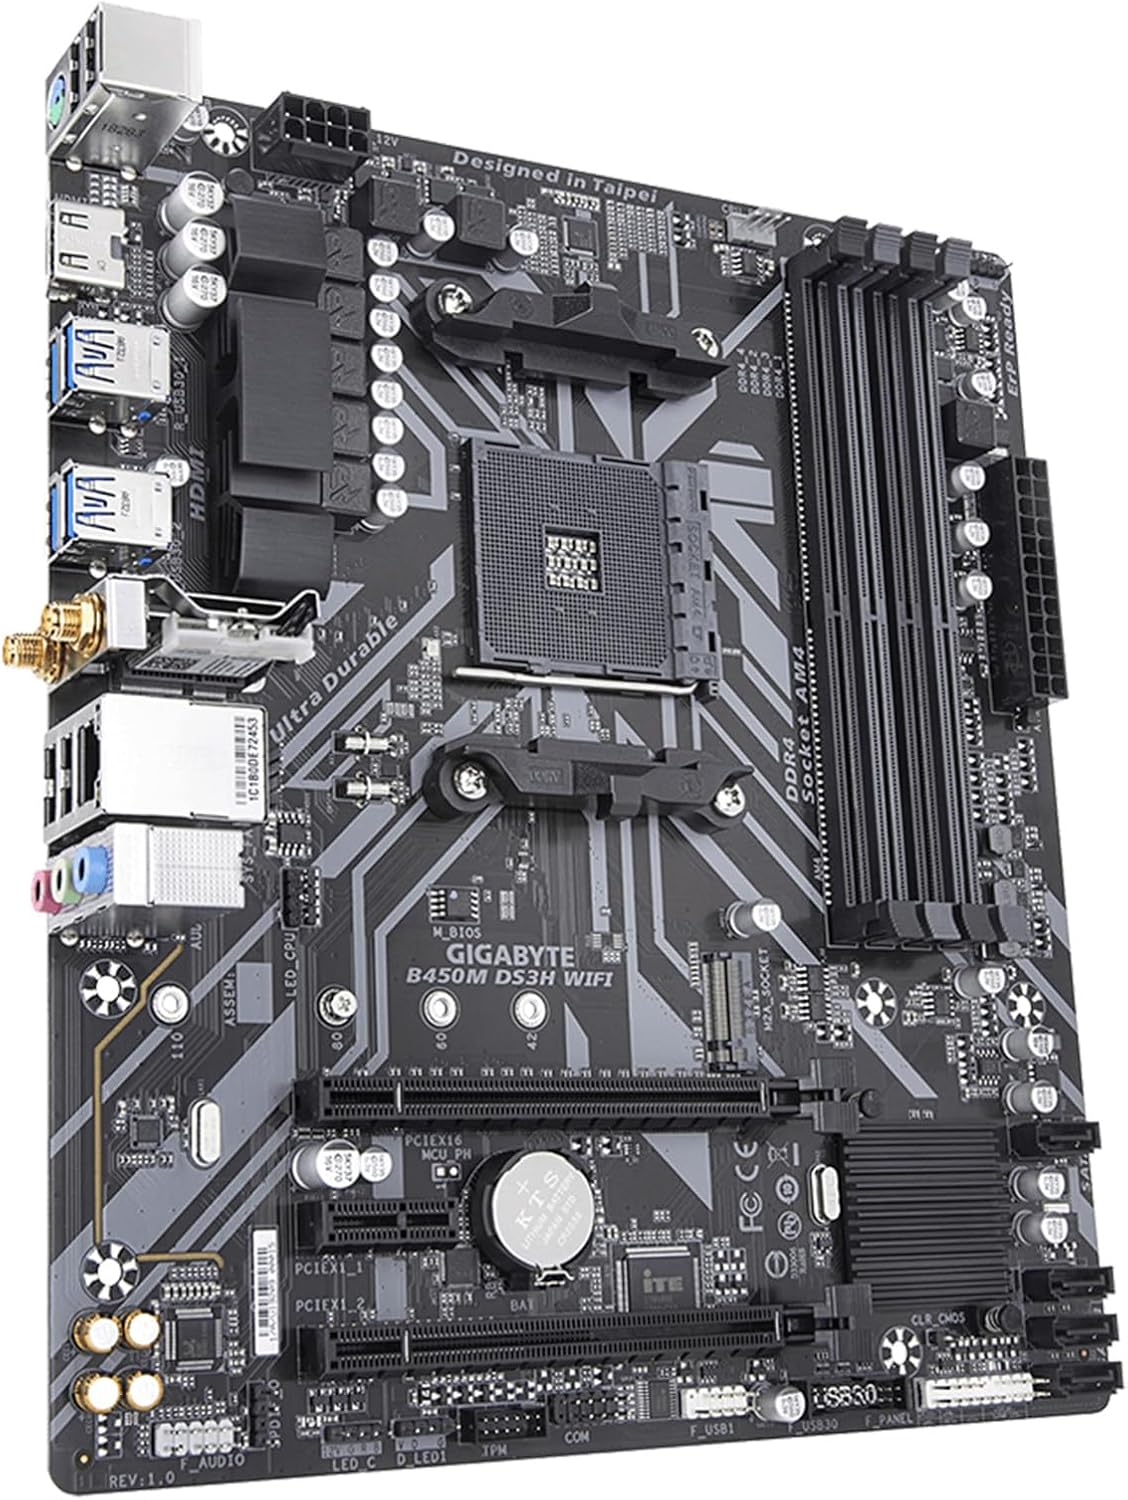
Image: An angled view of the GIGABYTE B450M DS3H WiFi Motherboard, showcasing the various ports and headers available for connecting components and peripherals.

Image: A close-up view of the rear I/O panel of the GIGABYTE B450M DS3H WiFi Motherboard, displaying the USB ports, HDMI, LAN, audio jacks, and WiFi antenna connectors.
2. Operating Instructions
Once all components are installed, you can power on your system and proceed with operating system installation.
2.1 First Boot and BIOS Setup
- Connect your monitor, keyboard, and mouse.
- Power on your system.
- Press the DEL key repeatedly during startup to enter the BIOS setup utility.
- In the BIOS, you can configure boot order, system time, and other advanced settings.
- Save changes and exit BIOS to continue with OS installation.
2.2 Driver Installation
After installing your operating system, install the necessary drivers for optimal performance. Drivers can be found on the included CD/DVD or downloaded from the official GIGABYTE website.
- Chipset Drivers
- LAN Drivers (Realtek Gigabit LAN)
- Audio Drivers (High Quality Audio Capacitors and Audio Noise Guard Design)
- WiFi & Bluetooth Drivers (Intel Dual Band 802.11ac WIFI & BT 4.2)
- Graphics Drivers (for integrated graphics if applicable, or discrete GPU)
2.3 Software Utilities
GIGABYTE provides several utilities to enhance your experience:
- APP Center: Centralized access to GIGABYTE applications.
- EasyTune: For system tuning and overclocking.
- Cloud Station Utilities: For cloud connectivity features.
- RGB FUSION 2.0: For controlling Addressable RGB & RGB LED Strips.
- Smart Fan 5: Features 5 Temperature Sensors and 2 Hybrid Fan Headers with FAN STOP for advanced fan control.
3. Maintenance
Regular maintenance helps ensure the longevity and stable operation of your motherboard and system.
- Keep it Clean: Regularly clean dust from inside your PC case, especially around fans and heatsinks, using compressed air.
- BIOS Updates: Check the GIGABYTE website periodically for BIOS updates. Updates can improve compatibility, stability, and performance. Follow the instructions carefully when updating BIOS.
- Driver Updates: Keep your drivers updated to the latest versions for optimal performance and security.
- Temperature Monitoring: Utilize Smart Fan 5 or other monitoring software to keep an eye on system temperatures to prevent overheating.
4. Troubleshooting
This section provides solutions to common issues you might encounter.
4.1 No Display/No Boot
- Check Power Connections: Ensure all power cables (24-pin ATX, 8-pin CPU, GPU power) are securely connected.
- Reseat Components: Remove and re-install RAM modules, graphics card, and CPU to ensure they are properly seated.
- Clear CMOS: Refer to your motherboard manual for instructions on how to clear the CMOS (usually by removing the CMOS battery for a few minutes or using a jumper).
- Test with Minimal Components: Disconnect all non-essential peripherals and components (e.g., extra storage drives, PCIe cards) and try booting with only CPU, one RAM stick, and GPU (if no integrated graphics).
4.2 System Instability/Crashes
- Check Temperatures: Overheating can cause instability. Monitor CPU and GPU temperatures.
- Memory Issues: Run a memory diagnostic tool (e.g., Windows Memory Diagnostic) to check for faulty RAM.
- Driver Conflicts: Ensure all drivers are up-to-date and compatible with your operating system. Try rolling back recent driver updates if issues started after an update.
- Power Supply: Ensure your power supply unit (PSU) has sufficient wattage for all your components.
4.3 WiFi/Bluetooth Connectivity Issues
- Install Antennas: Ensure the WiFi antennas are securely connected to the rear I/O panel.
- Driver Installation: Verify that the Intel Dual Band 802.11ac WIFI & BT 4.2 drivers are correctly installed.
- Interference: Move your system away from potential sources of interference (e.g., microwaves, cordless phones).
- Router Settings: Check your router's settings and ensure it's broadcasting on a clear channel.
5. Specifications
Detailed technical specifications for the GIGABYTE B450M DS3H WiFi Motherboard.
| Feature | Specification |
|---|---|
| CPU Socket | Socket AM4 |
| Compatible Processors | AMD 3rd Gen Ryzen/ 2nd Gen Ryzen/ 1st Gen Ryzen/ 2nd Gen Ryzen with Radeon Vega Graphics/ 1st Gen Ryzen with Radeon Vega Graphics/ Athlon with Radeon Vega Graphics Processors |
| Chipset | AMD B450 |
| Memory | Dual Channel Non-ECC Unbuffered DDR4, 4 DIMMs, up to 4400 MHz (OC) |
| Storage | Ultra-Fast PCIe Gen3 x4 M.2 with PCIe NVMe & SATA mode support, SATA 6GB/s ports |
| Expansion Slots | PCIe Gen3 x16, PCIe x1 |
| Wireless Connectivity | Intel Dual Band 802.11ac WIFI & BT 4.2 |
| LAN | Realtek Gigabit LAN with cFosSpeed Internet Accelerator Software |
| Audio | High Quality Audio Capacitors and Audio Noise Guard Design |
| RGB Lighting | RGB FUSION 2.0 with Addressable RGB & RGB LED Strips Support |
| Fan Control | Smart Fan 5 Features 5 Temperature Sensors and 2 Hybrid Fan Headers with FAN STOP |
| Dimensions | 10.43 x 10.43 x 2.13 inches (mATX) |
6. Product Videos
Watch these official product videos for additional information and visual guides.
6.1 Product Overview
Video: An official product overview video showcasing the GIGABYTE B450M DS3H WiFi Motherboard's features and design. This video highlights key components and connectivity options.
7. Warranty and Support
For warranty information and technical support, please refer to the official GIGABYTE website or the documentation included with your product. You can also find the user manual in PDF format here.
For further assistance, contact GIGABYTE customer support through their official channels.
Ask a question about this manual
Ask about setup, troubleshooting, compatibility, parts, safety, or missing instructions. Manuals+ will review the question and use this page’s manual context to help answer it.