
1. Introduction
Thank you for choosing the CORN Technology N520 Wireless Keyboard and Mouse Combo. This product is designed to enhance your computing experience with its ergonomic design, retro chiclet round keycaps, and stable 2.4GHz wireless connectivity. This manual provides detailed instructions to help you set up, operate, and maintain your new device effectively.
2. Product Features
- 2.4GHz Stable Wireless Connectivity: Plug and play with a single USB receiver for both keyboard and mouse, offering up to 33ft effective wireless range.
- 12 Function Hotkey Design: Multimedia hotkeys (FN combinations) for quick access to music, movies, web browsing, and email.
- Ergonomic Design: 1600 DPI mouse for adjustable cursor sensitivity and smooth tracking. Ergonomic keycaps for a comfortable typing experience with balanced sound levels.
- Wide Compatibility: Supports Windows XP / WIN7 / WIN10 / ISO, compatible with Notebooks and Desktop PCs.
- Power Saving: Automatic sleep mode for both keyboard and mouse after a period of inactivity to conserve battery life.
3. Package Contents
Please ensure all items are present in your package:
- 1 x Wireless Keyboard
- 1 x Wireless Mouse
- 1 x USB Receiver (stored in the mouse battery compartment)
- 3 x AA Batteries (for mouse and keyboard)
- 1 x Welcome Guide
4. Setup Instructions
- Install Batteries:
- Open the battery compartment on the underside of the mouse and insert 1 AA battery.
- Open the battery compartment on the underside of the keyboard and insert 2 AAA batteries.
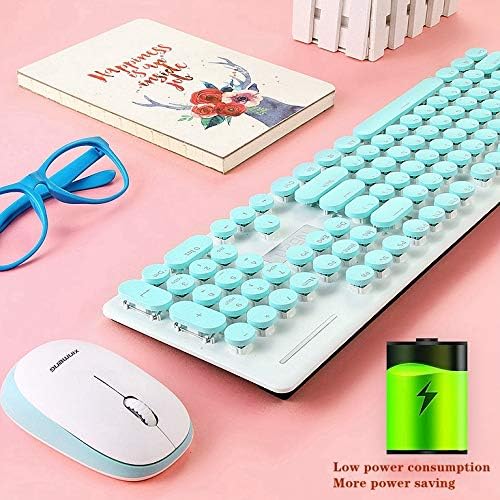
Image: The underside of the keyboard and mouse, highlighting the battery compartments. An icon indicating low power consumption is also visible, suggesting efficient battery usage.
- Locate USB Receiver: The tiny USB receiver is stored securely within the battery compartment of the mouse. Carefully remove it.
- Connect to Computer: Plug the USB receiver into an available USB port on your computer or laptop.
- Power On: Ensure both the keyboard and mouse are switched ON (if they have an on/off switch). The devices should automatically connect to your computer. No additional drivers are typically required.
Video: A seller-provided video demonstrating the installation of batteries and the USB receiver for a wireless keyboard and mouse combo. It shows the process of opening compartments, inserting batteries, and plugging in the receiver.
5. Operating Instructions
5.1 Mouse Operation
- DPI Adjustment: The mouse features a 1600 DPI sensor. Press the DPI button (usually located near the scroll wheel) to cycle through different sensitivity levels to suit your preference.
- Power Saving: The mouse will automatically enter sleep mode after a period of inactivity. To wake it up, simply move the mouse or click any button.
5.2 Keyboard Operation
- Multimedia Hotkeys: Use the 'Fn' key in combination with the F1-F12 function keys to access various multimedia and system functions (e.g., volume control, media playback, web browser, email). Refer to the keycap legends for specific functions.
- Ergonomic Typing: The keyboard features an inclined design for comfortable typing.
- Power Saving: The keyboard will automatically enter sleep mode after a period of inactivity. To wake it up, simply press any key.

Image: A close-up view of the keyboard, highlighting the round chiclet-style keycaps and the function keys, which can be used for multimedia controls.
6. Maintenance
- Cleaning: The floating keycap design allows for easy cleaning. Use a soft brush or compressed air to remove dust and debris from between the keys. For surface cleaning, use a soft, damp cloth.
- Waterproof Design: The keyboard features a waterproof design, making it resistant to minor spills and easier to clean. However, avoid submerging the device in water.

Image: A visual representation emphasizing the waterproof capabilities of the keyboard, indicating its resilience against liquid spills.
7. Troubleshooting
- No Connection:
- Ensure the USB receiver is securely plugged into a working USB port.
- Check if the batteries in both the keyboard and mouse are correctly installed and have sufficient charge.
- Try plugging the USB receiver into a different USB port on your computer.
- Restart your computer.
- Lagging or Intermittent Connection:
- Ensure the devices are within the effective wireless range (up to 33ft) of the USB receiver.
- Minimize interference from other wireless devices or large metal objects.
- Replace batteries if they are low.
- Lost USB Receiver: The USB receiver is crucial for wireless connectivity. If lost, contact customer service for potential replacement options.
8. Specifications
| Brand | CORN |
| Model Number | N520 (EL0780-01B) |
| Color | Blue |
| Connectivity Technology | 2.4GHz Radio Frequency Wireless |
| Mouse DPI | 1600 DPI (adjustable) |
| Keyboard Keys | 104 keys |
| System Support | Windows XP / WIN7 / WIN10 / ISO, Mac OS X 10.3+ |
| Compatible Devices | Laptop, Personal Computer |
| Batteries Required | 1 AA for Mouse, 2 AAA for Keyboard (included) |
| Item Weight | 2 pounds |
| Package Dimensions | 17.7 x 8.7 x 1.18 inches |
9. Warranty and Support
Your CORN Technology N520 Wireless Keyboard and Mouse Combo comes with a worry-free 12-month warranty. For any product inquiries, technical support, or warranty claims, please contact our friendly customer service team. Refer to the contact information provided in your welcome guide or on the product packaging.