
Retevis FC9152A
Retevis EHK007 Tactical Headset User Manual
Model: FC9152A
Product Overview
The Retevis EHK007 Tactical Headset is designed for communication and hearing protection in various environments, including hunting, shooting, and tactical games. It features sound amplification, noise reduction, and compatibility with a range of two-way radios.
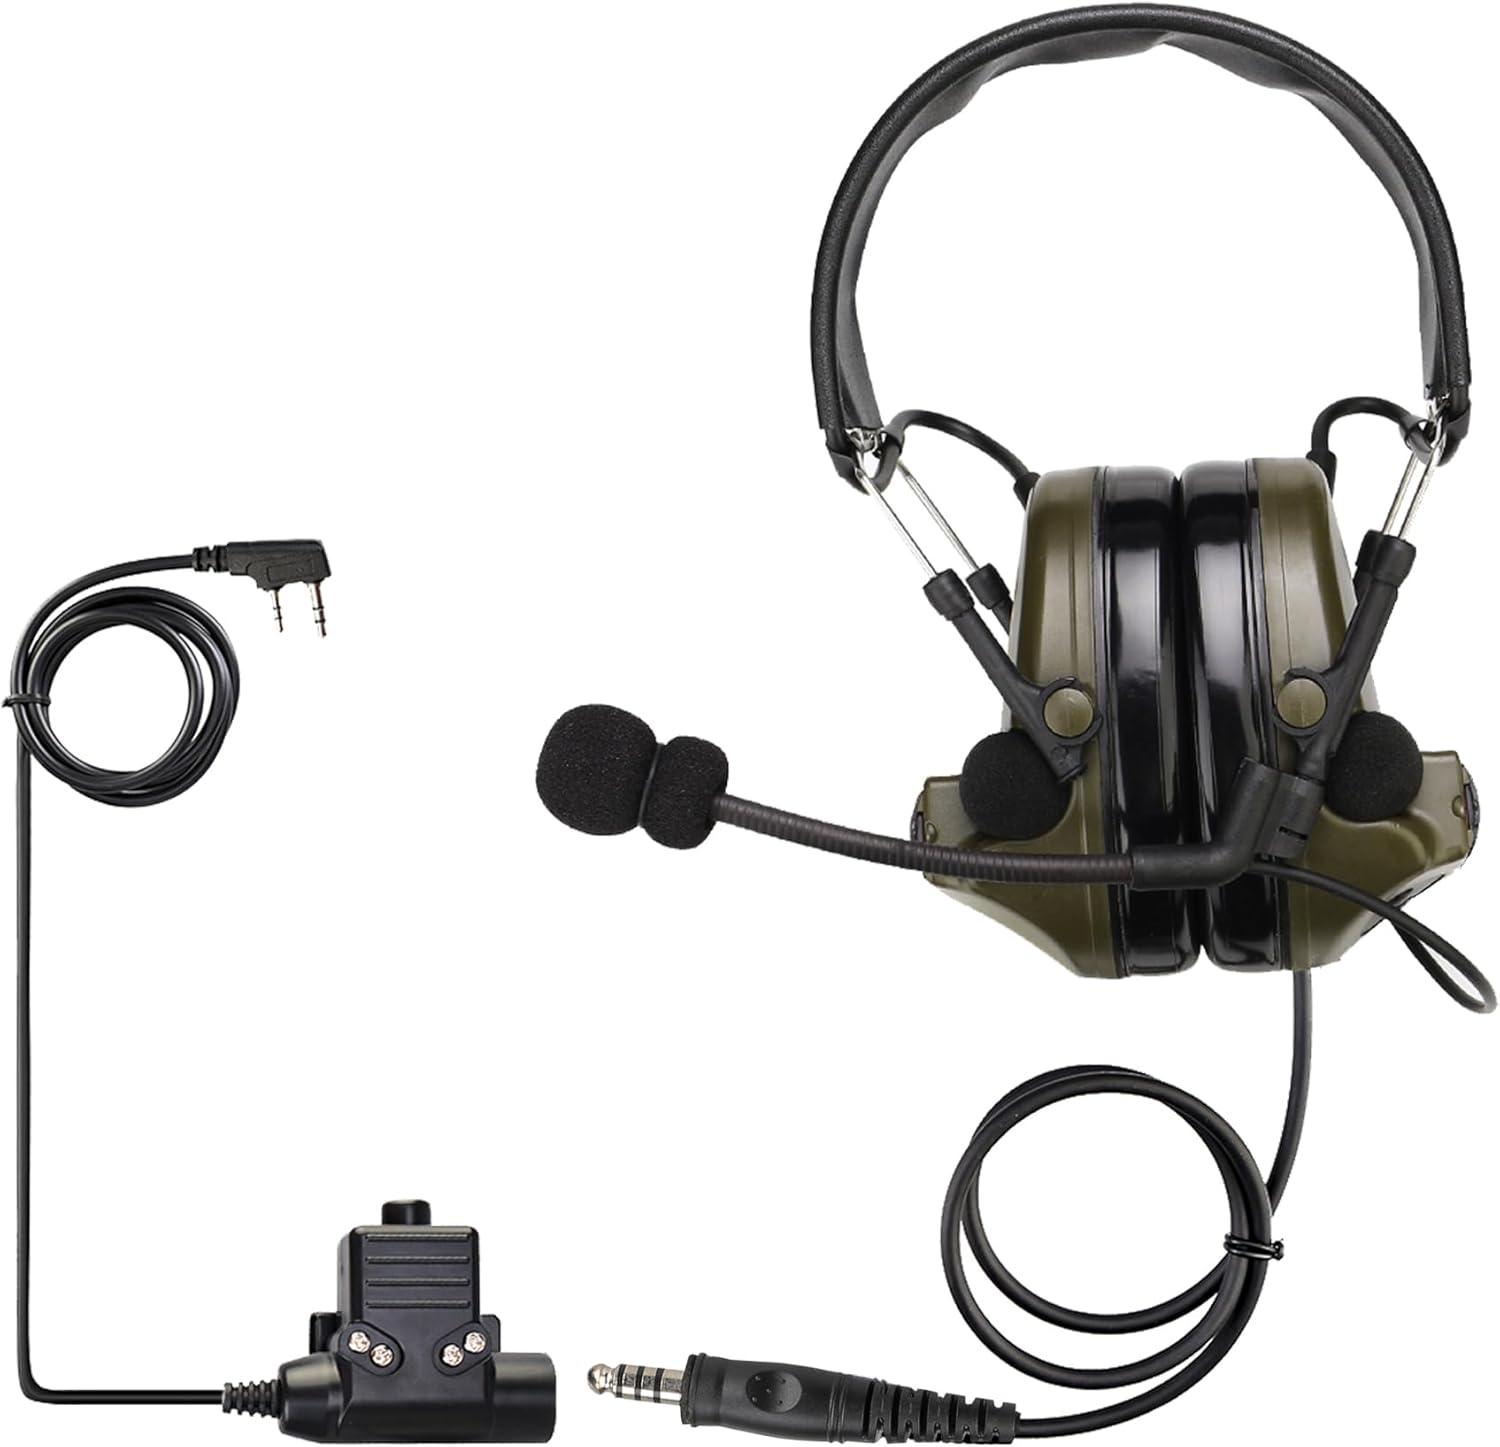
Figure 1: Retevis EHK007 Tactical Headset with PTT cable and radio connector.
This image displays the complete Retevis EHK007 Tactical Headset, including the over-ear earmuffs, boom microphone, Push-to-Talk (PTT) unit, and the Kenwood 2-pin radio connector. The headset is shown in its assembled state, ready for connection to a compatible two-way radio.
Package Contents
Before proceeding with setup, please ensure all items are present in the package:
- 1 x Tactical Headset
- 1 x U94 K Head 2 Pin (PTT unit and cable)
- 2 x Battery Cover (for headset)

Figure 2: Included components of the Retevis EHK007 Tactical Headset.
This image shows the main components included in the product package: the tactical headset, the U94 K Head 2 Pin PTT unit, and two battery covers. The headset is depicted alongside its packaging and a user guide, illustrating what a user receives upon purchase.
Setup Instructions
1. Battery Installation
The Retevis EHK007 tactical headset requires 2 AA batteries (not included) for its electronic functions (sound amplification and noise reduction). The headset can function for communication without batteries if connected to a radio, but these features will be inactive.
- Locate the battery compartments on each earcup.
- Pry open the battery case cover using a fingernail or small tool.
- Insert one AA battery into each compartment, ensuring correct polarity (+ and -).
- Securely close the battery covers.

Figure 3: Steps for installing AA batteries into the headset earcups.
This image illustrates the process of installing AA batteries into the headset. It shows an open battery compartment on the earcup, with a battery being inserted. Note that batteries are required for electronic features but not for basic radio communication.
2. Connecting to a Two-Way Radio
The headset connects to compatible two-way radios via the included U94 K Head 2 Pin PTT unit.
- Connect the 7.1mm connector from the headset cable into the corresponding port on the U94 K Head 2 Pin PTT unit.
- Connect the Kenwood 2-pin connector from the PTT unit into the audio/microphone jack of your compatible two-way radio.
Compatibility: This headset is compatible with radios featuring a Kenwood 2-pin (K-head) interface, including:
- Retevis: RT22, RT21, RT68, H-777, RT22S, H-777H, RB85, NR10, EZTalk 2
- Baofeng: BF-F8HP, UV-5R, UV-82HP, UV-82, UV-17R, AR152, 5RM, UV5G, UV5G Plus, UV5G Pro, UV-S9 Plus
- Kenwood walkie talkies
- Pxton two-way radios

Figure 4: Headset connected to the PTT unit and ready for radio connection.
This image shows the headset's main cable connected to the Push-to-Talk (PTT) unit, which then connects to a two-way radio (radio not included). It highlights the wired connection setup for communication functionality.

Figure 5: Diagram of the Kenwood 2-pin connector for radio compatibility.
This diagram illustrates the standard Kenwood 2-pin connector, showing the 3.5mm and 2.5mm pins. It also lists various compatible radio models from Retevis, Baofeng, Kenwood, and Pxton, ensuring users can verify their radio's compatibility.
3. Comfort Adjustment
Adjust the headband and earcup positions for a comfortable and secure fit. The headset is foldable for easy storage and transport.
Figure 6: Headset adjustment and folding for comfort and portability.
This image demonstrates how to adjust the headset for a comfortable fit and how it can be folded for compact storage. It highlights the adjustable headband and the foldable design, emphasizing user comfort and portability.
Operating Instructions
1. Powering On/Off Electronic Functions
To activate or deactivate the sound amplification and noise reduction features, press and hold both the Volume + and Volume - buttons simultaneously for 3 seconds.

Figure 7: Location of Volume + and Volume - buttons for power control.
This image clearly indicates the location of the Volume + and Volume - buttons on the headset earcup. It also provides instructions on how to use these buttons to turn the headset's electronic functions (sound amplification and noise reduction) on or off by pressing and holding them simultaneously for 3 seconds.
2. Volume Control
Adjust the ambient sound amplification level using the dedicated volume buttons:
- Press the Volume + button to increase the amplification.
- Press the Volume - button to decrease the amplification.
3. Sound Amplification and Noise Reduction
The headset features two pickup microphones (left and right) that amplify ambient sounds when there is no external noise or the noise is relatively small. In situations with sudden loud noises, such as gunshots or explosions, the noise reduction function automatically activates to effectively reduce environmental noise.

Figure 8: Headset demonstrating sound pickup and noise reduction capabilities.
This image visually represents the sound pickup and noise reduction features of the headset. It shows the headset on a mannequin head, with green waves indicating sound amplification from the surrounding environment, and a note about automatic noise reduction during loud events. A radio is also shown, emphasizing its use in communication scenarios.
4. Communication (Push-to-Talk)
The headset's microphone and PTT unit enable clear communication through your connected two-way radio. The microphone boom is flexible and can be adjusted to your preferred position. The PTT button on the unit allows you to transmit your voice.
The headset's communication function works even without batteries or when the electronic features are turned off, allowing for basic radio transmission and reception.
Maintenance
Proper maintenance ensures the longevity and optimal performance of your Retevis EHK007 Tactical Headset.
- Cleaning: Use a soft, damp cloth to wipe down the headset. Avoid harsh chemicals or abrasive materials.
- Storage: When not in use, fold the headset to save space and store it in a dry, cool place away from direct sunlight.
- Moisture Protection: This headset is not water resistant. Avoid exposure to rain, splashes, or high humidity to prevent damage to internal electronics.
- Battery Care: Remove batteries if the headset will not be used for an extended period to prevent battery leakage and damage.
Troubleshooting
If you encounter issues with your headset, refer to the following common problems and solutions:
| Problem | Possible Cause | Solution |
|---|---|---|
| No sound amplification or noise reduction. | Batteries are dead or incorrectly installed; electronic functions are off. | Check battery polarity and replace if necessary. Press and hold both volume buttons for 3 seconds to turn on electronic functions. |
| No communication via radio. | Incorrect connection to radio; radio not compatible; radio issues. | Ensure the PTT unit is securely connected to both the headset and the radio. Verify your radio model is listed as compatible. Check your radio's power and settings. |
| Distorted or unclear audio. | Microphone position; loose connections; environmental interference. | Adjust the microphone closer to your mouth. Check all cable connections. Move away from sources of strong electromagnetic interference. |
Specifications
| Feature | Detail |
|---|---|
| Model Name | EHK007 |
| Connectivity Technology | Wired |
| Headphones Jack | Kenwood 2 Pin |
| Noise Control | Active Noise Cancellation |
| Power Source | 2 x AA Batteries (not included) |
| Material | Acrylonitrile Butadiene Styrene (ABS) |
| Item Weight | 15.3 ounces |
| Water Resistance Level | Not Water Resistant |
| Frequency Range | 20 Hz - 20,000 Hz |
| Impedance | 32 Ohm |
| Earpiece Shape | Over-ear |
Warranty and Support
Most new products carry a two-year manufacturer's warranty from the date of purchase. For further details regarding warranty coverage and after-sales service, please refer to the official Retevis website or contact the seller where you purchased the product.
Products requiring repair may be serviced by a local repair center. For warranty service, you will need to provide a receipt or proof of purchase from the actual seller for verification.
Exclusions from Warranty Coverage:
- Any product damaged by accident.
- In the event of misuse or abuse of the product or as a result of unauthorized alterations or repairs.
- If the serial number has been altered, defaced, or removed.
For more information, visit: www.retevis.com/after-sale
Ask a question about this manual
Ask about setup, troubleshooting, compatibility, parts, safety, or missing instructions. Manuals+ will review the question and use this page’s manual context to help answer it.