1. Introduction
This manual provides comprehensive instructions for the setup, operation, and maintenance of your HP LaserJet MFP 432fdn multifunction printer. Designed for secure and efficient business solutions, this printer helps conserve energy with HP EcoSmart black toner. It is engineered to work exclusively with HP original or reused cartridges containing an HP chip. Dynamic security measures may periodically update firmware to block non-HP chipped cartridges.

Figure 1: Front view of the HP LaserJet MFP 432fdn printer.
2. Safety Information
Please read all safety instructions before using the printer to prevent injury or damage.
- Always connect the printer to a grounded power outlet.
- Do not place the printer in an area with excessive dust, humidity, or direct sunlight.
- Keep hands and loose clothing away from moving parts during operation.
- Use only HP-approved toner cartridges.
- Unplug the printer from the power outlet before cleaning or performing maintenance.
3. Product Overview and Components
Familiarize yourself with the main components of your HP LaserJet MFP 432fdn.
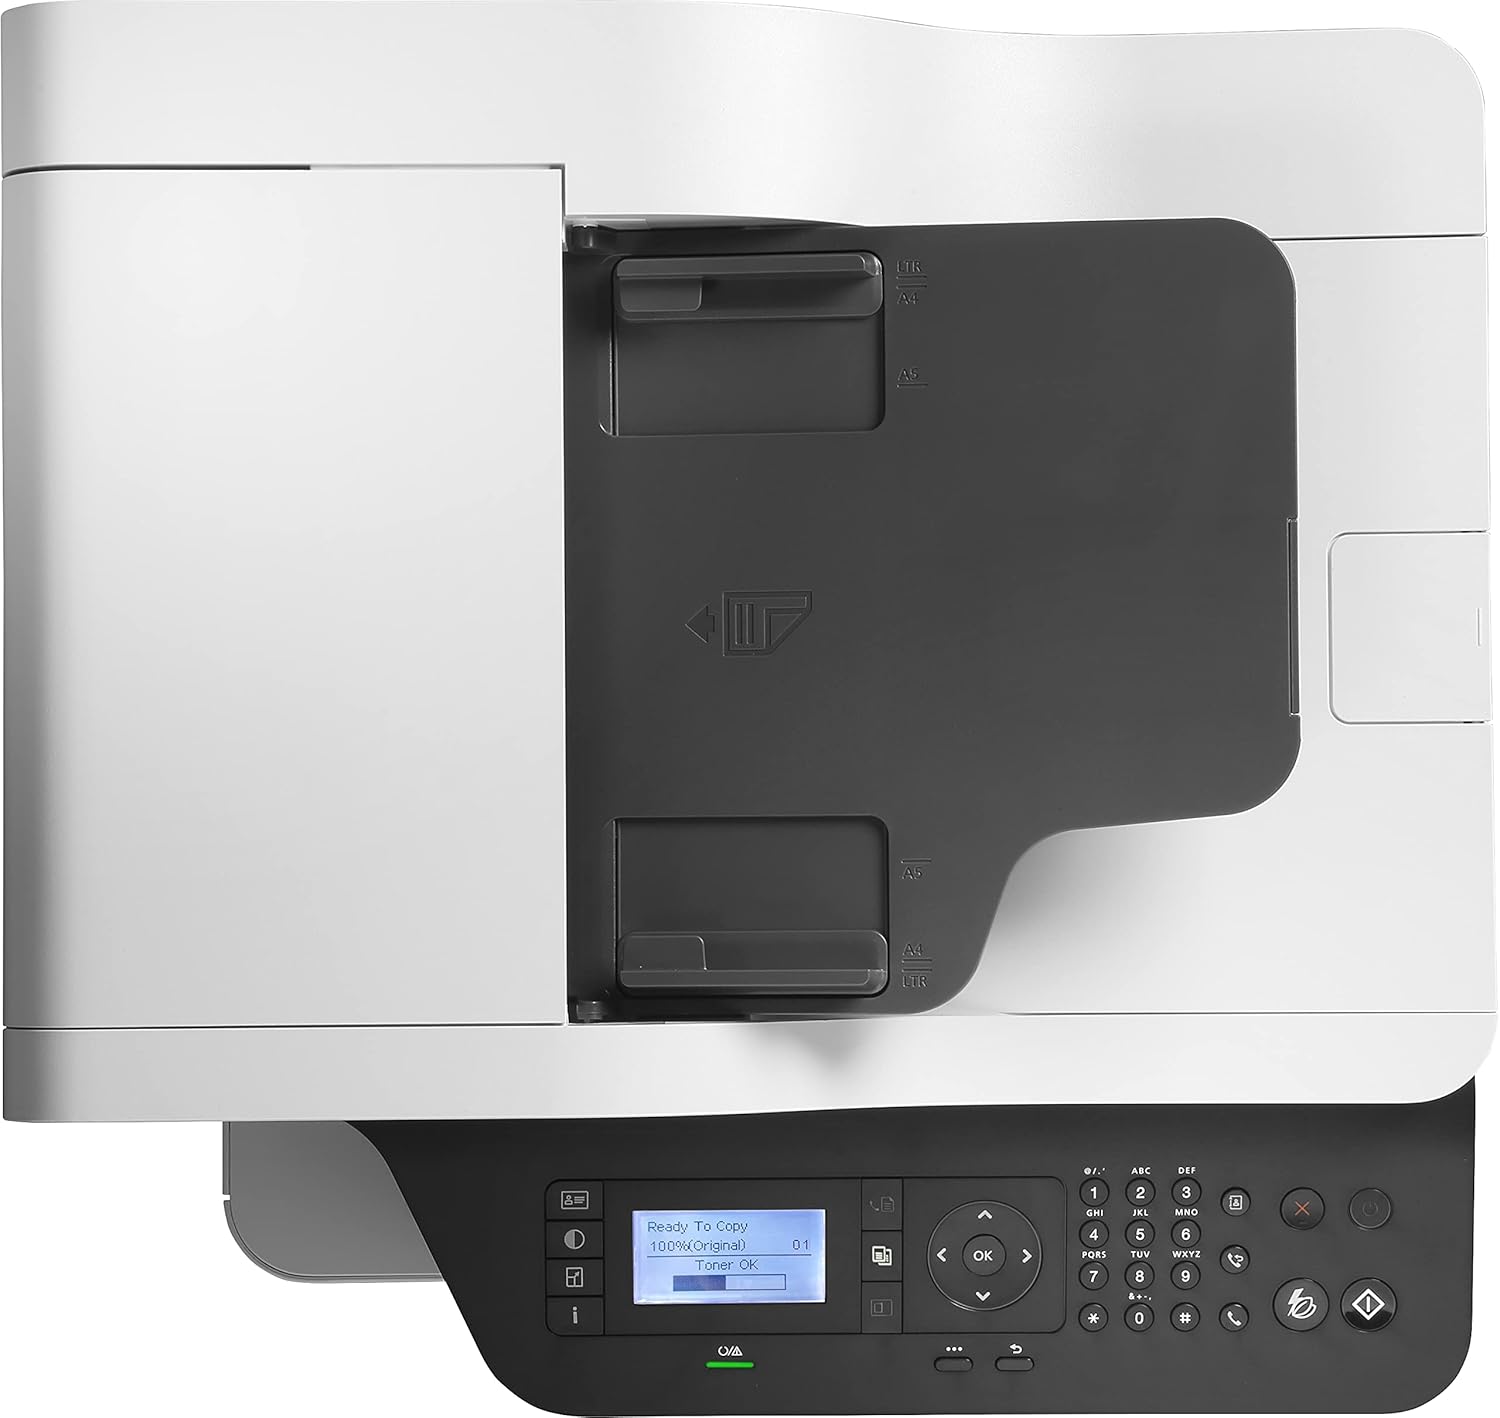
Figure 2: Top view showing the Automatic Document Feeder (ADF) and output tray.
- Automatic Document Feeder (ADF): For scanning, copying, and faxing multiple pages automatically.
- Control Panel: Features an LCD screen and buttons for printer operation.
- Output Tray: Where printed pages are collected.
- Paper Tray: Main input tray for paper.
- Toner Cartridge Access: Area for installing and replacing toner cartridges.
- USB Port: For direct printing or connecting to a computer.
- Ethernet Port: For network connectivity.
- Fax Port: For connecting a telephone line for fax functions.

Figure 3: Detailed view of the control panel, including the 2-line LCD display.
4. Setup Guide
4.1 Unpacking the Printer
- Remove the printer from its packaging.
- Remove all packing materials, tapes, and protective films from the printer.
- Place the printer on a stable, level surface.
4.2 Installing the Toner Cartridge

Figure 4: Toner cartridge installation area with an HP W1330A cartridge visible.
- Open the front access door to the toner cartridge compartment.
- Unpack the new HP toner cartridge (e.g., HP 330A Black W1330A).
- Gently shake the cartridge to distribute the toner evenly.
- Insert the cartridge into the printer until it clicks into place.
- Close the front access door.
4.3 Loading Paper
- Pull out the paper tray.
- Adjust the paper guides to the correct paper size (A4, A5, A6, B5, B6, 10x15 cm, envelopes).
- Load paper into the tray, ensuring it is flat and not exceeding the maximum fill line.
- Push the paper tray back into the printer.
4.4 Connecting the Printer
- Power Connection: Connect the power cord to the printer and then to a grounded electrical outlet.
- USB Connection: For direct connection to a computer, use a USB cable.

Figure 5: USB port for direct connection or USB drive.
- Network Connection (Ethernet): Connect an Ethernet cable from the printer to your network router or switch.
- Fax Connection: Connect a phone line to the printer's fax port.
4.5 Software Installation
Install the latest printer drivers and software from the official HP website or the provided installation disc to enable full functionality, including HP Smart features.
5. Operating Instructions
5.1 Printing
- Monochrome Printing: The printer supports black and white printing at speeds up to 40 pages per minute (ppm).
- Automatic Duplex Printing: The printer automatically prints on both sides of the paper. Ensure this option is selected in your print settings.
- Supported Media Sizes: A4, A5, A6, B5 (JIS), B6 (JIS), 10 x 15 cm, envelopes (DL, C5, B5).
5.2 Scanning
- Flatbed Scanner: Place documents or photos face down on the scanner glass.
- Automatic Document Feeder (ADF): Load multiple pages into the ADF for continuous scanning. The ADF supports duplex scanning for A4 documents.
- Initiate scanning from the printer's control panel or your computer's scanning software.
5.3 Copying
- Place the original document on the flatbed scanner or in the ADF.
- Use the control panel to select copy options (e.g., number of copies, duplex, lighten/darken).
- Press the Copy button to start.
5.4 Faxing
- Ensure the phone line is connected.
- Place the document to be faxed on the flatbed scanner or in the ADF.
- Enter the recipient's fax number using the control panel.
- Press the Fax button to send.
6. Maintenance
6.1 Replacing the Toner Cartridge
When the toner level is low, the printer's LCD screen will display a warning. Replace the cartridge as follows:
- Open the front access door.
- Remove the old toner cartridge by pulling it out.
- Unpack and prepare the new HP original toner cartridge (e.g., HP 330A Black W1330A, HP 330X Black W1330X, HP 330XC Black W1330XC, HP 332A Black W1332A, HP 332AC Black W1332AC).
- Insert the new cartridge until it locks into place.
- Close the front access door.
6.2 Cleaning the Printer
- Unplug the printer before cleaning.
- Wipe the exterior of the printer with a soft, damp, lint-free cloth.
- Clean the scanner glass with a soft cloth and a non-abrasive glass cleaner.
- Refer to the HP support website for detailed instructions on cleaning internal components if necessary.
7. Troubleshooting
This section addresses common issues you might encounter.
| Problem | Possible Cause | Solution |
|---|---|---|
| Printer not turning on | Power cord disconnected, power outlet issue | Check power connections, try a different outlet. |
| Paper jams | Incorrectly loaded paper, damaged paper, foreign objects | Remove jammed paper carefully, ensure paper is loaded correctly. |
| Poor print quality | Low toner, incorrect print settings, dirty printer components | Replace toner, adjust print settings, clean printer. |
| "Non-HP Cartridge" message | Printer designed for HP original chips | Ensure you are using an HP original or HP-chipped reused cartridge. Firmware updates may block non-HP chips. |
For more detailed troubleshooting, refer to the HP support website or contact customer service.
8. Specifications
| Feature | Detail |
|---|---|
| Model Number | 7UQ76A |
| Brand | HP |
| Product Dimensions | 58.9D x 58.9W x 62.6H cm |
| Connectivity Technology | Ethernet, USB |
| Printing Technology | Laser |
| Print Output | Monochrome |
| Max Print Speed (Monochrome) | 40 pages per minute |
| Duplex Printing | Automatic (Yes) |
| Max Print Resolution (B&W) | 1200 x 1200 dpi |
| Scanner Type | Flatbed, ADF |
| Max Sheet Capacity (ADF) | 50 sheets |
| Max Copy Speed (B&W) | 40 pages per minute |
| Max Copies per Series | 2000 |
| Supported Media Sizes | A4, A5, A6, B5 (JIS), B6 (JIS), 10 x 15 cm, envelopes (DL, C5, B5) |
| Power Consumption | 700 Watts (Operating) |
| Display Size | 2-line LCD |
| Compatible Toner | HP 330A Black W1330A, HP 330X Black W1330X, HP 330XC Black W1330XC, HP 332A Black W1332A, HP 332AC Black W1332AC |
| Item Weight | 16.9 Kilograms |
9. Warranty & Support
9.1 Warranty Information
This HP LaserJet MFP 432fdn printer typically comes with a standard manufacturer's warranty. Spare parts availability in the EU is guaranteed for 2 years. Please refer to your purchase documentation or the official HP website for specific warranty terms and conditions applicable to your region.
9.2 Customer Support
For technical assistance, driver downloads, or further information, please visit the official HP support website. You can find contact details for customer service in your region on the HP support portal.