Introduction
Thank you for purchasing the Trevi TT 1072 DAB Turntable System. This versatile audio system combines a classic vinyl turntable with modern features like Bluetooth connectivity, DAB/DAB+ digital radio, CD player, USB/SD playback, and recording capabilities. This manual provides detailed instructions for setup, operation, maintenance, and troubleshooting to ensure optimal performance and longevity of your device.
Important Safety Information
Please read these safety instructions carefully before using the appliance and keep them for future reference. Incorrect use may result in electric shock or fire.
- Do not expose the unit to rain or moisture.
- Do not block any ventilation openings.
- Ensure proper power supply voltage as indicated on the unit.
- Do not open the casing; refer all servicing to qualified personnel.
- Keep the unit away from direct sunlight, heat sources, and strong magnetic fields.
- Clean only with a dry cloth.
Package Contents
Verify that all items are present and in good condition upon unpacking:
- Trevi TT 1072 DAB Turntable System
- Pickup System
- Stylus (Needle)
- Dust Cover
- Power Cable
- User Manual (this document)
Product Overview
Familiarize yourself with the main components of your Trevi TT 1072 DAB system.

Figure 1: Front view of the Trevi TT 1072 DAB Turntable System with the dust cover open, showing the turntable platter, control panel, and two external speakers.
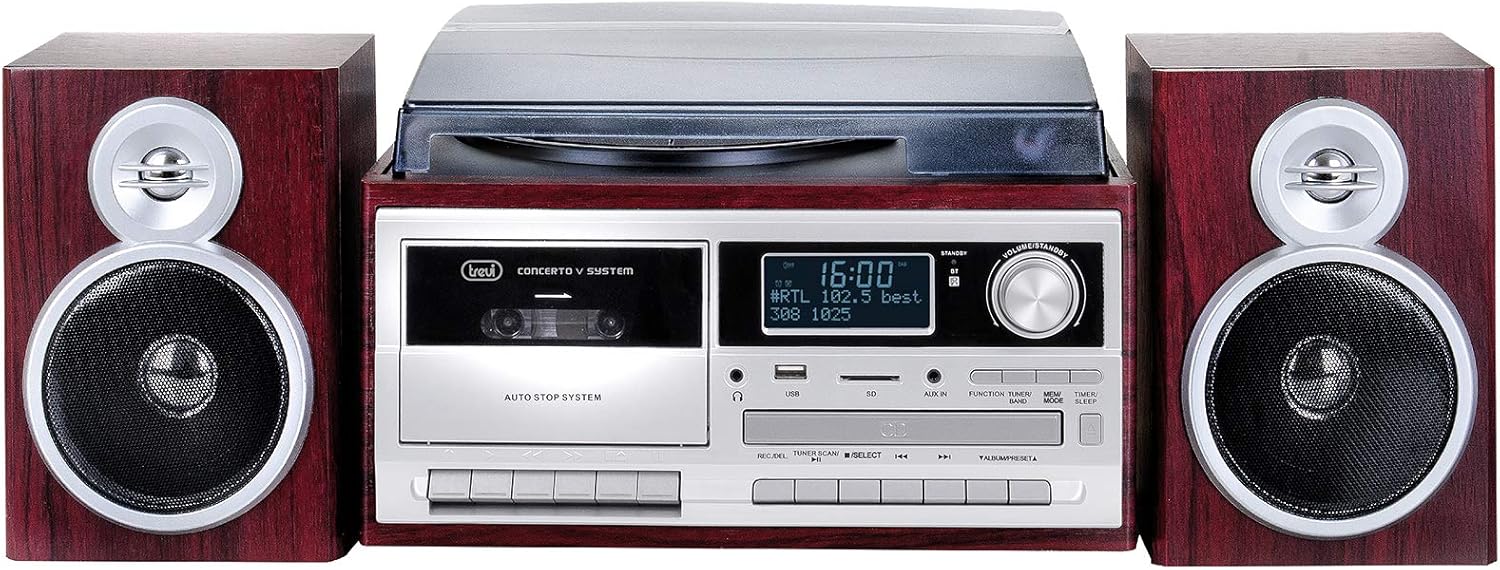
Figure 2: Front view of the Trevi TT 1072 DAB Turntable System with the dust cover closed, showcasing its compact design with the central unit and two detached speakers.
Key Features:
- Vinyl Turntable: Supports 33, 45, and 78 RPM records.
- Bluetooth Connectivity: Wireless connection to external devices.
- DAB/DAB+ Digital Radio: For clear digital radio reception.
- Multi-format Player: Plays MP3 files from CD, USB, and SD cards.
- Recording Function (Full Encoding): Record vinyl, CD, or radio to USB/SD.
- Cassette Player/Recorder (Full Recorder): Play and record audio cassettes.
- LCD Display: Shows track information, radio stations, and settings.
Setup Guide
1. Unpacking and Placement:
- Carefully remove all components from the packaging.
- Place the main unit on a stable, flat surface, away from direct sunlight, heat, and moisture.
- Position the speakers on either side of the main unit for optimal stereo sound.
2. Connecting the Speakers:
Connect the speaker wires from the back of each speaker to the corresponding speaker output terminals on the main unit. Ensure correct polarity (red to red, black to black).
3. Power Connection:
Plug the power cable into the AC IN socket on the back of the unit, then plug the other end into a standard wall outlet.
4. Installing the Dust Cover:
Carefully attach the dust cover to the hinges on the back of the turntable unit. This protects the turntable from dust when not in use.
Operating Instructions
1. Powering On/Off:
Press the POWER button on the front panel to turn the unit on or off.
2. Turntable Operation:
- Open the dust cover.
- Place a vinyl record on the platter.
- Select the appropriate speed (33, 45, or 78 RPM) using the speed selector switch. For 45 RPM records, place the included adapter on the spindle.
- Gently lift the tone arm using the cueing lever and position the stylus over the desired track.
- Lower the tone arm slowly onto the record using the cueing lever.
- Adjust the volume using the VOLUME knob.
- At the end of the record, the turntable may stop automatically (depending on the auto-stop feature). Lift the tone arm and return it to its rest.
3. Bluetooth Connectivity:
- Press the MODE button until "Bluetooth" or "BT" appears on the display.
- Enable Bluetooth on your smartphone, tablet, or other device.
- Search for "Trevi TT 1072 DAB" (or similar) in your device's Bluetooth settings and select it to pair.
- Once paired, you can stream audio wirelessly from your device to the turntable system.
4. DAB/DAB+ Digital Radio:
- Press the MODE button until "DAB" appears on the display.
- The system will automatically scan for available DAB/DAB+ stations.
- Use the TUNE +/- buttons to navigate through the available stations.
- To save a station, press and hold the PRESET button, then use TUNE +/- to select a preset number and press PRESET again to confirm.
5. CD/USB/SD Playback:
- Insert a CD into the CD slot, a USB drive into the USB port, or an SD card into the SD card slot.
- Press the MODE button to select the desired source (CD, USB, or SD).
- Use the PLAY/PAUSE, STOP, SKIP +/- buttons to control playback.
6. Recording (Full Encoding/Full Recorder):
The system allows recording from vinyl, CD, radio, or cassette to USB or SD card.
- Insert a USB drive or SD card into the respective slot.
- Select the desired source (e.g., Turntable, CD, Radio, Cassette).
- Press the RECORD button. The display will indicate recording is active.
- Start playback on the source (e.g., play a vinyl record, start a CD track).
- Press the RECORD button again or STOP to end the recording.
For cassette recording, ensure a blank cassette is inserted and follow similar steps, using the cassette deck's record function.
Maintenance and Care
- Cleaning the Unit: Use a soft, dry cloth to wipe the exterior of the unit. Do not use abrasive cleaners or solvents.
- Cleaning the Stylus: Gently brush the stylus from back to front with a soft brush designed for stylus cleaning. Avoid touching the stylus with your fingers.
- Dust Cover: Keep the dust cover closed when the turntable is not in use to prevent dust accumulation on the platter and stylus.
- Record Care: Keep your vinyl records clean and store them vertically in their sleeves to prevent warping and dust buildup.
- Stylus Replacement: The stylus is a consumable part and will wear out over time. Replace it when you notice a degradation in sound quality or visible wear. Refer to the manufacturer's recommendations for replacement stylus models.
Troubleshooting
| Problem | Possible Cause | Solution |
|---|---|---|
| No power | Power cable not connected; power outlet not working. | Ensure power cable is securely plugged in; try a different outlet. |
| No sound from speakers | Volume too low; speakers not connected correctly; wrong input mode selected. | Increase volume; check speaker connections; select correct source mode (e.g., PHONO, BT, CD). |
| Turntable speed incorrect | Incorrect speed selected. | Adjust the speed selector switch to 33, 45, or 78 RPM. |
| Bluetooth pairing failed | Device too far; Bluetooth not enabled on device; unit not in Bluetooth mode. | Move device closer; enable Bluetooth; ensure unit is in Bluetooth mode. |
| Poor radio reception | Antenna not extended; weak signal. | Fully extend the antenna; reposition the unit for better reception. |
Specifications
| Feature | Detail |
|---|---|
| Model Number | 0T107230 |
| Dimensions (L x W x H) | 32 x 21 x 29 cm |
| Weight | 5.85 kg |
| Turntable Speeds | 33, 45, 78 RPM |
| Connectivity | Bluetooth, USB, SD, Aux-in |
| Radio Tuner | DAB/DAB+ Digital Radio |
| Compatible Devices | Smartphone, MP3 player, PC, tablet, speaker, headphones |
| Power Source | AC Adapter |
| Color | Brown |
| Material | Vinyl (exterior finish) |
Warranty and Support
Trevi products are designed for reliability and performance. For warranty information, please refer to the warranty card included with your purchase or visit the official Trevi website. For technical support, troubleshooting assistance, or spare parts, please contact Trevi customer service through their official channels.
You can find more information and contact details on the official Trevi website: www.trevi.it


