1. Introduction
Thank you for choosing the KITCHEN MOVE VIPER PRO Multifunction Stand Mixer. This appliance is designed to assist you with various kitchen tasks, including mixing, kneading, blending, and meat grinding. To ensure safe and optimal performance, please read this instruction manual thoroughly before first use and retain it for future reference.
This manual covers the model BAT-1518BM, which includes a stand mixer, a meat grinder attachment, and a blender attachment.
2. Important Safety Instructions
- Always ensure the appliance is unplugged from the power outlet before assembly, disassembly, or cleaning.
- Keep hands, hair, clothing, as well as spatulas and other utensils away from moving parts during operation to prevent injury.
- Never operate the appliance with a damaged cord or plug, or if it has malfunctioned or been dropped or damaged in any manner.
- Do not immerse the motor unit in water or any other liquid. Clean with a damp cloth only.
- Close supervision is necessary when any appliance is used by or near children.
- Avoid contact with moving parts.
- Do not use attachments not recommended or sold by the manufacturer.
- Ensure the appliance is placed on a stable, flat, and dry surface during operation.
- The appliance is equipped with overheat protection. If it stops during use, unplug it and allow it to cool down for at least 30 minutes before restarting.
3. Product Overview and Components
Familiarize yourself with the various parts of your KITCHEN MOVE VIPER PRO multifunction stand mixer.

Image: The KITCHEN MOVE VIPER PRO stand mixer base, stainless steel bowl, splash guard, dough hook, beater, whisk, meat grinder attachment with various plates, and blender attachment.
Main Components:
- Motor Unit/Base: Contains the motor, speed control dial, and attachment ports.
- Mixing Bowl: 5.5L stainless steel bowl for mixing ingredients.
- Splash Guard: Prevents splashing during mixing and allows adding ingredients.
- Dough Hook: For kneading heavy doughs like bread and pizza.
- Beater: For mixing medium-heavy mixtures like cake batter and cookie dough.
- Whisk: For whipping light mixtures like egg whites, cream, and light batters.
- Meat Grinder Attachment: For grinding various types of meat.
- Blender Attachment: For blending liquids, making smoothies, and purees.
4. Setup and Assembly
4.1 Initial Setup
- Unpack all components and remove any packaging materials.
- Clean all detachable parts (mixing bowl, attachments, blender jug, meat grinder parts) according to the 'Maintenance and Cleaning' section before first use.
- Place the motor unit on a clean, dry, stable, and flat surface. Ensure there is enough space around the unit for ventilation.
4.2 Attaching the Mixing Bowl and Accessories
- Ensure the appliance is unplugged.
- Press the head release lever (usually on the side of the unit) and lift the motor head until it locks into place.
- Place the stainless steel mixing bowl onto the base, turn it clockwise until it locks securely.
- Select the appropriate mixing attachment (dough hook, beater, or whisk) for your task. Align the attachment with the shaft and push upwards, then turn slightly to lock it into place.
- Attach the splash guard by aligning it with the motor head and twisting it into position.
- Lower the motor head by pressing the head release lever again and gently pushing the head down until it clicks into place.
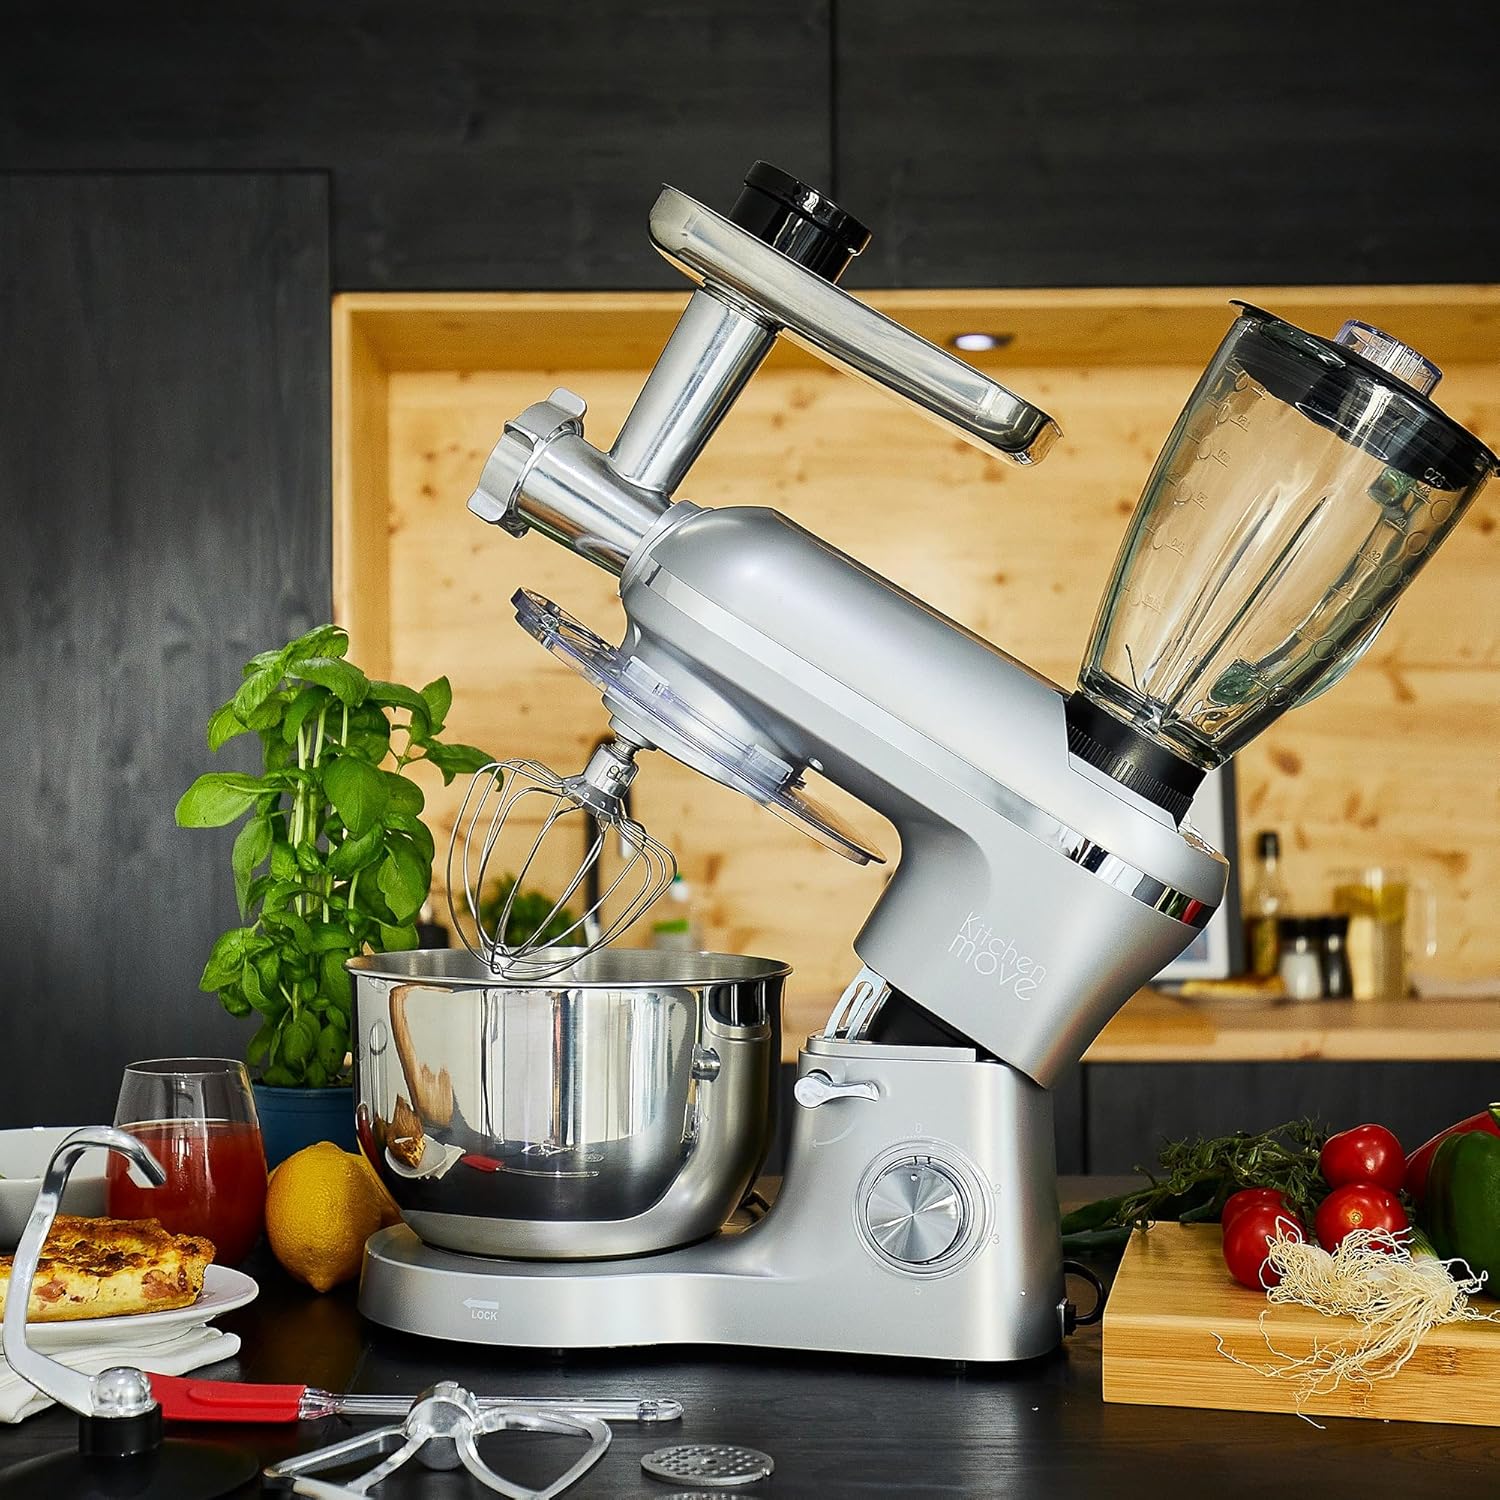
Image: The stand mixer with its head tilted upwards, illustrating how to attach the mixing bowl and accessories like the whisk.
4.3 Attaching the Meat Grinder
- Ensure the appliance is unplugged.
- Remove the cover from the front attachment port on the motor unit.
- Assemble the meat grinder components: feeding screw, blade, and desired grinding plate. Insert them into the grinder housing.
- Attach the assembled meat grinder to the front port, aligning the tab with the slot, and turn the locking knob clockwise to secure it.
- Place the feeding tray on top of the grinder.

Image: A detailed view of the meat grinder attachment, showing the grinding plate and internal components.
4.4 Attaching the Blender
- Ensure the appliance is unplugged.
- Remove the cover from the top attachment port on the motor unit.
- Place the blender jug onto the top port, aligning the base with the drive shaft, and turn clockwise to lock it securely.
- Ensure the blender lid is properly sealed before operation.
5. Operating Instructions
5.1 General Operation
- Once assembled, plug the appliance into a suitable 220-240V AC, 50/60Hz power outlet.
- The speed control dial allows you to select from 6 speeds and a Pulse function.
- Turn the dial clockwise to increase speed from 1 to 6.
- Turn the dial to 'P' (Pulse) for short bursts of maximum power. Release the dial to return to the '0' (Off) position.
- Always start at a lower speed and gradually increase as needed to prevent splashing and ensure even mixing.

Image: A close-up view of the speed control dial, showing settings from 0 to 6 and the Pulse function.
5.2 Using the Mixing Function
- Dough Hook: Ideal for kneading heavy doughs such as bread, pizza, and brioche. Use speeds 1-3.
- Beater: Suitable for mixing medium-heavy mixtures like cake batters, cookie dough, and mashed potatoes. Use speeds 2-4.
- Whisk: Best for whipping egg whites, cream, light batters, and mayonnaise. Use speeds 4-6.

Image: The dough hook attachment, suitable for kneading heavy doughs.

Image: The beater attachment, used for mixing various batters and doughs.

Image: The whisk attachment, designed for aerating and whipping ingredients.
5.3 Using the Meat Grinder Function
- Ensure the meat grinder is securely attached (refer to Section 4.3).
- Cut meat into small pieces (approx. 2-3 cm) that fit into the feeding tube. Remove bones, gristle, and excessive fat.
- Place a bowl under the grinder outlet to collect the ground meat.
- Turn the speed dial to a medium setting (e.g., 3-4).
- Feed the meat pieces into the tube using the food pusher. Never use your fingers or other utensils.
- After grinding, turn the appliance off and unplug it before disassembling for cleaning.

Image: A hand gently pushing pieces of meat into the meat grinder attachment for processing.
5.4 Using the Blender Function
- Ensure the blender jug is securely attached (refer to Section 4.4).
- Add ingredients to the blender jug. Do not exceed the maximum fill line.
- Securely close the blender lid.
- Turn the speed dial to a desired setting (e.g., 3-6) or use the Pulse function for quick blending.
- For best results, start with liquids, then add soft ingredients, and finally harder ingredients.
- After blending, turn the appliance off and unplug it before removing the jug.

Image: The blender jug attached to the stand mixer, filled with fresh fruits like strawberries and kiwi, ready for blending.
6. Maintenance and Cleaning
Regular cleaning ensures the longevity and hygienic operation of your appliance.
6.1 Cleaning the Motor Unit
- Always unplug the appliance before cleaning.
- Wipe the exterior of the motor unit with a soft, damp cloth. Do not use abrasive cleaners or immerse the unit in water.
- Ensure all surfaces are completely dry before storing or next use.
6.2 Cleaning Attachments and Bowls
- Mixing Bowl and Splash Guard: These parts are generally dishwasher-safe. For best results and to prolong their life, hand washing with warm soapy water is recommended.
- Dough Hook, Beater, Whisk: These metal attachments should be washed by hand with warm soapy water immediately after use. Do not wash in a dishwasher as this can cause discoloration or corrosion (as noted in customer reviews). Rinse thoroughly and dry completely.
- Meat Grinder Parts: Disassemble all parts immediately after use. Wash thoroughly by hand with warm soapy water. Use a brush to clean small openings. Dry all parts completely to prevent rust.
- Blender Jug: The blender jug can be washed by hand with warm soapy water. For stubborn residue, fill with warm water and a drop of dish soap, then run on a low speed for a few seconds before rinsing.
6.3 Storage
Store the appliance and its accessories in a clean, dry place, away from direct sunlight and out of reach of children.
7. Troubleshooting
If you encounter any issues with your KITCHEN MOVE VIPER PRO, refer to the following table:
| Problem | Possible Cause | Solution |
|---|---|---|
| Appliance does not turn on. | Not plugged in; power outlet fault; motor head not locked; overheat protection activated. | Check power connection; try another outlet; ensure motor head is fully lowered and locked; unplug and let cool for 30 minutes. |
| Attachments not fitting correctly. | Incorrect alignment; debris in shaft. | Ensure attachment is aligned with the shaft and pushed up firmly, then twisted to lock. Check for any obstructions. |
| Excessive noise or vibration during operation. | Appliance not on a stable surface; too much load; attachment not properly secured. | Place on a flat, stable surface; reduce ingredient quantity; ensure all attachments are securely locked. |
| Meat grinder or blender not processing effectively. | Ingredients too large/hard; attachment clogged. | Cut ingredients into smaller pieces; ensure meat is free of bones/gristle; disassemble and clean attachment. |
If the problem persists after attempting these solutions, please contact customer support.
8. Specifications
Technical details for the KITCHEN MOVE VIPER PRO Multifunction Stand Mixer (Model BAT-1518BM):

Image: Diagram showing the approximate dimensions of the KITCHEN MOVE VIPER PRO stand mixer.
- Model Number: BAT-1518BM
- Power: 1500 Watts
- Voltage: 220-240V AC, 50/60Hz
- Mixing Bowl Capacity: 5.5 Liters
- Number of Speeds: 6 + Pulse function
- Noise Level: Below 80 dB
- Dimensions (L x W x H): Approximately 47 x 24 x 53 cm
- Weight: Approximately 7.6 Kilograms
- Materials: Alloy steel, Acrylonitrile Butadiene Styrene (ABS)
- Special Features: Anti-slip base, Overheat protection, Locking system
9. Warranty and Support
9.1 Product Warranty
This KITCHEN MOVE product comes with a 2-year warranty from the date of purchase, covering manufacturing defects. Please retain your proof of purchase for warranty claims. The warranty does not cover damage caused by misuse, neglect, unauthorized repairs, or normal wear and tear.
9.2 Customer Support
For any questions, technical assistance, or warranty claims, please contact KITCHEN MOVE customer support. Refer to the contact information provided with your purchase documentation or visit the official KITCHEN MOVE website for support details.


