

1. Introduction
This manual provides essential information for the proper installation, operation, and maintenance of your HEIMAN Carbon Monoxide (CO) Detector. Please read this manual thoroughly before installation and keep it for future reference.
Carbon monoxide (CO) is a colorless, odorless, and tasteless gas that can be fatal. This detector is designed to detect carbon monoxide gas from incomplete combustion sources such as furnaces, gas appliances, fireplaces, and vehicle exhaust.
2. Safety Information
WARNING: This carbon monoxide alarm is designed to detect carbon monoxide gas from ANY source of combustion. It is NOT designed to detect smoke, fire, or any other gas.
CAUTION: This alarm will only indicate the presence of carbon monoxide gas at the sensor. Carbon monoxide gas may be present in other areas.
IMPORTANT: This product is intended for use in ordinary indoor locations of family living units. It is not designed to measure compliance with occupational safety and health administration (OSHA) commercial or industrial standards.
2.1 Carbon Monoxide Poisoning Symptoms
The following symptoms are related to carbon monoxide poisoning and should be taken seriously:
- Mild Exposure: Slight headache, nausea, vomiting, fatigue (often described as "flu-like" symptoms).
- Medium Exposure: Throbbing headache, drowsiness, confusion, fast heart rate.
- Extreme Exposure: Unconsciousness, convulsions, cardio-respiratory failure, death.
If you experience any of these symptoms, evacuate the premises immediately and seek medical attention.

3. Package Contents
Verify that all items are present and in good condition.
- 1 x HEIMAN Carbon Monoxide Detector
- 2 x 1.5V DC AA Batteries
- 2 x Wall Plugs
- 2 x Screws
- 1 x User Manual

4. Product Overview
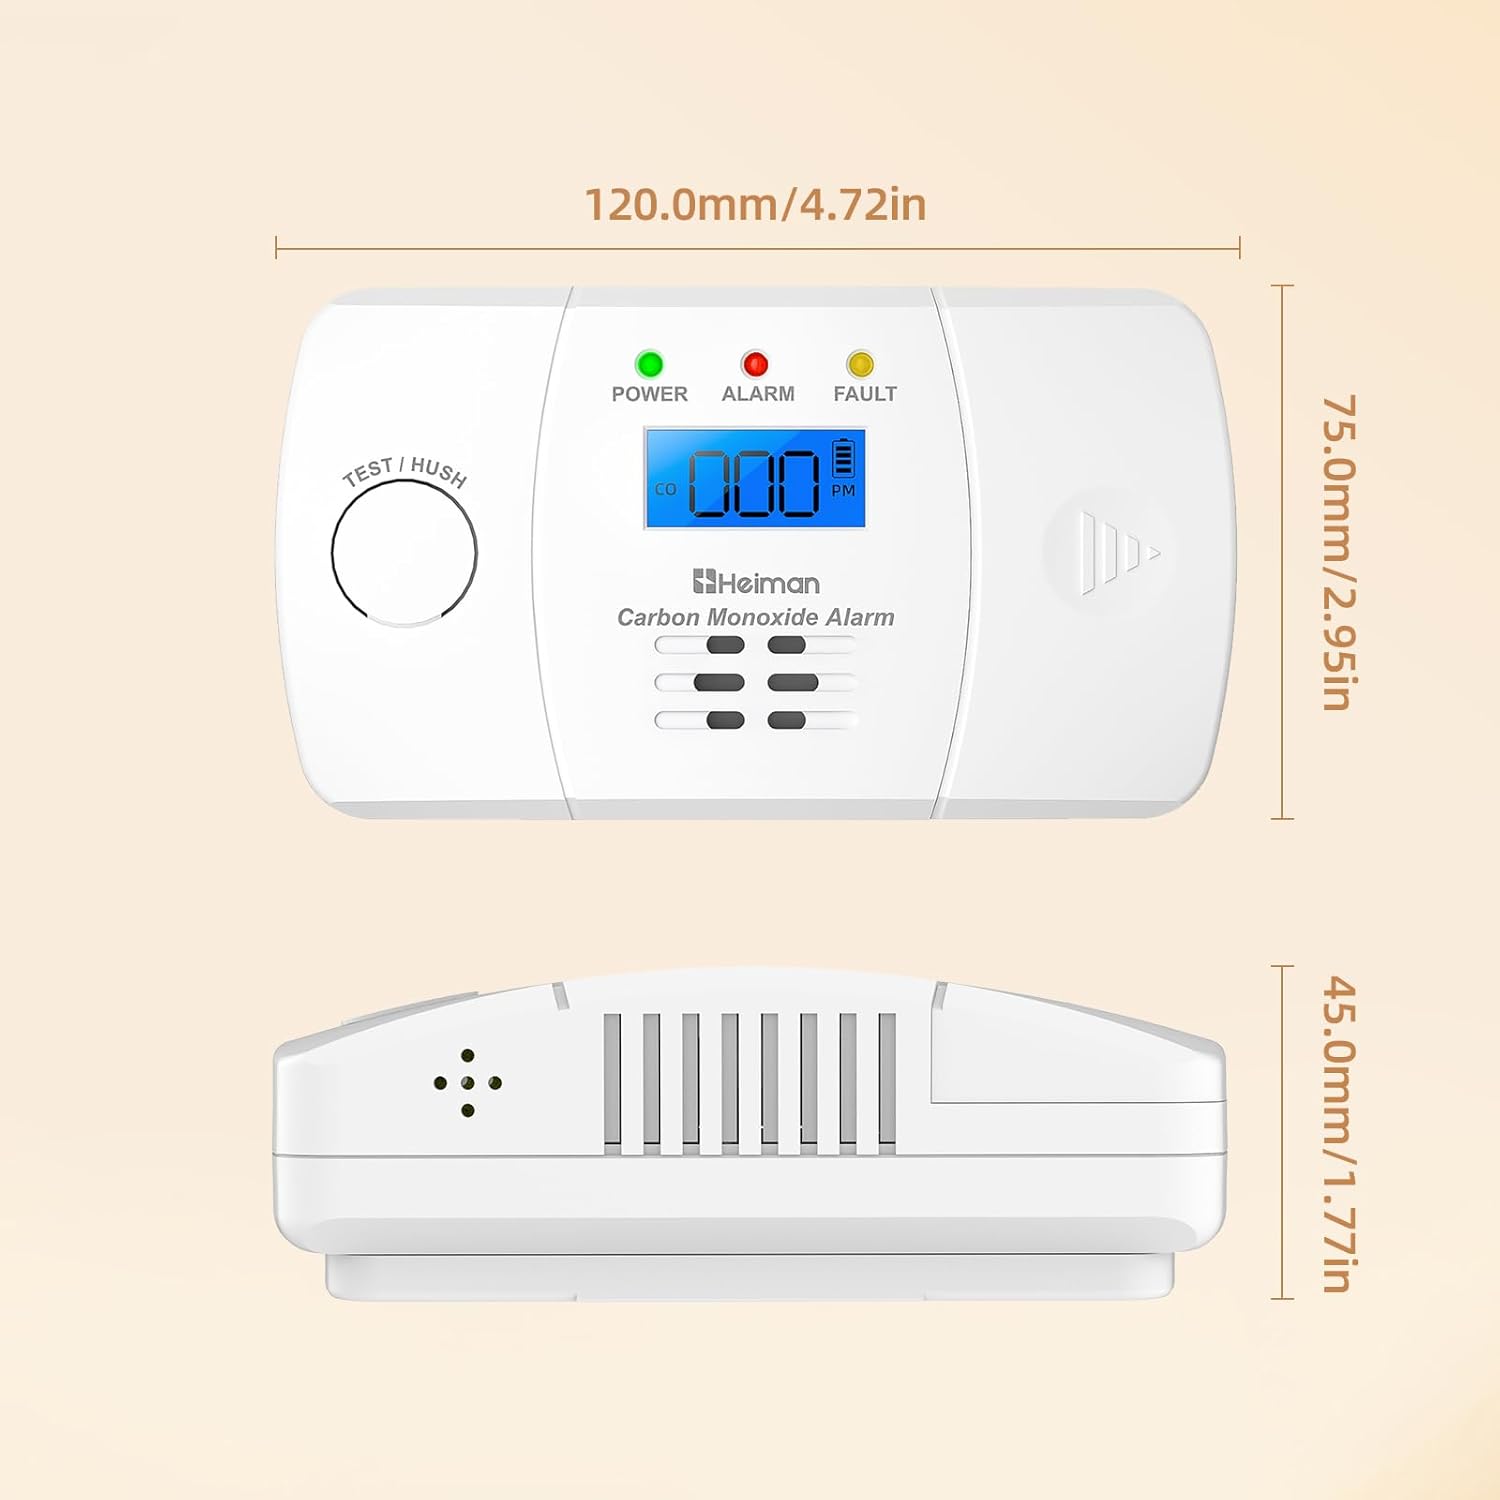
The HEIMAN Carbon Monoxide Detector features a clear LCD display, LED indicators, and a test/hush button for easy operation and status monitoring.
4.1 Components
- LED Indicators: Green (Power), Yellow (Fault), Red (Alarm).
- LCD Digital Display: Shows CO concentration in PPM and battery status.
- Horn: Emits an audible alarm signal (approx. 85 dB).
- Test/Hush Button: Used to test the alarm function and silence false alarms.

4.2 Dimensions
The detector has compact dimensions for versatile placement.
| Dimension | Value |
|---|---|
| Length | 120 mm (4.72 in) |
| Width | 75 mm (2.95 in) |
| Height | 45 mm (1.77 in) |
5. Installation
The HEIMAN Carbon Monoxide Detector can be easily installed either by wall-mounting or by placing it on a flat surface.
5.1 Choosing a Location
For optimal protection, install a CO detector on each level of your home, especially near sleeping areas and living spaces.
- Install at least 1.5 meters (5 feet) from fuel-burning appliances to avoid false alarms from initial startup.
- Do not install in garages, kitchens, furnace rooms, or bathrooms.
- Avoid areas with high humidity, dust, or grease.
- Do not install in direct sunlight or areas subject to drafts from windows, doors, or vents.
- For wall mounting, install at eye level or higher, but not directly on the ceiling.

5.2 Wall Mounting
- Mark the desired mounting location on the wall.
- Drill two holes at the marked spots.
- Insert the wall plugs into the drilled holes.
- Secure the mounting bracket (if applicable, or the detector directly if it has keyholes) to the wall using the provided screws.
- Attach the detector to the mounted screws/bracket.
6. Setup
6.1 Battery Installation
- Open the battery compartment cover on the back of the detector.
- Insert the two 1.5V AA batteries, ensuring correct polarity (+ and -).
- Close the battery compartment cover securely.
- The detector will perform a self-test upon battery insertion, indicated by LED flashes and a short beep.
7. Operating Instructions
7.1 Normal Operation
In normal operation, the green POWER LED will flash approximately once every 30 seconds, and the LCD display will show "0 PPM" or the current CO concentration if any is detected.
7.2 Testing the Alarm
It is recommended to test the alarm weekly.
- Press and hold the "TEST / HUSH" button for a few seconds.
- The alarm will sound, and the red ALARM LED will flash. The LCD display will show a test value.
- Release the button. The alarm will stop, and the detector will return to normal operation.
7.3 Alarm Conditions
The detector is designed to alarm at specific CO concentrations and durations as per EN 50291 standard:
- 30 PPM: Alarm within 120 minutes
- 50 PPM: Alarm within 60 to 90 minutes
- 100 PPM: Alarm within 10 to 40 minutes
- 300 PPM: Alarm within 3 minutes
When CO is detected at dangerous levels, the red ALARM LED will flash rapidly, and the horn will emit a loud intermittent sound (4 short beeps, pause, 4 short beeps). The LCD display will show the detected CO concentration.
7.4 Silencing the Alarm (Hush Feature)
To silence a nuisance alarm (e.g., from temporary high CO levels during cooking), press the "TEST / HUSH" button. The alarm will be silenced for a short period (e.g., 5-10 minutes), after which it will re-evaluate the CO level. If CO levels remain high, the alarm will reactivate.
8. Alarms and Indicators
| Indicator | Status | Meaning | Action |
|---|---|---|---|
| Green LED | Flashing every 30s | Normal operation | None |
| Red LED + Alarm | Rapid flashing + 4 beeps | CO detected | Evacuate, ventilate, call emergency services |
| Yellow LED | Flashing | Fault | Refer to troubleshooting |
| LCD Display | "Lb" | Low Battery | Replace batteries immediately |
| LCD Display | "Err" | Sensor Error | Replace unit |
9. Maintenance
Regular maintenance ensures the optimal performance and longevity of your CO detector.
- Weekly: Test the alarm using the "TEST / HUSH" button.
- Monthly: Vacuum or wipe the detector's exterior to remove dust and debris. Do not use cleaning agents or solvents.
- Annually: Check the battery expiration date and replace if necessary, even if the low battery warning has not appeared.
- Sensor Life: The CO sensor has a typical lifespan of 10 years. The unit will indicate an end-of-life warning when replacement is due.
10. Troubleshooting
| Problem | Possible Cause | Solution |
|---|---|---|
| Alarm sounds frequently without apparent CO | Nuisance alarm from temporary CO source (e.g., cooking fumes, car exhaust near open window) | Press "HUSH" button. Ventilate the area. Relocate detector if problem persists. |
| Yellow FAULT LED flashing | Internal fault or sensor error | Press the "TEST / HUSH" button. If fault persists, replace the unit. |
| LCD shows "Lb" | Low battery | Replace both AA batteries immediately. |
| No display or power | Batteries incorrectly installed or dead | Check battery polarity or replace batteries. |
| Alarm does not sound during test | Unit malfunction | Replace the unit. |
11. Specifications
| Feature | Specification |
|---|---|
| Model | 722ESY |
| Power Source | 2 x 1.5V AA Batteries |
| Sensor Type | Electrochemical CO Sensor |
| Alarm Volume | ≥ 85 dB at 1 meter |
| Operating Temperature | -10°C to +40°C (14°F to 104°F) |
| Operating Humidity | 20% - 95% RH (non-condensing) |
| Dimensions (L x W x H) | 120 x 75 x 45 mm (4.72 x 2.95 x 1.77 inches) |
| Weight | 155 grams |
| Certification | EN 50291 |
| Sensor Lifetime | 10 years |
| Battery Lifetime | 5 years (replaceable) |
12. Warranty and Support
HEIMAN products are designed for reliability and performance. For warranty information and technical support, please refer to the contact details provided on the product packaging or visit the official HEIMAN website.
Keep your purchase receipt as proof of purchase for warranty claims.


