
RovyVon E200u-K
Contents
RovyVon E200U EDC Flashlight
User Manual
Introduction
The RovyVon E200U is a versatile Everyday Carry (EDC) flashlight designed for various lighting needs. It features dual front emitters providing up to 1650 lumens of bright light, along with three side emitters offering 270nm and 390-400nm UV light. This compact and powerful flashlight is USB-C rechargeable and includes a magnetic tail base and tripod hole for enhanced utility.

Image: The RovyVon E200U EDC Flashlight, showcasing its compact design and dual front emitters.
Product Features
- High Lumens Output: Features 2 front emitters with a maximum output of 1650 lumens (Turbo mode), suitable for illuminating large areas.
- Versatile Lighting Modes: Front modes include Low, Medium, High, and Turbo. Dedicated fast access for Moonlight and Strobe modes.
- UV Sidelights: Equipped with 3 side emitters (270nm/390-400nm) for specialized applications such as checking tableware, toiletries, or other EDC items.
- Ramping Button Control: Long-press the button to smoothly adjust brightness from dim to bright, releasing to set the desired level.
- USB-C Rechargeable: Fast charging capability with a 1400 mAh rechargeable battery for extended use.
- Magnetic Tail Base: Allows the flashlight to attach to iron surfaces, providing hands-free operation for tasks like repairs or camping.
- Tripod Hole: Integrated tripod hole offers additional mounting options for stable illumination.
What's in the Box
Your RovyVon E200U package includes the following components:
- RovyVon E200U EDC Flashlight
- Quartz Protect Case
- Pocket Clip
- Lanyard
- USB B-C Cable
- Warranty Card
- User Manual (this document)
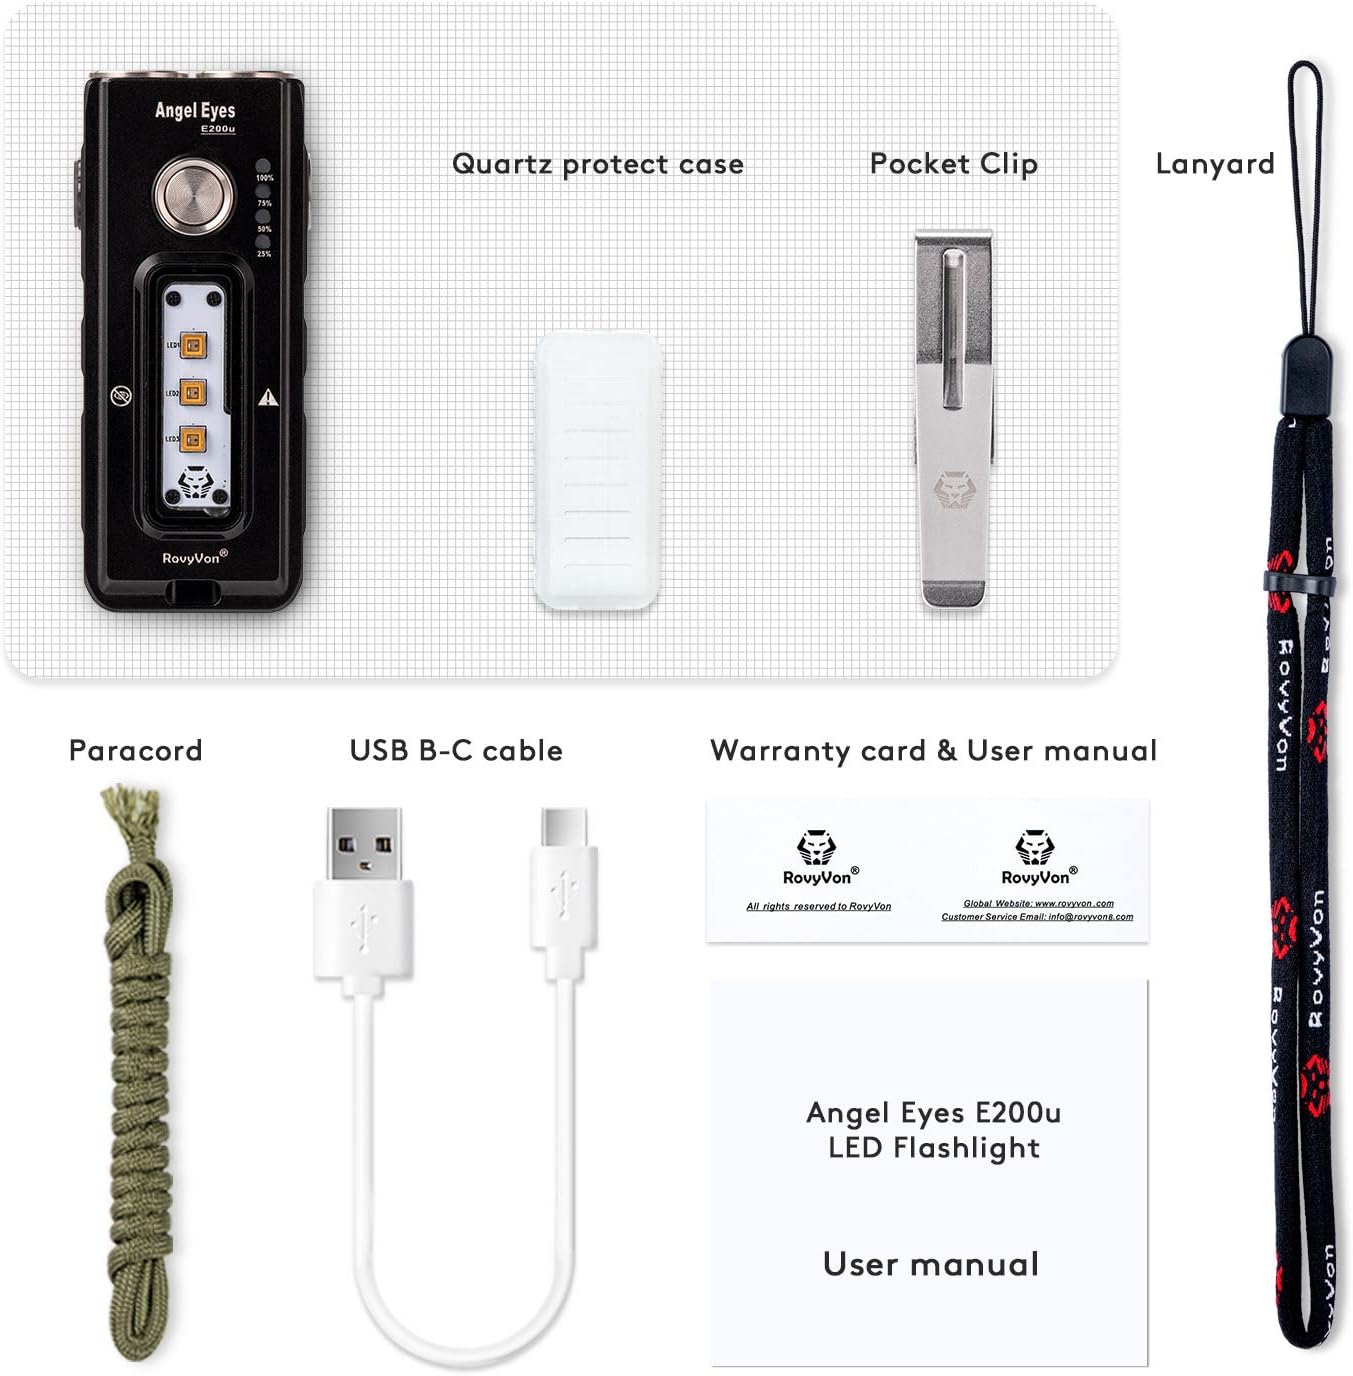
Image: All components included in the RovyVon E200U package, laid out for clear identification.
Setup
Charging the Flashlight
The RovyVon E200U features a built-in 1400 mAh rechargeable battery and supports USB-C fast charging. To charge the device:
- Locate the USB-C charging port on the flashlight.
- Connect the provided USB B-C cable to the flashlight's USB-C port.
- Plug the other end of the cable into a compatible USB power source (e.g., wall adapter, computer USB port).
- The charging indicator lights will show the charging progress. A full charge takes approximately 48 minutes.

Image: The RovyVon E200U connected via USB-C cable for fast charging, showing charging time estimates.
Attaching the Pocket Clip and Lanyard
The E200U comes with a two-way pocket clip and a lanyard for convenient carrying options. Follow these steps for installation:
Video: Demonstrates the installation and removal of the pocket clip and lanyard for the RovyVon E200U flashlight.
- Pocket Clip Installation: Align the two-way pocket clip with the slot on the flashlight body. Use your thumb to press down firmly on the metal sheet inside the clip, then use your index finger to press down firmly on the top of the clip until it securely snaps into place. Ensure the clip is fixed securely.
- Lanyard Attachment: Thread the thin loop of the lanyard through the designated lanyard hole on the flashlight. Pass the main body of the lanyard through the loop to secure it.

Image: The RovyVon E200U flashlight with its pocket clip attached, demonstrating how it can be clipped to a hat brim.
Operating Instructions
Front Light Operation (White Light)
- Turn On/Off: Press the main button once to turn on the light to the last used mode. Press again to turn off.
- Mode Cycling (Low-Med-High-Turbo): When the light is on, single-click the button to cycle through Low, Medium, High, and Turbo modes.
- Ramping Brightness: From any mode, long-press the button to smoothly ramp the brightness up or down. Release the button when the desired brightness level is reached.
- Moonlight Mode: From off, long-press the button to directly access Moonlight mode.
- Strobe Mode: From off, double-click the button to activate Strobe mode.
Side UV Sidelights Operation
The E200U features three side emitters for UV light, with wavelengths of 270nm and 390-400nm. These are useful for various inspection tasks.
- Activate UV Light: Refer to the product's specific button sequence for activating the side UV lights. Typically, this involves a different click pattern than the main light.
- Applications: The UV light can be used to inspect tableware, toiletries, or other items for cleanliness or authenticity.

Image: The RovyVon E200U demonstrating its UV sidelight function, illuminating a surface with purple light.
Magnetic Tail Base and Tripod Hole
The E200U is designed with practical features for hands-free use:
- Magnetic Tail Base: The powerful double magnet in the tail allows the flashlight to securely attach to any iron material, freeing your hands for various tasks.
- Tripod Hole: A standard tripod hole is included, enabling you to mount the flashlight on a tripod for stable, directional lighting.
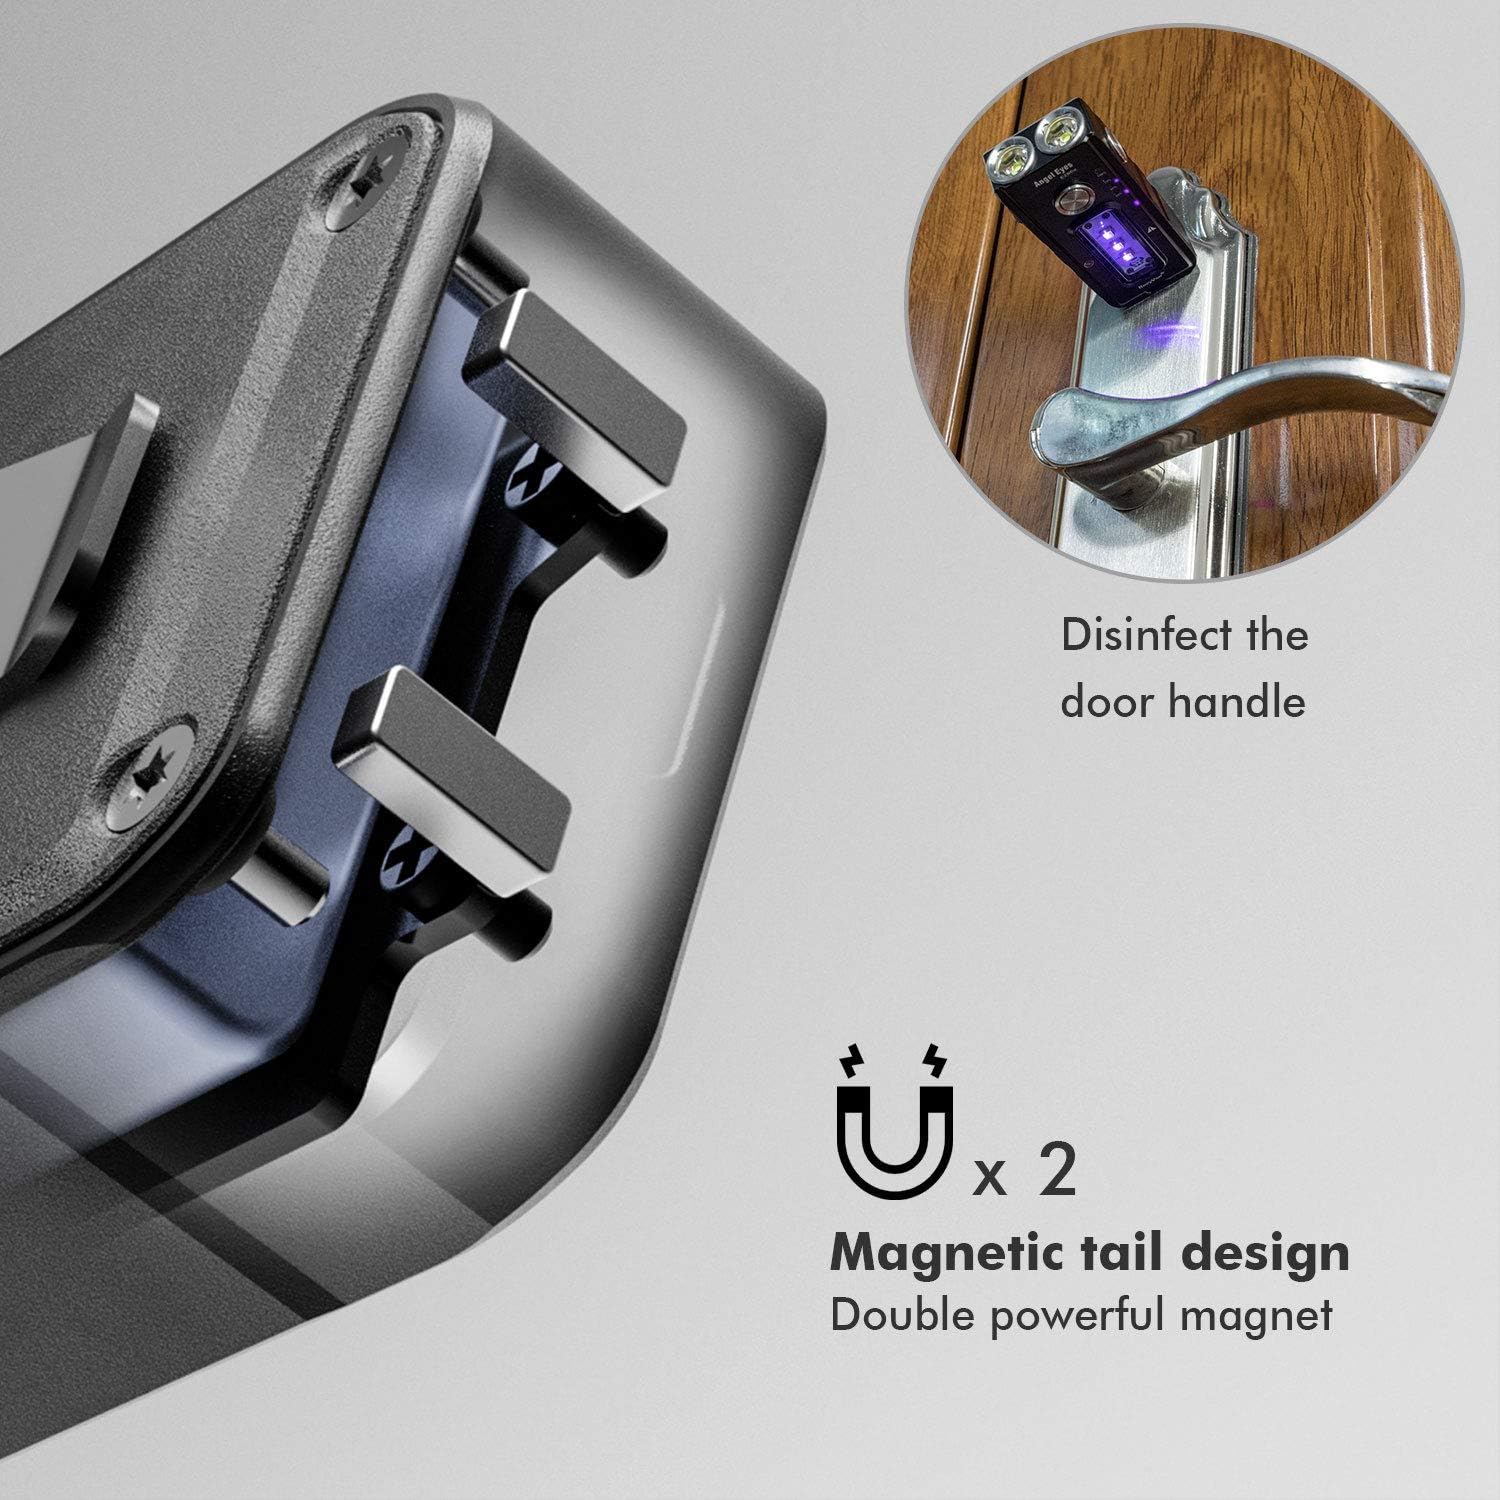
Image: Close-up of the RovyVon E200U's magnetic tail design, showing its ability to adhere to metal surfaces like a door handle.
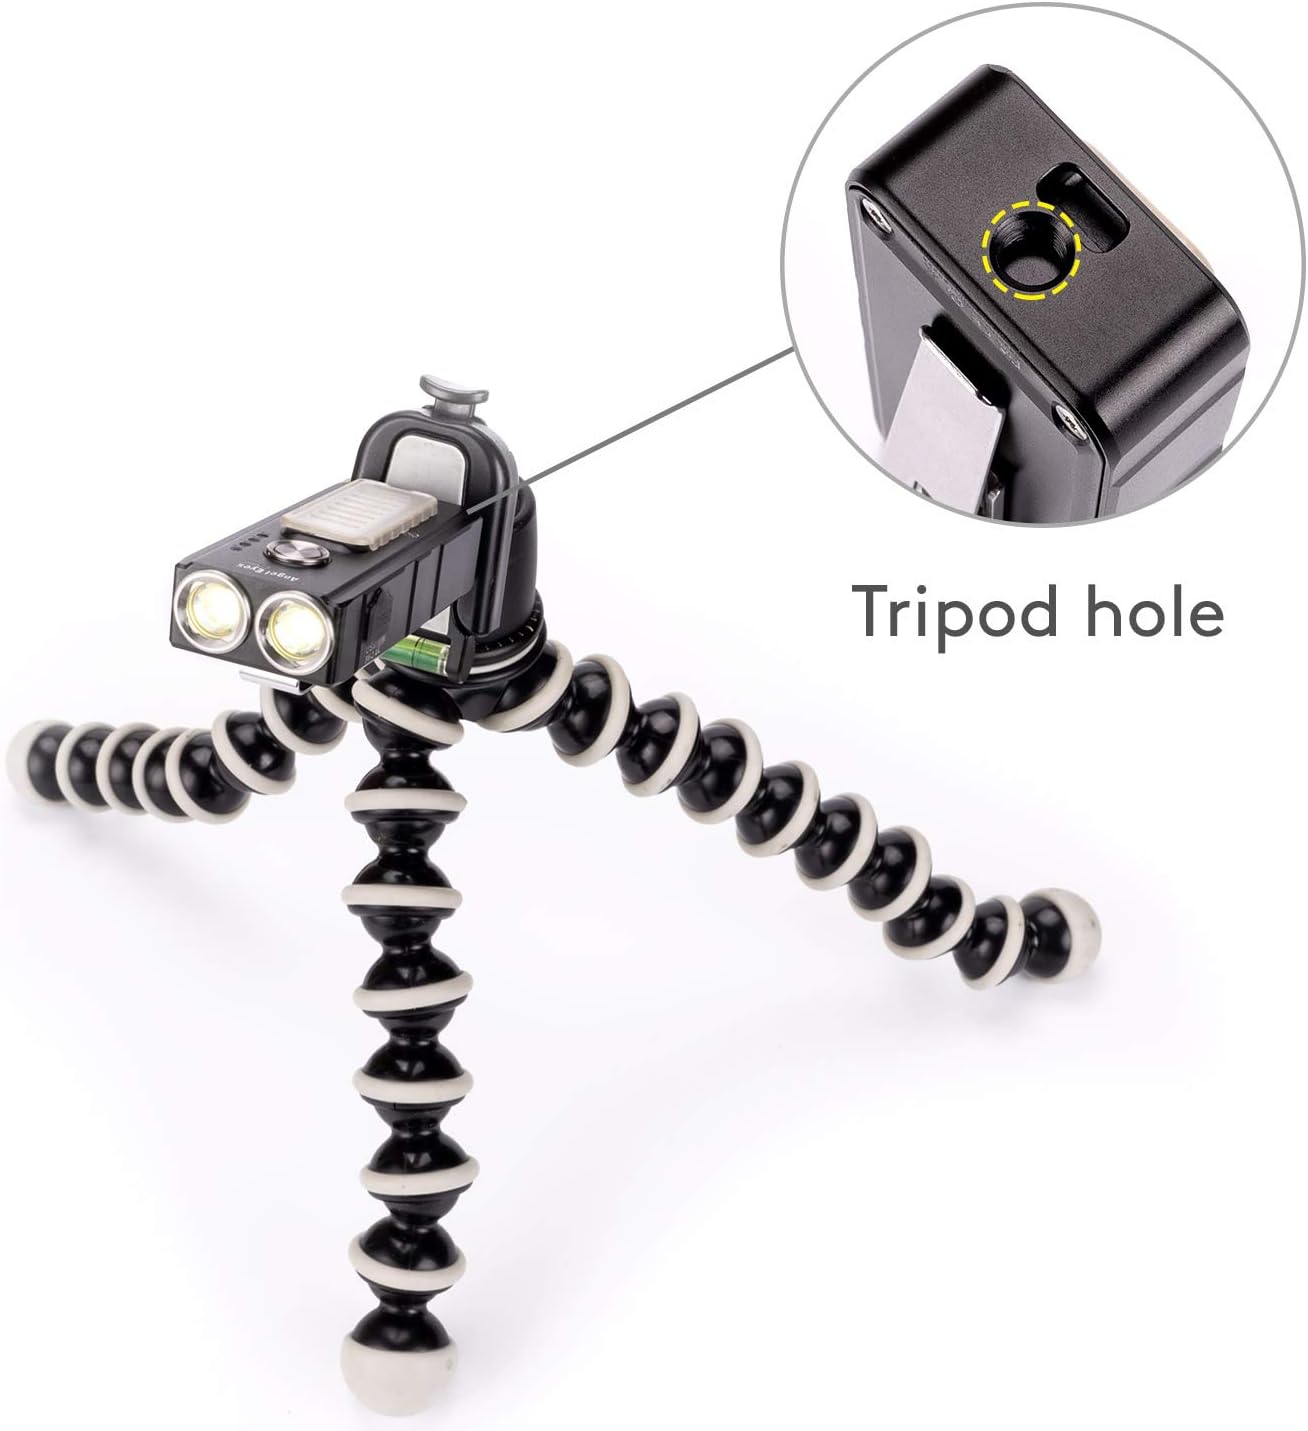
Image: The RovyVon E200U mounted on a flexible tripod, highlighting the integrated tripod hole for stable positioning.
Maintenance
To ensure the longevity and optimal performance of your RovyVon E200U flashlight, follow these maintenance guidelines:
- Cleaning: Use a soft, damp cloth to clean the exterior of the flashlight. Avoid using abrasive cleaners or solvents that could damage the finish or internal components.
- Battery Care: Charge the flashlight regularly, even if not in frequent use, to maintain battery health. Avoid fully discharging the battery for extended periods.
- Storage: Store the flashlight in a cool, dry place away from direct sunlight and extreme temperatures.
- Lens Care: Keep the lenses clean to ensure maximum light output. Use a lens cleaning cloth or soft microfiber cloth to gently wipe away dust or smudges.
Troubleshooting
If you encounter issues with your RovyVon E200U flashlight, refer to the following common problems and solutions:
| Problem | Possible Cause | Solution |
|---|---|---|
| Flashlight does not turn on. | Low battery; improper button press; internal issue. | Charge the battery fully. Ensure correct button press sequence for activation. If problem persists, contact support. |
| Light output is dim or inconsistent. | Low battery; dirty lens; incorrect mode. | Recharge the flashlight. Clean the lens. Cycle through modes to ensure desired brightness is selected. |
| UV light is not effective. | Incorrect activation; specific wavelength limitations. | Ensure the UV light is activated correctly. Note that 390-400nm UV is for general inspection, while 270nm is for specific applications. Effectiveness may vary based on the material being inspected. |
| Flashlight gets warm during use. | Normal operation at high brightness levels. | This is normal, especially in Turbo mode. The flashlight has built-in thermal management. Reduce brightness if it becomes uncomfortably warm. |
Specifications
| Feature | Detail |
|---|---|
| Model | E200u-K |
| Brand | RovyVon |
| Light Source Type | LED |
| White Brightness (Max) | 1650 Lumens |
| UV Sidelight Wavelengths | 270nm, 390-400nm |
| Power Source | Battery Powered |
| Battery Type | 1 Lithium Polymer (included) |
| Rechargeable | Yes, USB-C |
| Material | Aluminum |
| Product Dimensions | 3.14"D x 1.33"W x 0.68"H |
| Item Weight | 2.89 Ounces |
| Water Resistance Level | Not Water Resistant |
Warranty and Support
RovyVon is committed to providing quality products and services. For any product questions, warranty claims, or support needs, please reach out to us. We prioritize innovation, originality, and quality in all our products.
Please refer to your warranty card included in the package for specific warranty terms and conditions. For direct support, you may visit the official RovyVon store or contact customer service through the details provided on the warranty card or product packaging.
Thank you for choosing RovyVon.
Documents and downloads
Ask a question about this manual
Ask about setup, troubleshooting, compatibility, parts, safety, or missing instructions. Manuals+ will review the question and use this page’s manual context to help answer it.