1. Introduction
This manual provides detailed instructions for the installation, operation, and maintenance of your Oraymin LED Ceiling Light with Motion Detector. Please read this manual thoroughly before installation and retain it for future reference. This ceiling light features an integrated microwave motion sensor, providing automatic illumination and energy efficiency for various indoor and covered outdoor applications.

Image 1.1: Oraymin LED Ceiling Light with Motion Detector, illuminated.
2. Safety Instructions
- Ensure the power supply is disconnected before installation, maintenance, or cleaning.
- Installation should be performed by a qualified electrician in accordance with local wiring regulations.
- Do not modify the product in any way. Unauthorized modifications may lead to electric shock, fire, or product damage.
- This product is designed for indoor and covered outdoor use (IP54 rated). Do not expose to direct water jets or prolonged heavy rain.
- The light source of this luminaire is not replaceable; when the light source reaches its end of life, the entire luminaire shall be replaced.
- This luminaire is Class II, meaning it does not require an earth wire connection.
3. Product Overview
3.1 Key Features
- Integrated Microwave Motion Sensor: 360° detection angle, 2-8m detection range, 160° beam angle. Automatically turns on when motion is detected and off after a set delay.
- Energy Efficient: 18W LED, 1800 lumens, equivalent to a 150W incandescent bulb, saving up to 85% energy.
- Durable Construction: Made from PC material, lightweight, flame-retardant, shock-resistant.
- IP54 Waterproof Rating: Suitable for damp locations such as bathrooms, hallways, stairwells, garages, balconies, and cellars.
- Long Lifespan: Approximately 30,000 hours.
- Flicker-Free Illumination: Designed to protect eyes by providing stable light output.

Image 3.1: Illustrates the convenience of a motion sensor light compared to a standard light in a dark environment.

Image 3.2: Demonstrates the flicker-free operation of the Oraymin LED ceiling light, designed for eye protection, compared to lights that may flicker.

Image 3.3: Indicates the product's long operational lifespan of 30,000 hours.
3.2 Dimensions and Application Areas
The Oraymin LED Ceiling Light has a diameter of 25 cm (9.84 inches) and a height of 6.45 cm (2.54 inches). Its IP54 rating makes it suitable for various environments.

Image 3.4: Diagram showing the physical dimensions (diameter 25cm, height 6.45cm) and the detection characteristics (360° detection, 160° beam angle, 2-8m induction range, 3-5m installation height).

Image 3.5: Examples of suitable application areas including bathrooms, garages, entrances, and hallways, highlighting the versatility of the IP54 rated light.
4. Installation
Before beginning installation, ensure the main power supply is switched off at the circuit breaker to prevent electric shock.
- Prepare Mounting Surface: Choose a suitable location on the ceiling. The recommended installation height is 3-5 meters for optimal sensor performance.
- Mount the Bracket: Secure the mounting bracket to the ceiling using appropriate screws and anchors (not included, typically).
- Adjust Sensor Settings: Crucially, adjust the sensor settings (detection distance, hold time, twilight effect) using the small switches located inside the luminaire BEFORE mounting the main body. Refer to Section 5 for detailed instructions on sensor adjustment. The settings are also printed on the inside cover of the sensor compartment.
- Wire Connection: Connect the live (L) and neutral (N) wires from your ceiling to the corresponding terminals on the luminaire. This is a Class II appliance, so no earth wire connection is required.
- Attach Luminaire Body: Carefully align the luminaire body with the mounted bracket. Secure it by pressing the two outer "pins" or clips until it locks into place.
- Restore Power: Once the luminaire is securely installed and wired, restore power at the circuit breaker.
- Test Functionality: Test the motion sensor and light operation according to your chosen settings.

Image 4.1: Diagram illustrating the adjustable sensor settings: Sensing Range, Hold Time, and Daylight Sensor. These settings must be configured before final installation.
5. Operating Instructions: Sensor Settings
The Oraymin LED Ceiling Light features adjustable settings for its microwave motion sensor. These settings are configured via small switches located within the luminaire body. It is recommended to set these before final installation.
5.1 Sensing Range (Detection Distance)
This setting determines how far the sensor will detect motion. Options typically include:
- 25% (2m): Shortest detection range.
- 50% (4m): Medium detection range (default setting).
- 75% (6m): Longer detection range.
- 100% (8m): Maximum detection range.
5.2 Hold Time (Light Duration)
This setting determines how long the light remains on after motion is no longer detected. Options typically include:
- 5 seconds
- 30 seconds: (default setting)
- 60 seconds
- 300 seconds (5 minutes)
5.3 Daylight Sensor (Twilight Effect)
This setting controls the ambient light level at which the motion sensor becomes active. If there is sufficient ambient light, the sensor will not activate the light, saving energy.
- 2 Lux: Light will only activate in very dark conditions.
- 10 Lux: Light will activate in dim conditions.
- 50 Lux: Light will activate in moderately dim conditions (default setting).
- Disable: Light will activate regardless of ambient light level (motion sensor always active).

Image 5.1: Visual representation of the microwave induction auto ON/OFF work mode and the adjustable settings for range, duration, and daylight sensitivity.
6. Maintenance
- Cleaning: Disconnect power before cleaning. Wipe the luminaire with a soft, dry, or slightly damp cloth. Do not use abrasive cleaners or solvents.
- Inspection: Periodically check for any signs of damage or loose connections. If any issues are found, disconnect power and consult a qualified electrician.
- No user-serviceable parts inside. Do not attempt to open or repair the luminaire.
7. Troubleshooting
| Problem | Possible Cause | Solution |
|---|---|---|
| Light does not turn on. | No power supply. Daylight sensor setting too high. Motion not detected. | Check circuit breaker. Adjust daylight sensor to a lower Lux value or 'Disable'. Ensure motion is within detection range and sensor is not obstructed. |
| Light stays on continuously. | Continuous motion in detection area. Hold time set too long. Sensor malfunction. | Ensure no constant movement. Adjust sensing range. Reduce hold time setting. Contact customer support if problem persists. |
| Light turns on unexpectedly. | Sensor too sensitive or range too wide. Interference from other devices. | Reduce sensing range or sensitivity. Ensure no other 5G microwave devices are in close proximity. |
| Light flickers. | Unstable power supply. Loose wiring connection. | Consult an electrician to check power supply stability. Disconnect power and check wiring connections. |
8. Specifications
| Parameter | Value |
|---|---|
| Brand | Oraymin |
| Model Number | QC-C250Y-MR |
| Power Consumption | 18 Watts |
| Luminous Flux | 1800 lumens |
| Color Temperature | 4000K (Neutral White) |
| Voltage | 240 Volts (AC) |
| Material | Polycarbonate (PC) |
| Dimensions (L x W x H) | 25 x 25 x 6.45 cm |
| Weight | 590 grams |
| IP Rating | IP54 |
| Detection Angle | 360° |
| Detection Range | 2-8 meters |
| Beam Angle | 160° |
| Lifespan | 30,000 hours |
| Energy Efficiency Class | F |
| Special Features | Light Sensor, Motion Detector, Adjustable Motion Sensor Distance, Adjustable Motion Sensor Timer, Adjustable Light Sensitivity |
| Usage Areas | Hallway, Staircase, Warehouse, Garage, Balcony, Cellar |
For detailed energy information, please refer to the EU energy label:
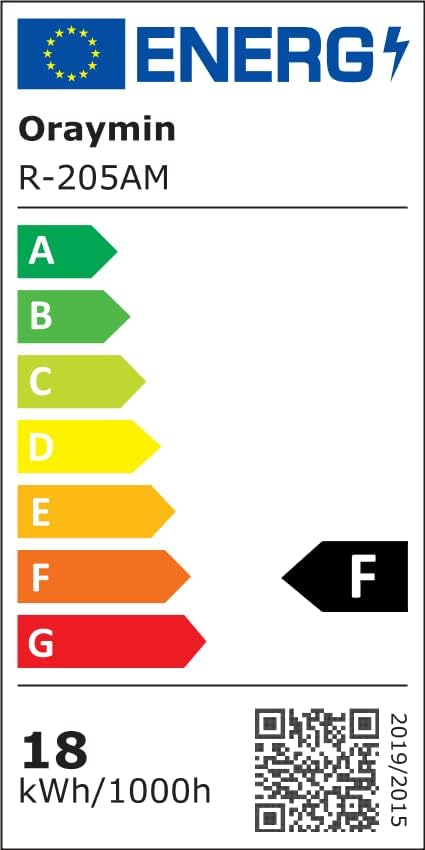
Image 8.1: EU Energy Label for the Oraymin LED Ceiling Light, showing an energy efficiency class of F and 18 kWh/1000h consumption. More details can be found at eprel.ec.europa.eu/qr/1504293.
9. Warranty and Support
Information regarding specific warranty terms and conditions is not provided in the product details. For warranty claims or technical support, please contact your retailer or the Oraymin customer service directly. Keep your purchase receipt as proof of purchase.