
Introduction
Welcome to the world of robotics with your new Silverlit YCOO Program A Bot X! This gigantic programmable robot stands at an impressive 40cm tall and offers a dynamic play experience with multiple control methods and interactive features. Please read this manual carefully to ensure proper setup, operation, and maintenance of your robot.

Figure 1: The Program A Bot X robot alongside its retail packaging.
What's in the Box
Your Program A Bot X package should contain the following items:
- 1 x Program A Bot X Robot
- 1 x Full-Function Remote Control
- Instruction Manual (this document)
Setup
Battery Installation
The Program A Bot X requires batteries for both the robot and the remote control. Batteries are not included.
- Robot: Locate the battery compartment on the back of the robot. Use a screwdriver to open the compartment. Insert 4 x AA batteries, ensuring correct polarity (+/-). Close the compartment and secure with the screw.
- Remote Control: Locate the battery compartment on the back of the remote control. Use a screwdriver to open the compartment. Insert 2 x AAA batteries, ensuring correct polarity (+/-). Close the compartment and secure with the screw.
Note: Always use new batteries of the same type. Do not mix old and new batteries, or different types of batteries.
Initial Power On
Once batteries are installed:
- Turn on the robot using the power switch, usually located on its back or chest.
- Turn on the remote control using its power switch.
- The robot and remote should automatically pair. If not, refer to the troubleshooting section.
Operating the Robot
The Program A Bot X offers three primary modes of interaction: direct remote control, motion control, and programmable actions.
Remote Control Operation
Use the included remote control for full-function direct command over the robot's movements and actions.
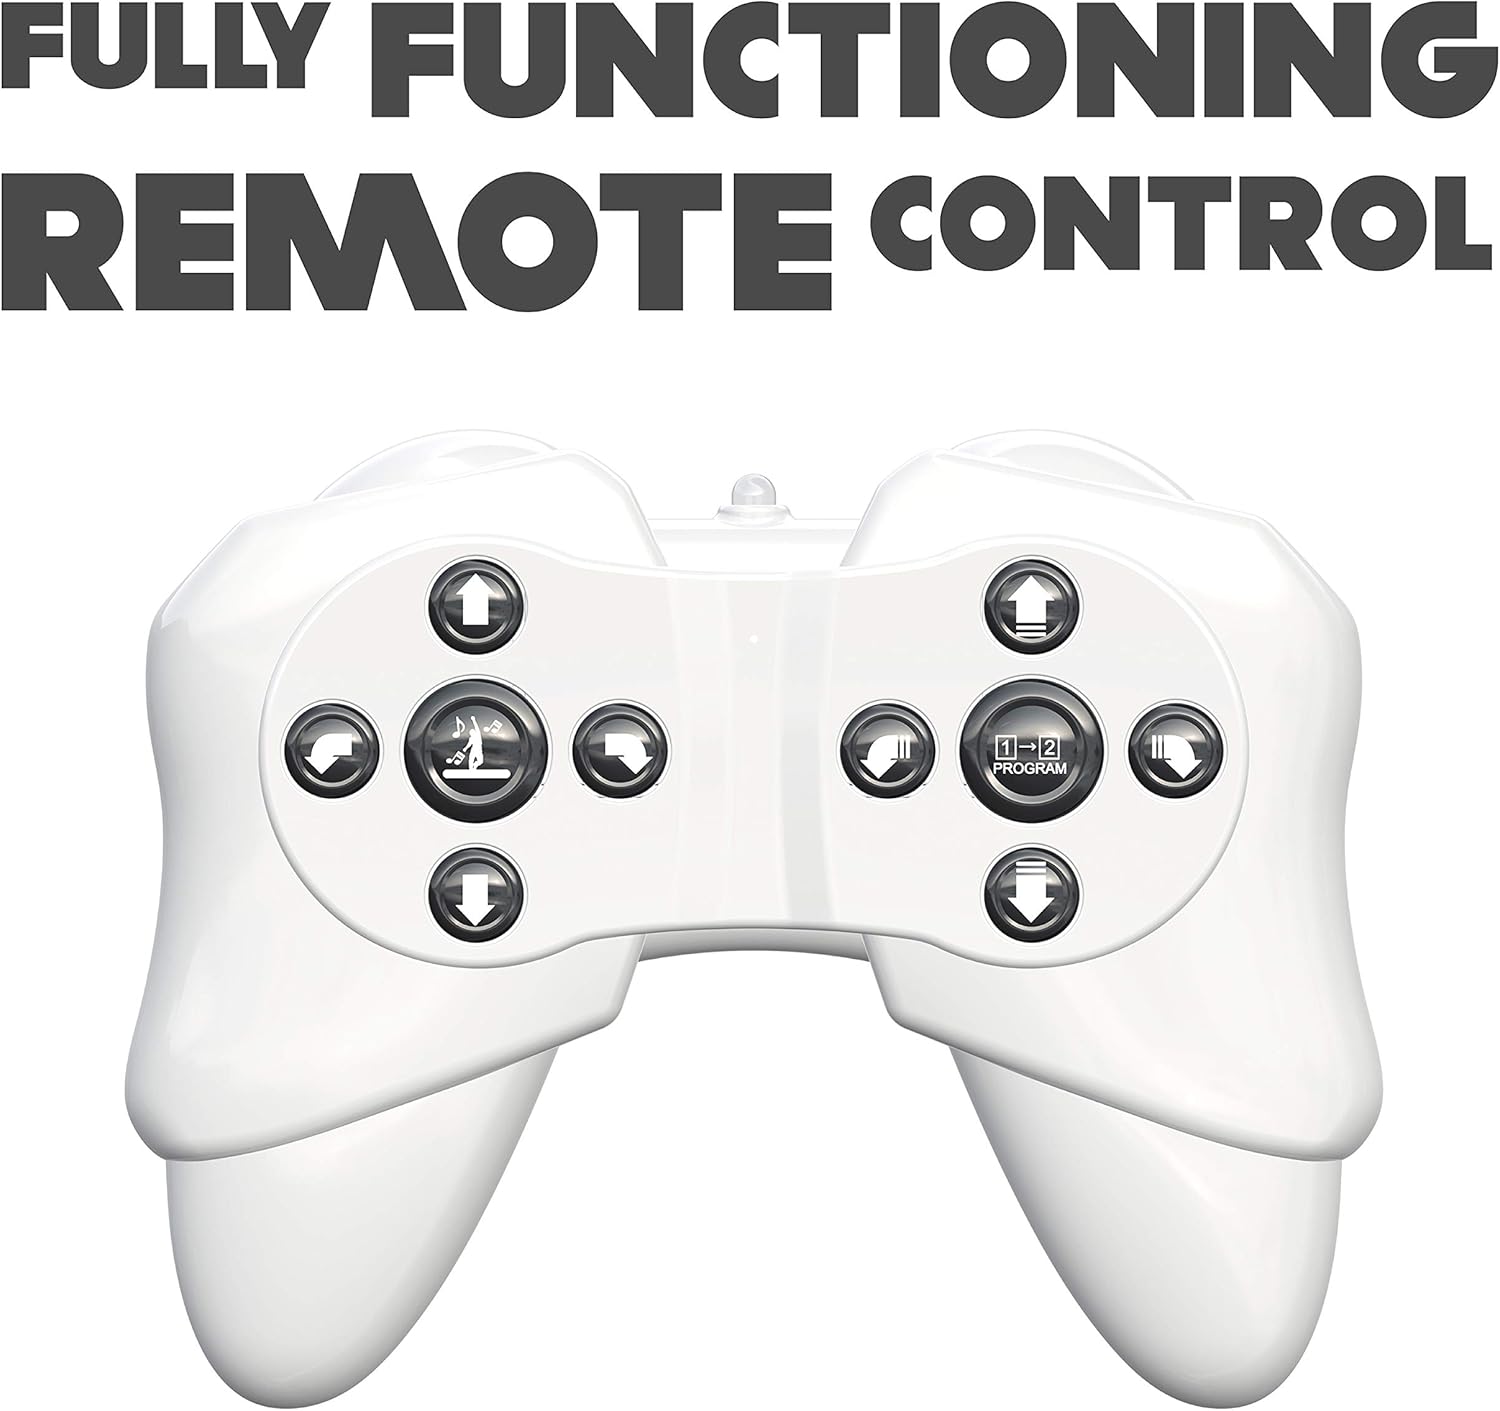
Figure 2: The robot's remote control, featuring various directional and action buttons.
- Directional Buttons: Control forward, backward, left, and right movements.
- Walk/Glide Button: Toggle between walking and gliding modes.
- Dance Button: Activate pre-programmed dance routines. The robot features swinging arms during dance.
- Program Button: Enter programming mode (see below).
Motion Control
Interact with the robot using simple hand gestures. The robot is equipped with sensors to detect specific hand movements.

Figure 3: Demonstrating the gesture control feature of the robot.
- Refer to the quick start guide for specific gesture commands.
- Ensure adequate lighting and clear space for optimal gesture recognition.
Programmable Actions
The Program A Bot X can store and execute a sequence of up to 48 commands.

Figure 4: The robot is programmable, allowing for sequences of up to 48 actions.
- Press the Program button on the remote control to enter programming mode.
- Input your desired sequence of movements and actions using the remote control buttons. Each button press will be recorded as one command.
- Press the Program button again to exit programming mode and save the sequence.
- Press the Play button (or equivalent, refer to remote diagram) to execute the programmed sequence.
Interactive Features
- Robotic Sound Effects: The robot produces various sound effects to enhance interaction.
- LED Eyes: The robot's eyes display different LED expressions, adding to its personality.

Figure 5: The robot features integrated robotic sound effects.

Figure 6: The robot's eyes illuminate with various LED patterns.
Maintenance
- Cleaning: Wipe the robot and remote control with a soft, dry cloth. Do not use harsh chemicals or abrasive cleaners.
- Battery Replacement: Replace batteries when the robot's performance diminishes or it stops responding. Always replace all batteries at once.
- Storage: When not in use for extended periods, remove all batteries from both the robot and the remote control to prevent leakage. Store in a cool, dry place away from direct sunlight.
Troubleshooting
| Problem | Possible Cause | Solution |
|---|---|---|
| Robot does not turn on. | Batteries are dead or incorrectly installed. | Check battery polarity. Replace with fresh batteries. |
| Robot does not respond to remote control. | Remote control batteries are low/dead; robot and remote are not paired; out of range. | Replace remote control batteries. Ensure robot and remote are turned on and within operating range. Re-pair if necessary (refer to initial power on steps). |
| Robot falls over frequently. | Uneven surface; complex programmed movements. | Operate on a flat, smooth surface. Simplify programmed sequences if they cause instability. |
| Gesture control is not working. | Insufficient lighting; incorrect gesture; obstruction of sensors. | Ensure adequate lighting. Perform gestures clearly as instructed. Check for any obstructions blocking the robot's sensors. |
Specifications
| Model Number | 88071 |
| Product Dimensions | 15.24 x 45.72 x 25.4 cm; 1.22 kg |
| Material Type | Plastic |
| Batteries Required | Yes (4 x AA for robot, 2 x AAA for remote) |
| Remote Control Included | Yes |
| Manufacturer Recommended Age | 15 years and up |
| Language | English, Italian, French, German, Spanish |
| Color | White |
Warranty and Support
For warranty information and customer support, please refer to the contact details provided on the product packaging or visit the official Silverlit website. Keep your purchase receipt as proof of purchase for any warranty claims.
