Introduction
This manual provides essential information for the installation, operation, and maintenance of your MSI MAG B550M Bazooka Gaming Motherboard. Designed for AMD Ryzen AM4 processors, this motherboard features DDR4 memory support, PCIe 4.0, SATA 6Gb/s, M.2 slots, and USB 3.2 Gen 1 connectivity. Please read these instructions carefully before proceeding with installation to ensure proper setup and functionality.
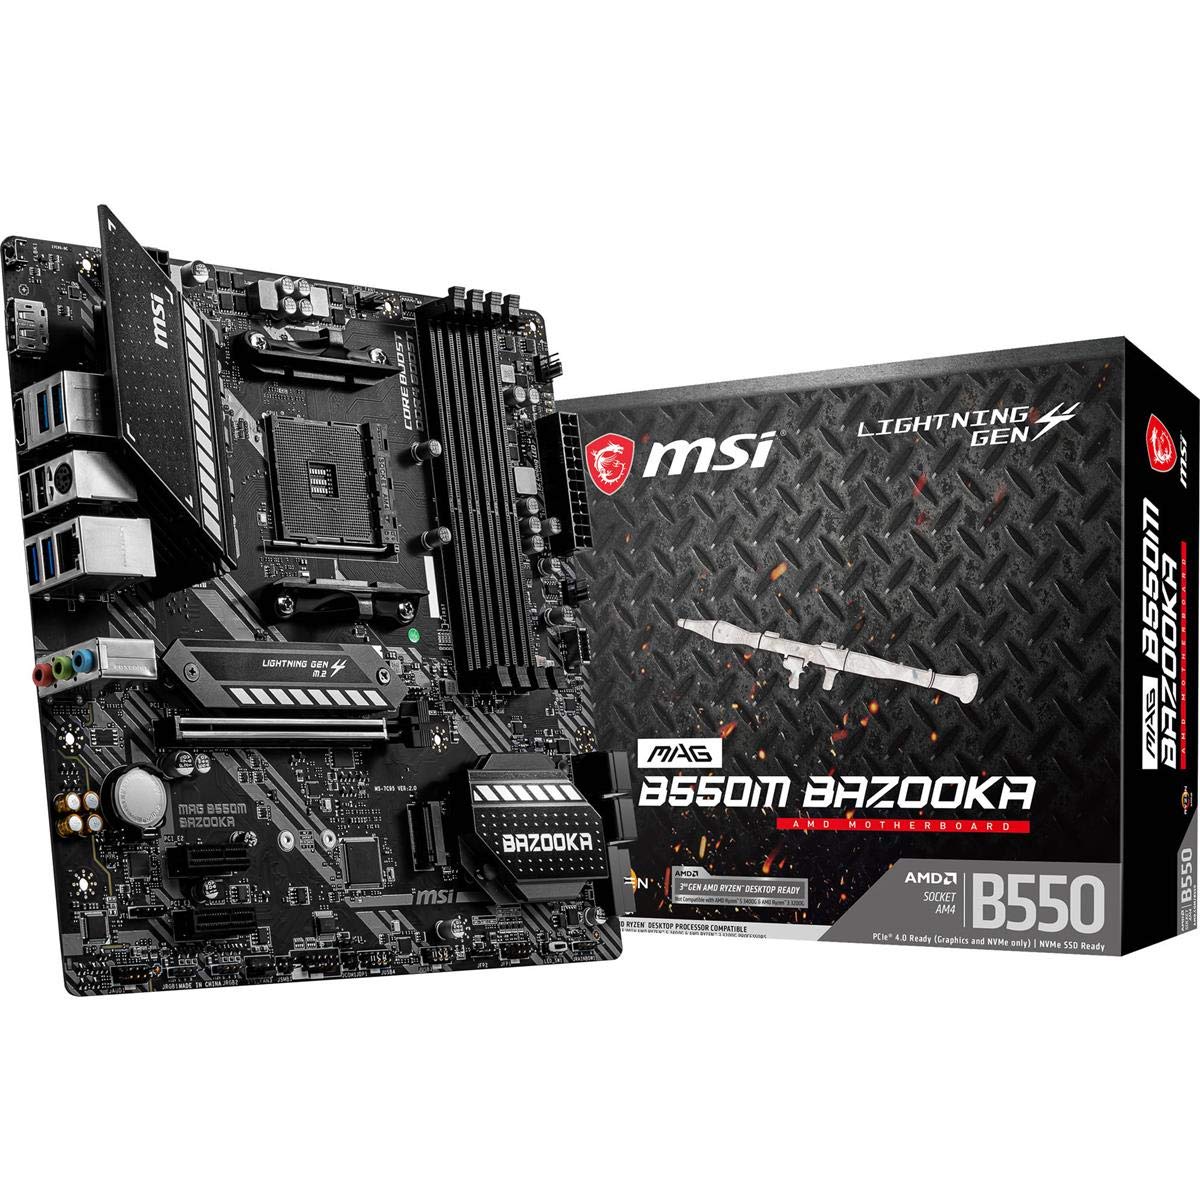
Figure 1: MSI MAG B550M Bazooka Gaming Motherboard. This image displays the overall layout of the motherboard, highlighting key components such as the CPU socket, RAM slots, and heatsinks.
Setup and Installation
Follow these steps for proper installation of your motherboard and its components.
1. M.2 Drive Installation
The motherboard features Lightning Gen 4 M.2 slots with M.2 Shield Frozr for optimal performance and cooling. Locate the M.2 slots on the motherboard. Remove the M.2 Shield Frozr heatsink by unscrewing the retaining screws. Insert your M.2 SSD into the slot, ensuring it is fully seated. Secure the SSD with the provided screw, then reattach the M.2 Shield Frozr heatsink.
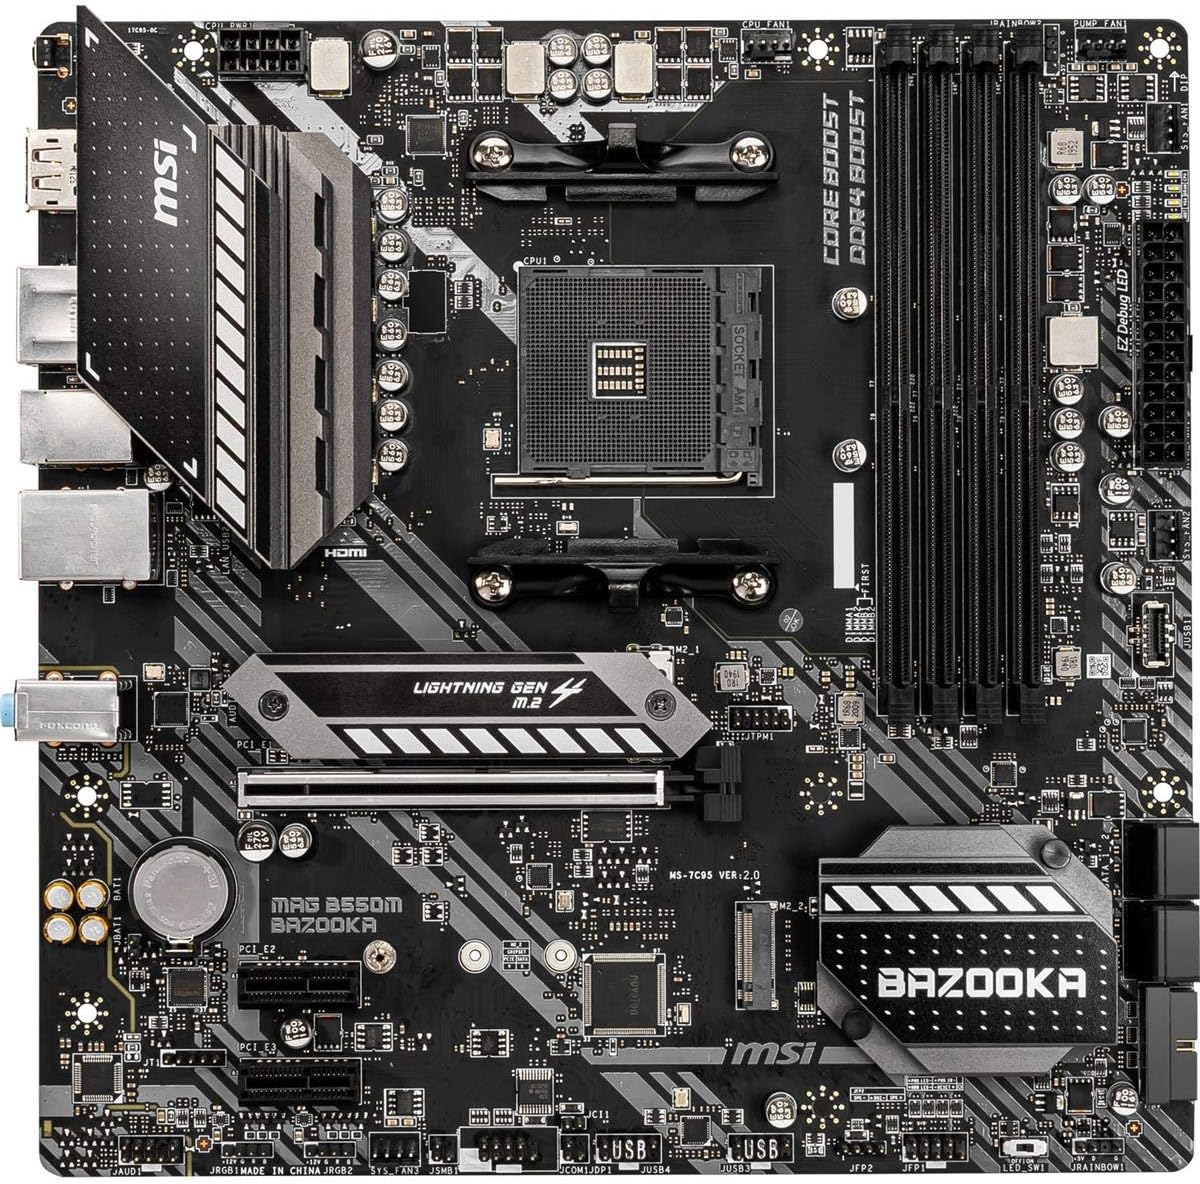
Figure 2: Top-down view of the MSI MAG B550M Bazooka Motherboard. This image provides a clear view of the M.2 slots, CPU socket, and RAM slots, aiding in component identification during installation.
2. RAM (DDR4 Memory) Installation
This motherboard supports dual channel DDR4 memory up to 128 GB (4400 MHz). Open the clips on both ends of the DIMM slots. Align the notch on the RAM module with the notch in the DIMM slot. Press down firmly on both ends of the RAM module until the clips snap into place. For dual-channel configuration, refer to your motherboard's manual for recommended slot pairing (typically A2 and B2 for two modules).
3. CPU Installation
The motherboard supports 3rd Gen AMD Ryzen processors and future AMD Ryzen processors with BIOS update. Lift the CPU retention lever on the AM4 socket. Carefully align the golden triangle on your AMD Ryzen CPU with the corresponding triangle on the CPU socket. Gently place the CPU into the socket without forcing it. Lower the retention lever to secure the CPU in place.
4. CPU Cooler Installation
If using an aftermarket cooler, follow its specific installation instructions. For stock AMD coolers, ensure the pre-applied thermal paste is intact. Align the cooler's mounting brackets with the holes around the CPU socket. Secure the cooler by tightening the screws or engaging the clips as per the cooler's design. Connect the CPU fan cable to the designated CPU_FAN header on the motherboard.
5. Motherboard Installation into PC Case
Carefully place the motherboard into your PC case, aligning the screw holes on the motherboard with the standoffs in the case. Ensure the I/O shield is properly seated in the case's rear opening. Secure the motherboard with the appropriate screws. Connect all necessary power cables (24-pin ATX, 8-pin CPU), front panel connectors, and other peripheral cables.
Operating Instructions
After successful hardware installation, power on your system. The motherboard's BIOS (Basic Input/Output System) allows for configuration of various system settings.
BIOS Settings
To access the BIOS, press the designated key (usually DEL or F2) during system startup. The MSI BIOS offers both an EZ Mode for quick adjustments and an Advanced Mode for detailed configurations. Key settings include:
- CPU Settings: Monitor CPU frequency, core ratio, and voltage.
- Memory Settings: Adjust DRAM frequency and enable XMP profiles for optimal RAM performance. By default, RAM may run at a lower speed; enable the correct XMP profile to achieve advertised speeds.
- Storage: Configure SATA ports and M.2 devices.
- Fan Info: Monitor fan speeds and temperatures, and adjust fan curves for cooling optimization.
- Boot Options: Set boot order priorities for your operating system drive.
- Overclocking (OC): Advanced users can fine-tune CPU and memory settings for enhanced performance.
- M-Flash: Update the BIOS using a USB drive. The Flash BIOS Button allows BIOS flashing even without a CPU or memory installed.
Maintenance
Regular maintenance helps ensure the longevity and optimal performance of your motherboard.
- Dust Removal: Periodically clean dust from the motherboard and cooling components using compressed air. Ensure the system is powered off and unplugged before cleaning.
- BIOS Updates: Keep your BIOS updated to the latest version to ensure compatibility with new hardware and improve system stability. Check the MSI website for updates.
- Cable Management: Ensure all cables are neatly routed to promote better airflow and prevent interference.
Troubleshooting
If you encounter issues, consider the following common troubleshooting steps:
- No Display: Check all power connections, ensure the graphics card is properly seated, and verify monitor cables. Try reseating RAM modules.
- System Instability: Ensure all drivers are up to date. Check CPU and GPU temperatures. Verify RAM stability and settings in BIOS.
- Boot Issues: Check boot order in BIOS. Ensure your operating system drive is detected. Use the EZ Debug LED indicators on the motherboard to identify problematic components (CPU, DRAM, VGA, BOOT).
- Peripheral Detection: Ensure USB devices are properly connected. Check BIOS settings for USB controller configuration.
Specifications
| Feature | Specification |
|---|---|
| Brand | MSI |
| Model Name | MAG B550M BAZOOKA |
| CPU Socket | Socket AM4 |
| Compatible Processors | AMD 3rd Generation Ryzen |
| Chipset Type | AMD B550 |
| RAM Memory Technology | DDR4 SDRAM |
| Memory Clock Speed | 4400 MHz |
| Memory Storage Capacity | 128 GB |
| Product Dimensions | 9.6 x 9.6 x 1.5 inches |
| Item Weight | 2.8 pounds |
| Operating System Support | Windows 10 64-bit |
Warranty
For detailed warranty information regarding your MSI MAG B550M Bazooka Gaming Motherboard, please refer to the official MSI website or the warranty card included with your product. Warranty terms and conditions may vary by region and retailer.
Support
For further assistance, technical support, or to download the latest drivers and BIOS updates, please visit the official MSI support website:
You may also contact MSI customer service directly for personalized support.


