Introduction
Welcome to your JOYACCESS 1080P Webcam. This manual provides detailed instructions for setting up, operating, and maintaining your webcam to ensure optimal performance for video conferencing, calling, gaming, and online learning.
Key Features
- Webcam with Built-in Digital Stereo Microphone: Picks up your voice clearly from up to 15 feet away.
- Full HD 1080P Glass Lens: Delivers crisp images and crystal-clear video at a fluid 30 frames per second.
- Automatic Low Light Correction and HDR Technology: Auto-adjusts color and brightness for natural lighting even in dim conditions.
- Plug and Play USB 2.0 Connectivity: Connects directly to your PC without the need for driver installation.
- 105° Wide View Angle: Accommodates more participants in video calls, reducing the need for frequent camera adjustments.
- High Compatibility: Compatible with Windows XP/Vista/7/8/8.1/10, Mac 10.4 or later, and Android Smart TV.
- Multi-Application Support: Works seamlessly with major software like Zoom, Facetime, Facebook, Skype, and YouTube.

This image illustrates the key features of the JOYACCESS webcam, including its Full HD 1080P resolution, 105-degree wide-angle view, built-in microphone, and plug-and-play functionality.
Package Contents
- JOYACCESS 1080P Webcam (Model: JP-WEBGRAY)
- Integrated USB 2.0 Cable
- Instruction Manual (this document)

The package includes the JOYACCESS 1080P Webcam with an integrated USB cable, as shown in this product image.
Setup
Step 1: Placement
The webcam features a versatile clip that allows for secure placement on various devices.

The webcam can be easily clipped onto the top of your computer monitor or laptop screen.

The adjustable clip allows for stable mounting on various screen thicknesses.
Step 2: Connection
The JOYACCESS webcam is designed for plug-and-play operation, requiring no additional drivers for most operating systems.

Connect the integrated USB 2.0 cable from the webcam directly into an available USB port on your computer.
This video demonstrates the simple plug-and-play setup of the webcam, highlighting how it connects to a USB port and is ready for use without driver installation. It also shows the privacy feature.
Step 3: Initial Use
Once connected, your operating system should automatically detect the webcam. You can then select it as your video and audio input device in your preferred video conferencing or streaming application.
Operating Instructions
Video Calls and Conferencing
The 105° wide-angle lens is ideal for group video calls, accommodating multiple participants without needing to adjust the camera's position frequently.
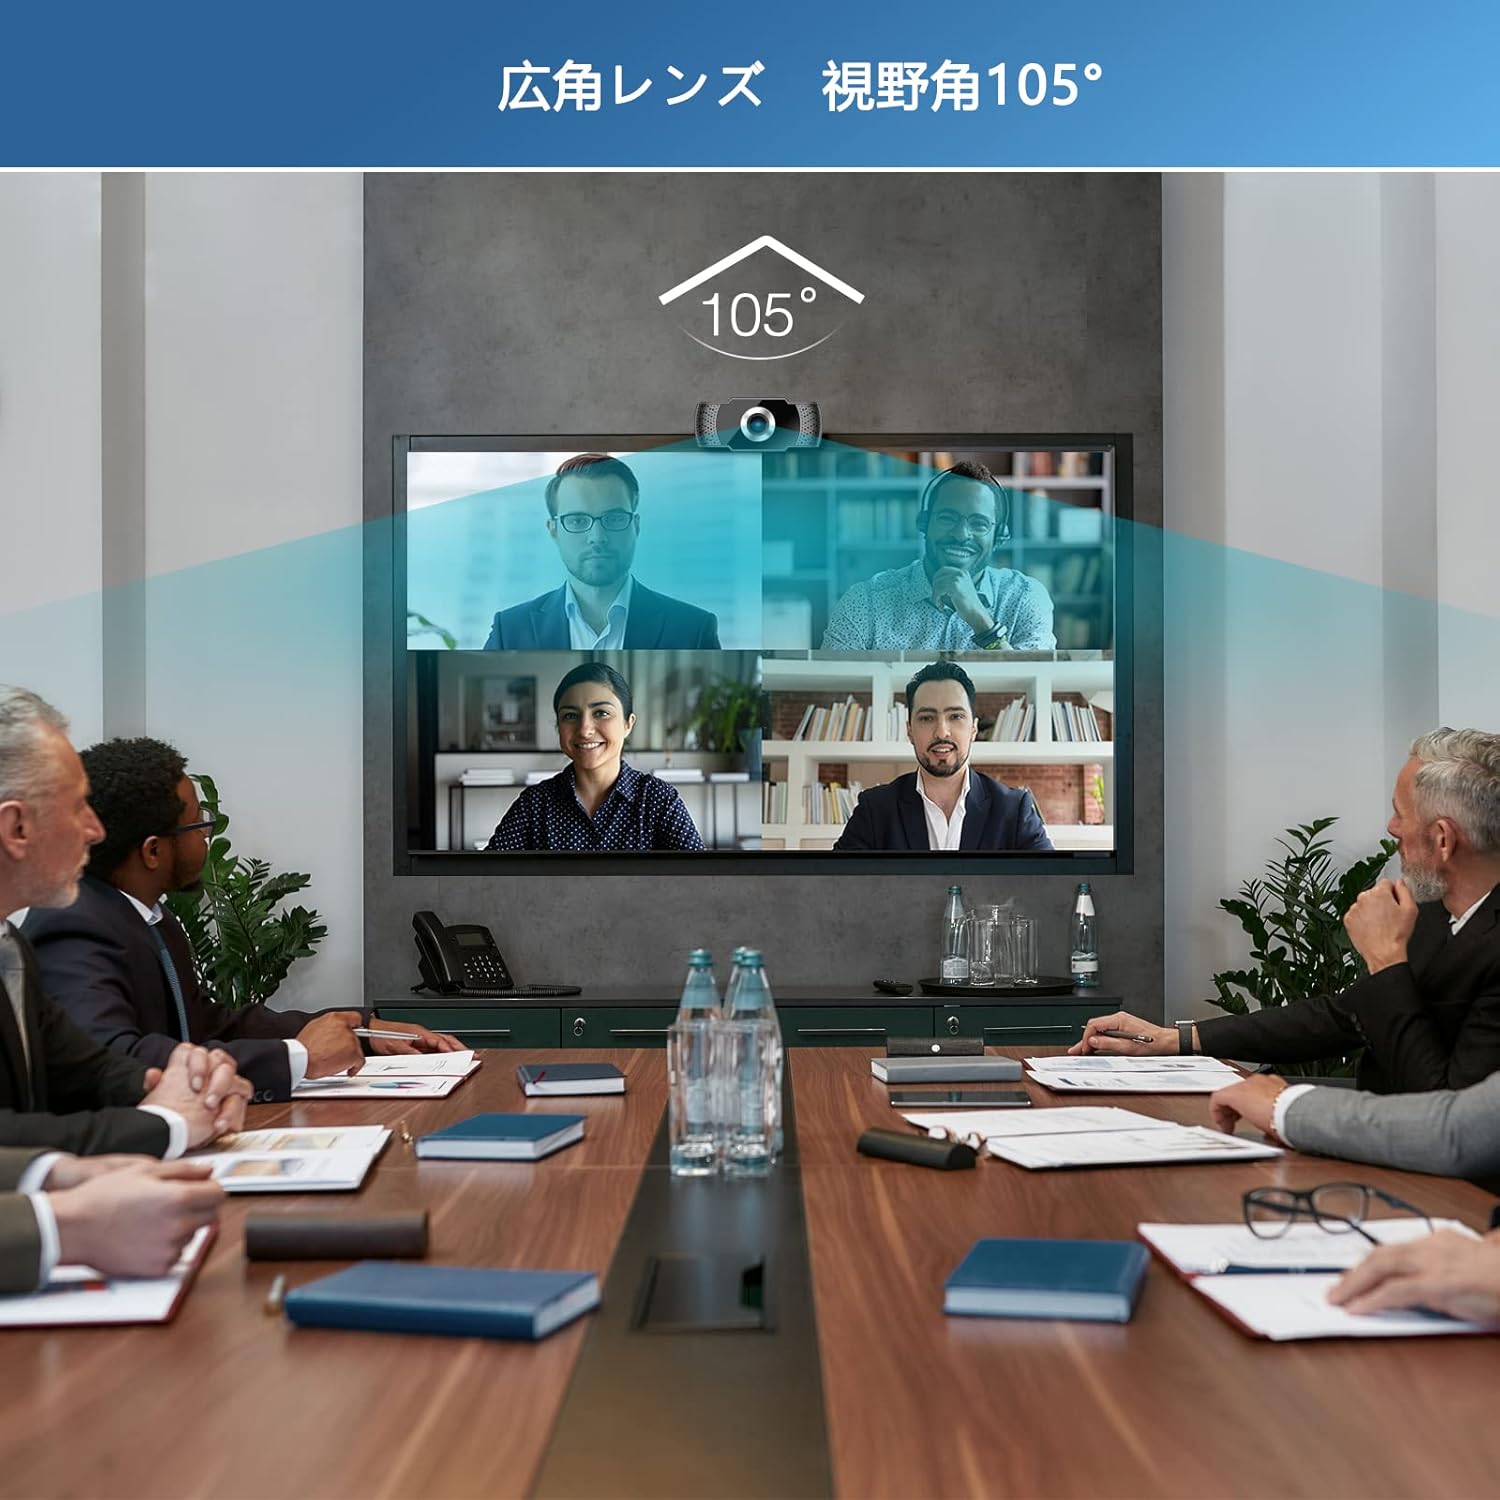
The 105-degree wide-angle lens captures a broad field of view, making it suitable for group video conferences.
The webcam features automatic low light correction and HDR technology, ensuring clear and natural lighting even in dim environments.

This image demonstrates the webcam's automatic light correction feature, which adjusts brightness and color for optimal video quality in various lighting conditions.
Microphone Usage
The built-in digital stereo microphone can pick up your voice from up to 15 feet away, providing clear audio for communication.
The integrated digital stereo microphone ensures clear voice pickup during calls.
Privacy Feature
The webcam includes a privacy feature where the lens can be physically adjusted up and down to block the view when not in use, ensuring your privacy.
This video highlights the webcam's privacy feature, allowing you to physically cover the lens when not in use.
This official product video showcases the webcam in various usage scenarios, including online meetings, e-learning, and gaming, demonstrating its versatility and ease of use across different platforms.
Maintenance
- Keep the lens clean: Gently wipe the lens with a soft, lint-free cloth. Avoid abrasive materials or harsh chemicals.
- Store properly: When not in use, store the webcam in a clean, dry place to prevent dust accumulation and damage.
- Handle with care: Avoid dropping the webcam or subjecting it to strong impacts.

To maintain optimal image quality, regularly clean the high-quality optical glass lens group with a soft cloth.
Troubleshooting
No Image / Black Screen
- Check Connection: Ensure the USB cable is securely plugged into both the webcam and the computer's USB port. Try a different USB port.
- Restart Application/Computer: Close and reopen your video conferencing application. If the issue persists, restart your computer.
- Privacy Feature: Ensure the physical privacy cover (if applicable) or the lens adjustment is not blocking the camera view.
Poor Image Quality (Grainy/Dark)
- Lighting: While the webcam has auto low light correction, sufficient ambient lighting will always yield better results. Ensure your room is adequately lit.
- Focus: If the image appears blurry, gently rotate the lens ring to manually adjust the focus until the image is clear.

If the image is blurry, you can manually adjust the focus by rotating the lens as shown.
Microphone Not Working / Poor Audio Quality
- Check Settings: In your application's audio settings, ensure the JOYACCESS webcam's microphone is selected as the input device.
- Volume Levels: Verify microphone input levels are not muted or set too low in both your application and operating system sound settings.
- Distance: While the microphone has a good pickup range, ensure you are within a reasonable distance (e.g., within 15 feet) for optimal clarity.
Specifications
| Feature | Detail |
|---|---|
| Brand | JOYACCESS |
| Model Number | JP-WEBGRAY |
| Video Capture Resolution | 1080p |
| Item Weight | 4.3 ounces |
| Connectivity Technology | USB |
| Special Feature | Low Light |
| Screen Size | 105 Inches |
| Maximum Focal Length | 150 Millimeters |
| Supported Audio Format | MP3, WAV, AAC, FLAC, OPUS |
| Color | black+red |
Warranty and Support
For warranty information and technical support, please refer to the official JOYACCESS website or contact their customer service directly. Keep your purchase receipt for warranty claims.


