
1. Introduction
The SINORIKO Red Light Therapy Device is a versatile, handheld unit designed to provide targeted pain relief and promote healing for various conditions in both humans and pets. Utilizing a combination of 650nm and 808nm wavelengths, this device offers a non-invasive, drug-free physical therapy option.

Figure 1: SINORIKO Red Light Therapy Device
2. Product Features
- Dual Wavelength Technology: Features 13pcs x 650nm red lights and 3pcs x 808nm infrared lights for comprehensive tissue penetration.
- Adjustable Settings: Offers 4 timer settings (5/10/15/20 minutes) and 4 power levels (L1, L2, L3, L4) for customized treatment.
- User-Friendly Display: Equipped with an LCD screen that displays battery capacity, timer countdown, and power level.
- Portable and Rechargeable: Lightweight, handheld design with a rechargeable battery for convenient use anywhere.
- Non-Invasive & Drug-Free: Provides a physical therapy option without medication or invasive procedures.
- Versatile Application: Suitable for various joints and muscles in humans, as well as for pets (dogs, cats, horses) with conditions like arthritis, joint pain, and muscle soreness.
- Enhanced Safety: Includes protective glasses to shield eyes during operation and a twice-press protection feature to prevent accidental activation.
- Hands-Free Option: Comes with an adjustable stand for effortless, hands-free application.

Figure 2: Device controls and features
3. Package Contents
Please check the package for the following items:
- 1x Red Light Therapy Device
- 1x Protective Glasses
- 1x Charger (Power Adapter)
- 1x USB Cable
- 1x Adjustable Stand
- 1x User Manual

Figure 3: Included accessories
4. Specifications
| Specification | Value |
|---|---|
| Wavelengths | 650nm, 808nm |
| Number of Diodes | 650nm x 13pcs; 808nm x 3pcs |
| Max Output Power (808nm) | 30mW |
| Max Output Power (650nm) | 5mW |
| Power Levels | 4 (L1, L2, L3, L4) |
| Time Settings | 5/10/15/20 minutes |
| Charger Voltage | DC 5V/1A |
| Input Voltage | 100-240V |
| Battery Type | 1 Lithium Polymer battery (included) |
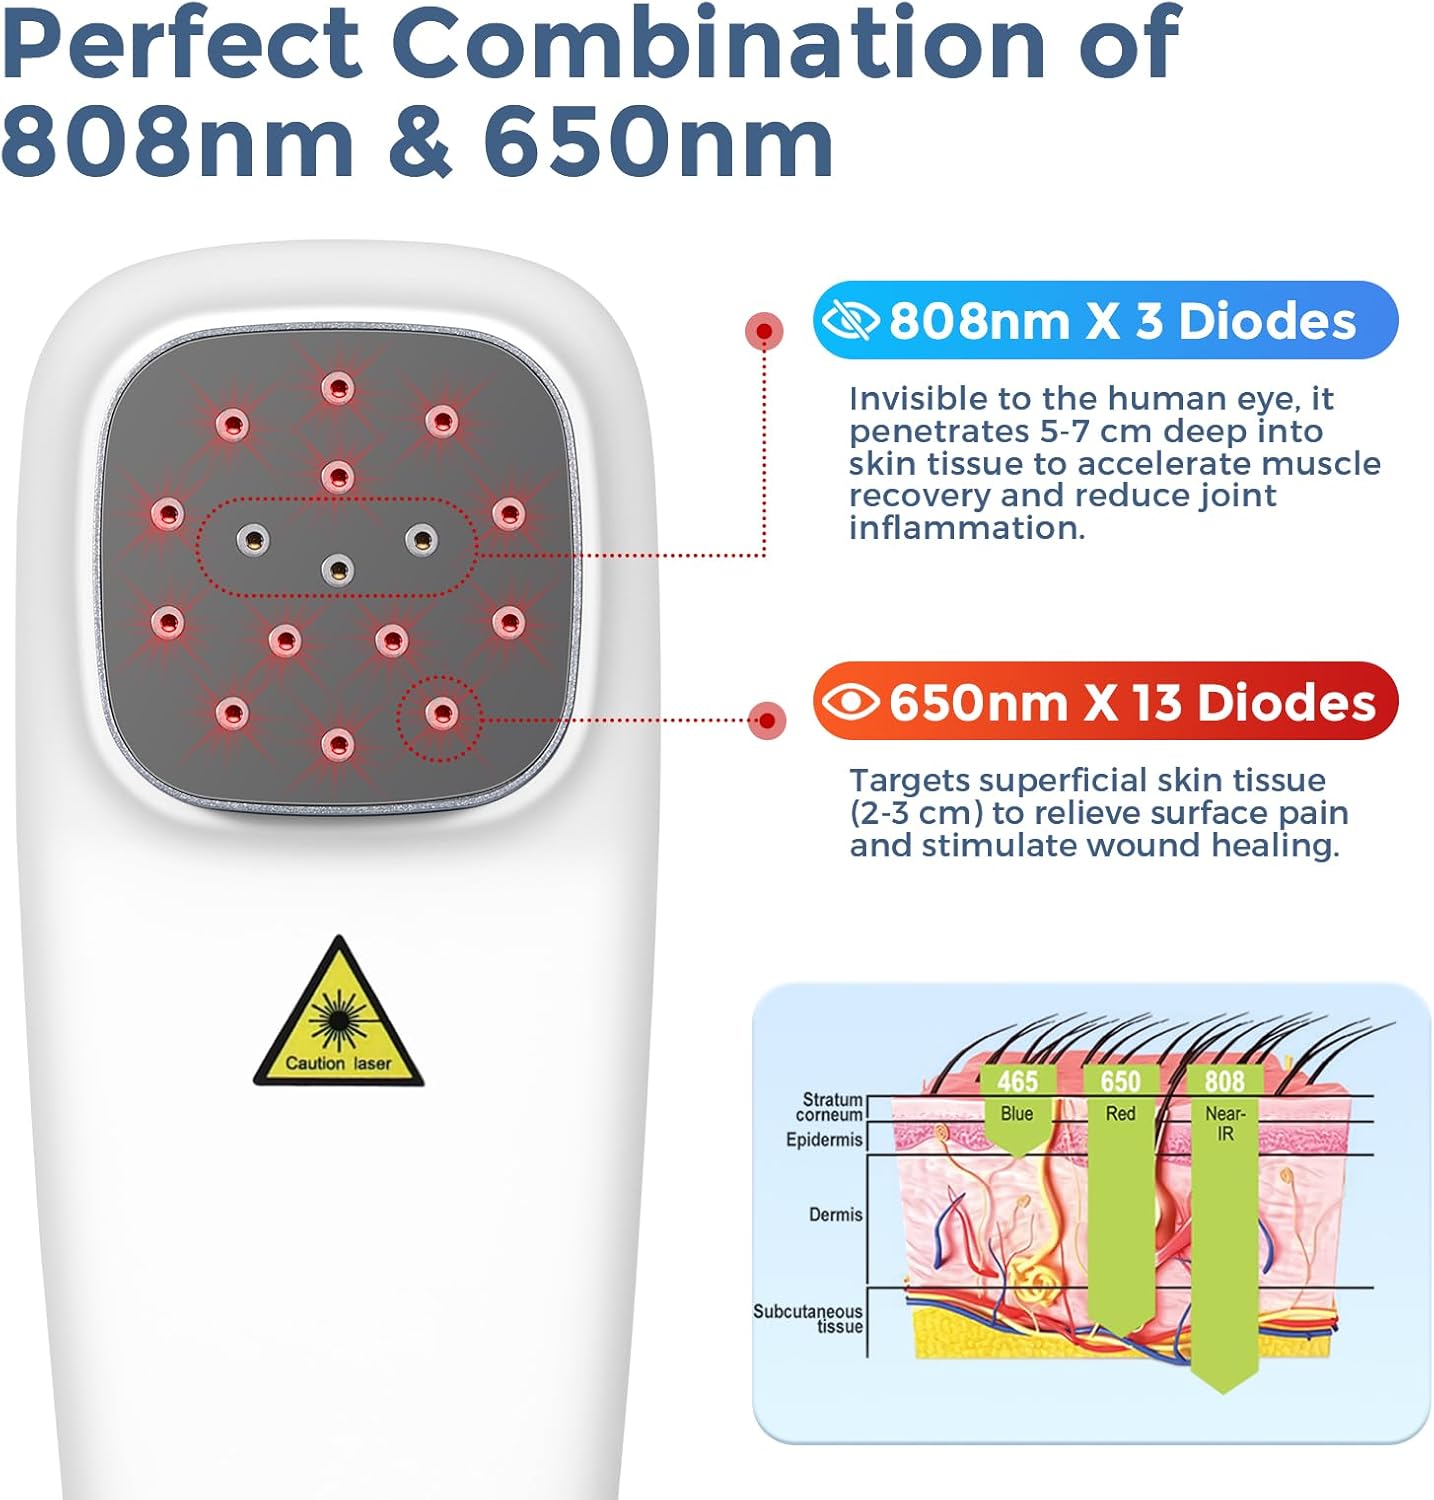
Figure 4: Wavelengths and their penetration
5. Setup
5.1 Charging the Device
- Connect the USB cable to the device's charging port.
- Plug the charger into a standard electrical outlet.
- Allow 4-5 hours for a full charge. The battery indicator on the LCD screen will show charging status.
- Important: Remove the charging cable before attempting to turn on the device. The device will not power on while connected to the charging cable.
5.2 Assembling the Adjustable Stand
- Attach the device clip to the stand's mounting screw.
- Extend the legs of the tripod stand for stability.
- Slide the stand to the desired height and secure it.
- Lock the device into the clip and adjust the angle to target the treatment area.

Figure 5: Stand assembly and adjustment
6. Operating Instructions
6.1 Powering On/Off
- To Power On: Long press the "On/Off" button until the screen illuminates.
- To Start Treatment: After powering on, press the "On/Off" button once more to begin the light emission.
- Twice-Press Protection: The device features a twice-press protection to prevent accidental activation.
- To Power Off: Long press the "On/Off" button until the screen turns off.
6.2 Setting the Timer
- Press the "Timer" button to cycle through the available time settings: 5, 10, 15, or 20 minutes.
- The selected time will be displayed on the LCD screen and will count down during treatment.
6.3 Adjusting Power Levels
- Press the "Power" button to cycle through the 4 power levels: L1 (lowest) to L4 (highest).
- The current power level will be indicated on the LCD screen.
6.4 Mode Selection (Continuous Wave / Pulsed Wave)
- Some models may offer Continuous Wave (CW) and Pulsed Wave (PW) modes. Consult your specific device's manual for mode selection.
- Pulsed Wave mode is often considered more effective for certain applications like nerve regeneration.
7. Treatment Guidance
It is recommended to use the device 1-2 times a day for a period of 4 weeks. Each session should last approximately 20 minutes per treatment area. Apply the device directly to the skin, ensuring no clothing covers the treatment area. For optimal results, keep the laser as close to the skin as possible.
7.1 For Humans
The device is suitable for all joints of the human body, offering a drug-free, non-invasive, side-effect-free physical therapy option. It can help with:
- Shoulder, Back, Knee, Joint, Muscle Pain Relief
- Arthritis and Tendonitis
- Wound Healing and Muscle Relaxation

Figure 6: Human application areas
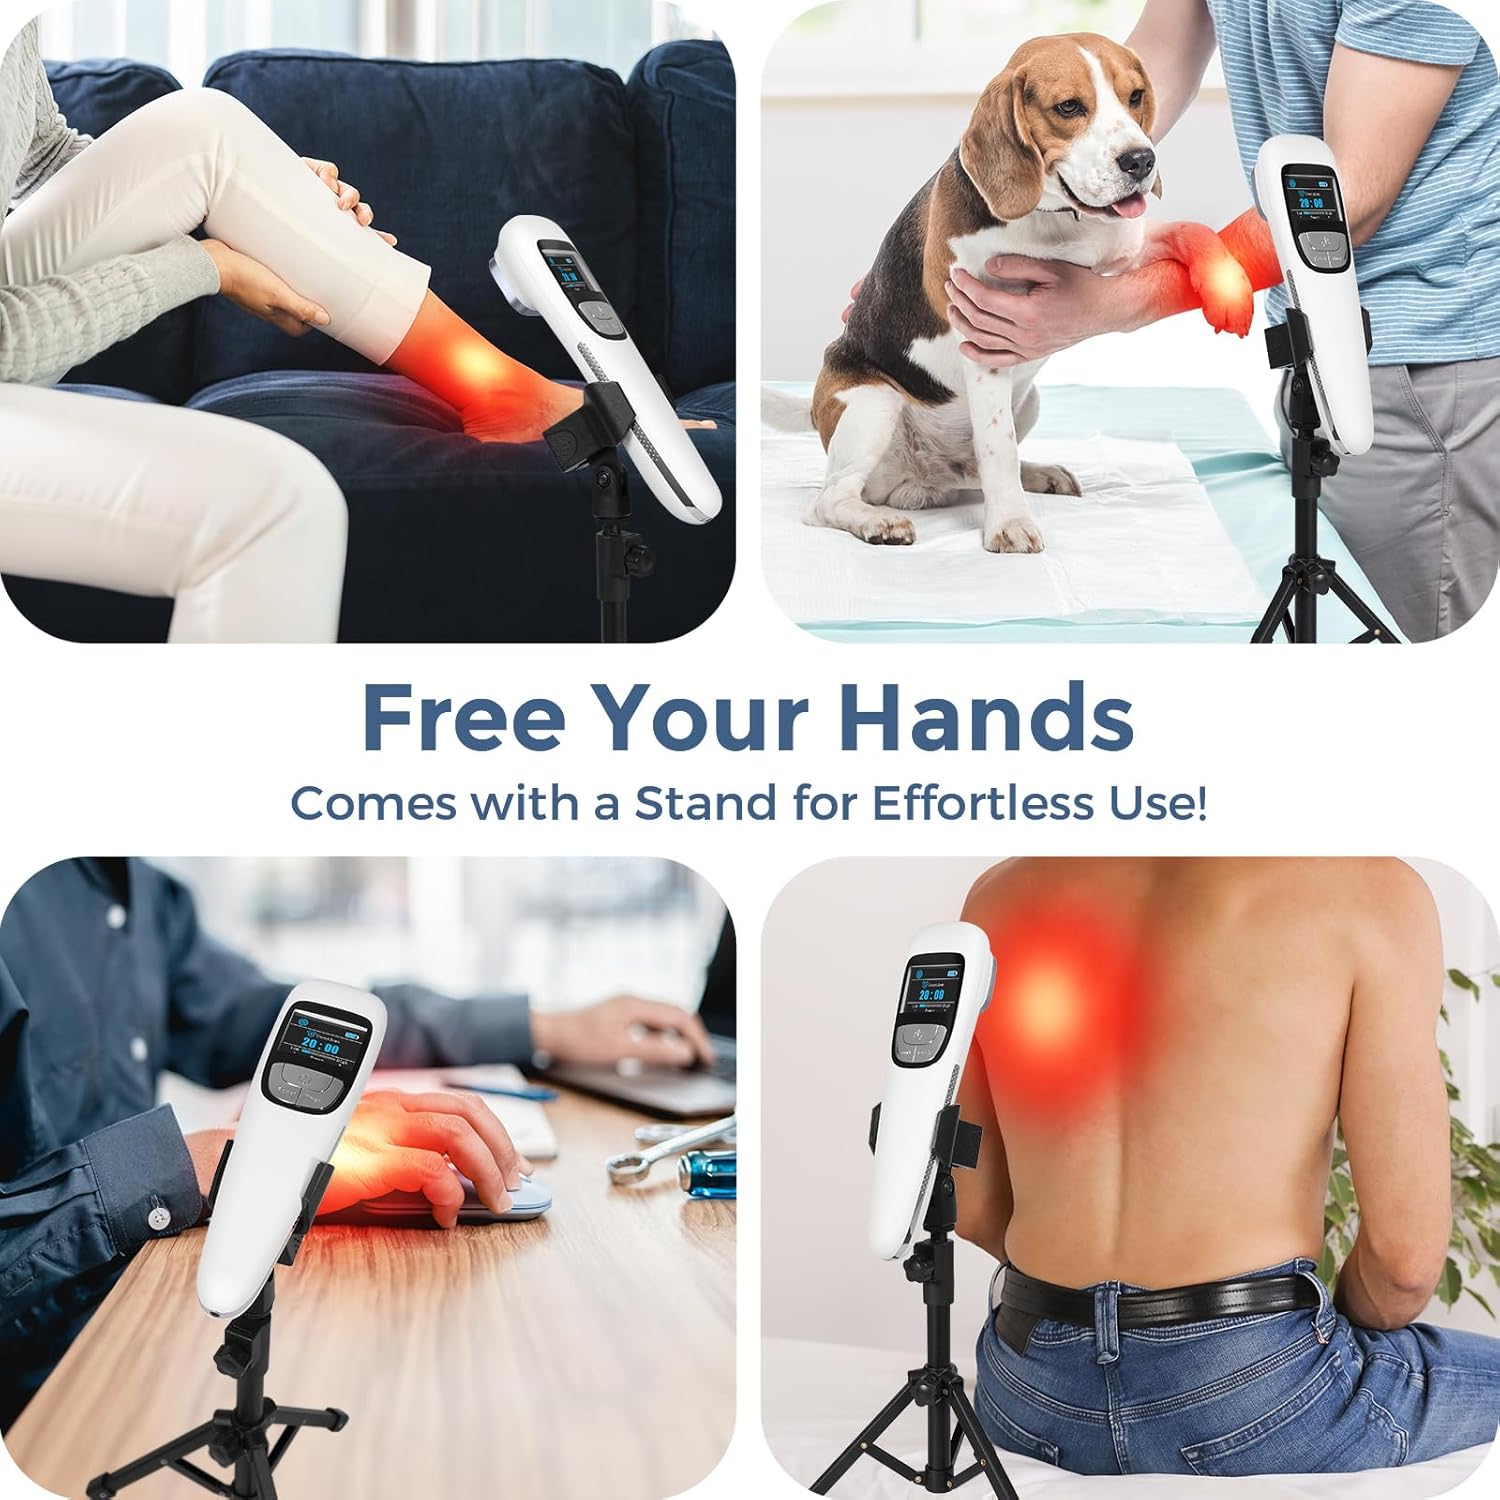
Figure 7: Hands-free use with stand
7.2 For Pets
The device is also effective as home veterinary equipment for pets, including dogs and horses. It can assist with:
- Acute Chronic Otitis
- Degenerative Joint Disease
- Arthritis
- Hip Dysplasia
- Anal Glands

Figure 8: Pet application
7.3 Official Product Videos (Seller)
Cold Laser Therapy Device for Pain Relief
Video 1: This video demonstrates the cold laser therapy device in use for pain relief, highlighting its features and application.
Shine Therapeutic and You
Video 2: An overview of the therapeutic benefits and user experience with the device, presented by LUMINA GROUP.
Frovab Red Light Therapy Device at Home
Video 3: Demonstrates the practical use of the Frovab Red Light Therapy Device in a home setting.
8. Maintenance
- Keep the device clean using a soft, dry cloth.
- Ensure the light emission area is free from dust or debris for optimal performance.
- Store the device in its protective case when not in use to prevent damage.
9. Troubleshooting
- Device Not Turning On: Ensure the device is fully charged and the charging cable is disconnected. The device cannot be turned on while charging.
- No Light Emission: After powering on, press the "On/Off" button a second time to initiate light emission.
- Reduced Effectiveness: Ensure the device is applied directly to the skin without clothing. For pets, ensure the device is as close to the skin as possible, moving hair if necessary. Consistent use over several weeks is recommended for best results.
10. Safety Information
- Eye Protection: Always wear the provided protective glasses during operation to prevent direct eye exposure to the light.
- Consult Professionals: Statements regarding dietary supplements have not been evaluated by the FDA and are not intended to diagnose, treat, cure, or prevent any disease or health condition. Consult a healthcare professional or veterinarian before starting any new treatment, especially if you have pre-existing medical conditions.
- Skin Sensitivity: If you experience any discomfort, redness, or irritation, discontinue use immediately.
- Children and Pets: Keep out of reach of children. Supervise pets during treatment.
11. Warranty and Support
The SINORIKO Red Light Therapy Device comes with a Lifetime Warranty. For any issues or concerns, please contact the seller directly for customer service and support. They are committed to providing the highest customer satisfaction.