1. Introduction
Thank you for purchasing the Everycom X10 Home & Business Native Full HD 1080p LED Projector. This projector is designed to provide a superior viewing experience with its impressive native resolution of 1920 x 1080, 5500 Lumens of brightness, and a high contrast ratio of 5000:1. This manual provides detailed instructions for setting up, operating, and maintaining your projector to ensure optimal performance and longevity. Please read this manual thoroughly before using the product and keep it for future reference.
2. Safety Information
To prevent fire or electric shock, do not expose this appliance to rain or moisture. To avoid electric shock, do not open the cabinet. Refer servicing to qualified personnel only.
- Do not block ventilation openings.
- Use only attachments/accessories specified by the manufacturer.
- Unplug this apparatus during lightning storms or when unused for long periods.
- Protect the power cord from being walked on or pinched, particularly at plugs, convenience receptacles, and the point where they exit from the apparatus.
- Do not look directly into the projector lens when the lamp is on.
- Ensure the projector is placed on a stable, level surface.
3. What's in the Box
Please check that all the following items are included in your package:
- Everycom X10 Projector
- Remote Control
- User Manual
- AV Cable
- HDMI Cable
- Power Cord
4. Product Overview
4.1 Front View
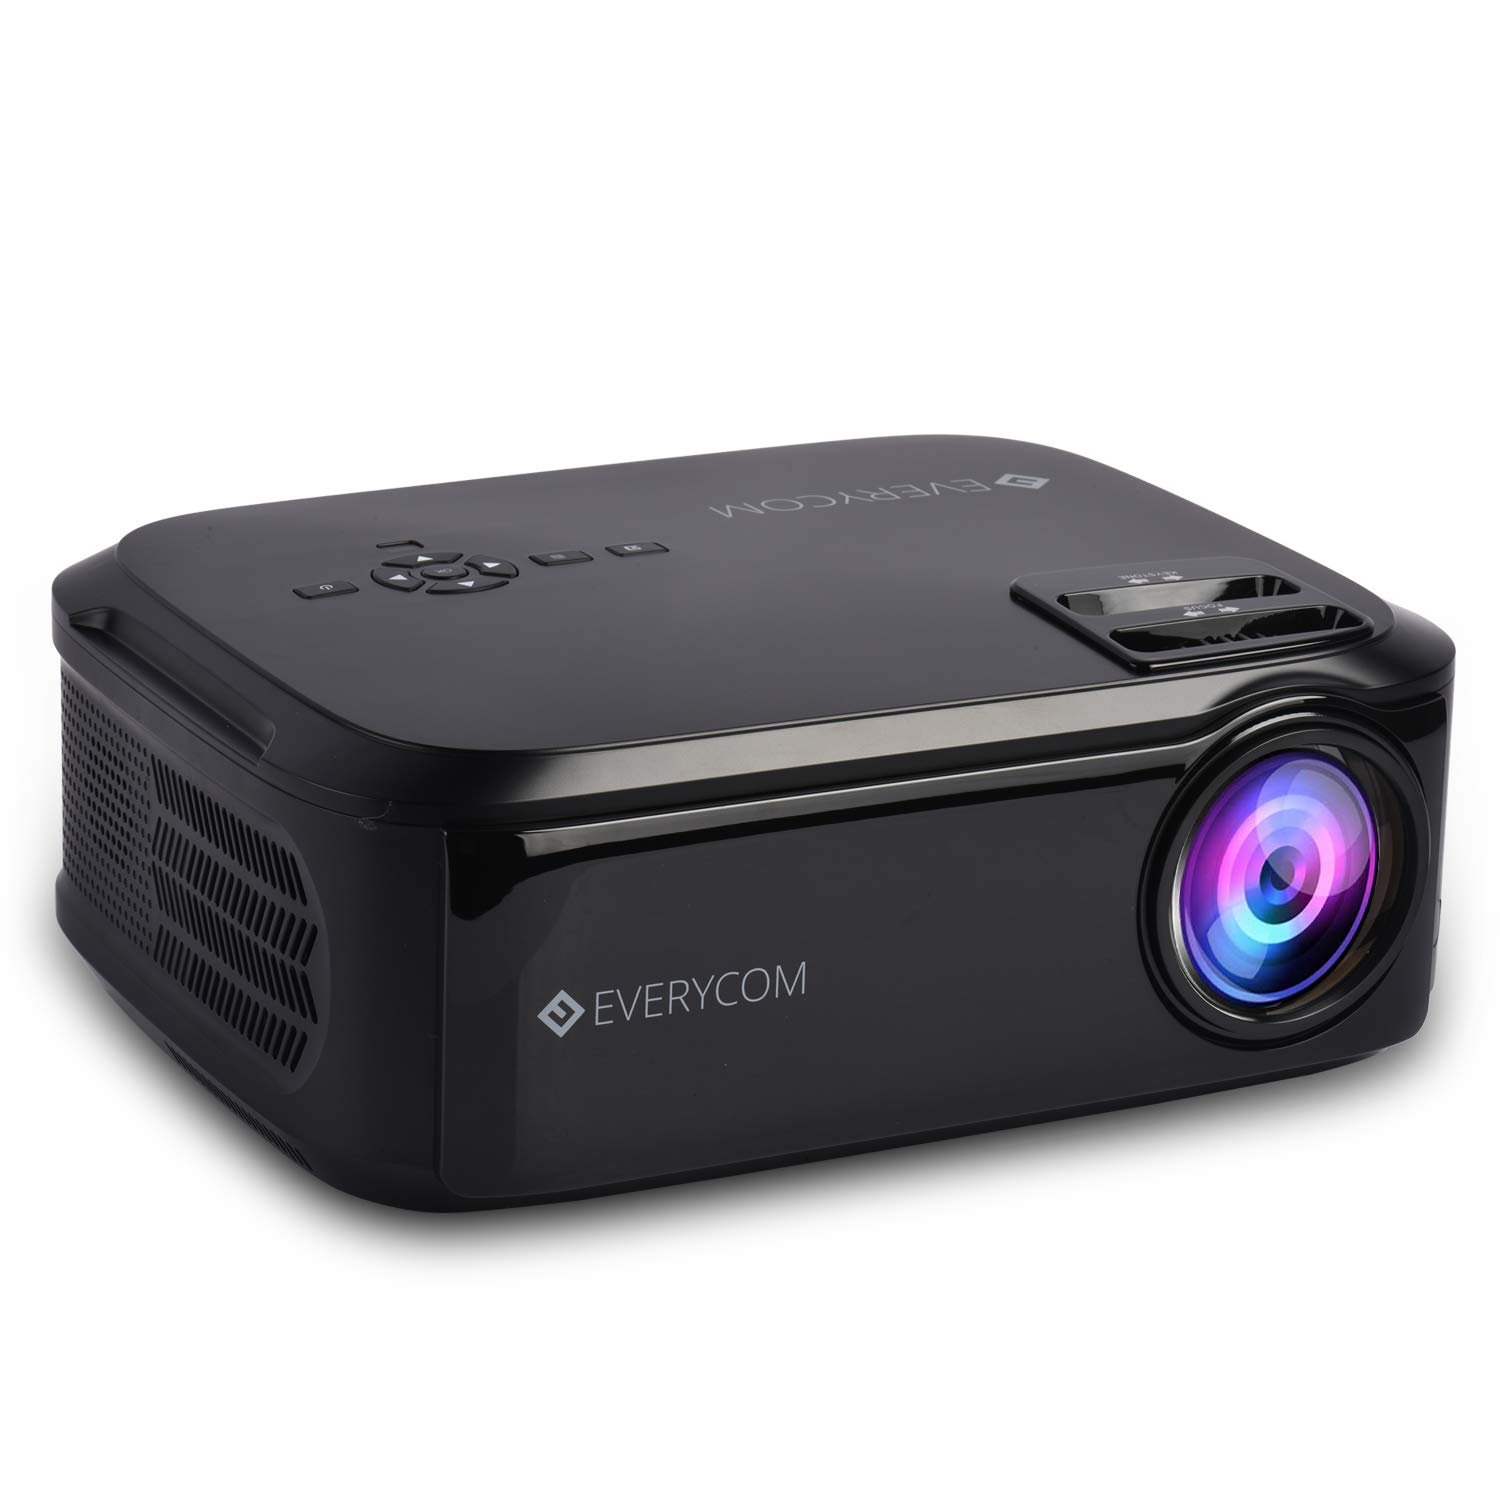
This image displays the front of the Everycom X10 projector, highlighting the main lens and the sleek black casing. The lens is the primary component for projecting images onto a screen or wall.
4.2 Side View (Ports)

This image shows the side of the Everycom X10 projector, featuring the various input and output ports. These include two HDMI inputs, two USB inputs, and a VGA port, allowing for versatile connectivity with different devices.
4.3 Top View (Controls)

The top view of the Everycom X10 projector displays the integrated control panel and the focus and keystone adjustment dials. The control panel allows for basic navigation and settings adjustments directly on the unit, while the dials are used to fine-tune image clarity and shape.
4.4 Bottom View

This image shows the bottom of the Everycom X10 projector, revealing the product label with model information, serial number, and certification marks. It also shows the adjustable feet for leveling and mounting points.
5. Setup
5.1 Placement
Place the projector on a stable, flat surface. Ensure there is adequate ventilation around the projector to prevent overheating. The projection distance can range from 1.6m to 7.1m to achieve a screen size of 45" to 200".
5.2 Power Connection
- Connect the power cord to the projector's power input port.
- Plug the other end of the power cord into a power outlet.
5.3 Connecting Input Devices
The Everycom X10 supports multiple input sources:
- HDMI: Connect your PC, laptop, gaming console, Amazon Fire TV, or Chromecast using an HDMI cable to one of the two HDMI ports.
- USB: Insert a USB stick or connect a media player to one of the two USB ports.
- VGA: Connect older PCs or laptops using a VGA cable.
- AV: Use the provided AV cable to connect DVD players or other devices with AV output.
5.4 Focus and Keystone Adjustment
- Focus: Rotate the focus ring on the top of the projector until the projected image is clear and sharp.
- Keystone: Use the keystone correction dial (vertical ±15 degrees) to adjust the image shape if it appears trapezoidal. This ensures the projected image is rectangular.
6. Operating Instructions
6.1 Powering On/Off
- Power On: Press the power button on the projector or the remote control. The indicator light will turn on.
- Power Off: Press the power button again. The projector will shut down. Always allow the projector to cool down properly before unplugging it.
6.2 Source Selection
After powering on, select the desired input source:
- Press the 'Source' button on the remote control or the projector's control panel.
- Use the arrow keys to navigate through the input options (HDMI1, HDMI2, USB1, USB2, VGA, AV).
- Press 'OK' to confirm your selection.
6.3 Menu Navigation
Use the 'Menu' button on the remote or projector to access settings:
- Picture Settings: Adjust brightness, contrast, color, and aspect ratio (16:9/4:3).
- Sound Settings: Control volume and audio modes for the built-in dual stereo speakers.
- Time Settings: Set sleep timer or adjust time-related functions.
- Option Settings: General settings like language, factory reset, etc.
7. Maintenance
7.1 Cleaning the Lens
Use a soft, lint-free cloth or lens cleaning paper to gently wipe the lens. Do not use abrasive cleaners or solvents.
7.2 Cleaning the Projector Body
Wipe the projector's exterior with a soft, dry cloth. For stubborn dirt, dampen the cloth slightly with water and a mild detergent, then wipe dry.
7.3 Fan Maintenance
The projector features an innovative cooling system with heat dispersion and noise suppression. Ensure the ventilation vents are clear of dust and obstructions to maintain efficient cooling.
8. Troubleshooting
| Problem | Possible Cause | Solution |
|---|---|---|
| No image displayed | Power cord loose; Incorrect input source; Device not connected properly. | Check power connection; Select correct input source; Reconnect input device. |
| Image is blurry | Focus not adjusted; Projector too far/close. | Adjust focus ring; Adjust projection distance. |
| Image is trapezoidal | Keystone not adjusted. | Adjust keystone correction dial. |
| No sound | Volume too low; Audio cable not connected; Source device audio settings. | Increase volume; Check audio connections; Adjust audio output on source device. |
| Projector overheats | Ventilation blocked; Prolonged use in hot environment. | Ensure vents are clear; Operate in a well-ventilated area; Allow cool-down periods. |
9. Specifications
| Feature | Specification |
|---|---|
| Brand | Everycom |
| Model | X10 |
| Native Resolution | 1920 x 1080 (Full HD) |
| Brightness | 5500 Lumens |
| Contrast Ratio | 5000:1 |
| Aspect Ratio | 16:9 / 4:3 |
| Projection Size | 45" to 200" |
| Projection Distance | 1.6m to 7.1m |
| Keystone Correction | ±15° Vertical |
| Input Ports | 2 x HDMI, 2 x USB, 1 x VGA, 1 x AV |
| Audio | Built-in Dual Stereo Speakers |
| Product Dimensions | 32 x 26 x 12 cm |
| Item Weight | 2.6 kg |
10. Warranty and Support
10.1 Warranty Information

The Everycom X10 Projector comes with a Nationwide 1 Year Indian Warranty. This product is also Bureau of Indian Standards (BIS) certified.
10.2 Customer Support

For any assistance, queries, or support regarding your Everycom X10 Projector, please contact our customer service team:
- Toll-Free Number: 1800 121 4480
- Customer Support Working Hours: Monday - Saturday, 10:00 AM - 6:30 PM (Except on Public Holidays)


