
Introduction
The NICREW Digital Temperature Controller is a highly accurate thermostat designed for precise temperature regulation in various environments. It is suitable for use with heaters, heat mats, and other heating devices, maintaining stable temperatures for reptiles, aquariums, incubators, greenhouses, and more. Featuring an easy-to-read LCD display, it allows for temperature adjustment in 0.1°C increments and can switch between Fahrenheit and Celsius.
Product Features
- Temperature control range: 16~40°C (60.8~104°F).
- Maximum output load: 1100W (220V).
- Temperature adjustment accuracy: 0.1°C.
- High-precision thermostat for use with various heating devices.
- Maintains stable environmental temperatures.
- Probe can be placed in both wet and dry conditions.
- LCD display for easy operation.
- Switchable between Fahrenheit and Celsius.
- Wide application: Reptiles, aquariums, incubators, greenhouses, and other constant temperature applications.
Package Contents
Please ensure all items are present and in good condition upon opening the package:
- NICREW Digital Temperature Controller (Model: AC-112)
- Temperature Probe
- User Manual
Product Overview

Figure 1: Front view of the NICREW Digital Temperature Controller, showing the display, control buttons, and power outlet.
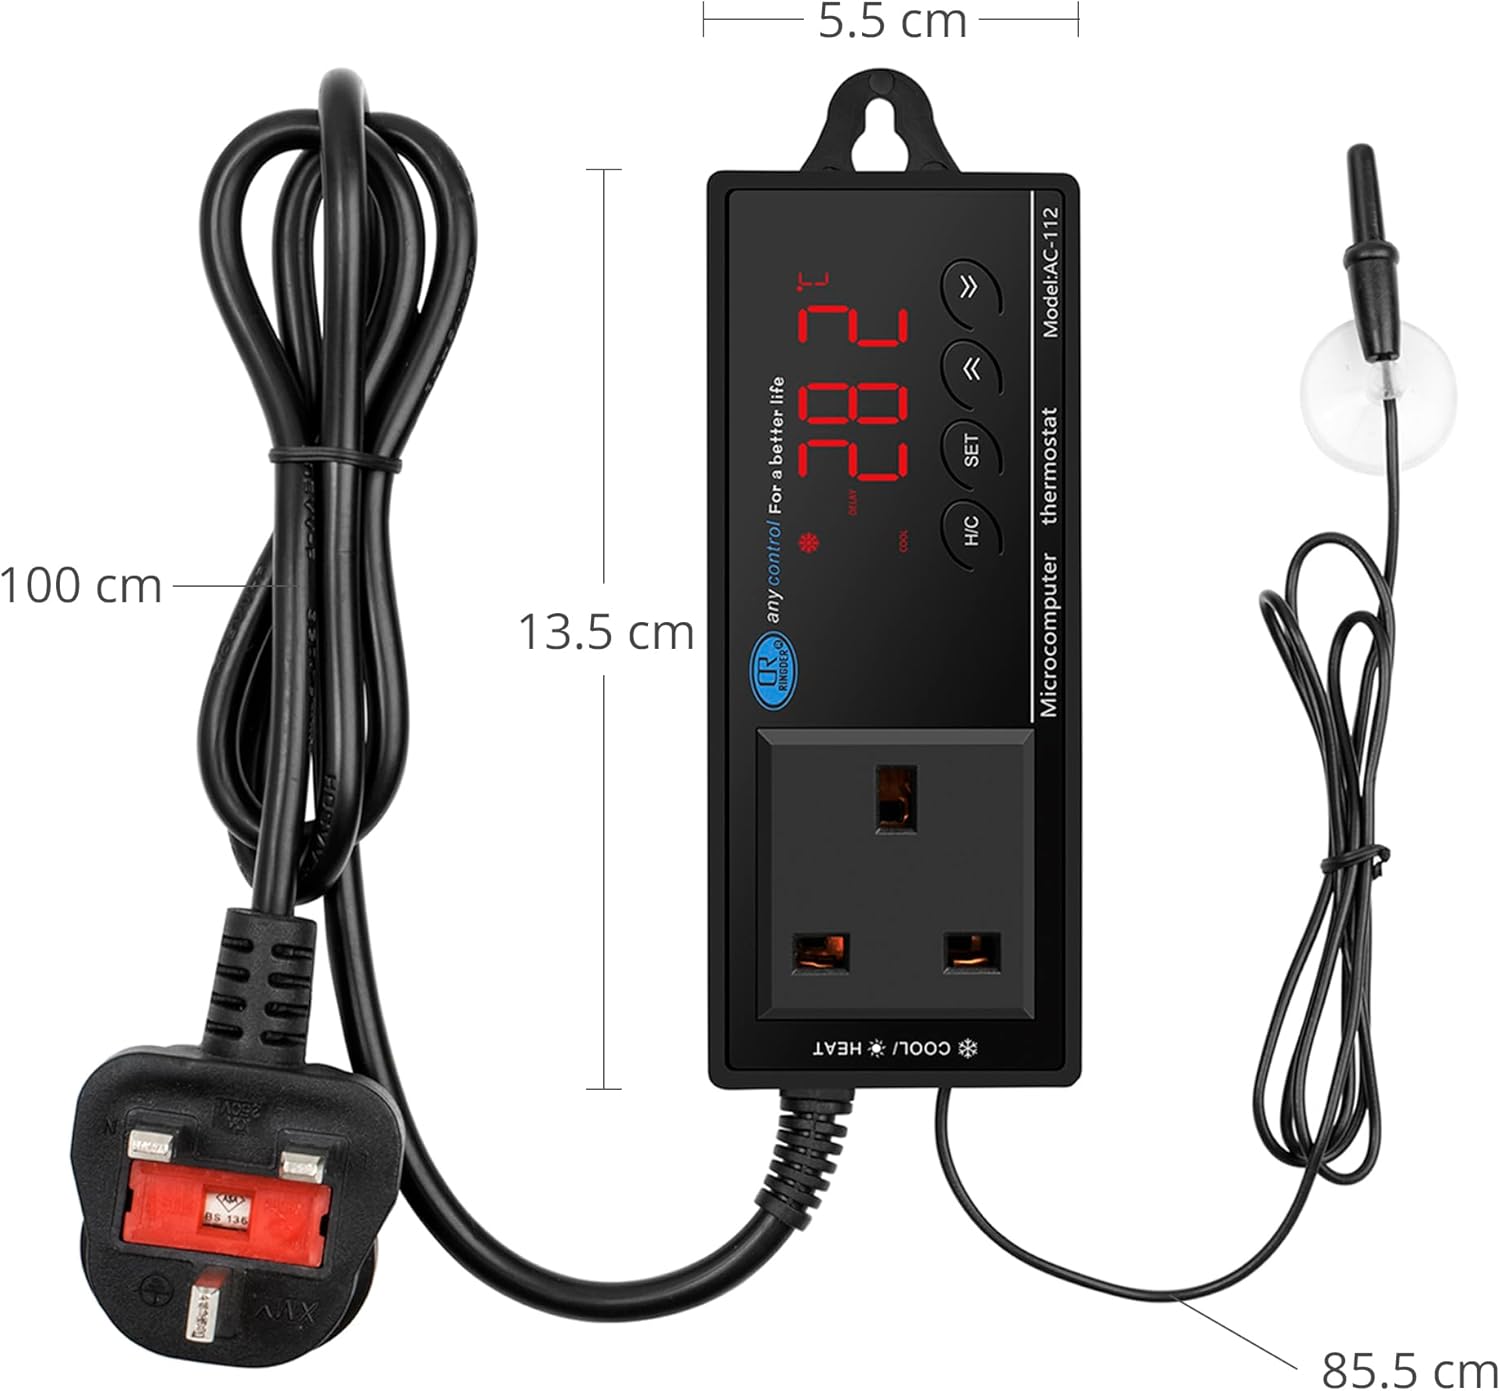
Figure 2: Dimensions of the NICREW Digital Temperature Controller and its probe cable length. The main unit measures approximately 13.5 cm in length and 5.5 cm in width. The power cord is 100 cm long, and the temperature probe cable is 85.5 cm long.
Setup
- Placement: Choose a suitable location for the temperature controller. Ensure it is in a dry area, away from direct sunlight or extreme temperatures.
- Probe Installation: Carefully place the temperature probe in the desired environment where temperature needs to be monitored and controlled. The probe is waterproof and can be situated in both wet (e.g., aquarium water) and dry (e.g., terrarium substrate) conditions.

Figure 3: The temperature probe can be placed in both wet environments like an aquarium and dry environments like a terrarium.
- Connect Heating/Cooling Device: Plug your heating or cooling device (e.g., heat mat, aquarium heater, cooling fan) into the power outlet on the temperature controller.
- Power On: Plug the temperature controller's power cord into a standard 220V electrical outlet. The LCD display will light up, showing the current temperature.
Operating Instructions
Switching Between Fahrenheit and Celsius
The unit can display temperature in either Celsius (°C) or Fahrenheit (°F). To switch between these units:
- Press the H/C button to toggle between heating and cooling modes.
- Press and hold the SET button for 3 seconds to enter the setting mode.
- Use the UP or DOWN arrows to select the desired temperature unit.
- Press SET again to confirm and exit.

Figure 4: The display showing temperature in Celsius (top) and Fahrenheit (bottom), demonstrating the unit's ability to switch between scales.
Setting Temperature (Heating Mode Example)
To maintain a temperature range, for example, from 26°C to 29°C in heating mode:
- Choose the heating mode by pressing the H/C button until the "HEAT" indicator is lit.
- Press and hold the SET button for 3 seconds to enter the setting mode.
- Set the target temperature (e.g., 29°C) using the UP or DOWN arrows. This is the temperature at which the heating equipment will turn off.
- Set the "DIFF" (differential) value (e.g., 3°C). This is the temperature difference below the target temperature at which the heating equipment will turn back on.
- In this example: 29°C (target) - 3°C (DIFF) = 26°C. Heating equipment turns on when temperature is < 26°C and turns off at 29°C.
- Press SET again to confirm and exit.
Setting Temperature (Cooling Mode Example)
To maintain a temperature range, for example, from 26°C to 29°C in cooling mode:
- Choose the cooling mode by pressing the H/C button until the "COOL" indicator is lit.
- Press and hold the SET button for 3 seconds to enter the setting mode.
- Set the target temperature (e.g., 26°C) using the UP or DOWN arrows. This is the temperature at which the cooling equipment will turn off.
- Set the "DIFF" (differential) value (e.g., 3°C). This is the temperature difference above the target temperature at which the cooling equipment will turn back on.
- In this example: 26°C (target) + 3°C (DIFF) = 29°C. Cooling equipment turns on when temperature is > 29°C and turns off at 26°C.
- Set the desired delay value if applicable (consult specific device instructions for delay settings).
- Press SET again to confirm and exit.
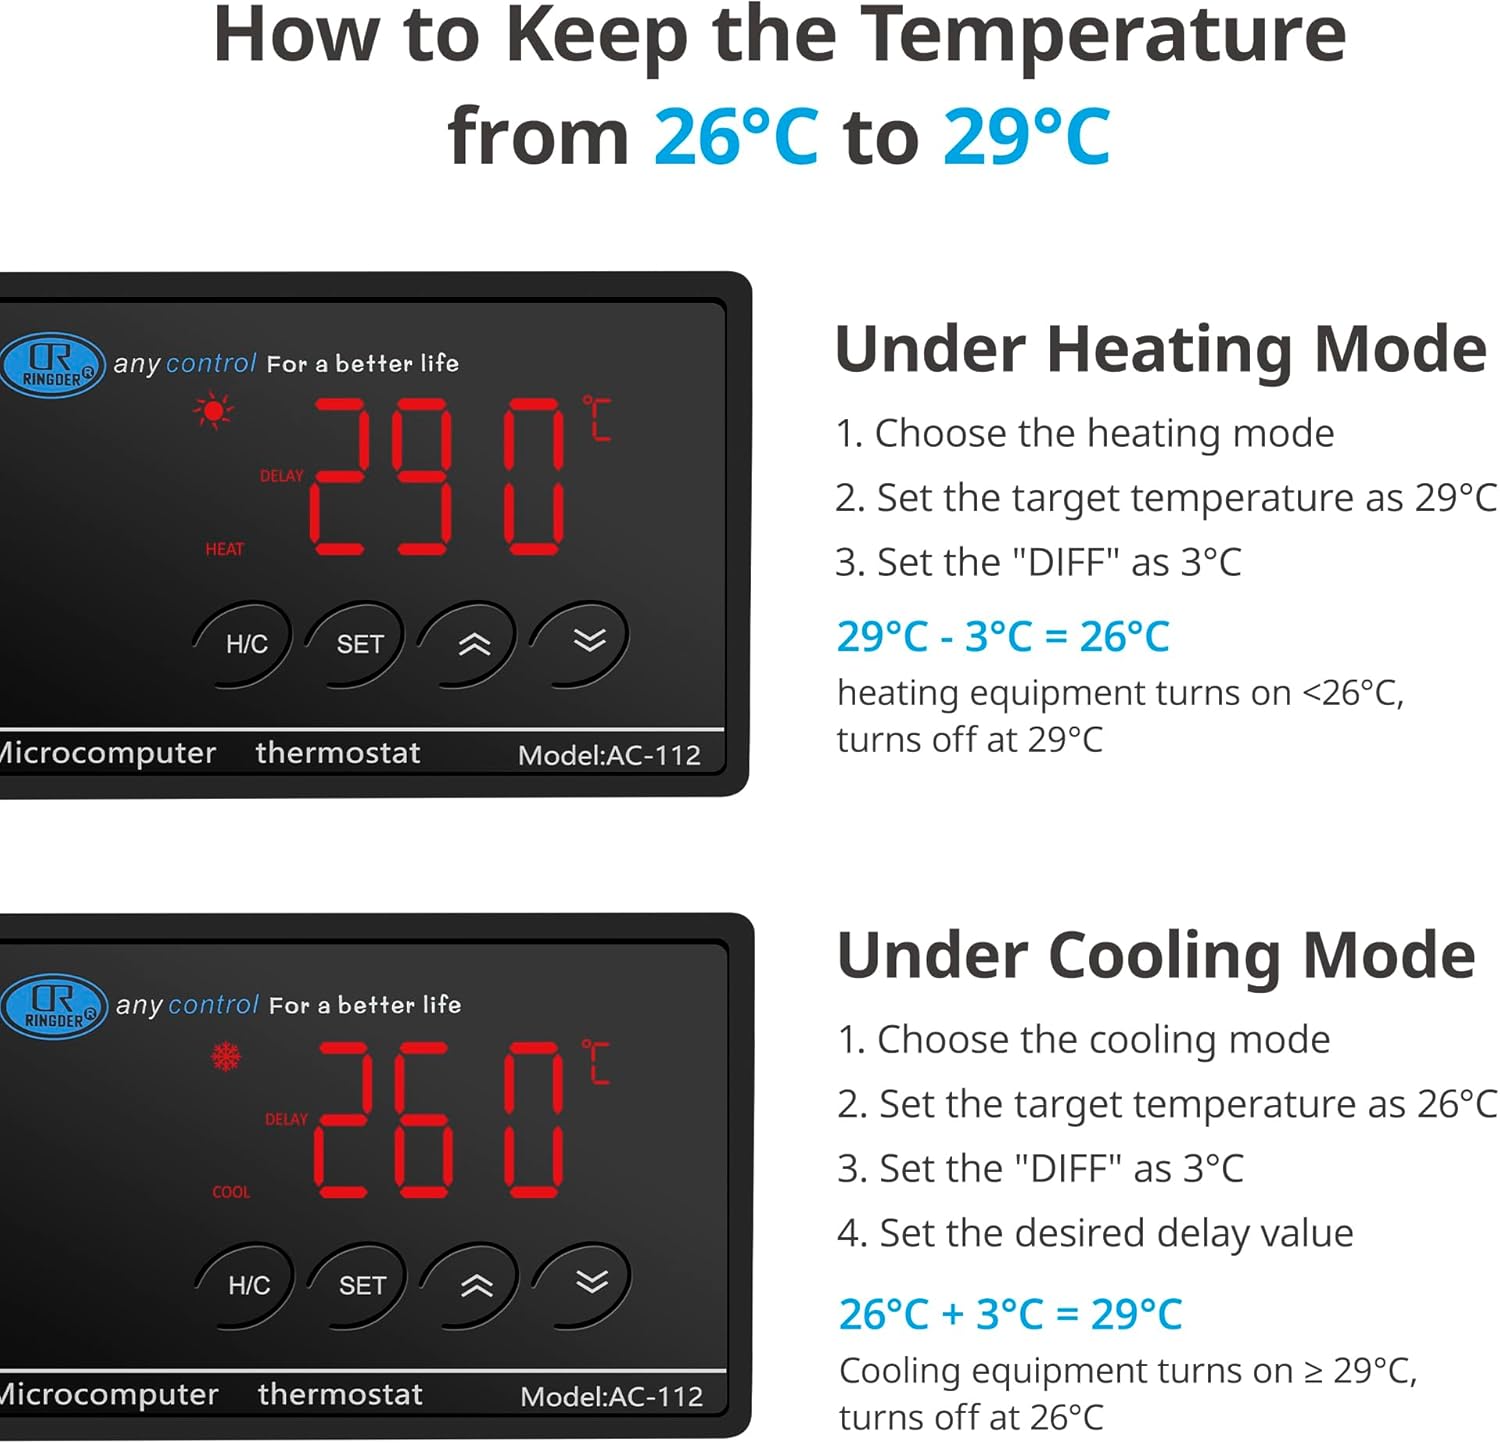
Figure 5: Visual guide for setting temperature in heating mode (top) and cooling mode (bottom), illustrating the target temperature and differential settings.
Applications
The NICREW Digital Temperature Controller is versatile and can be used in a wide range of applications requiring precise temperature control:
- Reptile Habitats/Terrariums: Maintain optimal temperatures for snakes, lizards, turtles, and other reptiles.
- Aquariums: Regulate water temperature for fish and aquatic plants.
- Incubators: Ensure stable temperatures for hatching eggs (e.g., chicken, reptile eggs).
- Greenhouses: Control ambient temperature for plant growth and seedling propagation.
- Fermentation: Provide consistent temperatures for brewing, making koji, or other fermentation projects.
- Pet Breeding: Create ideal thermal conditions for various small animals.

Figure 6: Examples of diverse applications for the temperature controller, including fermenters, terrariums, aquariums, incubators, pet breeding, greenhouses, plant seeding, and grow tents.
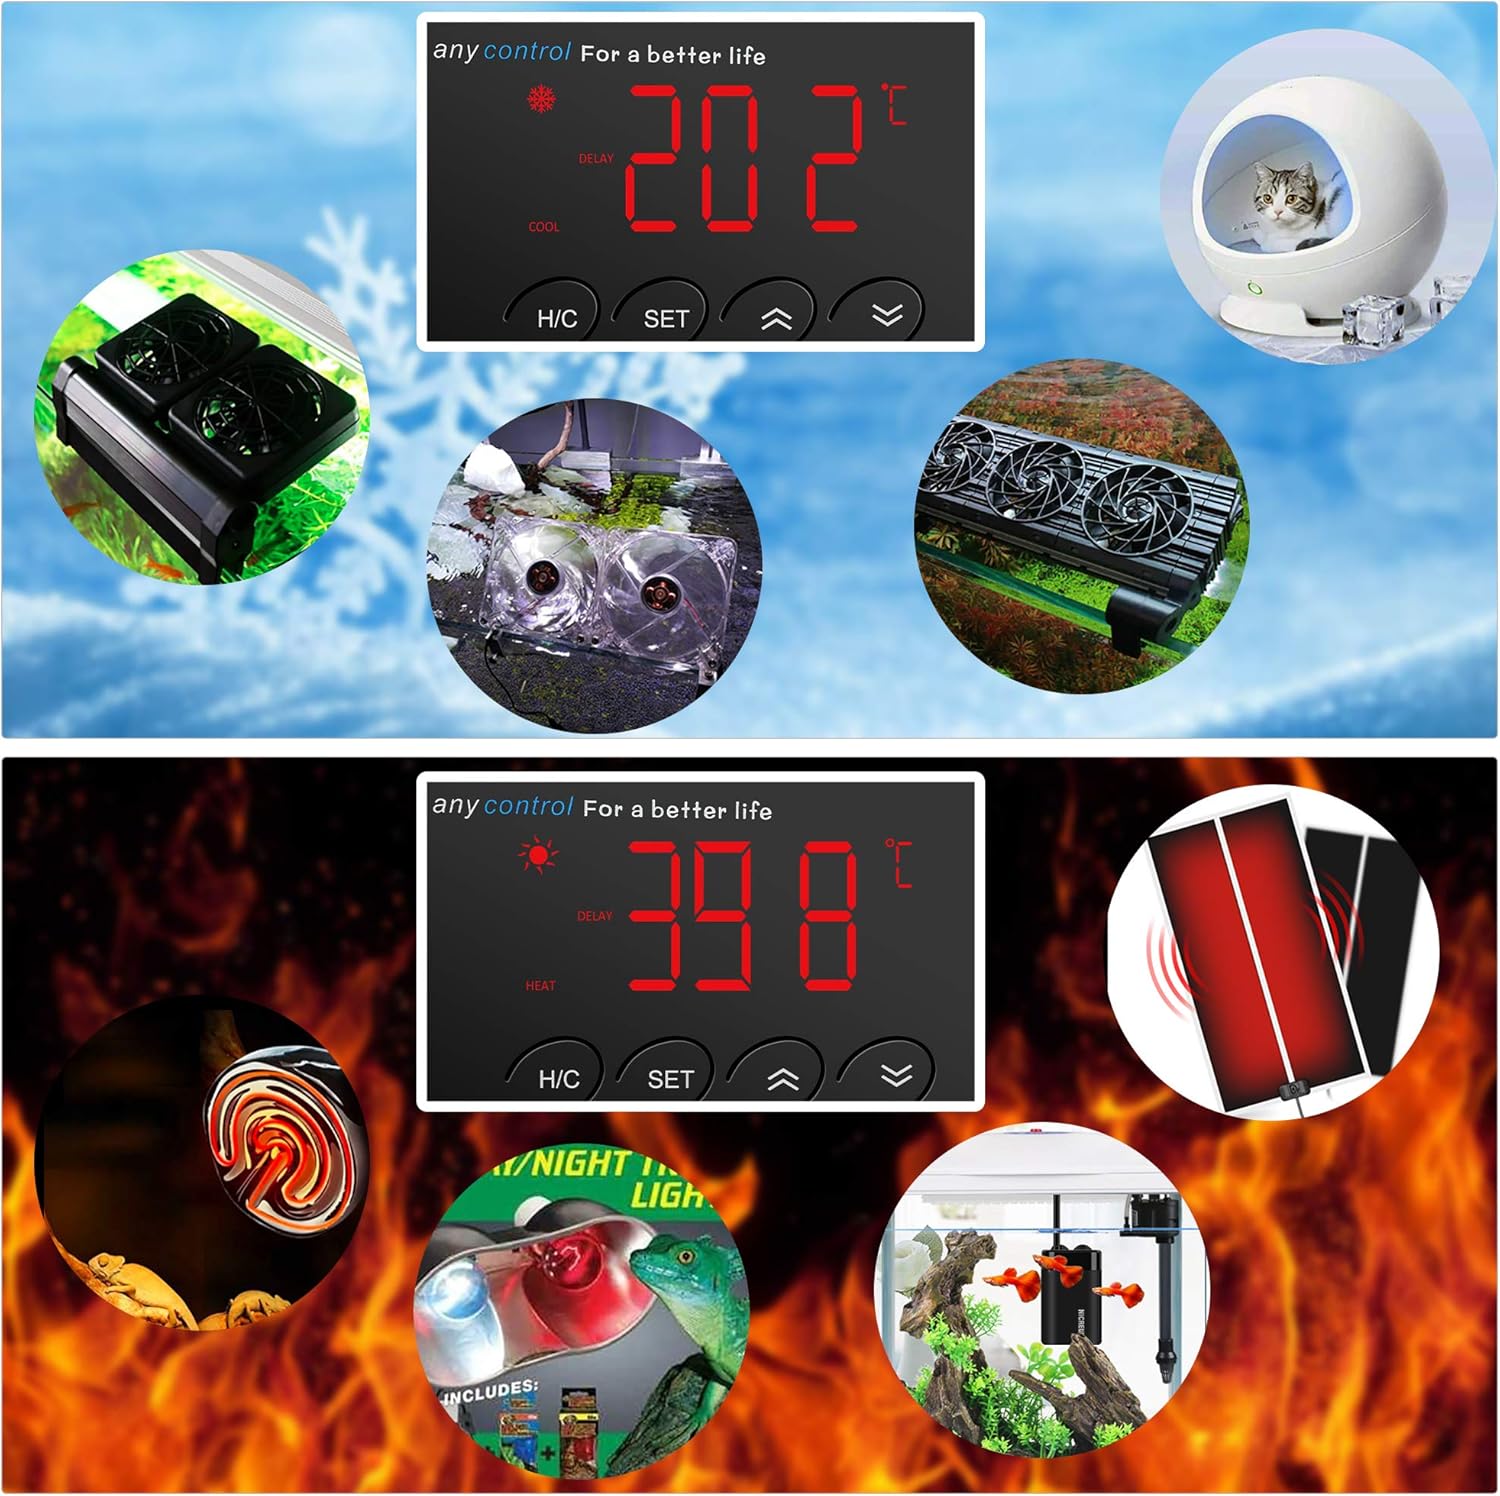
Figure 7: Visual representation of the controller's use in both cooling scenarios (top, with fans for aquariums/terrariums) and heating scenarios (bottom, with heat lamps/mats for reptiles).
Maintenance
- Cleaning: Wipe the unit with a soft, dry cloth. Do not use abrasive cleaners or immerse the unit in water.
- Probe Care: Periodically check the temperature probe for any damage or buildup. Clean it gently if necessary.
- Storage: If not in use for an extended period, unplug the unit and store it in a cool, dry place.
- Cable Inspection: Regularly inspect the power cord and probe cable for any signs of wear or damage. Do not use the unit if cables are damaged.
Troubleshooting
| Problem | Possible Cause | Solution |
|---|---|---|
| Display is off / No power | Unit unplugged; Power outage; Faulty outlet. | Ensure the unit is securely plugged into a working outlet. Check household circuit breaker. |
| Temperature reading is inaccurate | Probe not properly placed; Damaged probe; Environmental interference. | Reposition the probe. Inspect probe for damage; if damaged, replace the unit. Ensure probe is not near heat sources/sinks. |
| Heating/Cooling device not turning on/off | Incorrect temperature settings; Device not plugged into controller; Device malfunction. | Verify target temperature and differential settings. Ensure device is correctly plugged into the controller. Test the heating/cooling device directly in a wall outlet. |
| "HHH" or "LLL" error on display | Temperature out of range; Probe disconnected or faulty. | Check if the temperature is outside the 16-40°C range. Ensure the probe is securely connected. If the problem persists, the probe may be faulty. |
Specifications
| Brand | NICREW |
| Model Number | AC-112 |
| Temperature Control Range | 16°C to 40°C (60.8°F to 104°F) |
| Temperature Accuracy | ±0.1°C |
| Maximum Output Load | 1100W |
| Voltage | 220V AC |
| Package Dimensions | 19.4 x 11.4 x 5.4 cm |
| Weight | 420 g |
Warranty and Support
NICREW products are manufactured with high-quality materials and craftsmanship. For warranty information or technical support, please refer to the contact details provided on the product packaging or visit the official NICREW website. Please retain your proof of purchase for warranty claims.
For further assistance, you may contact NICREW customer service through their official channels. Always provide your product model number (AC-112) and purchase details when seeking support.