
Introduction
This manual provides essential information and instructions for the ASUS TUF Gaming B550M-PLUS (WiFi 6) AMD AM4 microATX Gaming Motherboard. Designed for robust performance and durability, this motherboard supports AMD 3rd Gen Ryzen CPUs and offers advanced features for gaming and productivity.
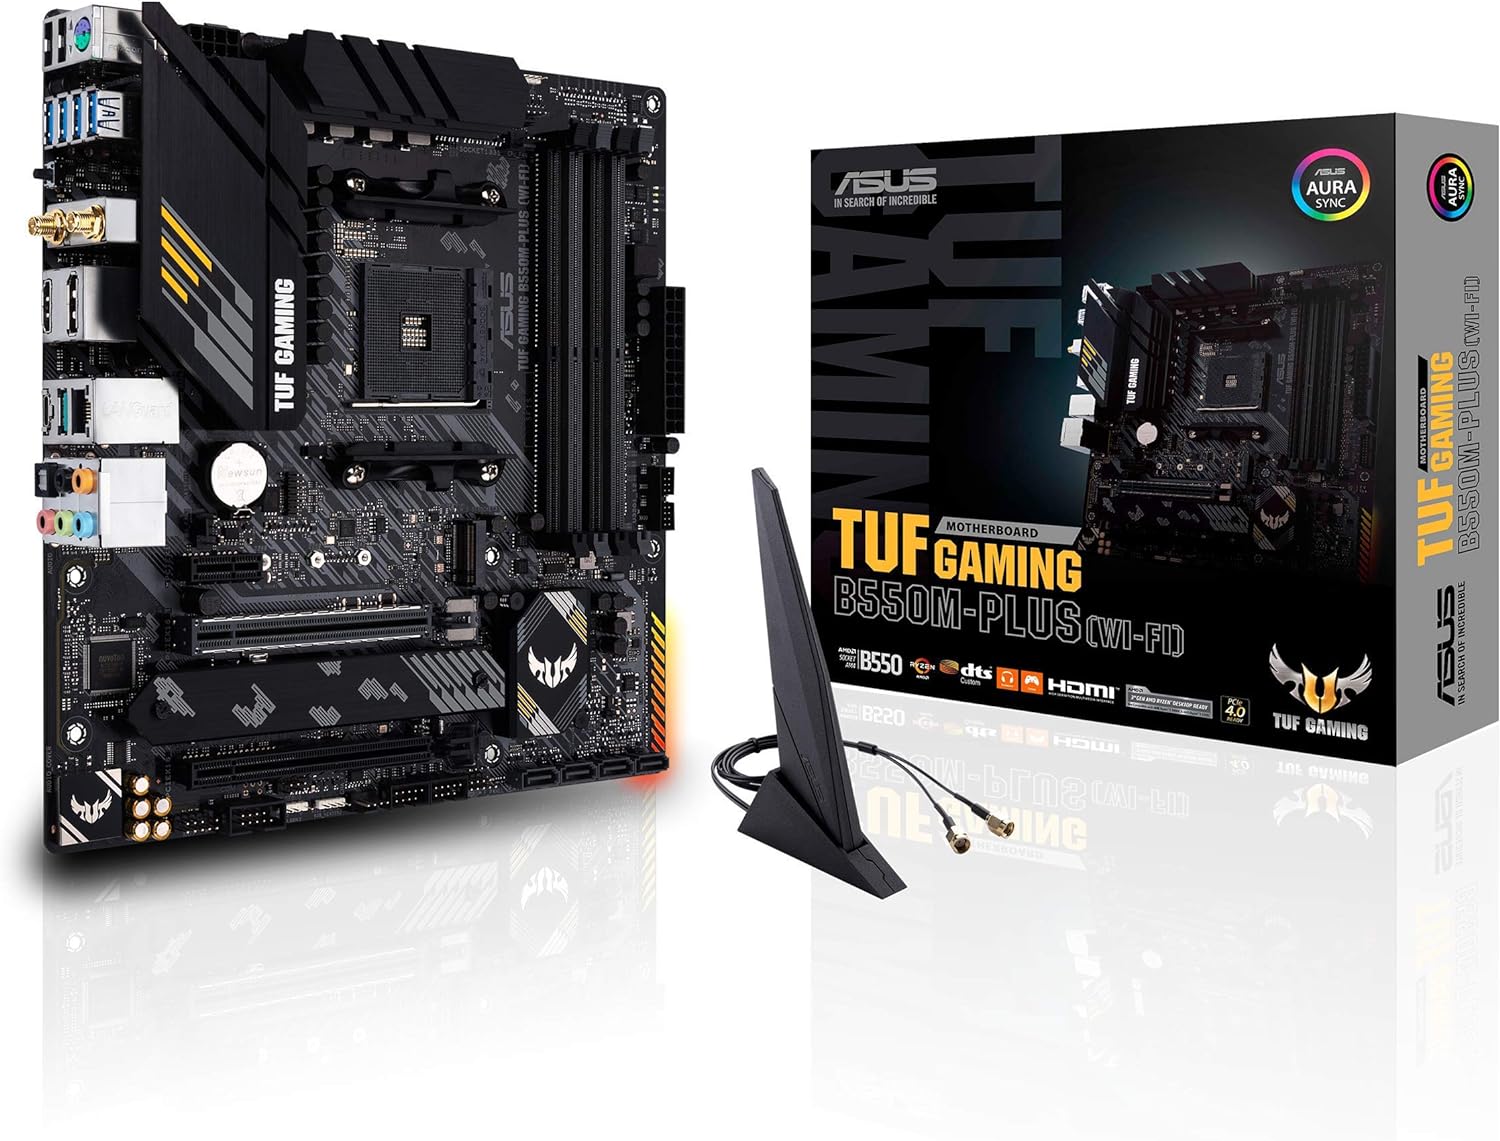
Figure 1: ASUS TUF Gaming B550M-PLUS (WiFi 6) Motherboard and included accessories.
Product Overview
The ASUS TUF Gaming B550M-PLUS (WiFi 6) motherboard is engineered with military-grade components, an upgraded power solution, and comprehensive cooling options to deliver stable performance. It features an AMD AM4 socket, PCIe 4.0 support, WiFi 6, and 2.5Gb LAN.

Figure 2: Top-down view of the ASUS TUF Gaming B550M-PLUS (WiFi 6) Motherboard, highlighting its layout and components.
Key Features
- AMD AM4 Socket and PCIe 4.0: Compatible with Zen 3 Ryzen 5000 and 3rd Gen AMD Ryzen CPUs.
- Robust Power Design: 8+2 DrMOS power stages with high-quality alloy chokes and durable capacitors.
- Optimized Thermal Solution: Fanless VRM and chipset heatsink, multiple hybrid fan headers, and Fan Xpert 4/UEFI Q-Fan Control.
- High-performance Networking: WiFi 6 (802.11ax) and 2.5 Gb LAN with ASUS LANGuard.
- Advanced Connectivity: HDMI 2.1 (4K@60HZ), DisplayPort 1.2, dual M.2 slots (one with PCIe 4.0 x4), front panel USB 3.2 Gen 1, USB 3.2 Gen 2 Type-C & Type-A ports.
Video Overview
Video 1: An overview of the TUF GAMING B550M-PLUS (WI-FI) AMD Ryzen Gaming Motherboard, detailing its features and design.
Setup
1. CPU Installation
Ensure the motherboard is placed on a non-conductive surface. Open the CPU socket lever and align your AMD AM4 processor with the socket, matching the golden triangle on the CPU to the triangle on the socket. Gently lower the CPU into place and close the lever to secure it.
2. Memory Installation
This motherboard supports up to 128GB of DDR4 RAM across four DIMM slots. For optimal dual-channel performance, refer to the motherboard's user guide for recommended slot configurations. Open the clips on the DIMM slots, align the memory module's notch with the slot's key, and press down firmly until the clips snap into place.
3. Storage Installation
The motherboard features dual M.2 slots for NVMe SSDs, one supporting PCIe 4.0 x4 connectivity. It also has four SATA 6Gb/s ports for traditional hard drives or SSDs. Install M.2 SSDs by inserting them into the slot and securing them with the provided screw. Connect SATA drives using SATA cables.
4. Expansion Card Installation
Install your graphics card into the primary PCIe 4.0 x16 slot. This slot features ASUS SafeSlot metal reinforcement for added durability. Additional PCIe 3.0 x16 and PCIe 3.0 x1 slots are available for other expansion cards.
5. Power Connections
Connect the 24-pin ATX power connector from your power supply to the motherboard. Also, connect the 8-pin CPU power connector (EATX12V) to provide power to the processor.
6. I/O Shield and Antenna
The I/O shield is a separate component that should be installed into your PC case before mounting the motherboard. Attach the WiFi 6 antenna to the designated connectors on the rear I/O panel for wireless connectivity.

Figure 3: Rear I/O panel, showing various connectivity options including USB, Ethernet, HDMI, DisplayPort, and WiFi antenna connectors.
Operating
1. BIOS FlashBack
The BIOS FlashBack feature allows you to update the BIOS without a CPU or memory installed. Simply download the latest BIOS file from the ASUS website, rename it, place it on a USB drive, and insert it into the designated BIOS FlashBack USB port on the rear I/O panel. Press the BIOS FlashBack button until the LED starts flashing, indicating the update process has begun.
2. Fan Control
Utilize Fan Xpert 4 or the UEFI Q-Fan Control utility within the BIOS to manage fan speeds and optimize cooling performance. The motherboard includes multiple hybrid fan headers for flexible cooling solutions.

Figure 4: Motherboard layout highlighting the VRM heatsink, 8+2 power stages, and 4-pin PWM fan headers for optimized thermal management.
3. Aura Sync RGB Lighting
The motherboard features an onboard RGB lighting zone and Addressable Gen 2 RGB headers. Use ASUS Aura Sync software to customize lighting effects and synchronize them with other compatible components.

Figure 5: Motherboard features for total gaming immersion, including 4-pin RGB header, 3-pin Addressable Gen 2 RGB header, and Aura Sync LED lighting.
Maintenance
Regularly clean your PC to prevent dust buildup, which can affect cooling performance. Ensure all cables are securely connected. For BIOS updates, refer to the BIOS FlashBack instructions in the Operating section or consult the ASUS support website.
Troubleshooting
If you encounter issues, perform the following basic checks:
- Check all power connections: Ensure the 24-pin ATX and 8-pin CPU power cables are firmly seated.
- Verify component seating: Reseat the CPU, RAM modules, and any expansion cards.
- Q-LED Indicators: The motherboard features Q-LEDs (BOOT, VGA, CPU, DRAM) that light up to indicate the status of key components during startup. If a specific LED remains lit, it points to an issue with that component.
- Clear CMOS: Refer to the user manual for instructions on how to clear the CMOS settings, which can resolve boot issues.
Specifications
| Feature | Specification |
|---|---|
| Brand | ASUS |
| Model Name | TUF GAMING B550M-PLUS (WI-FI) |
| CPU Socket | Socket AM4 |
| Compatible Processors | AMD 3rd Generation Ryzen, Zen 3 Ryzen 5000 Series |
| Chipset Type | AMD B550 |
| RAM Memory Technology | DDR4 |
| Memory Clock Speed | Up to 4400 MHz (O.C.) |
| Max Memory Size | 128GB |
| Expansion Slots | 1 x PCIe 4.0 x16, 1 x PCIe 3.0 x16, 1 x PCIe 3.0 x1 |
| Storage | 2 x M.2 slots, 4 x SATA 6Gb/s ports |
| Networking | WiFi 6 (802.11ax), 2.5 Gb LAN |
| Video Output | HDMI 2.1, DisplayPort 1.2 |
| USB Ports (Rear) | 2 x USB 3.2 Gen 2 (Type-A + Type-C), 4 x USB 3.2 Gen 1 (Type-A), 2 x USB 2.0 (Type-A) |
Warranty and Support
This product is covered by ASUS's standard warranty. For detailed warranty information, technical support, or to download the latest drivers and BIOS updates, please visit the official ASUS support website: www.asus.com/us/support/