1. Product Overview
The tectake 403000 Piotr Electric Table Frame is a versatile and robust solution for creating an ergonomic workspace. It allows for seamless transitions between sitting and standing positions, promoting a healthier work environment. Its design prioritizes user comfort and adaptability.

Image 1.1: The tectake Piotr electric table frame, showcasing its sturdy white metal construction and integrated control unit.
Key Features:
- Continuously electrically height-adjustable for ergonomic positioning.
- Smooth and quiet movements during height adjustments.
- Variable frame width to accommodate different tabletop sizes.
- Constructed from high-quality, robust steel for durability and stability.
- Powerful and quiet motor operation (less than 50 dB).
- Features a memory function to store up to three preferred height settings.
- Includes an alarm function to remind users to change positions.
- Designed for maximum legroom due to the absence of a crossbar.
- Easy assembly process.
2. Setup and Assembly
The tectake Piotr table frame is designed for straightforward assembly. Please follow these general steps. Refer to the included assembly instructions for detailed, step-by-step guidance and diagrams.
2.1 Unpacking and Component Check
Carefully unpack all components and verify against the packing list. Ensure all parts, including the frame sections, motor, control unit, power supply, and hardware, are present and undamaged.

Image 2.1: Essential tools and fasteners provided for assembly, including Allen keys, a wrench, screws, and cable management clips.
2.2 Frame Assembly
- Attach the feet to the bottom of the vertical columns.
- Connect the horizontal support beams to the vertical columns. Ensure all connections are secure.
- Mount the motor and control box to the designated areas on the frame.
- Connect the motor and control unit cables to the power supply and to each other as per the instructions.

Image 2.2: The frame's adjustable width feature, allowing it to accommodate various tabletop dimensions.
2.3 Attaching the Tabletop
Once the frame is assembled, carefully place your chosen tabletop onto the frame. Secure the tabletop to the frame using appropriate screws. Ensure the tabletop is centered and stable before use.

Image 2.3: Detail of the adjustable leveling feet, crucial for ensuring stability on uneven surfaces.
3. Operating Instructions
The tectake Piotr table frame features an intuitive control panel for easy height adjustment and memory functions.
3.1 Basic Height Adjustment
- Raise: Press and hold the 'Up' arrow button (▲) to raise the table to your desired standing height.
- Lower: Press and hold the 'Down' arrow button (▼) to lower the table to your desired sitting height.
- Release the button once the desired height is reached. The motor will stop automatically.
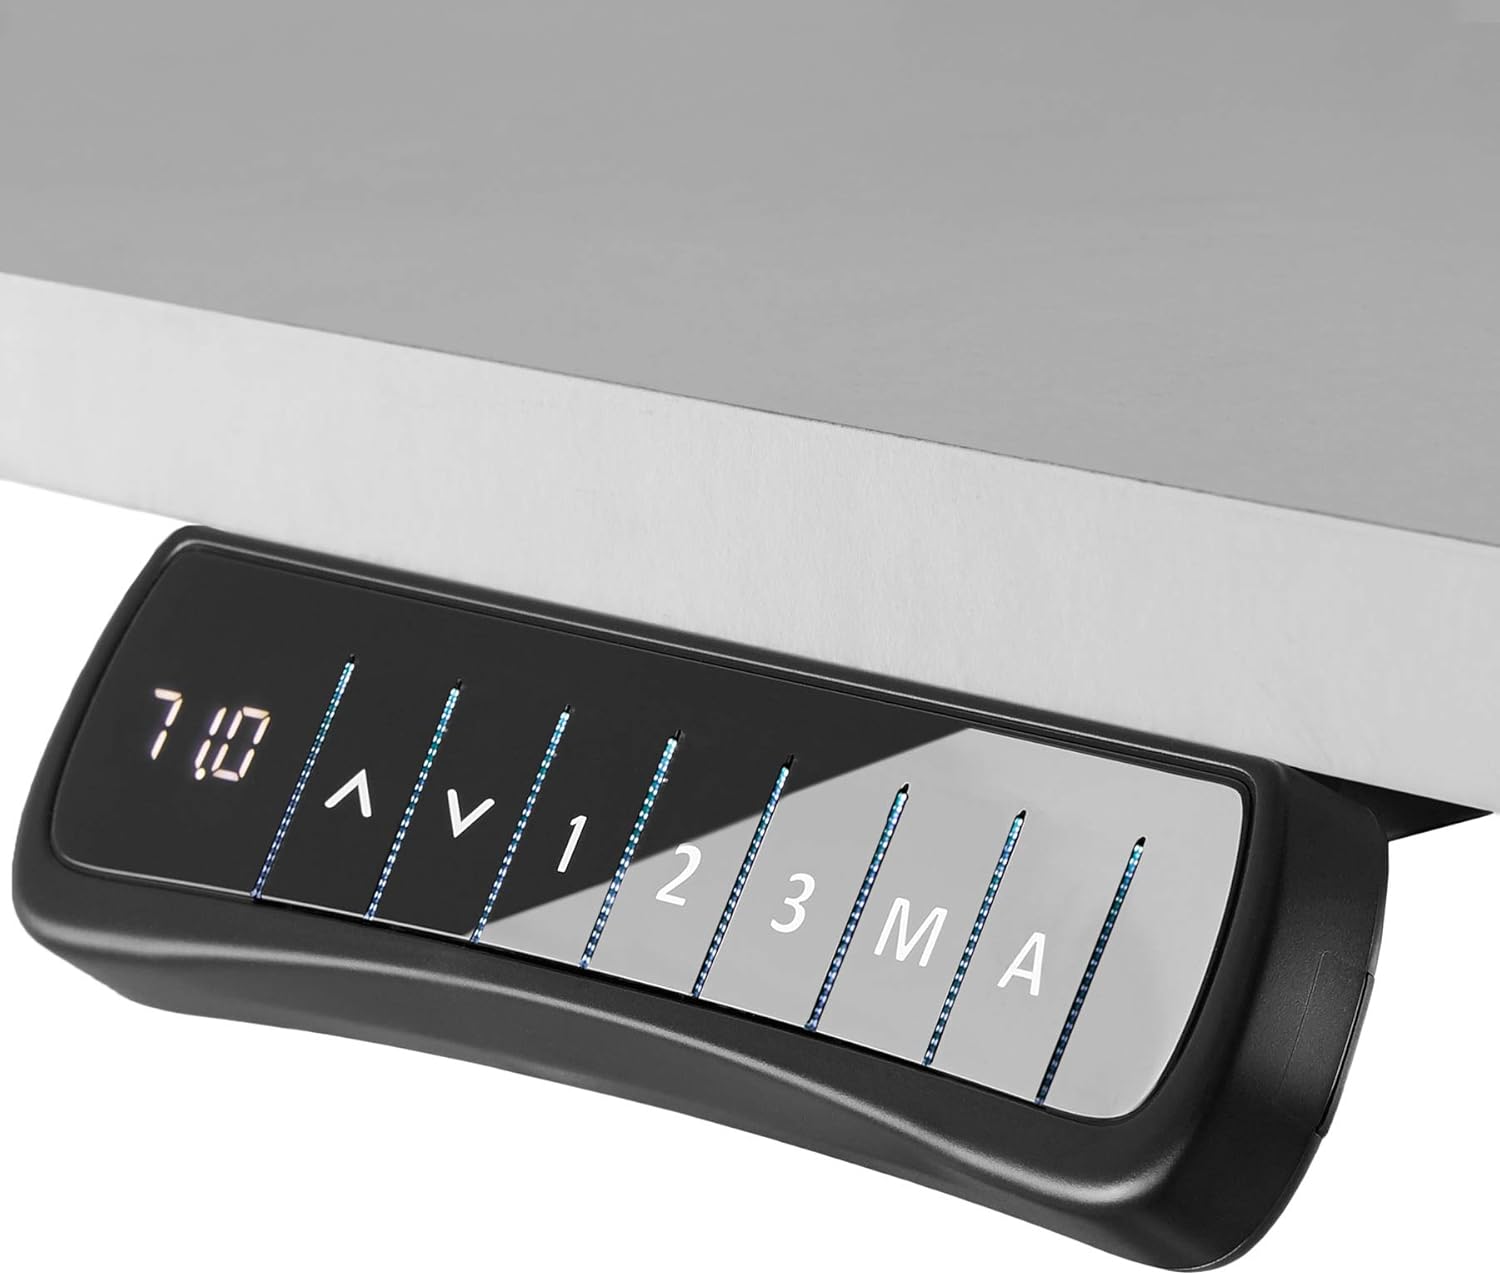
Image 3.1: The control panel with illuminated buttons for height adjustment and memory functions.
3.2 Memory Function
The table frame allows you to save up to three preferred height settings for quick recall.
- Adjust the table to your desired height using the up/down buttons.
- Press the 'M' (Memory) button. The display may flash or show 'S-'.
- Within a few seconds, press one of the preset number buttons (1, 2, or 3) to save the current height to that position. The display will confirm the setting.
- To recall a saved height, simply press the corresponding number button (1, 2, or 3). The table will automatically move to the saved position.

Image 3.2: Visual representation of the table frame's height adjustment capability and the control panel.
3.3 Position Alarm
The integrated alarm function can remind you to change your working position after a set period, promoting healthier habits. Consult your specific manual for details on how to activate or adjust the alarm settings, as this may vary.
4. Maintenance
Regular maintenance ensures the longevity and optimal performance of your tectake Piotr table frame.
4.1 Cleaning
- Disconnect the power supply before cleaning.
- Wipe the frame surfaces with a soft, damp cloth. Avoid abrasive cleaners or solvents that could damage the powder-coated finish.
- Ensure no liquid enters the motor or control unit.
4.2 Cable Management
Periodically check all cables for wear or damage. Use the provided cable clips or other cable management solutions to keep cables tidy and prevent them from being pinched or tangled during height adjustments.
4.3 General Inspection
Occasionally inspect all screws and connections to ensure they remain tight. If any components appear loose or damaged, tighten them or contact customer support.
5. Troubleshooting
If you encounter issues with your tectake Piotr table frame, try the following troubleshooting steps before contacting support.
5.1 Table Not Responding
- Check Power: Ensure the power cable is securely plugged into both the wall outlet and the control box. Verify the outlet is functional.
- Reset: Unplug the power cable from the wall for 10-15 seconds, then plug it back in. This can often reset the system.
- Overload Protection: If the table has been used continuously for an extended period, it might have activated its thermal overload protection. Allow it to cool down for 20-30 minutes before attempting to operate it again.
5.2 Uneven Height Adjustment
- Obstructions: Check for any obstructions under or around the table that might be impeding the movement of one of the legs.
- Weight Distribution: Ensure the weight on the tabletop is evenly distributed and does not exceed the maximum load capacity.
- Synchronization: Some models may require a synchronization process if the legs become uneven. Refer to your specific manual for instructions on how to perform a reset or synchronization.
5.3 Motor Noise
- While the motor is designed to be quiet, minor operational sounds are normal.
- If you notice unusual or loud grinding noises, discontinue use and contact customer support.
6. Technical Specifications
| Feature | Specification |
|---|---|
| Maximum Overall Dimensions (LxWxH) | approx. 129 x 65 x 121 cm |
| Minimum Overall Dimensions (LxWxH) | approx. 85 x 65 x 71 cm |
| Suitable for Table Tops (LxW) | approx. 100 x 50 to 160 x 80 cm |
| Main Column (LxW) | approx. 5 x 8 cm |
| Extendable Columns | 1 |
| Support Plate (LxW) | approx. 3.5 x 48 cm |
| Foot (LxW) | approx. 8 x 65 cm |
| Motor Noise Level | <50 dB |
| Sliding Speed | 25 mm/s |
| Power | 40 W |
| Voltage | 100 - 240 V |
| Cable Length | approx. 300 cm |
| Maximum Load Capacity | 70 kg |
| Weight | approx. 21 kg |
| Material | Powder-coated steel |

Image 6.1: Detailed technical drawing illustrating the dimensions of the table frame.

Image 6.2: The powerful and quiet motor responsible for the table's height adjustment.

Image 6.3: The power supply unit for the table frame.
7. Warranty and Support
For warranty information, please refer to the documentation included with your purchase or contact the retailer/manufacturer directly. Keep your proof of purchase for any warranty claims.
7.1 Customer Support
If you have any questions, require technical assistance, or need to report a problem that cannot be resolved using the troubleshooting guide, please contact tectake customer support. Contact details can typically be found on the manufacturer's website or in your purchase documentation.


