Introduction
Thank you for choosing the 360 S9 Robot Vacuum and Mop. This intelligent cleaning device is designed to provide efficient and thorough cleaning of your home with advanced navigation and dual cleaning capabilities. Please read this manual carefully before using the product to ensure proper operation and maintenance.

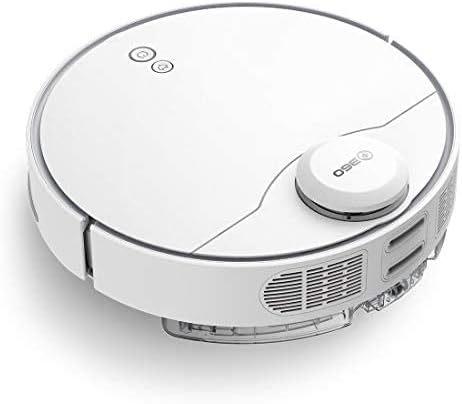
The 360 S9 Robot Vacuum and Mop, showcasing its sleek design and the accompanying mobile application for control.
Safety Information
To reduce the risk of injury or damage, read these safety instructions carefully and keep them handy for future reference.
- This appliance can be used by children aged 8 years and above and persons with reduced physical, sensory or mental capabilities or lack of experience and knowledge if they have been given supervision or instruction concerning use of the appliance in a safe way and understand the hazards involved.
- Children shall not play with the appliance. Cleaning and user maintenance shall not be made by children without supervision.
- Only use the original power adapter provided by the manufacturer.
- Do not use the robot in environments with open flames or fragile objects.
- Ensure the robot is fully charged before first use.
- Do not expose the robot to direct sunlight or extreme temperatures.
- Keep hair, loose clothing, fingers, and all parts of body away from openings and moving parts.
Package Contents
Please check if all components are included in the package:
- 360 S9 Robot Vacuum and Mop
- Charging Dock
- Power Adapter
- Water Tank
- Mop Cloth
- Side Brushes (2x)
- Cleaning Tool
- User Manual
Product Overview
Familiarize yourself with the different parts of your 360 S9 Robot Vacuum and Mop.
Side view of the 360 S9, highlighting the dustbin and side brush assembly.

Detailed side view of the 360 S9, illustrating its wheels and various sensors.
Top View
- LDS Laser Navigation Sensor: For precise mapping and navigation.
- Power/Clean Button: Start/pause cleaning.
- Recharge Button: Send robot back to charging dock.
- Dustbin Compartment: Houses the dustbin and water tank.
Bottom View
- Side Brush: Sweeps debris into the main brush path.
- Main Brush: Collects dust and debris.
- Driving Wheels: For movement across various surfaces.
- Cliff Sensors: Prevents the robot from falling down stairs.
- Charging Contacts: For connecting with the charging dock.
Setup
1. Charging Dock Placement
Place the charging dock against a wall on a hard, level surface. Ensure there is at least 0.5 meters (1.6 feet) of clear space on both sides and 1.5 meters (4.9 feet) in front of the dock. Connect the power adapter to the dock and plug it into a wall outlet. Ensure the indicator light on the dock is on.
2. Initial Charging
Place the robot onto the charging dock, ensuring the charging contacts align. The robot will automatically begin charging. For first-time use, fully charge the robot before operation. A full charge takes approximately 4-5 hours.
3. App Installation & Connection
Download the "360 Robot" app from the App Store (iOS) or Google Play Store (Android). Follow the in-app instructions to connect your robot to your home Wi-Fi network. This will enable advanced features like map management, scheduled cleaning, and remote control.

The 360 Robot app interface, demonstrating various cleaning modes and compatibility with Amazon Alexa and Google Assistant.
Operating Instructions
Cleaning Modes
The 360 S9 offers multiple cleaning modes to suit your needs:
- Auto Cleaning: The robot intelligently plans its cleaning route using LDS Lidar and SLAM algorithm to cover the entire area. Press the Power/Clean button on the robot or select "Auto Cleaning" in the app.
- Edge Cleaning: The robot cleans along the edges of your rooms. Select "Edge Cleaning" in the app.
- Spot Cleaning: The robot performs an intensive clean in a specific area. Place the robot in the desired area and select "Spot Cleaning" in the app.

The 360 S9 utilizing its advanced Lidar navigation system for high-precision mapping and cleaning.
Vacuuming and Mopping
The S9 can vacuum and mop simultaneously. To use the mopping function:
- Fill the water tank with clean water. Do not use detergents or corrosive liquids.
- Attach the mop cloth securely to the water tank.
- Insert the filled water tank into the robot's designated slot. The robot will automatically detect the water tank and switch to sweep+mop mode.

Visual representation of the 360 S9's 2-in-1 vacuuming and mopping function, showing the dustbin (0.42L) and water tank (0.2L) capacities.
The robot features a powerful 2650Pa suction with carpet boost, automatically increasing suction on carpets for deeper cleaning.

The 360 S9 showcasing its 2650Pa powerful suction with automatic carpet boost, effectively cleaning a rug.
No-Go Zones and Virtual Walls
Using the 360 Robot app, you can set up virtual walls or no-go zones to restrict the robot from entering certain areas. This is useful for protecting fragile items or preventing the robot from entering bathrooms while mopping.
Voice Control
The 360 S9 is compatible with Amazon Alexa and Google Assistant. Link your robot vacuum to your smart home system through the 360 Robot app to control it with voice commands, such as "Alexa, tell 360 Robot to start cleaning" or "Hey Google, ask 360 Robot to go home."
Maintenance
Regular maintenance ensures optimal performance and extends the lifespan of your robot vacuum.
1. Emptying the Dustbin
It is recommended to empty the dustbin after each cleaning cycle. Open the top cover of the robot, remove the dustbin, open its lid, and discard the collected debris. The dustbin capacity is 0.42 Liters.
2. Refilling the Water Tank
For mopping, ensure the water tank is filled with clean water. The water tank capacity is 0.2 Liters. Refill as needed before each mopping session.
3. Cleaning Brushes
- Main Brush: Remove the main brush cover and lift out the main brush. Use the provided cleaning tool to remove hair and debris tangled around the brush. Clean regularly, especially if pet hair is present.
- Side Brushes: Check side brushes for tangled hair or debris. If damaged or worn, replace them.
4. Cleaning Filters
The filter inside the dustbin should be cleaned regularly. Tap the filter against a trash can to remove dust. For a more thorough clean, the filter can be rinsed with water, but ensure it is completely dry before reinserting it into the dustbin and robot.
5. Cleaning Sensors
Wipe the cliff sensors (on the bottom of the robot), charging contacts (on the robot and dock), and the LDS laser sensor window (on top of the robot) with a clean, dry cloth. This prevents navigation errors and ensures proper charging.
Troubleshooting
| Problem | Possible Cause | Solution |
|---|---|---|
| Robot does not turn on. | Low battery; Power switch off. | Charge the robot; Ensure power switch is on. |
| Robot cannot find charging dock. | Dock is blocked or out of range. | Ensure clear space around dock; Manually place robot on dock. |
| Suction power is weak. | Dustbin full; Filter clogged; Main brush tangled. | Empty dustbin; Clean/replace filter; Clean main brush. |
| Robot gets stuck frequently. | Obstacles; Cliff sensors dirty. | Clear obstacles; Clean cliff sensors. |
| Mopping function not working. | Water tank empty; Mop cloth not attached. | Fill water tank; Attach mop cloth correctly. |
Specifications
| Brand | 360 |
| Model Name | S9 |
| Model Number | 360-S9-WHITE |
| Navigation | LDS Laser, SLAM Algorithm |
| Battery Capacity | 5200mAh |
| Max Suction Power | 2650Pa |
| Run Time | Up to 180 minutes |
| Dustbin Capacity | 0.42 Liters |
| Water Tank Capacity | 0.2 Liters |
| Noise Level | 53dB |
| Wi-Fi Connected | Yes |
| Control Method | App, Remote |
| Compatible Devices | Amazon Echo (Alexa), Google Assistant |
| Product Dimensions | 13.78"L x 13.78"W x 3.94"H |
| Item Weight | 8.47 pounds |
Warranty and Support
For warranty information and technical support, please refer to the official 360 website or contact their customer service. Keep your purchase receipt as proof of purchase for warranty claims.
For further assistance, you may visit the product page on Amazon or contact 360 Smart Network customer support.


