
SINGER 1412
Singer Promise 1412 Sewing Machine Instruction Manual
Brand: SINGER | Model: 1412
Introduction
The Singer Promise 1412 Sewing Machine is designed for domestic use and new sewers, featuring easy threading, 12 built-in stitches (7 basic, 2 decorative, 1 automatic 4-step buttonhole), and essential accessories. Its adjustable stitch length ensures strong seams and prevents fabric bunching, while the heavy-duty metal frame provides stability for skip-free sewing.
Machine Components

Overall view of the Singer Promise 1412 Sewing Machine, highlighting its compact design and key operational areas.

Close-up of the stitch length dial, allowing adjustment of stitch size for various fabric types and sewing needs.
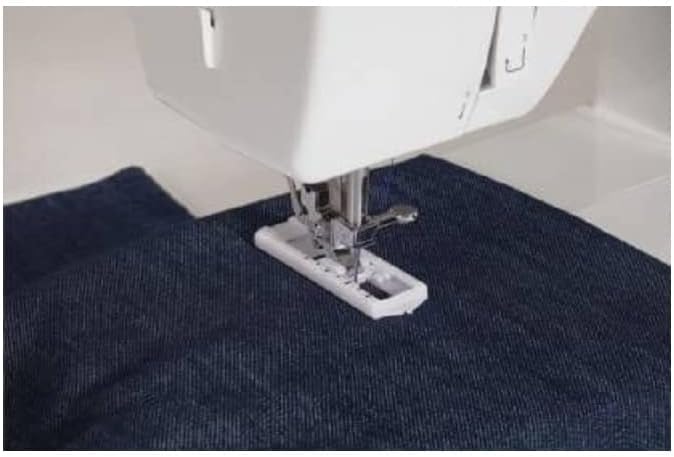
The presser foot in action, demonstrating its role in holding fabric securely during sewing.

Included accessories for the Singer Promise 1412 Sewing Machine, such as bobbins, needles, and various presser feet.
Key Parts:
- Spool Pins: Hold the thread spools.
- Bobbin Winder: Used to wind thread onto the bobbin.
- Handle: For carrying the machine.
- Thread Guide: Guides the thread through the machine.
- Thread Tension Dial: Adjusts the tension of the upper thread.
- Thread Cutter: Conveniently cuts threads.
- Stitch Selection Dial: Selects the desired stitch pattern.
- Stitch Length Dial: Controls the length of the stitches.
- Reverse Sewing Lever: Allows sewing in reverse to reinforce stitches.
- Thread Take-up Lever: Helps control the thread tension during sewing.
- Pressure Foot: Holds the fabric firmly against the feed dogs.
- Needle Plate: The metal plate under the needle, with markings for seam allowance.
- Pressure Foot Lifter: Raises and lowers the pressure foot.
- Removable Extension Table: Provides a larger work surface and contains a storage compartment.
- Bobbin Case: Holds the bobbin in place.
- Bobbin: Holds the lower thread.
- Shuttle: The mechanism that interacts with the needle thread to form stitches.
- Hand Wheel: Manually raises and lowers the needle.
- Power Switch: Turns the machine on/off.
- Main Plug Socket: Connects the power cord and foot controller.
- Foot Speed Controller: Controls the sewing speed.
Setup
Power Connection
Connect the power cord to the main plug socket at the back of the machine. Ensure the power switch is in the 'off' position before connecting or disconnecting the power cord or foot controller.
Bobbin Winding
- Place the thread spool on the spool pin.
- Pass the thread through the thread guide and around the bobbin.
- Insert the bobbin onto the bobbin winder.
- Push the bobbin winder to the right.
- Gently press the foot speed controller to wind the thread onto the bobbin.
- Once the bobbin is full, push the bobbin winder to the left to remove it.
Threading the Machine
- Follow the numbered thread guides on the machine, starting from the top (1).
- Guide the thread down through channel (2).
- Make a U-turn at the bottom (3).
- Guide the thread up through the thread take-up lever (4).
- Finally, guide the thread down to the needle (5) and thread the needle from front to back.
Inserting the Bobbin Case
- Open the removable extension table to access the bobbin area.
- Insert the wound bobbin into the bobbin case, ensuring the thread comes out correctly through the tension spring.
- Place the bobbin case into the shuttle, ensuring it clicks into place.
- Close the extension table.
Operating Instructions
Stitch Selection
Use the stitch selection dial to choose from the 12 built-in stitches, which include basic, stretch, and decorative patterns. Rotate the dial until the desired stitch symbol aligns with the indicator mark.
Stitch Length Adjustment
Adjust the stitch length using the dedicated dial. Higher numbers on the dial typically indicate longer stitches, suitable for various fabric types and sewing needs.
Reverse Sewing
To reinforce seams or tie off stitches at the beginning or end of a seam, use the reverse sewing lever. Hold the lever down to sew in reverse, and release it to resume forward sewing.
Sewing
- Place your fabric under the presser foot.
- Lower the presser foot using the pressure foot lifter.
- Gently press the foot speed controller to begin sewing. Control the speed by varying pressure on the controller.
- The machine is designed to handle multiple layers of thick fabric effectively, providing consistent stitch quality.
Maintenance
Regular cleaning of lint and thread buildup from the bobbin area and feed dogs is recommended to ensure smooth operation. Refer to the full manual for detailed cleaning and oiling procedures. Always unplug the machine before performing any maintenance or adjustments.
Troubleshooting
If the machine encounters issues such as thread jamming, skipped stitches, or uneven tension, first check the threading path (upper thread and bobbin), needle insertion, and tension settings. Ensure the correct needle type and size are used for your fabric. For persistent problems, consult the full user manual or contact customer support.
Specifications
- Product Dimensions: 16.4 x 13.8 x 8.8 inches
- Item Weight: 1 pounds
- ASIN: B088KSRXFK
- Item Model Number: 1412
- Brand: SINGER
- UPC: 037431884374
- Date First Available: May 13, 2020
Warranty and Support
For warranty information, please refer to the documentation included with your purchase. For additional support, visit the official SINGER website or contact their customer service department.
Ask a question about this manual
Ask about setup, troubleshooting, compatibility, parts, safety, or missing instructions. Manuals+ will review the question and use this page’s manual context to help answer it.