
CNCEST 853A
CNCEST 853A 600W Infrared Preheating Rework Station User Manual
Model: 853A
1. Introduction
This manual provides instructions for the safe and efficient operation, maintenance, and troubleshooting of the CNCEST 853A 600W Infrared Preheating Rework Station. Please read this manual thoroughly before operating the device.

Figure 1: The CNCEST 853A Infrared Preheating Rework Station. This image shows the device with a circuit board placed on its heating surface, illustrating its primary function for PCB preheating.
2. Safety Precautions
- Always operate the device in a well-ventilated area.
- Ensure the power supply matches the specified voltage (110V).
- Do not touch the heating plate during operation or immediately after shutdown, as it remains hot.
- Wear appropriate personal protective equipment (PPE), such as heat-resistant gloves and safety glasses.
- Keep flammable materials away from the heating station.
- Disconnect power before cleaning or maintenance.
- The device features an anti-static design; however, proper grounding practices should still be followed when handling sensitive electronic components.
3. Specifications
| Feature | Specification |
|---|---|
| Model | 853A |
| Heating Power | 600 W |
| Heating Area | 130 x 130 mm (5.118 x 5.118 inches) |
| Heating Element | Infrared Ceramic Heating Body |
| Temperature Sensor | K Thermocouple Type |
| Temperature Range | 50 ℃ - 350 ℃ (122 ℉ - 662 ℉) |
| Thermometer Test Range | 0 ℃ - 400 ℃ |
| Work Environment Temperature | 0 ℃ - 40 ℃ |
| Temperature Stability | ±1 ℃ |
| Voltage | 110V |
| Weight | 3.05 KG |
| Dimensions (L x W x H) | Approx. 25cm x 22cm x 9cm (9.8in x 8.7in x 3.5in) |
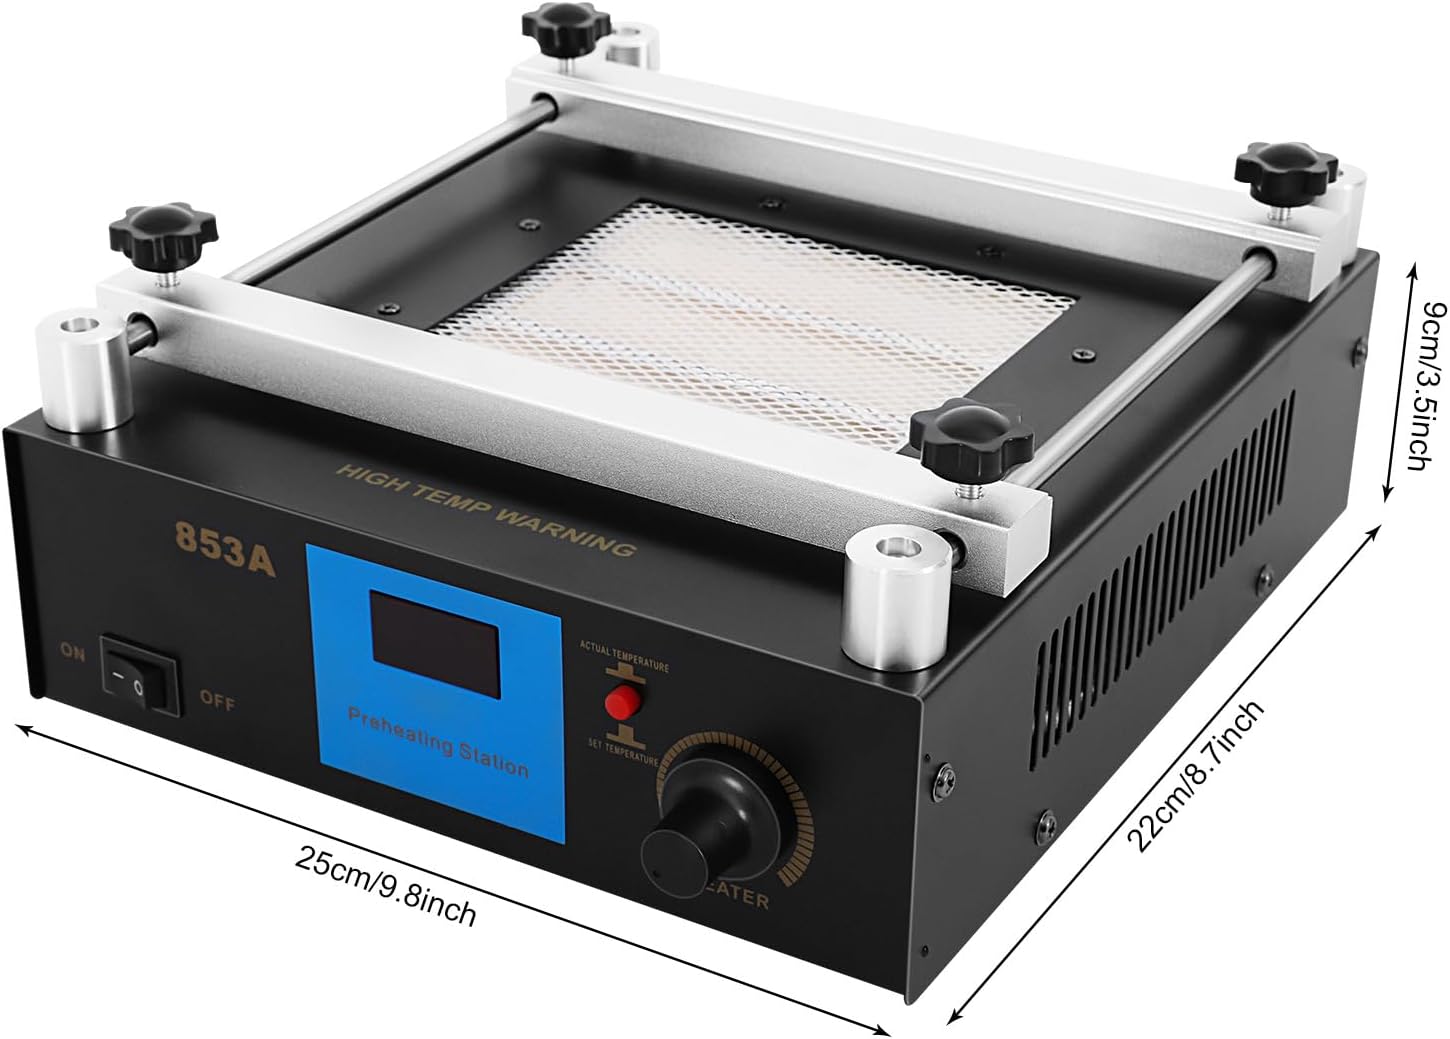
Figure 2: Physical dimensions of the 853A Preheating Rework Station, showing length, width, and height measurements.

Figure 3: Rear view of the device, highlighting the power input socket and ventilation grilles.
4. Setup
- Unpacking: Carefully remove the preheating station from its packaging. Inspect for any damage during transit.
- Placement: Place the unit on a stable, heat-resistant, and level surface in a well-ventilated area. Ensure adequate clearance around the unit for proper airflow.
- Power Connection: Connect the provided power cord to the power input socket on the rear of the unit and then to a grounded 110V AC power outlet.
- Initial Inspection: Verify that the power switch is in the "OFF" position before connecting to power.
- Adjusting Grippers: The station includes adjustable grippers to secure PCBs. Loosen the knobs, position the grippers to hold your circuit board securely, and then tighten the knobs.

Figure 4: Image showing the 4.92 ft power cord and the stable support feet of the preheating station.

Figure 5: Close-up of the front panel, displaying the LED temperature display, power switch, and gripper adjustment knobs.
5. Operating Instructions
- Power On: Flip the "ON/OFF" switch to the "ON" position. The digital display will illuminate, showing the current temperature.
- Set Temperature: Rotate the "SET TEMPERATURE" knob to adjust the desired preheating temperature. The digital display will show the set temperature. The unit will begin heating to reach this target.
- Monitor Temperature: The "ACTUAL TEMPERATURE" indicator will show the current temperature of the heating plate. Use the included thermometer to verify the PCB temperature if precise monitoring is required.
- Place PCB: Once the desired temperature is reached, carefully place the PCB onto the heating area, securing it with the adjustable grippers if necessary.
- Preheating Process: Allow the PCB to preheat to the required temperature. The infrared ceramic heating body ensures uniform heating across the 130x130mm area.
- Power Off: After use, turn the "ON/OFF" switch to the "OFF" position. Allow the unit to cool down completely before handling or storing.

Figure 6: View of the infrared ceramic heating body, illustrating the 120mm x 120mm heating area and its 450W power output for efficient heating.

Figure 7: Diagram illustrating the intelligent temperature control system, including PID control and digital constant temperature device, with a temperature adjustment range of 50-400°C.
6. Applications
The CNCEST 853A Infrared Preheating Rework Station is suitable for various applications, including:
- Electronic equipment maintenance and repair.
- Mobile communication device maintenance.
- Factory production lines requiring preheating or drying processes.
- Research and development for preheating sensitive components.
- Pre-heating for desoldering large-scale flat integrated circuits (IC) and double-layer large-size original devices.

Figure 8: Collage showing diverse applications such as electronic equipment maintenance, mobile communications maintenance, factory production, and scientific research and development.
7. Maintenance
- Cleaning: Ensure the unit is unplugged and completely cool before cleaning. Use a soft, dry cloth to wipe down the exterior. Do not use abrasive cleaners or solvents.
- Heating Plate: Keep the ceramic heating plate clean and free of debris to ensure efficient heat transfer.
- Ventilation: Regularly check that the cooling holes are not obstructed to maintain proper ventilation and prevent overheating.
- Storage: Store the unit in a dry, dust-free environment when not in use.

Figure 9: Illustration highlighting the cooling holes for heat dissipation and the static-prevention material used in the construction of the device, contributing to safe operation.
8. Troubleshooting
| Problem | Possible Cause | Solution |
|---|---|---|
| Unit does not power on. | No power supply; faulty power cord; power switch off. | Check power outlet and connections. Ensure power switch is "ON". Replace power cord if damaged. |
| Unit not heating. | Temperature not set; faulty heating element. | Verify temperature setting. If issue persists, contact customer support. |
| Inaccurate temperature reading. | Faulty temperature sensor; external factors. | Ensure sensor is clean and properly connected. Avoid drafts. If issue persists, contact customer support. |
| Uneven heating. | Debris on heating plate; faulty heating element. | Clean heating plate. If issue persists, contact customer support. |
9. Warranty and Support
For warranty information or technical support, please refer to the documentation provided with your purchase or contact CNCEST customer service. Keep your purchase receipt as proof of purchase.
Manufacturer: CNCEST
ASIN: B088K65T4Y
UPC: 738627811777
Ask a question about this manual
Ask about setup, troubleshooting, compatibility, parts, safety, or missing instructions. Manuals+ will review the question and use this page’s manual context to help answer it.