
AV Access HDEX80-KVM
Contents
AV Access HDMI USB KVM Extender User Manual
Model: HDEX80-KVM
1. Introduction
The AV Access HDMI USB KVM Extender (HDEX80-KVM) is designed to extend 1080P@60Hz HDMI signals and USB 2.0 data over a single Cat5e/6 cable up to 80 meters (260 feet). This device provides a reliable solution for remote control of computers or NVRs, ensuring zero latency and no signal loss. It features Power over Ethernet (PoE) for simplified installation and adaptive EDID/EQ management for optimal performance.
2. Package Contents
Please verify that all items listed below are included in your package:
- 1x HDMI USB KVM Extender Transmitter (TX) Unit
- 1x HDMI USB KVM Extender Receiver (RX) Unit
- 1x 12V DC Power Adapter
- 1x USB Type-A to Type-B Cable
- 2x Mounting Ear Pairs
- 1x User Manual (this document)

Image: Package contents of the AV Access HDMI USB KVM Extender.
3. Product Overview
The HDEX80-KVM system consists of a Transmitter (TX) unit and a Receiver (RX) unit. Each unit features specific ports for HDMI, USB, and Ethernet connectivity.
3.1 Transmitter (TX) Unit
The TX unit connects to your source device (e.g., computer, NVR) and sends the HDMI and USB signals over the Ethernet cable.
- HDMI In: Connects to the HDMI output of your source device.
- USB/PC: Connects to the USB port of your source device for KVM functionality.
- UTP Out: Connects to the RX unit via a Cat5e/6 Ethernet cable.
- DC 12V: Power input port.

Image: Transmitter (TX) Unit ports.
3.2 Receiver (RX) Unit
The RX unit connects to your display and USB peripherals, receiving the extended signals from the TX unit.
- HDMI Out: Connects to the HDMI input of your display.
- USB Device (2 ports): Connects to USB peripherals such as keyboard, mouse, game console, webcam, or USB microphone.
- UTP In: Connects to the TX unit via a Cat5e/6 Ethernet cable.
- DC 12V: Power input port.

Image: Receiver (RX) Unit ports and compatible USB devices.
4. Setup and Installation
Follow these steps to set up your AV Access HDMI USB KVM Extender:
- Connect the Source: Connect an HDMI cable from your source device (e.g., PC, NVR) to the HDMI In port on the Transmitter (TX) unit.
- Connect USB to Source: Connect the provided USB Type-A to Type-B cable from your source device's USB port to the USB/PC port on the TX unit.
- Connect Extender Units: Connect a single Cat5e/6 Ethernet cable (up to 80m/260ft) from the UTP Out port on the TX unit to the UTP In port on the Receiver (RX) unit. Ensure a high-quality Ethernet cable is used for optimal performance.
- Connect Display: Connect an HDMI cable from the HDMI Out port on the RX unit to the HDMI input of your display (e.g., monitor, TV).
- Connect USB Peripherals: Connect your USB peripherals (keyboard, mouse, etc.) to the USB Device ports on the RX unit.
- Apply Power: Connect the 12V DC power adapter to either the TX or RX unit's DC 12V port. The device supports two-way Power over Ethernet (PoE), meaning only one power adapter is needed for the entire system. It is recommended to connect the power adapter to the Receiver (RX) side for best results. The power adapter features a locking connector for a secure installation.

Image: Connection diagram for the KVM Extender.

Image: Detailed connection for KVM extension.

Image: Bi-directional PoE Functionality.
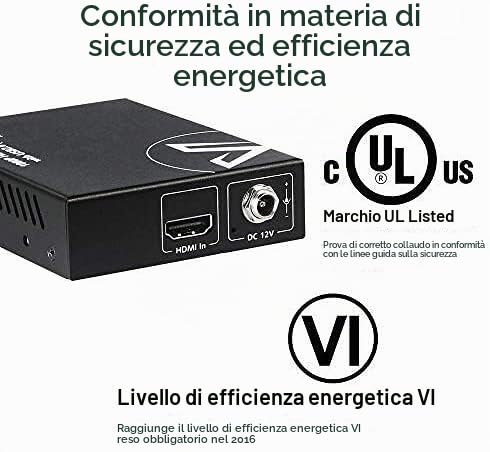
Image: Power adapter with locking connector.
5. Operating Instructions
The AV Access HDMI USB KVM Extender is designed for plug-and-play operation, requiring no driver installation.
- Automatic Operation: Once all connections are made and power is supplied, the extender will automatically detect and transmit the HDMI and USB signals.
- KVM Control: Use your keyboard and mouse connected to the RX unit to control the remote computer or NVR.
- USB 2.0 Compatibility: The two USB 2.0 ports on the RX unit support a wide range of high-speed USB devices, including keyboards, mice, game controllers, webcams, and USB microphones, with data transmission speeds up to 480Mbps.
- Adaptive EDID/EQ: The extender features adaptive EDID and EQ management to ensure optimal video and audio quality without manual configuration.

Image: Key features including 1080p, zero latency, and broad OS support.
6. Maintenance
The AV Access HDMI USB KVM Extender is designed for durability and minimal maintenance.
- Cleaning: Use a soft, dry cloth to clean the device. Avoid using liquid or aerosol cleaners.
- Casing: The full-metal casing provides excellent heat dissipation and minimizes EMI/RFI interference, contributing to the device's longevity.
- Safety Features: Built-in superior surge and ESD protection enhance the safety and reliability of the extender.
- Environment: Operate the device within its specified temperature and humidity ranges to ensure optimal performance and lifespan.

Image: Safety and energy efficiency compliance.
7. Troubleshooting
If you encounter issues with your KVM Extender, please refer to the following common problems and solutions:
- No Video Signal:
- Ensure all HDMI and Ethernet cables are securely connected.
- Verify that the power adapter is connected and the unit is receiving power.
- Check if the source device is outputting a signal and the display is set to the correct input.
- Try using a different, high-quality Cat5e/6 Ethernet cable. Cable quality can significantly impact signal transmission over longer distances.
- USB Devices Not Responding:
- Ensure the USB Type-A to Type-B cable is securely connected between the source PC and the TX unit.
- Verify that USB peripherals are correctly plugged into the RX unit's USB ports.
- Test USB peripherals directly with the source PC to confirm they are functional.
- If experiencing intermittent USB connection issues, consider using a shorter or higher-quality Ethernet cable (e.g., Cat7) between the TX and RX units, as cable quality can affect USB signal stability.
- Intermittent Signal Loss:
- Check for any kinks or damage in the Ethernet cable.
- Ensure the Ethernet cable is not running parallel to high-power electrical cables, which can cause interference.
- Confirm that the power adapter is providing stable power.
If the problem persists after trying these steps, please contact AV Access customer support.
8. Specifications
| Feature | Specification |
|---|---|
| Model | HDEX80-KVM |
| Brand | AV Access |
| Video Resolution | 1080P@60Hz (1920x1080) |
| Extension Distance | Up to 80m (260ft) over single Cat5e/6 cable |
| USB Standard | USB 2.0 (Up to 480Mbps) |
| USB Ports | 2x USB Device ports on RX unit |
| Connectivity Protocol | Ethernet |
| Power Supply | 12V DC (PoE supported, single adapter for both units) |
| Wattage | 24 Watts |
| Operating Voltage | 12 Volts |
| Rated Current | 2 Amperes |
| Material | Metal Casing |
| Mounting Type | Wall Mount (with included ears) |
| International Protection Rating | IP54 |
| Compatible Devices | Computer, NVR, Laptop |
| Control Method | Remote |
| UPC | 634923852868, 194852389779 |
| ASIN | B088JRQJ18 |
9. Warranty and Support
AV Access is committed to providing high-quality products and excellent customer service.
- Warranty: Please refer to the warranty information provided with your purchase or on the official AV Access website for details regarding product warranty coverage.
- Customer Support: For any technical assistance, troubleshooting, or product inquiries, AV Access offers 24/7 customer service. You can contact support through the seller page on Amazon or visit the official AV Access website for contact information.
- Additional Resources: A PDF version of the user manual and a Certificate of Conformity are available for download from the product's Amazon page or the AV Access support portal.
Documents and downloads
Ask a question about this manual
Ask about setup, troubleshooting, compatibility, parts, safety, or missing instructions. Manuals+ will review the question and use this page’s manual context to help answer it.