Introduction
Thank you for choosing the ARREGUI CI10D-AL Electronic Invisible Lock with Alarm. This advanced security device is designed to provide an additional layer of protection for your home or business. Its invisible design ensures that potential intruders are unaware of its presence, making forced entry significantly more difficult. This manual will guide you through the installation, operation, and maintenance of your new lock.
Safety Information
- Read all instructions carefully before installation and use.
- Keep the device away from water and excessive humidity.
- Use only the specified battery types (4 AAA for the main unit, CR2032 for remotes).
- Do not attempt to disassemble or repair the lock yourself. Contact qualified personnel for service.
- Ensure proper alignment during installation to prevent damage to the lock or door.
- Dispose of used batteries according to local regulations.
Package Contents
Verify that all components are present in the package:
- 1x ARREGUI CI10D-AL Electronic Invisible Lock Unit
- 1x Strike Plate
- 4x Remote Controls (with CR2032 batteries included)
- Mounting Hardware (screws, anchors)
- 4x AAA Batteries (for main unit)
- 1x Emergency Battery (for main unit)
- User Manual (this document)
Product Overview
The ARREGUI CI10D-AL is an invisible electronic lock designed for enhanced security. It features a robust alloy steel construction and operates via radio frequency remote controls with encrypted codes.
Main Features:
- Invisible Design: Installed on the interior side of the door, making it undetectable from the outside.
- High-Power Alarm: Integrated 110 dB alarm activates upon forced entry attempts or door opening.
- Remote Control Operation: Lock and unlock using the included radio frequency remote controls.
- Emergency Power: Includes an emergency battery to ensure operation even if main batteries are depleted.
- Low Battery Warning: Audible alert when main batteries are low.
- Fail-Safe Open: The lock remains open if batteries are completely exhausted, preventing lockout.
Components:
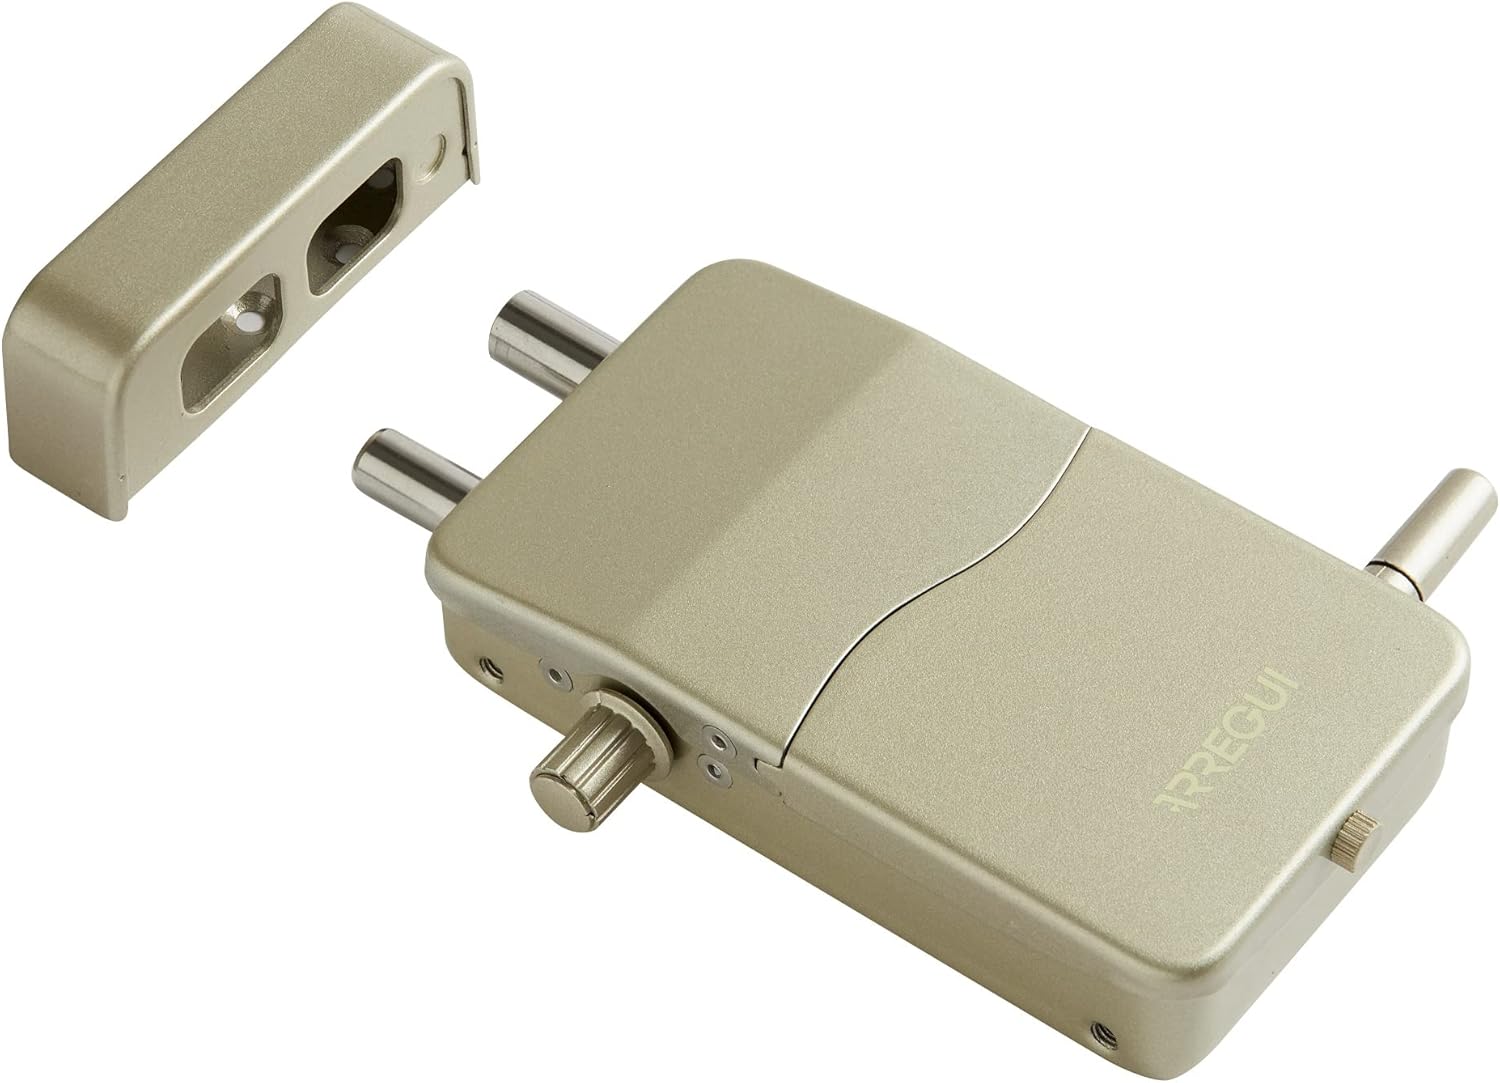
This image displays the primary components of the ARREGUI CI10D-AL lock system. On the right is the main lock body, showing its two robust locking bolts and the manual override knob. The ARREGUI brand name is visible on its surface. To the left is the strike plate, designed to receive the locking bolts when the door is secured. Both components are finished in a gold tone.

This image shows the ARREGUI CI10D-AL lock with its battery cover detached, exposing the internal battery compartment. The compartment is designed to hold four AAA batteries, which power the main unit. The cover, also gold-colored, is shown next to the lock, along with a small screw used to secure it.

This image illustrates the remote control in use. A hand is shown holding the black remote control, which features three buttons for locking, unlocking, and potentially activating the alarm. In the background, the ARREGUI CI10D-AL invisible lock is visible, mounted on the interior of a white door, demonstrating its discreet placement.
Setup and Installation
The ARREGUI CI10D-AL lock is designed for simple, wireless installation on both wooden and metal doors. Ensure you have the necessary tools (e.g., drill, screwdriver, measuring tape) before beginning.
1. Battery Installation (Main Unit):
- Remove the battery cover from the main lock unit (refer to Figure 2).
- Insert 4 AAA batteries into the designated slots, ensuring correct polarity (+/-).
- Insert the emergency battery into its dedicated slot.
- Replace the battery cover and secure it with the small screw.
- The lock will emit a short beep to indicate successful power-up.
2. Mounting the Lock Unit:
- Choose an appropriate location on the interior side of your door, ensuring it does not interfere with the existing lock mechanism or door frame. The lock should be positioned so its bolts can extend freely into the strike plate.
- Hold the lock unit in place and mark the drilling points for the mounting screws.
- Drill pilot holes at the marked points.
- Secure the main lock unit to the door using the provided screws. Do not overtighten.
3. Mounting the Strike Plate:
- Close the door and extend the bolts of the main lock unit.
- Align the strike plate with the extended bolts on the door frame, ensuring a smooth engagement.
- Mark the drilling points for the strike plate.
- Drill pilot holes and secure the strike plate to the door frame using the provided screws.
- Test the locking mechanism to ensure proper alignment and smooth operation. Adjust if necessary.
4. Remote Control Pairing:
The included remote controls are pre-paired. If you need to pair new remotes or re-pair existing ones:
- Locate the pairing button on the main lock unit (refer to the detailed diagram in the full manual if available).
- Press and hold the pairing button until the lock emits a specific sound or light indicator.
- Within a few seconds, press any button on the remote control you wish to pair.
- The lock will confirm successful pairing with another sound or light indicator.
- Repeat for all additional remote controls.
Operating Instructions
Locking the Door:
- Ensure the door is fully closed.
- Press the Lock button on your remote control (usually indicated by a closed padlock icon).
- The lock bolts will extend, and you will hear a confirmation sound.
Unlocking the Door:
- Press the Unlock button on your remote control (usually indicated by an open padlock icon).
- The lock bolts will retract, and you will hear a confirmation sound.
Alarm Function:
The integrated 110 dB alarm is designed to deter intruders. It activates automatically when the lock detects:
- Attempts to force the door open.
- Significant impacts or vibrations on the door.
- The alarm will sound for a set duration and then reset. To manually deactivate the alarm, press the Unlock button on your remote control.
Manual Override:
In case of remote control malfunction or battery depletion, the lock can be manually operated from the interior using the knob on the main unit.
Maintenance
Battery Replacement (Main Unit):
The lock will emit an audible warning when the main AAA batteries are low. Replace them promptly to ensure continuous operation.
- Unlock the door.
- Remove the battery cover (refer to Figure 2).
- Remove the old AAA batteries and dispose of them responsibly.
- Insert 4 new AAA batteries, observing correct polarity.
- Replace the battery cover.
Battery Replacement (Remote Control):
Each remote control uses a CR2032 3V lithium button cell battery.
- Carefully open the remote control casing (usually by prying it open with a small flat-head screwdriver).
- Remove the old CR2032 battery.
- Insert a new CR2032 battery with the positive (+) side facing up.
- Close the remote control casing securely.
Cleaning:
Wipe the lock unit and remote controls with a soft, dry cloth. Do not use abrasive cleaners or solvents.
Troubleshooting
| Problem | Possible Cause | Solution |
|---|---|---|
| Lock does not respond to remote. |
|
|
| Lock bolts do not extend/retract smoothly. |
|
|
| Alarm sounds unexpectedly. |
|
|
| Low battery warning persists after replacement. |
|
|
Specifications
| Model Number | CI10D-AL |
| Brand | ARREGUI |
| Material | Alloy Steel |
| Lock Type | Electronic |
| Special Feature | Alarm (110 dB) |
| Control Method | Remote Control (Radio Frequency) |
| Main Unit Power | 4x AAA Batteries (included) + Emergency Battery (included) |
| Remote Control Power | CR2032 3V Lithium Button Cell (included) |
| Dimensions (L x W x H) | 133 x 75 x 35 mm (5.24 x 2.95 x 1.38 inches) |
| Weight | 1.21 Kilograms (2.67 lbs) |
| Included Components | Lock unit, strike plate, 4 remote controls, mounting hardware, batteries |
Warranty Information
Specific warranty details for the ARREGUI CI10D-AL Electronic Invisible Lock with Alarm are not provided within this manual. Please refer to the product packaging, the manufacturer's official website, or your point of purchase for comprehensive warranty terms and conditions.
Support
For technical assistance, troubleshooting beyond this guide, or inquiries regarding your ARREGUI CI10D-AL lock, please contact ARREGUI customer support. Contact information can typically be found on the manufacturer's official website or on the product packaging.
When contacting support, please have your product model number (CI10D-AL) and purchase details ready.


