
1. Introduction
This manual provides detailed instructions for the safe and efficient operation of your Retevis RB19 USB C Walkie Talkie. The RB19 is a compact, ultra-slim two-way radio designed for clear communication in various environments. Please read this manual thoroughly before using the device to ensure proper functionality and to understand all features.
The Retevis RB19 features a dot matrix screen for clear display of channel, volume, and transmission status, a 1650mAh lithium battery for extended use, and convenient USB-C charging. It supports FRS 22 channels and includes functions such as VOX, key lock, and remote emergency alarm.
2. Product Overview
2.1 Package Contents
Upon opening the package, verify that all items are present and in good condition:
- 3 x Retevis RB19 Walkie Talkies
- 3 x Power Adapters
- 3 x Type-C USB Charging Cables
- 3 x English User Manuals

Figure 1: Retevis RB19 Package Contents
2.2 Device Components
Familiarize yourself with the various parts of your Retevis RB19 walkie talkie:

Figure 2: Retevis RB19 Front View
- Antenna: For transmitting and receiving signals.
- Dot Matrix Screen: Displays channel number, volume level, battery status, and other operational indicators.
- Control Buttons: Used for navigation, channel selection, and feature activation.
- Speaker: For audio output.
- Microphone: For voice input.
- PTT (Push-to-Talk) Button: Located on the side, used to transmit your voice.
- Power Switch: On/Off control.
- 1 Pin 3.5mm Headphone Jack & Charging Port: For connecting an earpiece or the USB-C charging cable.
- Non-removable Back Clip: For attaching the radio to clothing or a belt.
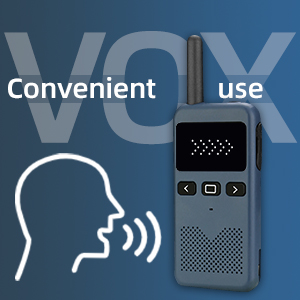
Figure 3: Retevis RB19 Component Diagram
3. Setup
3.1 Charging the Battery
The Retevis RB19 features a built-in 1650mAh lithium battery. Before initial use, fully charge the device.
- Connect the provided USB-C charging cable to the charging port on the side of the walkie talkie.
- Connect the other end of the USB-C cable to the power adapter, and then plug the adapter into a standard wall outlet. Alternatively, you can connect the USB-C cable to a laptop or other compatible USB power source.
- The screen will indicate charging status. A full charge typically takes several hours.
- Once fully charged, disconnect the charging cable.
Note: The device provides an audible warning when the battery is low.

Figure 4: USB-C Charging
3.2 Powering On/Off
- To Power On: Press and hold the Power Switch button until the screen illuminates.
- To Power Off: Press and hold the Power Switch button until the screen turns off.
4. Operating Instructions
4.1 Channel Selection
The RB19 supports 22 FRS channels. To communicate with other walkie talkies, ensure all devices are set to the same channel.
- Press the Menu button (center button below the screen) to enter channel selection mode.
- Use the Up (<) and Down (>) buttons to navigate through the available channels (1-22).
- Press the Menu button again to confirm your selection.
4.2 Volume Adjustment
Adjust the listening volume to a comfortable level.
- While in standby mode, use the Up (<) and Down (>) buttons to increase or decrease the volume.
- The volume level will be displayed on the screen.
4.3 Transmitting and Receiving
- To Transmit: Press and hold the PTT (Push-to-Talk) button located on the side of the radio. Speak clearly into the microphone. Release the PTT button when you finish speaking.
- To Receive: Ensure the PTT button is not pressed. The radio will automatically receive transmissions on the selected channel.
4.4 VOX Function (Voice Operated Exchange)
The VOX function allows you to transmit without pressing the PTT button, by simply speaking into the microphone.

Figure 5: VOX Function
- Refer to the full user manual for specific steps to activate and adjust VOX sensitivity.
- When VOX is active, the radio will automatically transmit when it detects your voice.
4.5 Key Lock
To prevent accidental changes to settings or unintended transmissions, you can lock the keypad.

Figure 6: Key Lock Function
- To Lock: Press and hold the Menu button for several seconds until a lock icon appears on the screen.
- To Unlock: Press and hold the Menu button again until the lock icon disappears.
4.6 Emergency Alarm
The remote emergency alarm function can be used to alert other walkie talkies on the same channel in an emergency situation.

Figure 7: Emergency Alarm
- Refer to the full user manual for specific instructions on how to activate the emergency alarm.
- When activated, the radio will transmit an alarm signal to other radios on the same channel.
5. Maintenance
- Cleaning: Use a soft, damp cloth to clean the exterior of the walkie talkie. Do not use harsh chemicals or abrasive cleaners.
- Storage: Store the device in a cool, dry place away from direct sunlight and extreme temperatures.
- Battery Care: To prolong battery life, avoid fully discharging the battery frequently. Charge the battery regularly, even if the device is not in use for extended periods.
- Antenna: Do not attempt to remove or modify the antenna.
6. Troubleshooting
| Problem | Possible Cause | Solution |
|---|---|---|
| No power | Battery is depleted. | Charge the battery fully. |
| Cannot transmit or receive | Incorrect channel selected. Out of range. PTT button not pressed/released correctly. | Ensure all radios are on the same channel. Move closer to the other radio. Press and hold PTT to transmit, release to receive. |
| Poor audio quality | Low battery. Out of range. Obstructions between radios. | Charge the battery. Move closer to the other radio. Move to an area with fewer obstructions. |
| Volume too loud after reboot | Previous software behavior. | The RB19 has an upgraded volume memory function to address this. If issue persists, ensure firmware is updated (if applicable) or contact support. |
7. Specifications
- Model: RB19 (Item model number: FA9193AX3)
- Brand: Retevis
- Color: Navy blue
- Number of Channels: 22 FRS Channels
- Frequency Range: FRS
- Talking Range Maximum: 300 Meters (actual range varies based on terrain and conditions)
- Battery: 1650mAh Lithium Ion (included)
- Charging: USB-C
- Display Type: LCD Dot Matrix Screen
- Product Dimensions: 2.1 x 0.55 x 5.7 inches
- Item Weight: 1.45 pounds (for the pack of 3, individual unit weight is approximately 0.22 pounds)
- Water Resistance Level: Not Water Resistant
- Date First Available: May 9, 2020
8. Warranty and Support
Retevis provides the following warranty and support for the RB19 walkie talkie:
- Warranty Period: 2-year warranty for the radio body and 1-year warranty for accessories.
- Return Policy: 30 days no reason to return.
- Post-Warranty Service: Maintain service is offered beyond the warranty period; buyers are responsible for associated costs.
- Contact Support: For any issues or inquiries, please contact Retevis customer service via Amazon. Responses are typically provided within 12 hours.
For further assistance, please visit the official Retevis store on Amazon: Retevis Store


