1. Introduction
This manual provides detailed instructions for the proper use, setup, maintenance, and troubleshooting of your MoKo Industrial Endoscope Borescope Inspection Camera. This multi-function inspection system features a 4.3-inch QVCA color LCD screen and powerful recording capabilities. It is designed for a wide range of applications, including vehicle repair, home inspections, electrical wiring checks, sewer drain pipe dredging, and HVAC repair.

Figure 1.1: MoKo Industrial Endoscope Borescope Inspection Camera
2. Product Features
The MoKo Industrial Endoscope Borescope Inspection Camera is equipped with several key features to enhance its functionality and ease of use:
- 10-Meter Semi-Rigid Cable with LED: The 8mm diameter metal gooseneck cable maintains its shape for precise positioning in various environments. It features 6 adjustable LED lights to illuminate dark inspection areas, making it suitable for checking car, boat, and aircraft engines, blocked drains, mechanical devices, and HVAC systems.
- Built-in 4.3-inch LCD Screen and Grip: The integrated 4.3-inch LCD color screen allows for direct viewing of recorded content, eliminating the need for external devices or app installations. An ergonomic handle grip ensures comfortable and convenient operation. The detachable design facilitates easy transport and storage.
- IP67 Waterproof HD Camera: The camera supports 1080P resolution and is rated IP67 waterproof, enabling operation in wet or damp environments, including underwater inspections, and within gaps and holes. This provides clear images and accurate color reproduction.
- High Capacity 1700mAh Battery: A built-in rechargeable 1700mAh Lithium battery provides approximately 3 hours of continuous operation on a full charge. The device supports TF cards up to 64GB for storage (TF card not included).
- Extended Focal Range: The camera offers an enlarged focal distance from 1.6 inches to 198 inches, ensuring a smooth refresh rate and delivering clear images with outstanding color reproduction across various distances.

Figure 2.1: Endoscope Control Panel and Ports
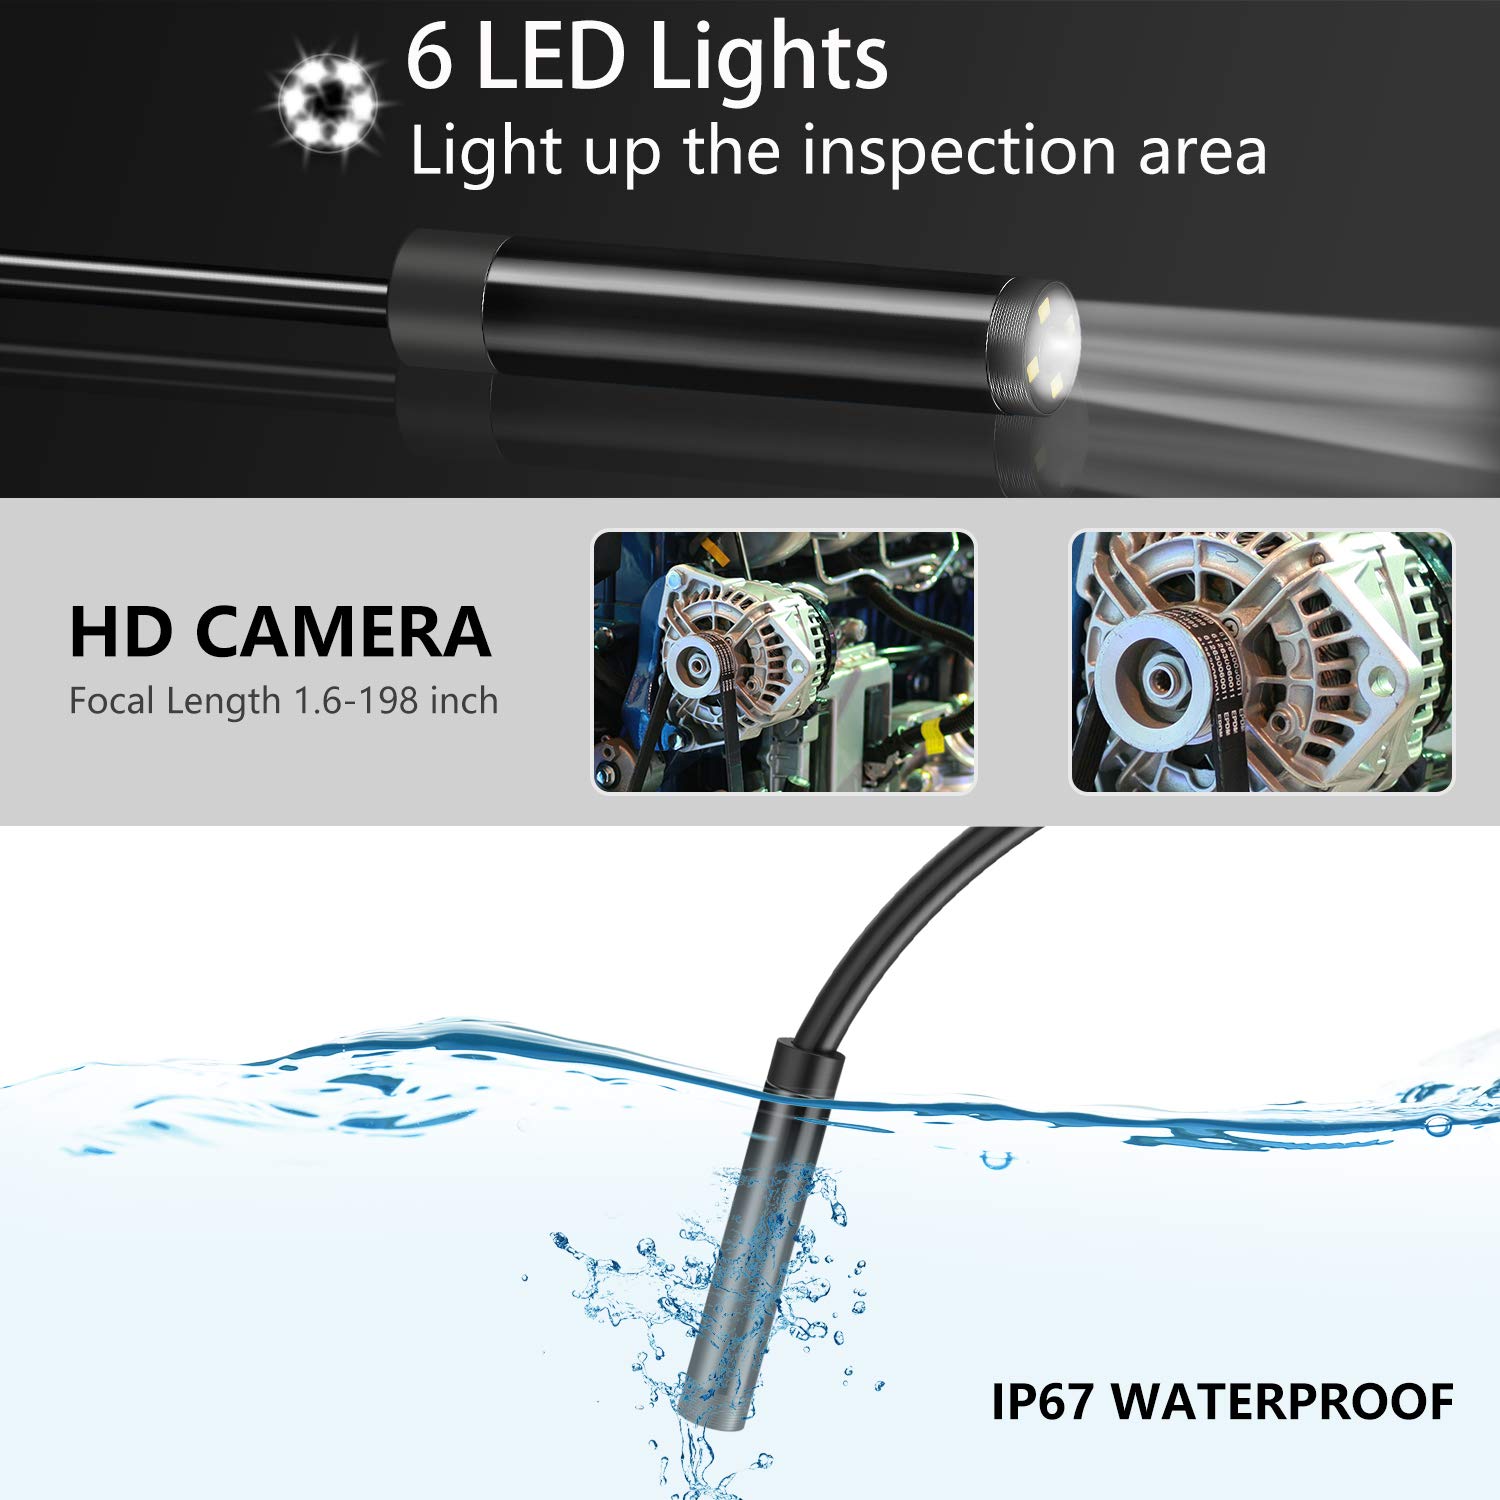
Figure 2.2: HD Camera with LED Lights and Waterproof Capability

Figure 2.3: USB Rechargeable Battery
3. Package Contents
Please verify that all items are present in the package:
- MoKo Industrial Endoscope Borescope Inspection Camera Unit
- Semi-Rigid Probe Cable with Camera and LED Lights
- USB Charging Cable
- User Manual
- Bonus Accessories: Camera protective cover, Mirror, Magnet, Hook

Figure 3.1: Bonus Accessories
4. Setup
Follow these steps to set up your endoscope camera:
- Charge the Battery: Before first use, fully charge the built-in 1700mAh Lithium battery. Connect the display unit to the handle, then use the provided USB cable to connect the device to a 5V 1A power adapter (not included). The charging indicator will show the charging status.
- Insert TF Card (Optional): If you wish to save photos or videos, insert a TF (microSD) card (Class 10 or higher, FAT32 format, up to 64GB) into the MicroTF card slot on the side of the display unit. Ensure the card is inserted correctly.
- Attach Accessories (Optional): For specific inspection needs, you can screw on the camera protective cover, mirror, magnet, or hook onto the camera head.
5. Operating Instructions
Learn how to operate your endoscope camera for effective inspections:
- Power On/Off: Press and hold the Power/Setting button (usually located on the right side of the display unit) to turn the device on or off. The LCD screen will illuminate.
- Adjust LED Lights: Use the UP/Light adjustment button to increase the brightness of the LED lights on the camera probe. Use the DOWN button to decrease brightness. Adjust as needed for optimal visibility in dark areas.
- Capture Photos: While viewing the live feed, press the Photo/Video Confirm (OK) button to take a still photograph. The image will be saved to the inserted TF card.
- Record Videos: To start recording a video, press and hold the Photo/Video Confirm (OK) button. Press and hold it again to stop recording. Videos will be saved to the TF card.
- Browse Files: Press the Return/File Browse button to enter the file browsing mode. Use the UP and DOWN buttons to navigate through your saved photos and videos. Press the OK button to view a selected file. Press the Return/File Browse button again to exit file browsing and return to live view.
- Perform Inspection: Carefully insert the semi-rigid probe into the area you wish to inspect. Use the flexible nature of the cable to maneuver the camera. Observe the live feed on the LCD screen.
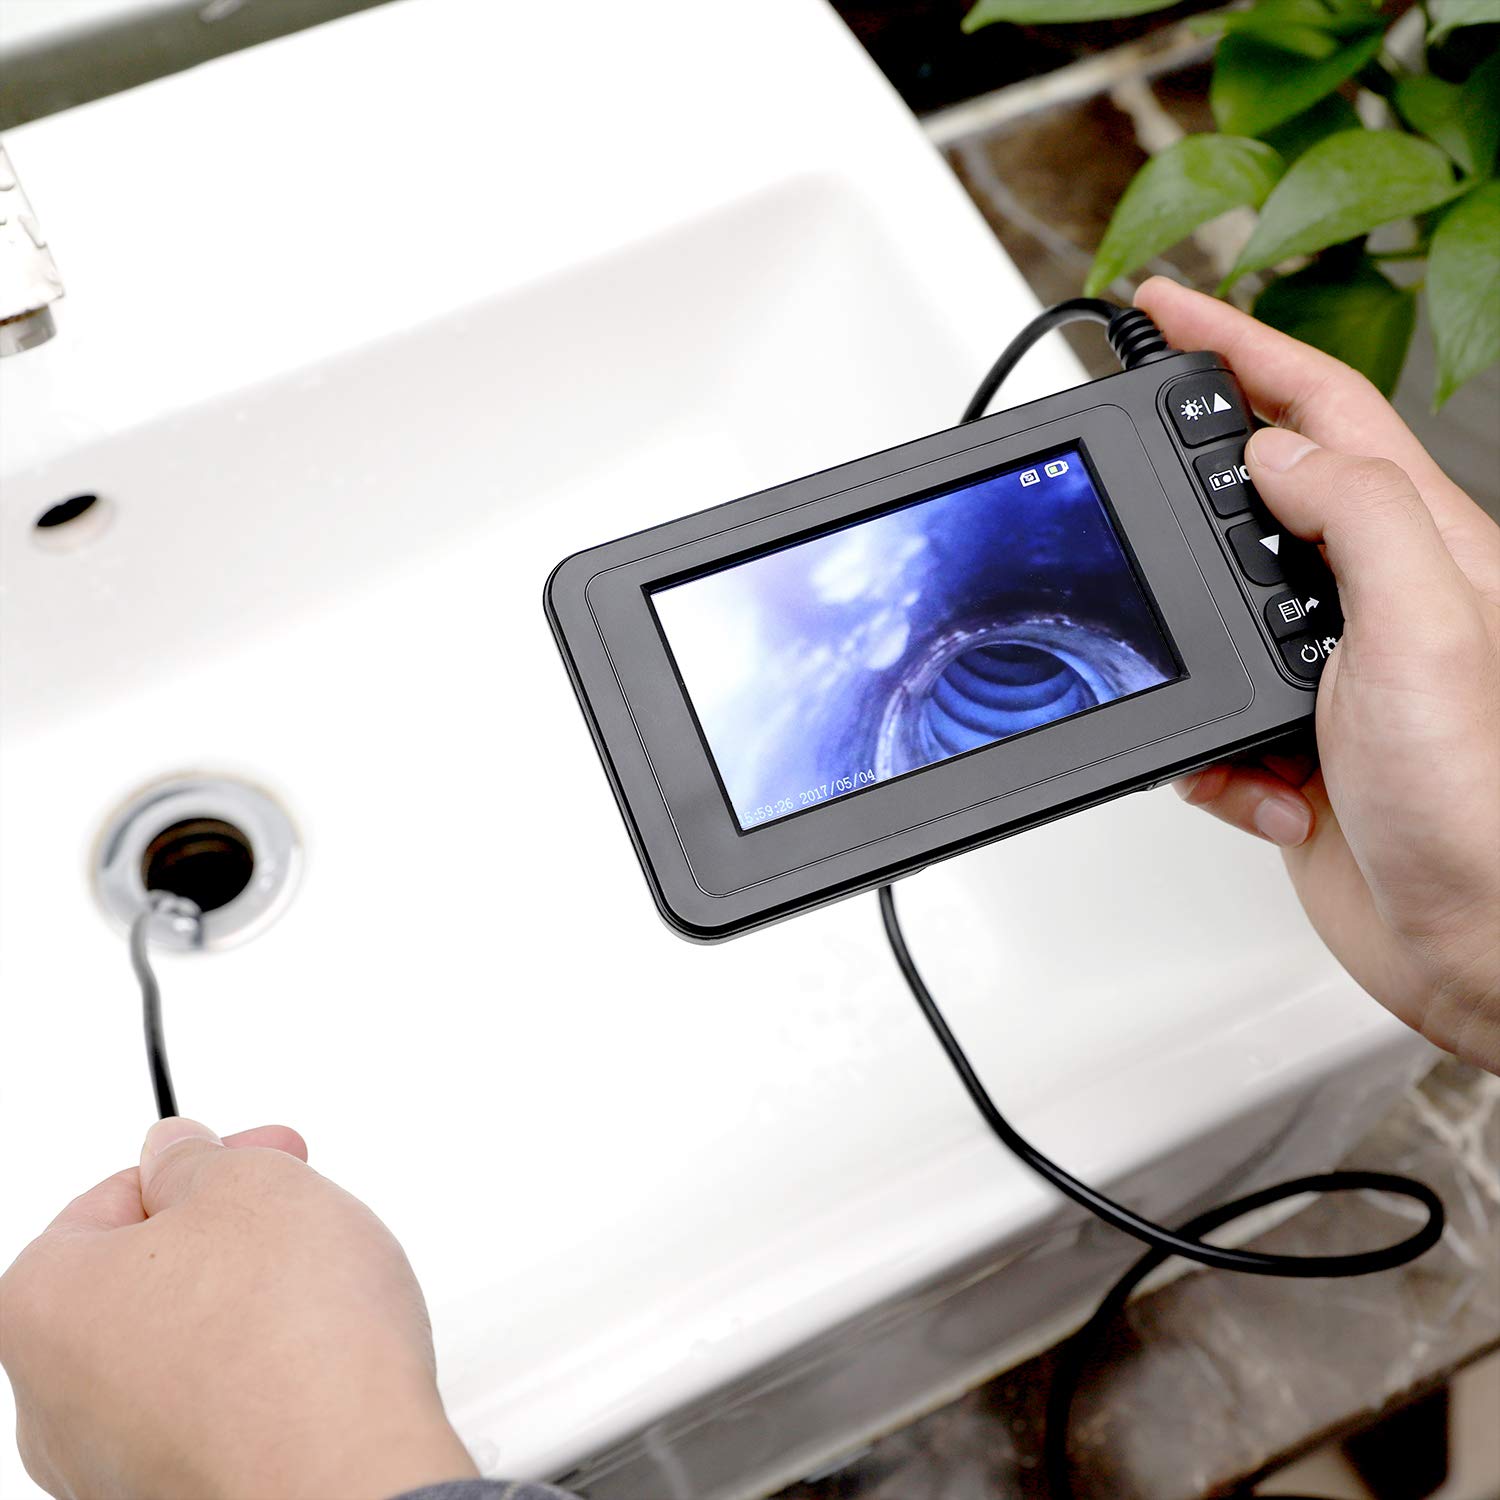
Figure 5.1: Endoscope in Use for Drain Inspection
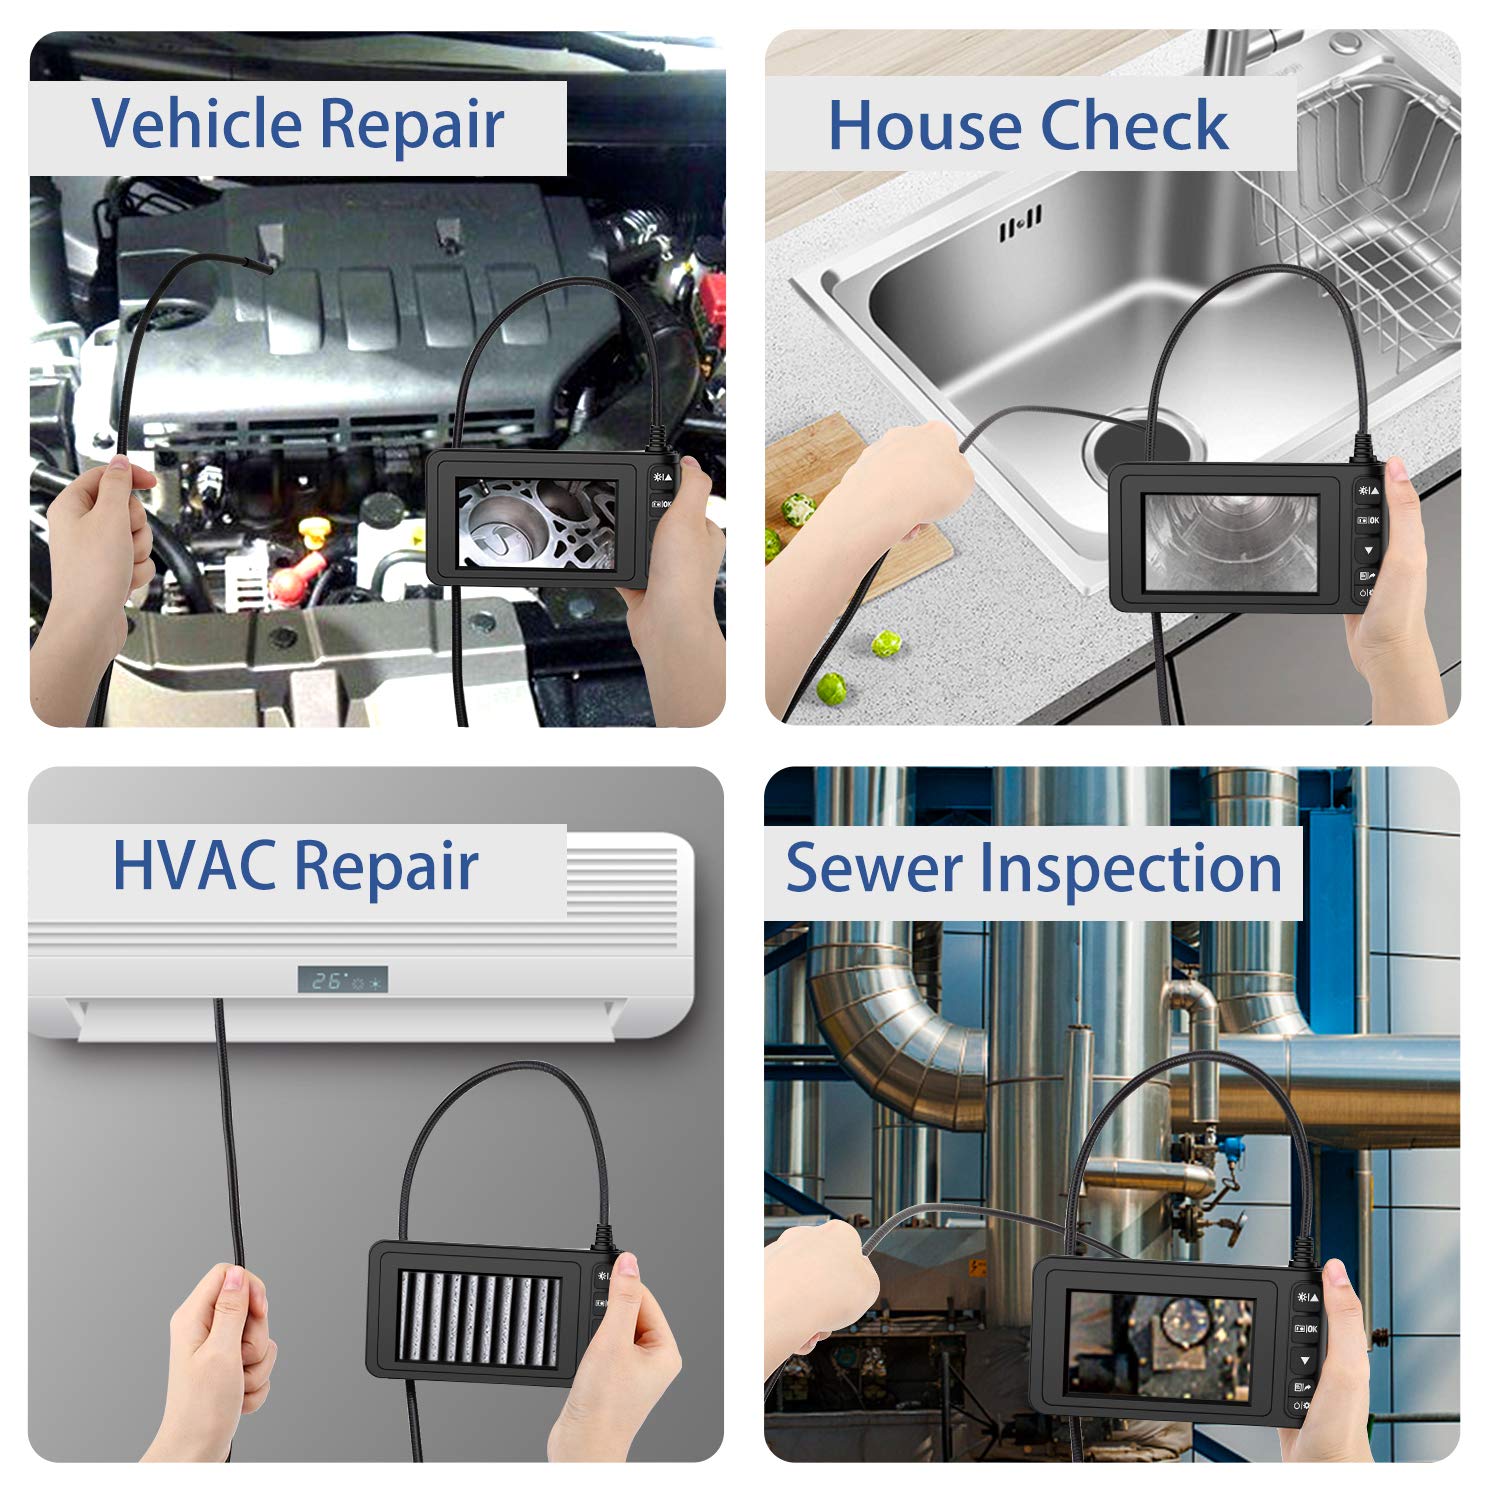
Figure 5.2: Common Application Scenarios
6. Maintenance
Proper maintenance ensures the longevity and optimal performance of your endoscope camera:
- Cleaning: After each use, especially in dirty or wet environments, gently wipe the camera probe and cable with a soft, damp cloth. For the display unit, use a dry, soft cloth. Do not use abrasive cleaners or solvents.
- Storage: Store the endoscope in a cool, dry place, away from direct sunlight and extreme temperatures. Coil the cable loosely to prevent kinks or damage.
- Battery Care: To maintain battery health, avoid fully discharging the battery frequently. If storing for an extended period, charge the battery to about 50% every few months.
- Camera Lens: Ensure the camera lens is clean and free of debris for clear images. If necessary, use a lens cleaning cloth.
7. Troubleshooting
If you encounter issues with your MoKo Industrial Endoscope, refer to the following common problems and solutions:
- Device Does Not Power On:
- Ensure the battery is sufficiently charged. Connect the device to a power source and allow it to charge for at least 30 minutes before attempting to power on again.
- If the device is unresponsive, try pressing the reset button (if available, often a small pinhole) with a thin object.
- Poor Image Quality / Blurry Image:
- Check if the camera lens is clean. Wipe it gently with a soft, lint-free cloth.
- Adjust the LED light brightness using the UP/DOWN buttons to improve visibility in dark areas.
- Ensure the object being viewed is within the camera's focal range (1.6 to 198 inches). Move the camera closer or further away as needed.
- In extremely dark or reflective environments, image quality may be affected.
- Cannot Save Photos/Videos:
- Verify that a TF card is inserted correctly into the slot.
- Ensure the TF card is formatted to FAT32 and is Class 10 or higher.
- Check if the TF card has sufficient free space. Delete unnecessary files or replace the card if full.
- Cable is Too Flexible / Hard to Maneuver:
- While the cable is semi-rigid, for very long or complex paths, it may require additional support or guidance. Consider using a guide wire or a stiffer conduit if available for specific applications.
8. Specifications
| Feature | Specification |
|---|---|
| Product Dimensions | 7.87 x 6.02 x 2.48 inches; 1.17 Pounds |
| Batteries | 1 Lithium Ion battery required (included) |
| Date First Available | May 8, 2020 |
| Manufacturer | MoKo |
| ASIN | B088B8CF9H |
| Macro Focus Range | 1.6-198 inches |
| Shooting Modes | Underwater |
| Exposure Control Type | Automatic |
| Color | Black |
| Video Capture Resolution | 1080p |
9. Warranty and Support
For warranty information or technical support, please contact MoKo customer service through their official channels. Refer to the product packaging or the MoKo brand store on Amazon for contact details.
MoKo Brand Store: Visit the MoKo Store on Amazon


