1. Introduction
Welcome
Thank you for choosing the Crane Deluxe Double Electric Cordless Rechargeable Breast Pump. This manual provides essential information for the safe and effective use of your new breast pump. Please read it thoroughly before first use and keep it for future reference.
Important Safety Information
- Always read all instructions before using the breast pump.
- Keep the breast pump unit and all its components out of reach of children.
- Do not immerse the main pump unit in water or other liquids. Clean only with a damp cloth.
- Use only the power adapter supplied with this device. Using an incorrect adapter may cause damage or injury.
- Inspect all pump parts for wear, damage, or cracks before each use. Replace any damaged parts immediately.
- If you experience pain or discomfort during pumping, discontinue use and consult a healthcare professional.
- This product is intended for personal use by a single user. Sharing the pump may pose health risks.
2. Product Overview
Key Features
- Cordless and Rechargeable: Integrated lithium-ion battery for portable use.
- Closed System Design: Prevents milk from flowing into the pump motor, ensuring hygiene and easy cleaning.
- Soft Silicone Breast Shields: Designed for comfort and effective milk expression.
- Easy Touch Controls: Intuitive interface for adjusting settings.
- Dual Expression Modes: Features 18 different stimulation and expression levels for personalized comfort and efficiency.
- BPA-Free Tritan Bottles: Safe for milk collection and storage.
- Innovative 3D Pumping Technology: Designed to mimic a baby's natural sucking rhythm.
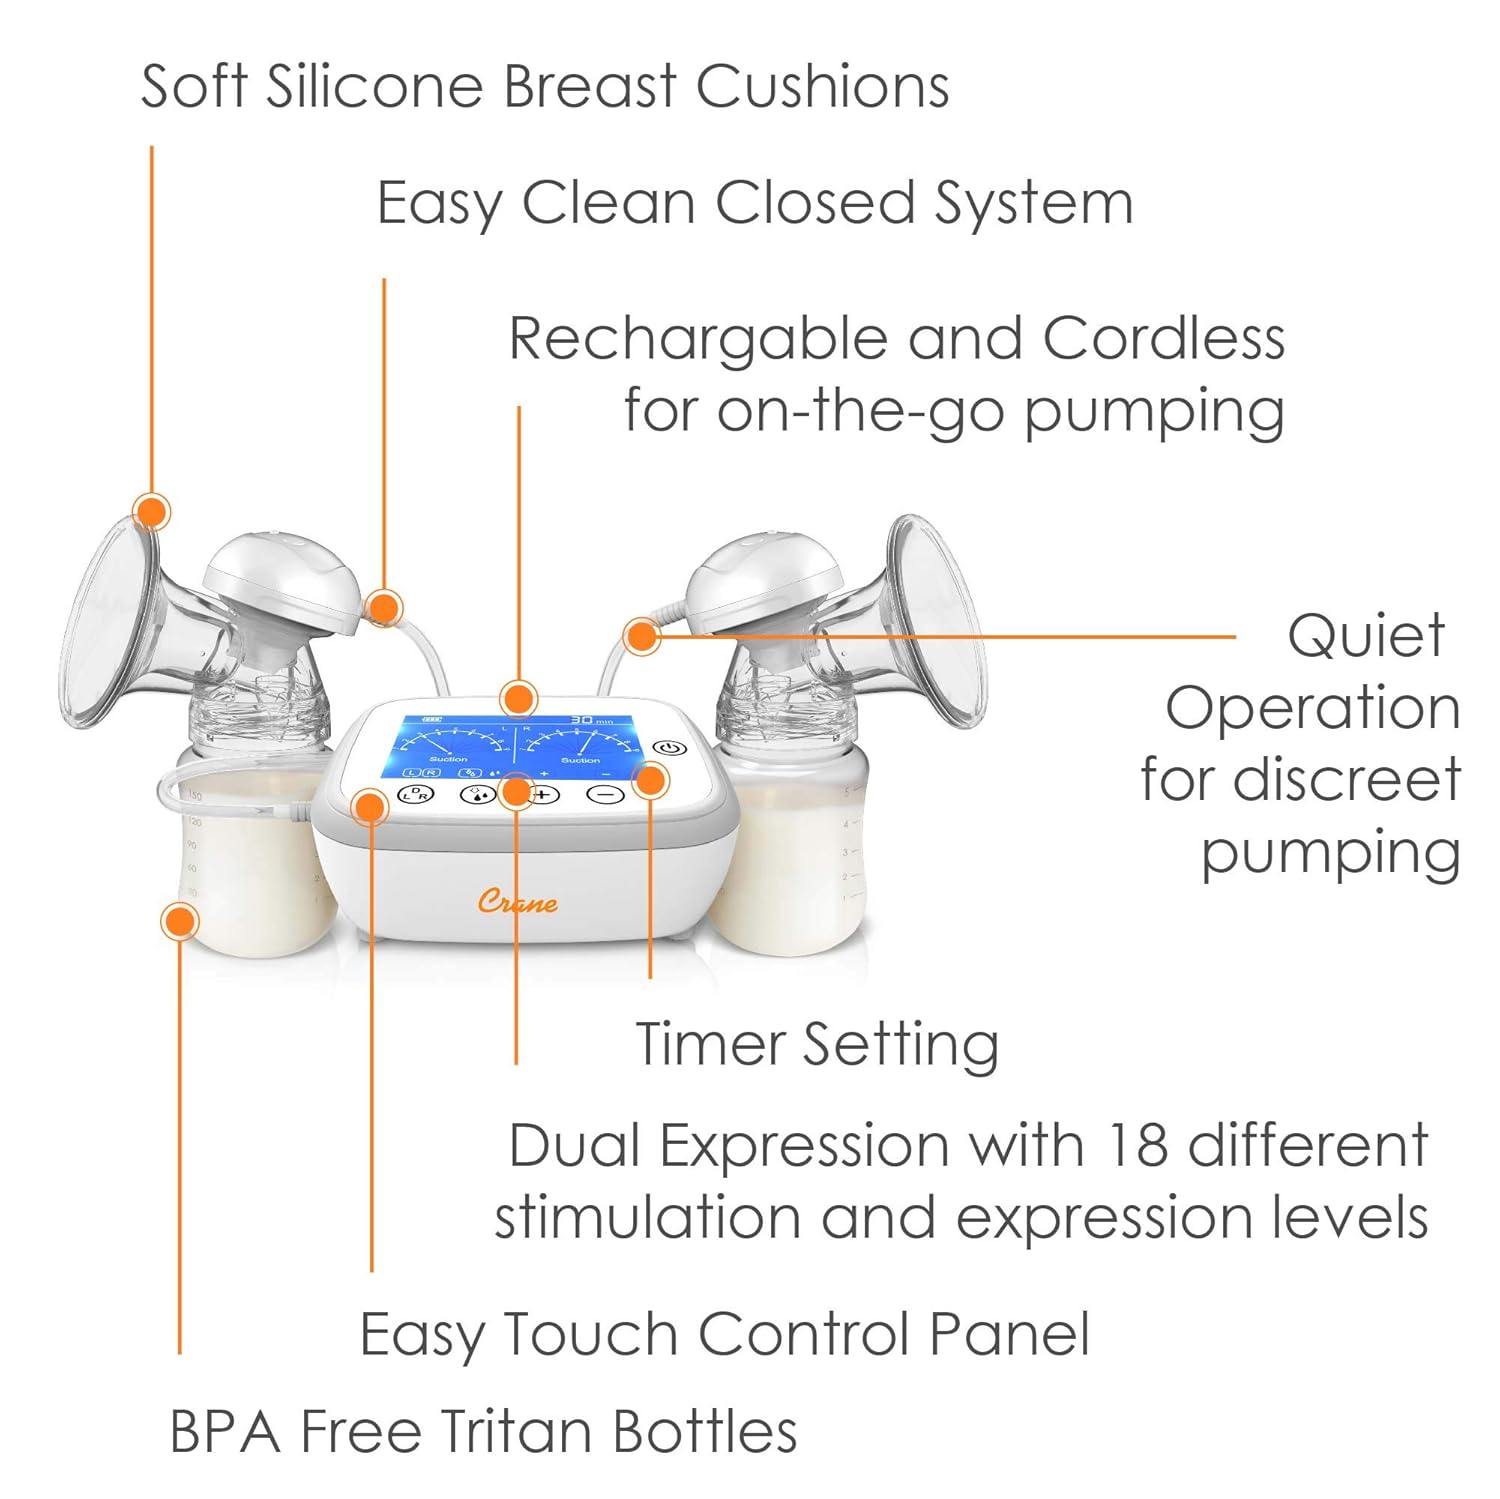
Figure 1: Key features of the Crane Deluxe Double Electric Breast Pump.
Components
The Crane Deluxe Double Electric Cordless Rechargeable Breast Pump package typically includes the following:
- Main Pump Unit (Model EE-9003)
- Breast Shields (2)
- Collection Bottles (2)
- Tubing (2)
- Diaphragms (2)
- Valves (2)
- Power Adapter
- User Manual (this document)
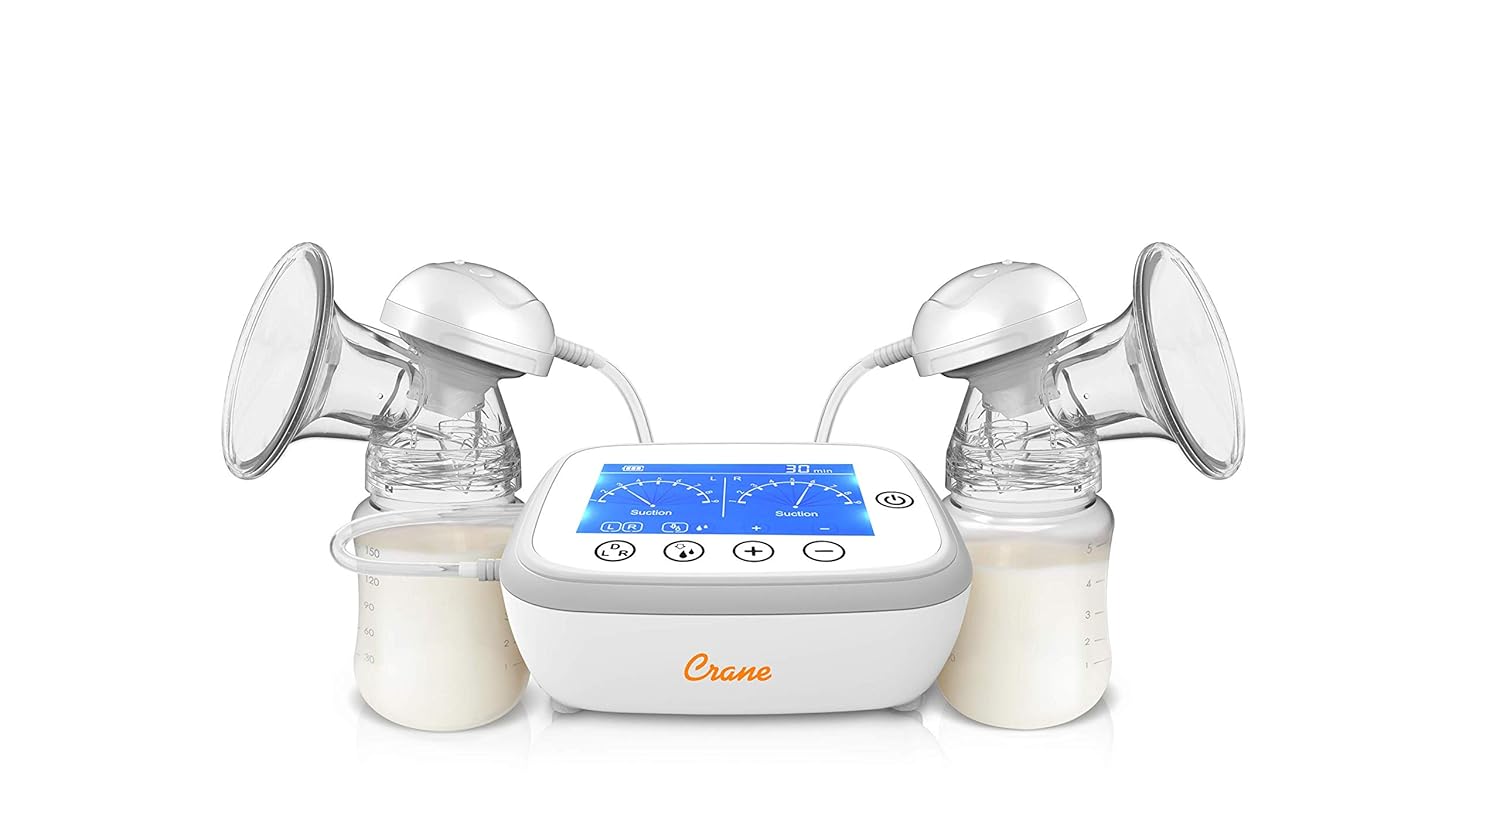
Figure 2: Crane Deluxe Double Electric Cordless Rechargeable Breast Pump with all main components.
3. Setup and Assembly
Before First Use
- Clean and Sterilize: Before using for the first time, wash and sterilize all parts that will come into contact with breast milk (breast shields, bottles, diaphragms, valves, tubing). Refer to the 'Cleaning and Maintenance' section for detailed instructions.
- Charge Battery: Ensure the pump unit is fully charged. Connect the power adapter to the pump unit and a power outlet. The charging indicator will illuminate.
Assembling the Breast Pump
Follow these steps to assemble the breast pump for use:
- Insert the valve firmly into the bottom of the breast shield.
- Screw the collection bottle onto the breast shield.
- Place the diaphragm onto the top of the breast shield, ensuring a secure seal.
- Connect one end of the tubing to the diaphragm cap and the other end to the corresponding port on the main pump unit. If using for single pumping, ensure the unused port on the pump unit is securely capped.

Figure 3: Assembling the breast shield and bottle.
4. Operating Instructions
Charging the Battery
The pump unit contains a rechargeable lithium-ion battery. To charge:
- Connect the power adapter to the charging port on the side of the pump unit.
- Plug the adapter into a wall outlet.
- The battery indicator on the display will show charging status. A full charge typically takes several hours.
- The pump can be used while charging, but for optimal battery life, it is recommended to fully charge before cordless use.
Understanding the Control Panel
The pump features an intuitive touch control panel:
- Power Button: Turns the pump ON/OFF.
- Mode Button: Toggles between Stimulation (massage) and Expression modes.
- Suction Level Buttons (+/-): Adjusts the suction intensity.
- Timer Display: Shows the duration of the pumping session.
- Battery Indicator: Displays current battery level.
Pumping Modes and Settings
The Crane pump offers two primary modes:
- Stimulation Mode (Massage): This mode uses a faster, lighter suction pattern to help initiate milk let-down. It typically runs for a few minutes before automatically switching to Expression mode, or you can manually switch.
- Expression Mode: Once milk let-down occurs, switch to this mode. It uses a slower, deeper suction pattern to efficiently express milk.
Both modes have multiple adjustable suction levels (up to 9 for each side, totaling 18 combinations) to customize your pumping experience for comfort and effectiveness.

Figure 4: The pump's display highlights 3D technology and 18 modes.
Initiating a Pumping Session
- Position Breast Shield: Center your nipple in the breast shield tunnel. Ensure the shield forms a complete seal around your breast.
- Turn On: Press the Power button to turn on the pump. It will typically start in Stimulation mode.
- Adjust Suction: Use the +/- buttons to adjust the suction level to a comfortable setting. You should feel a gentle tugging sensation, not pain.
- Switch Modes: Once milk begins to flow, press the Mode button to switch to Expression mode. Adjust suction as needed.
- Pumping Duration: Pump for approximately 15-20 minutes per breast, or until milk flow significantly slows.
- Turn Off: Press the Power button to turn off the pump. Carefully remove the breast shields from your breasts.

Figure 5: The pump supports dual expression for efficient milk collection.
5. Cleaning and Maintenance
Proper cleaning and maintenance are crucial for hygiene and the longevity of your breast pump.
Daily Cleaning (After Each Use)
- Disassemble: Separate all parts that came into contact with breast milk (breast shields, bottles, diaphragms, valves, tubing).
- Rinse: Rinse all disassembled parts under cool running water to remove any residual milk.
- Wash: Wash parts in warm, soapy water using a clean brush dedicated for feeding equipment.
- Rinse Thoroughly: Rinse all parts thoroughly under clean running water.
- Air Dry: Place parts on a clean paper towel or drying rack and allow them to air dry completely. Do not use a cloth towel, as it may transfer germs.
Sterilization (Periodically)
Sterilize parts that contact breast milk regularly, especially for newborns or infants with compromised immune systems.
- Boiling: Place disassembled, cleaned parts in a pot of boiling water for 5 minutes. Ensure parts do not touch the bottom or sides of the pot to prevent melting.
- Steam Sterilizer: Use a microwave or electric steam sterilizer according to the manufacturer's instructions.
Important: The main pump unit is NOT dishwasher safe and should NOT be immersed in water. Wipe the pump unit with a clean, damp cloth only.
6. Troubleshooting
If you encounter issues with your Crane breast pump, refer to the following common problems and solutions:
| Problem | Possible Cause | Solution |
|---|---|---|
| No suction or weak suction |
|
|
| Pump not turning on |
|
|
| Pain during pumping |
|
|
7. Specifications
| Feature | Detail |
|---|---|
| Model Number | EE-9003 |
| Product Dimensions | 12.25 x 7.75 x 9.25 inches |
| Item Weight | 4.09 pounds |
| Power Source | Battery Powered (1 Lithium Ion battery included) |
| Pump Type | Electric, Double Pump |
| Material Type | Plastic, BPA Free |
| Dishwasher Safe | No (for main unit) |
| Style | Portable, Double, Cordless |
8. Warranty and Support
For warranty information, product support, or to purchase replacement parts, please contact Crane customer service. Refer to the product packaging or the official Crane website for the most current contact details.
Please retain your proof of purchase for warranty claims.


