1. Introduction
This manual provides comprehensive instructions for the installation, operation, and maintenance of the 10L0L 36 Volt #70 Series Continuous Duty Solenoid Relay. This solenoid is designed to ensure efficient and stable performance in compatible electric golf carts.
2. Product Overview and Compatibility
The 10L0L 36 Volt #70 Series Continuous Duty Solenoid Relay is a critical component for the electrical system of your golf cart, ensuring reliable power management.
2.1 Compatible Models
This 36-volt solenoid is compatible with the following electric golf cart models:
- EZGO TXT (1980-2010)
- EZGO Marathon (1980-2010)
- EZ/KA/LE/ME/OT/PA electric models
It replaces OEM part numbers: 70-120224, 11761GA, 11761-G1, 27855-G01, 27855-G02, 3016, 31680-G1, and Cole Hersee 24080.
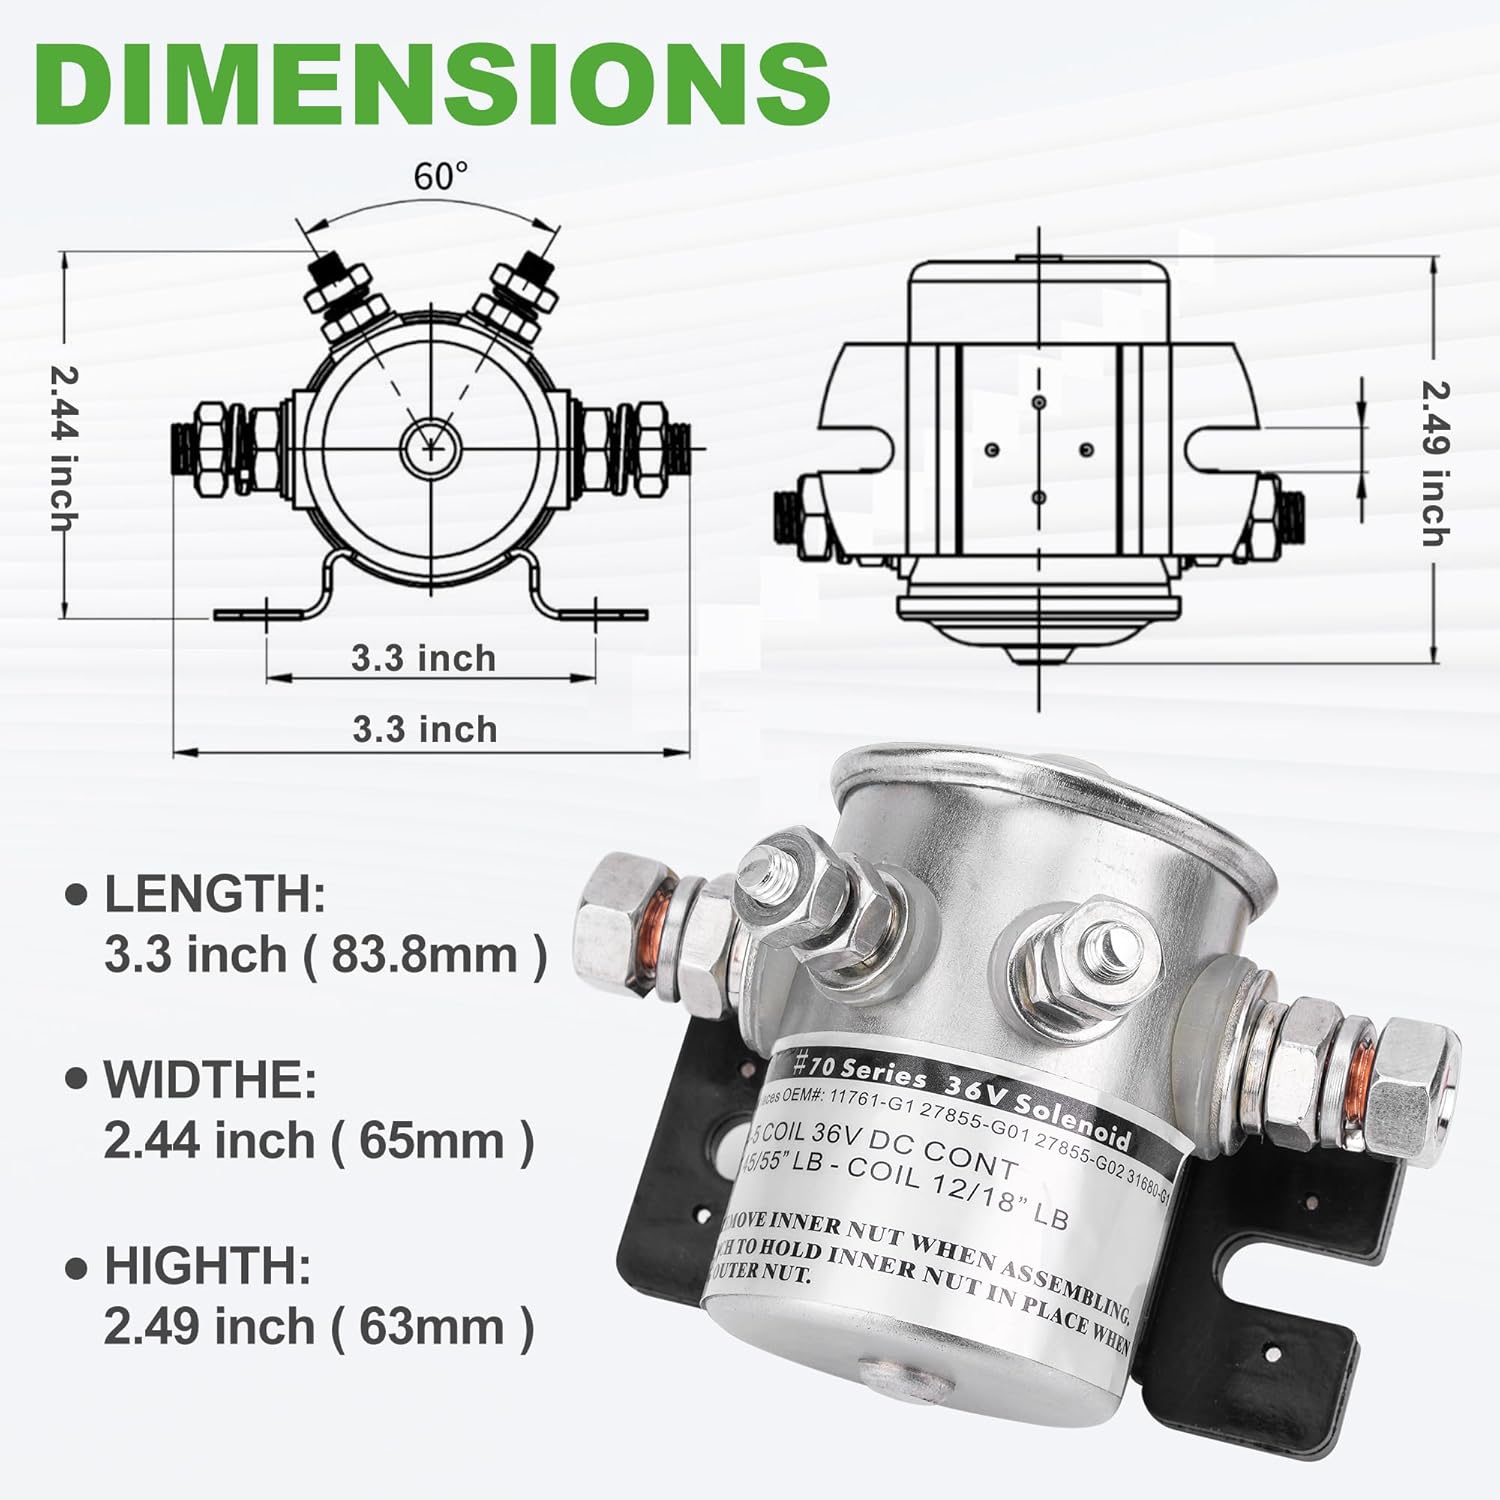
Figure 2.1: Solenoid relay with compatible OEM part numbers listed.
3. Specifications
| Feature | Detail |
|---|---|
| Voltage | 36V DC |
| Resistance | 110Ω |
| Body Shell Plating | Nickel-Plating |
| Potted Coil | 180°C Copper Wire Rolls |
| Structure | 1NO 1NC |
| Mounting Bracket | Flat, Open Slots |
| Contact Terminals | Copper |
| Contact Form | Normally Open |
| Circuitry | Single Pole Single Throw (SPST) |
| Operating Temperature | -40°F ~ +122°F |
| Dimensions (Length x Width x Height) | 3.3 inches (83.8mm) x 2.44 inches (65mm) x 2.49 inches (63mm) |

Figure 3.1: Product dimensions and key specifications.

Figure 3.2: Nickel-plated housing for enhanced durability.
4. Installation Instructions
The solenoid valve is designed for easy installation. Follow these steps carefully to ensure proper function and safety.
- Preparation: Before beginning installation, ensure the golf cart's power is completely off and the battery is disconnected to prevent electrical shock or damage.
- Locate Old Solenoid: Identify the existing solenoid in your golf cart. It is typically located near the battery or controller.
- Disconnect Wiring: Carefully disconnect all wires from the old solenoid. Note the position of each wire for correct re-connection.
- Remove Old Solenoid: Unmount the old solenoid from its position.
- Mount New Solenoid: Position the new 10L0L solenoid in the same location. Ensure the base is securely fixed. The mounting bracket features flat, open slots for easy attachment.
- Connect Wiring: Reconnect the wires to the new solenoid.
- When assembling, the base must be fixed.
- Clamp the ends of the wires between the inner and outer nuts on the terminals.
- Ensure your small diode is installed in the correct direction, with the line pointing to the positive terminal.
- Verify Connections: Double-check all connections to ensure they are tight and correctly positioned.
- Reconnect Battery: Reconnect the golf cart battery.
- Test Functionality: Turn on the golf cart and test the solenoid's operation to ensure it functions correctly.

Figure 4.1: The 10L0L Solenoid, ready for installation.

Figure 4.2: Detailed view of the 4 terminals and connection points.
5. Operation
The 10L0L 36 Volt Solenoid Relay is designed for continuous duty and provides fast response and precise control for your golf cart's electrical system.
5.1 Functionality
Upon receiving the control signal from the golf cart's system (e.g., when the accelerator pedal is pressed), the solenoid quickly opens or closes to manage the flow of electrical current. This rapid and accurate control ensures efficient operation of the golf cart's motor and other electrical components, contributing to smooth acceleration and reduced energy consumption.

Figure 5.1: Solenoid installed in a golf cart.
6. Maintenance and Care
To ensure the longevity and optimal performance of your 10L0L solenoid, follow these maintenance guidelines:
- Regular Inspection: Periodically inspect the solenoid and its connections for any signs of corrosion, loose wiring, or physical damage.
- Cleanliness: Keep the solenoid clean and free from dirt, dust, and moisture. The nickel-plated housing provides excellent resistance to dust, water, and corrosion, allowing it to perform reliably in various environmental conditions.
- Secure Connections: Ensure all terminal nuts remain tight. Loose connections can lead to poor performance or damage.
- Diode Check: If applicable, verify that the small diode remains correctly oriented with the line pointing to the positive terminal.
- Environmental Resilience: The solenoid is designed to work under harsh environments or vibration conditions due to its robust construction and pure copper coil.
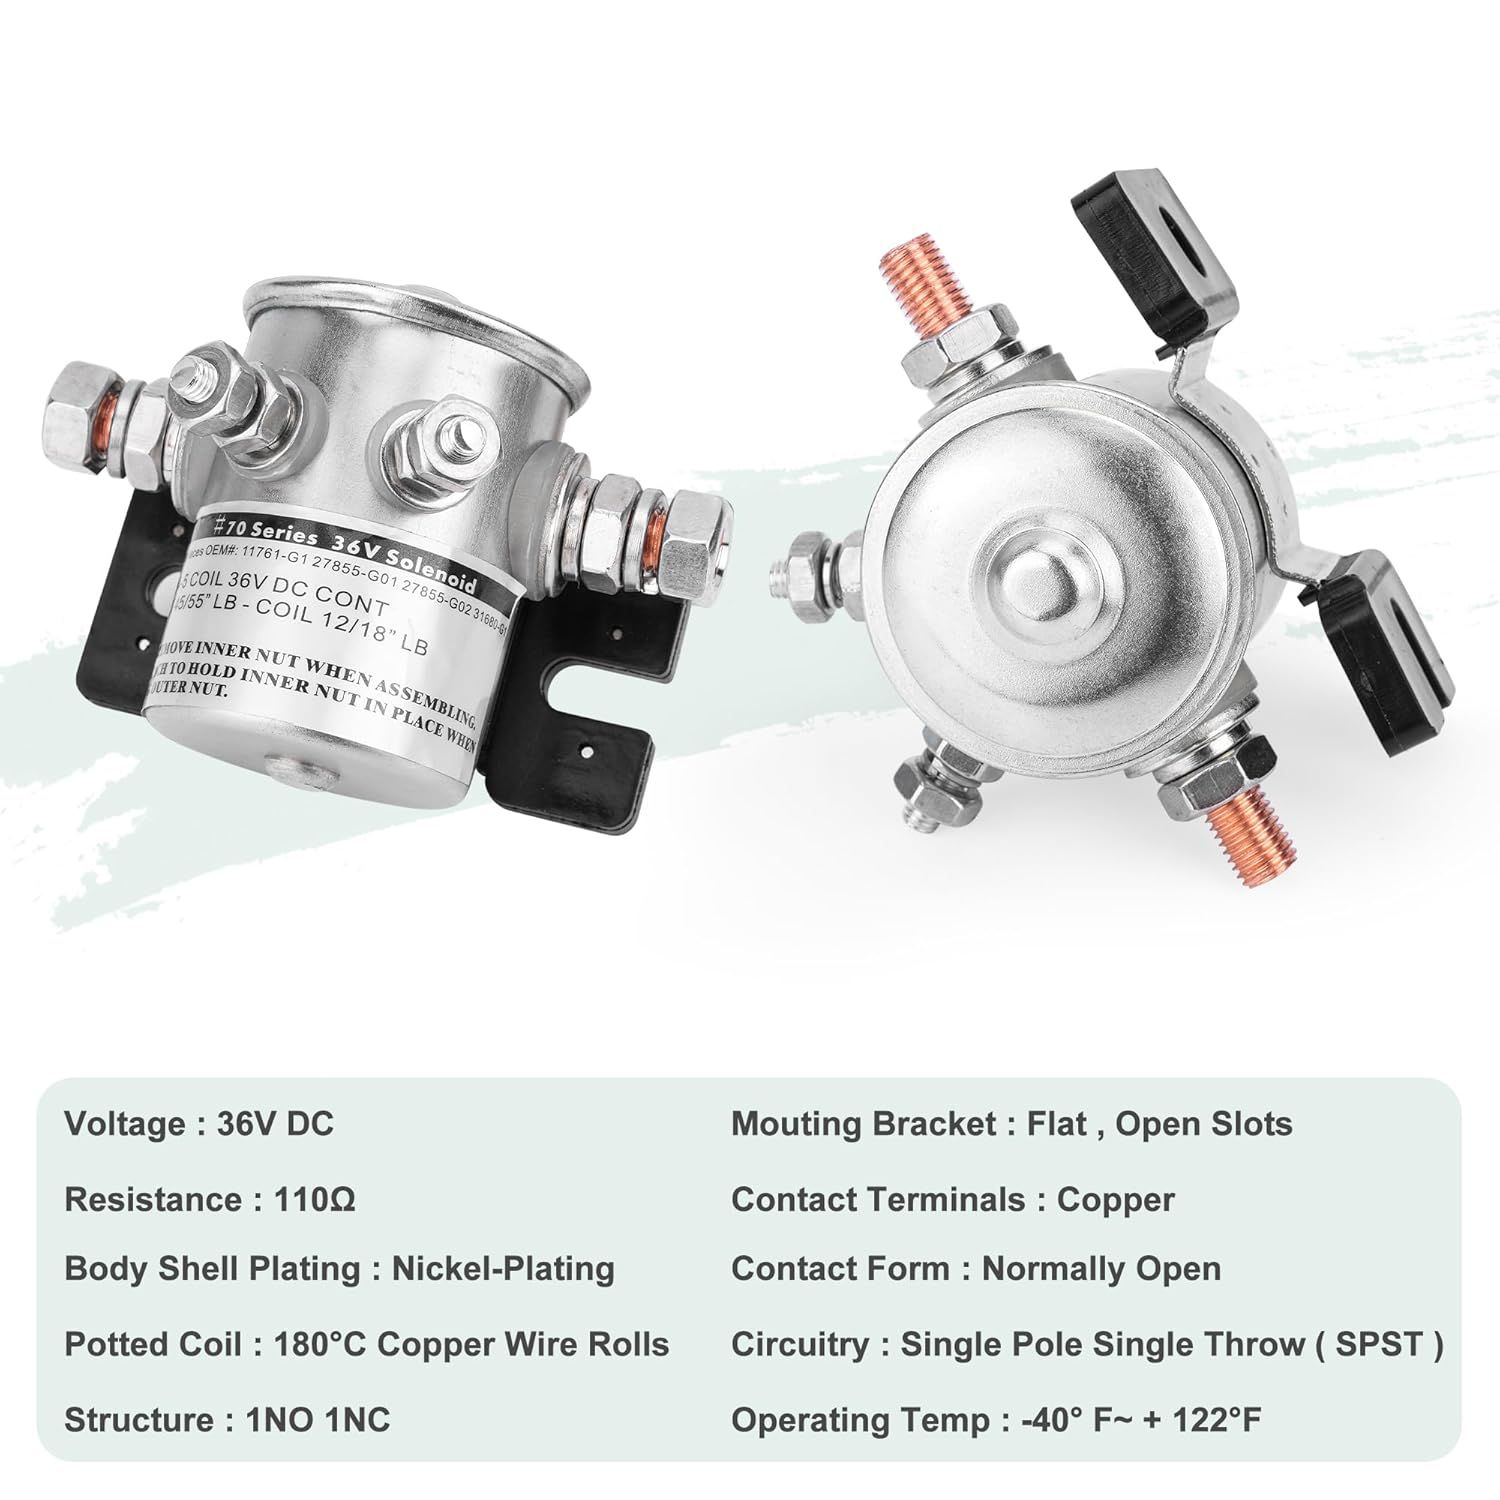
Figure 6.1: Pure copper coil for enhanced durability and performance.
7. Troubleshooting
If you experience issues with your golf cart's electrical system, the solenoid may be a factor. Consider the following common troubleshooting steps:
- No Click from Solenoid: If you press the accelerator and hear no click from the solenoid, check the battery voltage, main fuse, and all wiring connections to the solenoid. Ensure the control circuit to the solenoid is receiving power.
- Solenoid Clicks but Cart Doesn't Move: This could indicate a problem with the solenoid's internal contacts or a larger issue with the motor or controller. Verify the solenoid is passing current when activated.
- Intermittent Operation: Check for loose or corroded connections at the solenoid terminals. Ensure the diode is correctly installed and not damaged.
- Overheating Solenoid: This can be caused by continuous duty cycles beyond its rating (though this model is continuous duty, extreme conditions or incorrect voltage can cause issues) or poor connections leading to resistance. Verify correct voltage and secure connections.
For complex issues, it is recommended to consult a qualified golf cart technician.
8. Warranty and Support
10L0L is committed to customer satisfaction. Our products are manufactured with high-quality materials and undergo rigorous testing to ensure reliability.
If you encounter any problems during the use of your 10L0L Golf Cart Solenoid, please contact our customer service team. We provide comprehensive pre-sales consultation and after-sales support to assist you with any issues or questions.
For support, please visit the 10L0L Store on Amazon or refer to your purchase documentation for direct contact information.


