
1. Introduction
This manual provides essential instructions for the safe and efficient installation, operation, and maintenance of your PEAKCOLD IM48NDD2 2-Door Commercial Beer Dispenser. This unit is a double tap keg cooler designed for both commercial and residential use, featuring a 48-inch width and two dispensing taps. Please read this manual thoroughly before using the appliance and retain it for future reference.

Figure 1: PEAKCOLD IM48NDD2 2-Door Commercial Beer Dispenser with doors open.
2. Safety Information
Adhering to safety guidelines is crucial for preventing injury and damage to the unit. Always follow these precautions:
- Ensure the unit is connected to a properly grounded 110 Volt electrical outlet.
- Do not operate the unit with a damaged power cord or plug.
- Keep ventilation openings clear of obstructions.
- Do not store explosive substances such as aerosol cans with a flammable propellant in this appliance.
- This appliance uses R290 refrigerant. Handle with care and ensure proper ventilation during servicing.
- Do not use mechanical devices or other means to accelerate the defrosting process, other than those recommended by the manufacturer.
- Do not damage the refrigerant circuit.
- Only qualified personnel should perform repairs or maintenance involving the refrigerant system.
- Always unplug the unit before cleaning or performing any maintenance.
3. Unpacking and Setup
3.1 Unpacking
- Carefully remove all packaging materials, including tape and protective film.
- Inspect the unit for any shipping damage. Report any damage to the carrier immediately.
- Retain packaging materials for potential future transport or warranty claims.
3.2 Placement
- Place the unit on a strong, level surface capable of supporting its weight (approximately 231 lbs empty, plus kegs).
- Ensure adequate ventilation around the unit. Maintain at least 4 inches of space from walls or other obstructions on all sides, especially the rear where the compressor is located.
- Avoid direct sunlight or proximity to heat sources.
- Allow the unit to stand upright for at least 2 hours before plugging it in to allow refrigerant to settle.
3.3 Attaching Wheels
The unit comes with wheels for mobility. Carefully tilt the unit and screw the wheels into the designated threaded holes at the bottom corners. Ensure all wheels are securely tightened before placing the unit upright.
3.4 Initial Cleaning
Before first use, clean the interior and exterior surfaces with a mild detergent and warm water. Rinse thoroughly and dry completely.
3.5 Power Connection
Plug the unit into a dedicated 110 Volt, grounded electrical outlet. Do not use extension cords or adapters.
3.6 Installing Tap Towers and Keg Couplers
The unit includes forced air cooled towers and keg couplers. Follow these steps for installation:
- Mount the tap tower(s) onto the top surface of the unit, aligning with the pre-drilled holes. Secure with provided hardware.
- Connect the beer lines from the tap tower(s) to the keg couplers.
- Connect the air lines from the CO2 regulator (not included) to the keg couplers.
- Ensure all connections are tight to prevent leaks.

Figure 2: Double Tap Tower.

Figure 3: Keg Couplers.
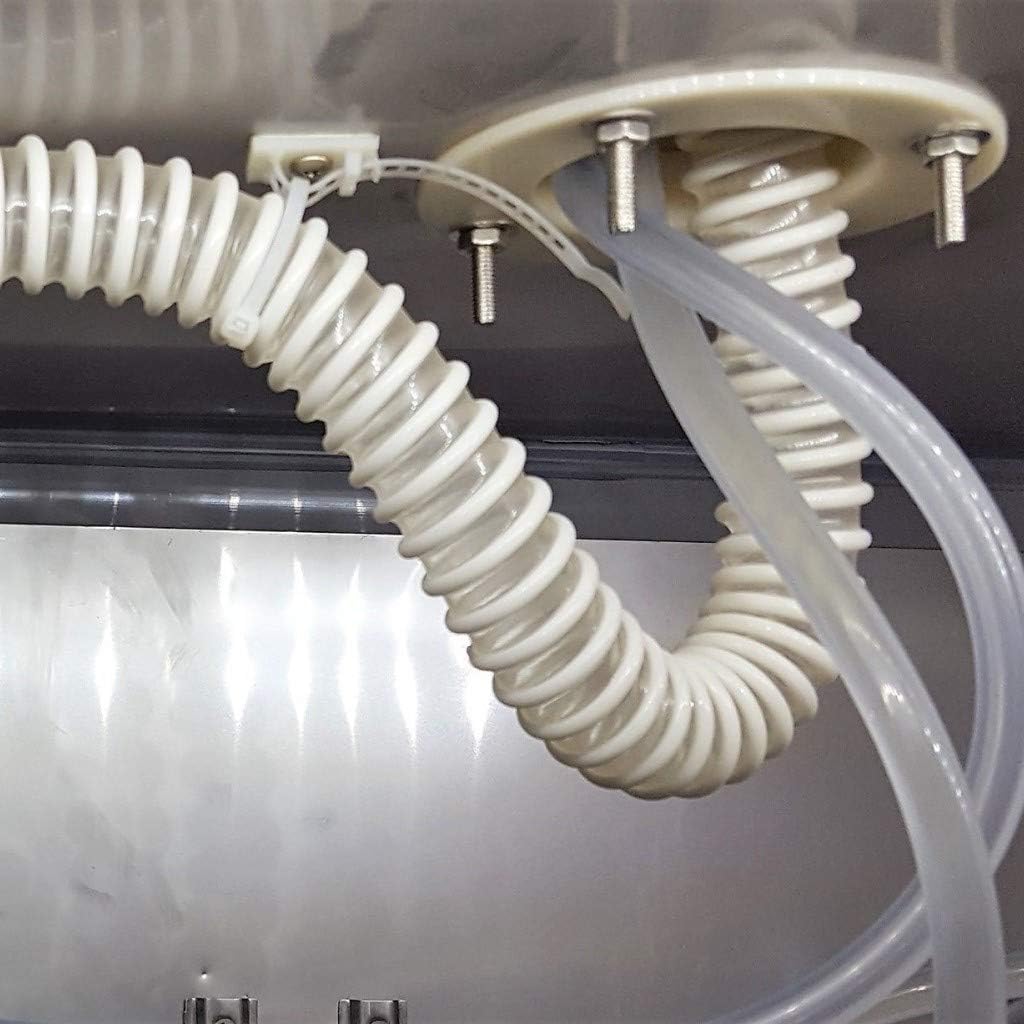
Figure 4: Forced Air Cooling for Towers.
3.7 Keg Loading
This unit can accommodate various keg configurations:
- Two (2) Half-barrel kegs.
- One (1) Half-barrel keg and three (3) Slim Quarter-barrel kegs.
- One (1) Half-barrel keg and four (4) Sixth-barrel kegs.
Important Note: Not all half-barrel kegs are uniform in size. Ensure that the kegs you intend to use are straight-sided and fit through the door openings and within the internal dimensions of the unit. Rounded or oversized half-barrel kegs may not fit.
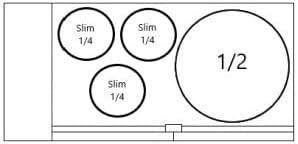
Figure 5: Keg Capacity Example (1 Half, 3 Slim Quarters).

Figure 6: Keg Capacity Example (1 Half, 4 Sixths).
4. Operation
4.1 Digital Temperature Control
The unit is equipped with a digital temperature control system. Refer to the control panel for current temperature readings and adjustment options. Set the desired temperature for optimal beverage cooling. Allow several hours for the unit to reach the set temperature after initial setup or significant temperature changes.
4.2 Dispensing
Once kegs are loaded, connected, and the unit has reached the desired temperature, you can begin dispensing. Ensure the CO2 tank is open and the regulator is set to the appropriate pressure for your beverage type. Pull the tap handle forward to dispense. Push back to close.
4.3 Door Lock
The unit features a door lock for security. Use the provided key to lock or unlock the doors as needed.
5. Maintenance
5.1 Cleaning
- Exterior: Wipe down the stainless steel top and black exterior panels with a soft cloth and mild cleaner. Avoid abrasive cleaners.
- Interior: Regularly clean the interior with a mild, food-safe sanitizer. Remove shelves and drip trays for thorough cleaning.
- Drip Tray: The stainless steel drip tray (Figure 7) should be emptied and cleaned regularly to prevent spills and maintain hygiene.
- Beer Lines: It is critical to clean beer lines regularly (e.g., every 2-3 weeks) to prevent bacterial growth and maintain beverage quality. Use a specialized beer line cleaning solution and follow its instructions.
- Condenser Coil: Periodically clean the condenser coil located at the rear of the unit to ensure efficient cooling. Use a brush or vacuum cleaner to remove dust and debris.
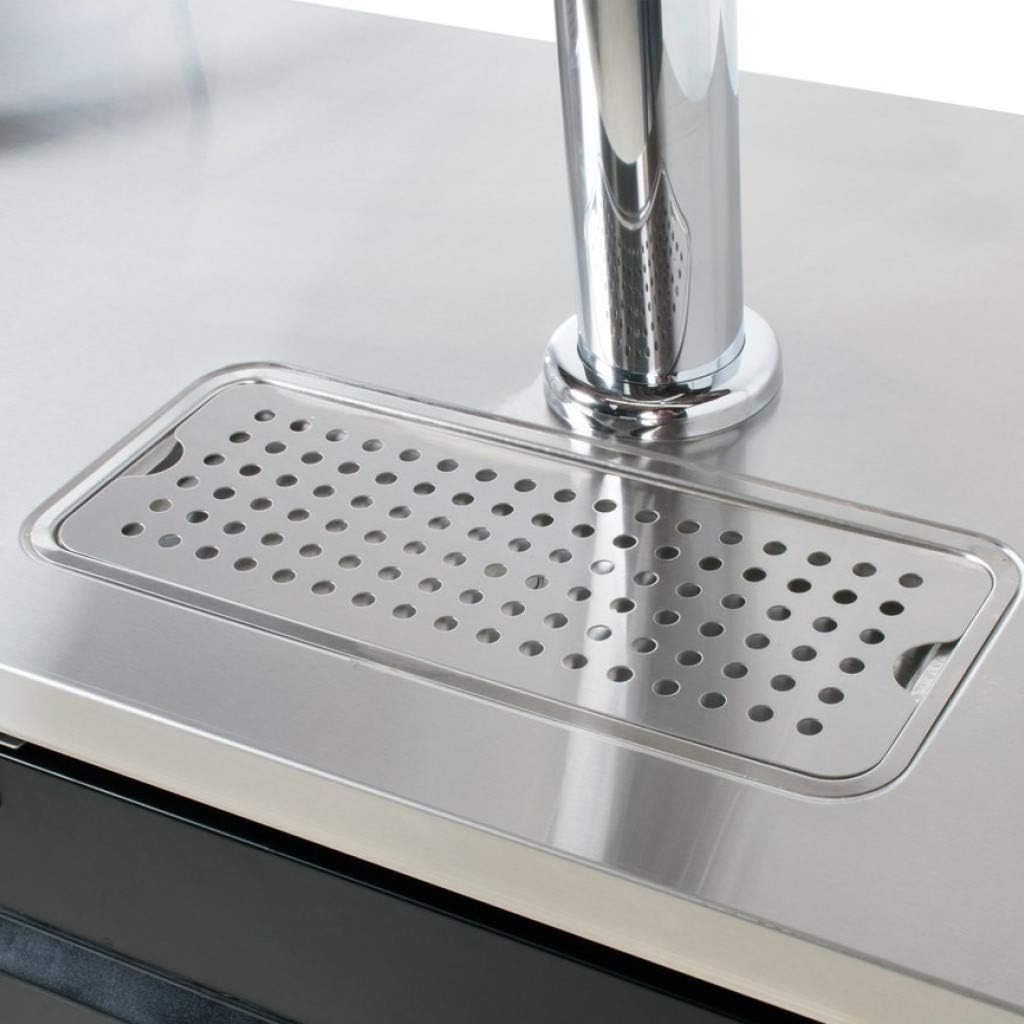
Figure 7: Stainless Steel Drip Tray.
5.2 Automatic Defrost
This unit features an automatic defrost system, minimizing the need for manual defrosting. If excessive ice buildup occurs, manually defrost by unplugging the unit and allowing ice to melt naturally. Do not use sharp objects to remove ice.
6. Troubleshooting
Before contacting support, review these common issues:
| Problem | Possible Cause | Solution |
|---|---|---|
| Unit does not power on. | No power supply; tripped circuit breaker. | Check power cord connection; reset circuit breaker. |
| Unit is not cooling. | Temperature setting too high; blocked condenser coil; door left open. | Adjust temperature; clean condenser coil; ensure doors are closed properly. |
| Beer not dispensing or dispensing slowly. | Empty keg; CO2 tank empty or off; regulator pressure too low; clogged beer line. | Replace keg; check CO2 supply and regulator settings; clean beer lines. |
| Excessive sweating around door handle/tap. | High ambient humidity; frequent door opening; poor door seal. | Ensure unit is in a well-ventilated area; minimize door openings; check door gaskets for proper seal. |
If issues persist after attempting these solutions, please contact customer support.
7. Specifications
| Feature | Detail |
|---|---|
| Model Number | IM48NDD2 |
| Product Dimensions (D x W x H) | 24.4" x 48.8" x 35.6" |
| Capacity (Internal) | 11.8 Cubic Feet (249.44 Liters) |
| Keg Capacity | 2 Half-barrel, or 1 Half-barrel and 3 Slim Quarter-barrel, or 1 Half-barrel and 4 Sixth-barrel kegs |
| Number of Doors | 2 |
| Voltage | 110 Volts |
| Refrigerant | R-290 |
| Defrost System | Automatic |
| Certifications | ETL, NSF |
| Item Weight | 231 Pounds |
| Included Components | Wheels, Forced Air Cooled Towers, Keg Couplers |

Figure 8: Product Dimensions.
8. Warranty and Support
8.1 Warranty Information
The PEAKCOLD IM48NDD2 Beer Dispenser comes with the following warranty:
- 1-Year: Parts and Labor Warranty
- 5-Year: Compressor Part Warranty
This warranty covers defects in materials and workmanship under normal use. Please retain your proof of purchase for warranty claims.
8.2 Customer Support
For technical assistance, troubleshooting beyond this manual, or warranty service, please contact PEAKCOLD customer support. Our US-based support team is available to provide assistance.
Video: PEAKCOLD Customer Experience. This video highlights the brand's commitment to customer support and service.