
Introduction
Thank you for choosing MOL Kids Bicycle Training Wheels. This manual provides essential information for the correct installation, safe operation, and proper maintenance of your training wheels. Please read this manual thoroughly before installation and retain it for future reference. These training wheels are designed to assist children in learning to ride bicycles ranging from 12 to 20 inches.
Safety Information
- Always ensure all bolts and nuts are securely tightened before each use.
- Regularly inspect the training wheels for any signs of wear, damage, or bending. Replace damaged parts immediately.
- Ensure the training wheels are installed at the correct height to allow the bicycle's rear wheel to slightly touch the ground, providing stability without lifting the rear wheel completely.
- Children should always wear appropriate safety gear, including a helmet, when riding a bicycle with training wheels.
- Adult supervision is recommended during use.
- These training wheels are designed for children's bicycles from 12 to 20 inches. Do not use on bicycles outside this size range.
Package Contents
Please verify that all components are present in your package:
- 2 x Training Wheel Assemblies (with flashing lights)
- 2 x Support Brackets
- 2 x Shoulder Bolts
- 2 x Lock Nuts
- 2 x Washers
- 2 x Spacers (if applicable for specific bike models)
Setup and Installation
Step-by-Step Installation Guide
- Prepare the Bicycle: Ensure the bicycle is stable, preferably upside down or on a stand. Remove the rear axle nut from both sides of the bicycle's rear wheel.
- Attach the Support Brackets: Slide one support bracket onto each side of the rear axle, ensuring the bracket's arm points towards the rear of the bicycle. The bracket should sit flush against the frame.
- Reinstall Axle Nuts: Re-tighten the original axle nuts over the support brackets to secure them to the bicycle frame. Ensure they are very tight to prevent movement.
- Attach Training Wheels: Insert a shoulder bolt through the hole at the end of each support bracket. Place a washer, then the training wheel, and finally a lock nut onto the shoulder bolt.
- Adjust Height: Adjust the height of the training wheels by sliding the support brackets up or down the bicycle's rear axle before fully tightening the axle nuts. The training wheels should be set so that the bicycle's rear wheel is slightly off the ground (approximately 0.5 to 1 inch) when the training wheels are resting on a flat surface. This allows the child to learn balance while still having support.
- Secure Training Wheels: Tighten the lock nuts on the shoulder bolts to firmly secure the training wheels to the support brackets. Double-check all connections for tightness.

Image: Training wheels attached to a bicycle, illustrating the connection points and overall design. This image shows the thickened design for durability.

Image: A detailed view of the training wheels mounted on a bicycle, emphasizing the secure attachment mechanism to the rear axle for stability.
Operation
Once properly installed, the MOL Kids Bicycle Training Wheels provide stability for young riders. The integrated flashing lights activate when the wheels spin, increasing visibility during low-light conditions such as evening rides or overcast days. This feature enhances safety by making the child more noticeable to others.
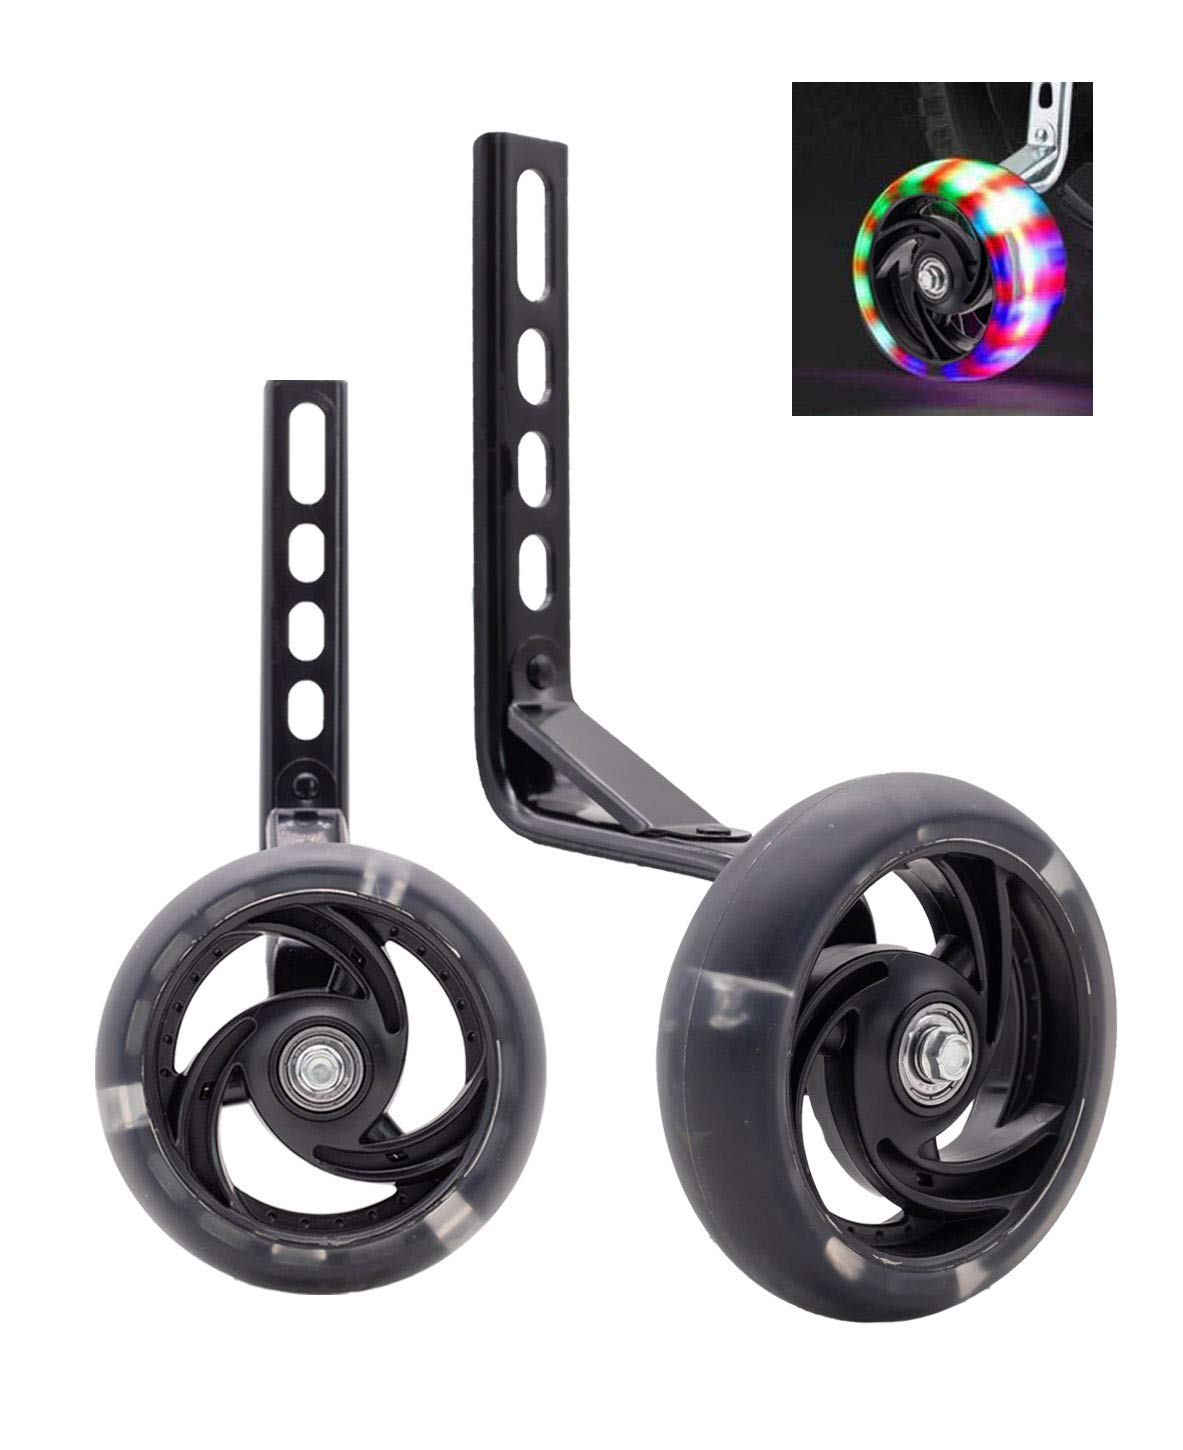
Image: The MOL training wheels in use, showcasing the flashing lights that activate when the wheels rotate, improving visibility for the rider.
Maintenance
- Regular Inspection: Periodically check all bolts, nuts, and connections for tightness. Re-tighten as necessary.
- Wheel Condition: Inspect the training wheel tires and bearings for wear or damage. The wheels feature seamless steel bearings for durability and high-quality rubber for wear resistance and reduced noise.
- Cleaning: Clean the training wheels with a damp cloth and mild soap. Avoid harsh chemicals that may damage the plastic or rubber components.
- Storage: Store the training wheels in a dry place away from direct sunlight when not in use for extended periods.
Troubleshooting
| Issue | Possible Cause | Solution |
|---|---|---|
| Training wheels bend or become unstable. | Loose connections; excessive weight; impact damage; improper installation. | Ensure all bolts and nuts are securely tightened. Verify the training wheels are suitable for the child's weight. Inspect for damage and replace if necessary. Re-install according to instructions. |
| Flashing lights do not activate. | Wheels not spinning fast enough; internal mechanism fault; dirt/debris. | Ensure the wheels are spinning freely. Clean any dirt or debris from the wheel hub. If the issue persists, the internal light mechanism may be faulty. |
| Bicycle leans too much or is too upright. | Incorrect training wheel height adjustment. | Adjust the training wheels so the bicycle's rear wheel is slightly off the ground (0.5 to 1 inch) when the training wheels are on a flat surface. |
Specifications
| Feature | Detail |
|---|---|
| Brand | MOL |
| Model Number | 1-20200522-001 |
| Compatible Bike Sizes | 12, 14, 16, 18, 20 inches |
| Material | High-quality Plastic (Exterior Finish), Rubber (Wheel Material), Seamless Steel Bearing |
| Wheel Diameter | Approximately 4.37 inches (118 mm) |
| Wheel Width | Approximately 1.50 inches (2 inches rim width) |
| Item Weight | 2.1 Pounds (total) |
| Special Features | Flashing LED lights (motion activated), Thickened design for durability, Universal fit |

Image: A diagram illustrating the dimensions of the training wheels, including wheel diameter and overall height, and indicating compatibility with various bike sizes (14, 16, 18, 20 inches).

Image: An exploded view highlighting the seamless steel bearing for enhanced durability and the high-quality rubber material used for the wheel, designed for wear resistance and noise reduction.
Warranty and Support
MOL products are manufactured with quality and reliability in mind. For specific warranty details or technical support, please refer to the product packaging or contact your retailer. Keep your purchase receipt as proof of purchase.
For further assistance, please contact customer support through the platform where the product was purchased.