
Introduction
Thank you for choosing the ErGear Single Monitor Arm, Model EGCM4. This manual provides essential information for the safe and efficient installation, operation, and maintenance of your monitor arm. Please read these instructions carefully before assembly and retain them for future reference.

A black single monitor arm with a desk clamp base and a VESA mounting plate, designed for desktop use.
Safety Information
- Ensure all components are present and undamaged before assembly. Do not use if any parts are missing or faulty.
- This monitor arm is designed for monitors between 13 and 32 inches, weighing up to 8 kg (17.6 lbs). Do not exceed the maximum weight capacity.
- Verify your monitor's VESA mounting pattern is 75x75mm or 100x100mm.
- For C-clamp installation, ensure your desk thickness is between 10-80mm. For grommet installation, ensure your desk thickness is between 20-80mm.
- Always tighten all screws securely. Loose screws can cause the monitor arm to fall, resulting in damage or injury.
- Keep children and pets away during installation. Small parts may be a choking hazard.
- If you have any doubts about installation, consult a qualified professional.
Package Contents
Please check that all parts are included in your package:
- Monitor Arm Assembly
- Desk Clamp Base
- Grommet Mount Components
- VESA Plate
- Mounting Hardware (screws, washers, spacers)
- Hex Keys for Adjustment
- Cable Management Clips
Specifications
| Feature | Specification |
|---|---|
| Model Number | EGCM4 |
| Compatible Monitor Size | 13 - 32 inches |
| Maximum Load Capacity | 8 kg (17.6 lbs) |
| VESA Compatibility | 75x75mm, 100x100mm |
| Material | Alloy Steel |
| Mounting Type | C-Clamp or Grommet |
| C-Clamp Desk Thickness | 10 - 80 mm |
| Grommet Desk Thickness | 20 - 80 mm |
| Tilt Range | Up/Down ±90° |
| Swivel Range | Left/Right ±180° |
| Rotation | 360° |
| Height Adjustment | Up to 41 cm |
| Product Dimensions | 44.4 x 16 x 8.7 cm (packaged) |
| Product Weight | 2.16 kg |
| UPC | 619191840540 |

An image illustrating the compatible monitor specifications for the arm, including screen size (13-32 inches), maximum weight (8kg), and VESA mounting patterns (75x75mm and 100x100mm).

A checklist image for users to verify compatibility before purchase, covering monitor size (13-32 inches), weight (up to 8kg), VESA standards (75x75mm/100x100mm), and desk thickness for C-clamp (10-80mm) and grommet (20-80mm) mounts.
Setup and Installation
The ErGear Single Monitor Arm offers two installation methods: C-clamp and Grommet mount. Choose the method suitable for your desk.
Pre-Installation Check
- Ensure your monitor meets the size and weight requirements (13-32 inches, max 8kg).
- Confirm your monitor has VESA 75x75mm or 100x100mm mounting holes.
- Measure your desk thickness to ensure compatibility with the chosen mounting method.
Installation Steps
- Attach the Base: Secure the C-clamp or grommet base to your desk. Ensure it is firmly tightened to prevent movement.
- Connect Arm to Pole: Slide the monitor arm onto the pole of the base. Tighten the connecting screws on the arm to secure it to the pole.
- Attach VESA Plate to Monitor: Attach the VESA plate to the back of your monitor using the appropriate screws (M4x12mm, M4x16mm, M6x12mm, M6x16mm).
- Mount Monitor to Arm: Slide the monitor (with VESA plate attached) onto the arm's mounting head. Ensure it clicks securely into place.

A visual guide detailing the three main steps for installing the monitor arm: securing the base, attaching the arm to the pole, and mounting the VESA plate to the arm.

A detailed image showing the two installation methods: C-clamp for desk thicknesses of 10-80mm and grommet mount for desk thicknesses of 20-80mm.
Operating Instructions (Adjustments)
The ErGear Single Monitor Arm allows for flexible adjustments to achieve an ergonomic viewing experience.
Adjustable Features:
- Height Adjustment: The monitor arm can be adjusted vertically along the pole by loosening and tightening the collar. This allows for up to 41cm of height adjustment to align your monitor with your eye level.
- Tilt: The monitor can be tilted up or down by ±90° to reduce glare and optimize viewing angles.
- Swivel: The arm allows for ±180° swivel, enabling you to share your screen with colleagues or adjust for different tasks.
- Rotation: The monitor can be rotated 360° from landscape to portrait orientation.

A visual representation of the monitor arm's extensive adjustability, detailing 360-degree rotation, +/-180-degree swivel, and +/-90-degree tilt capabilities.
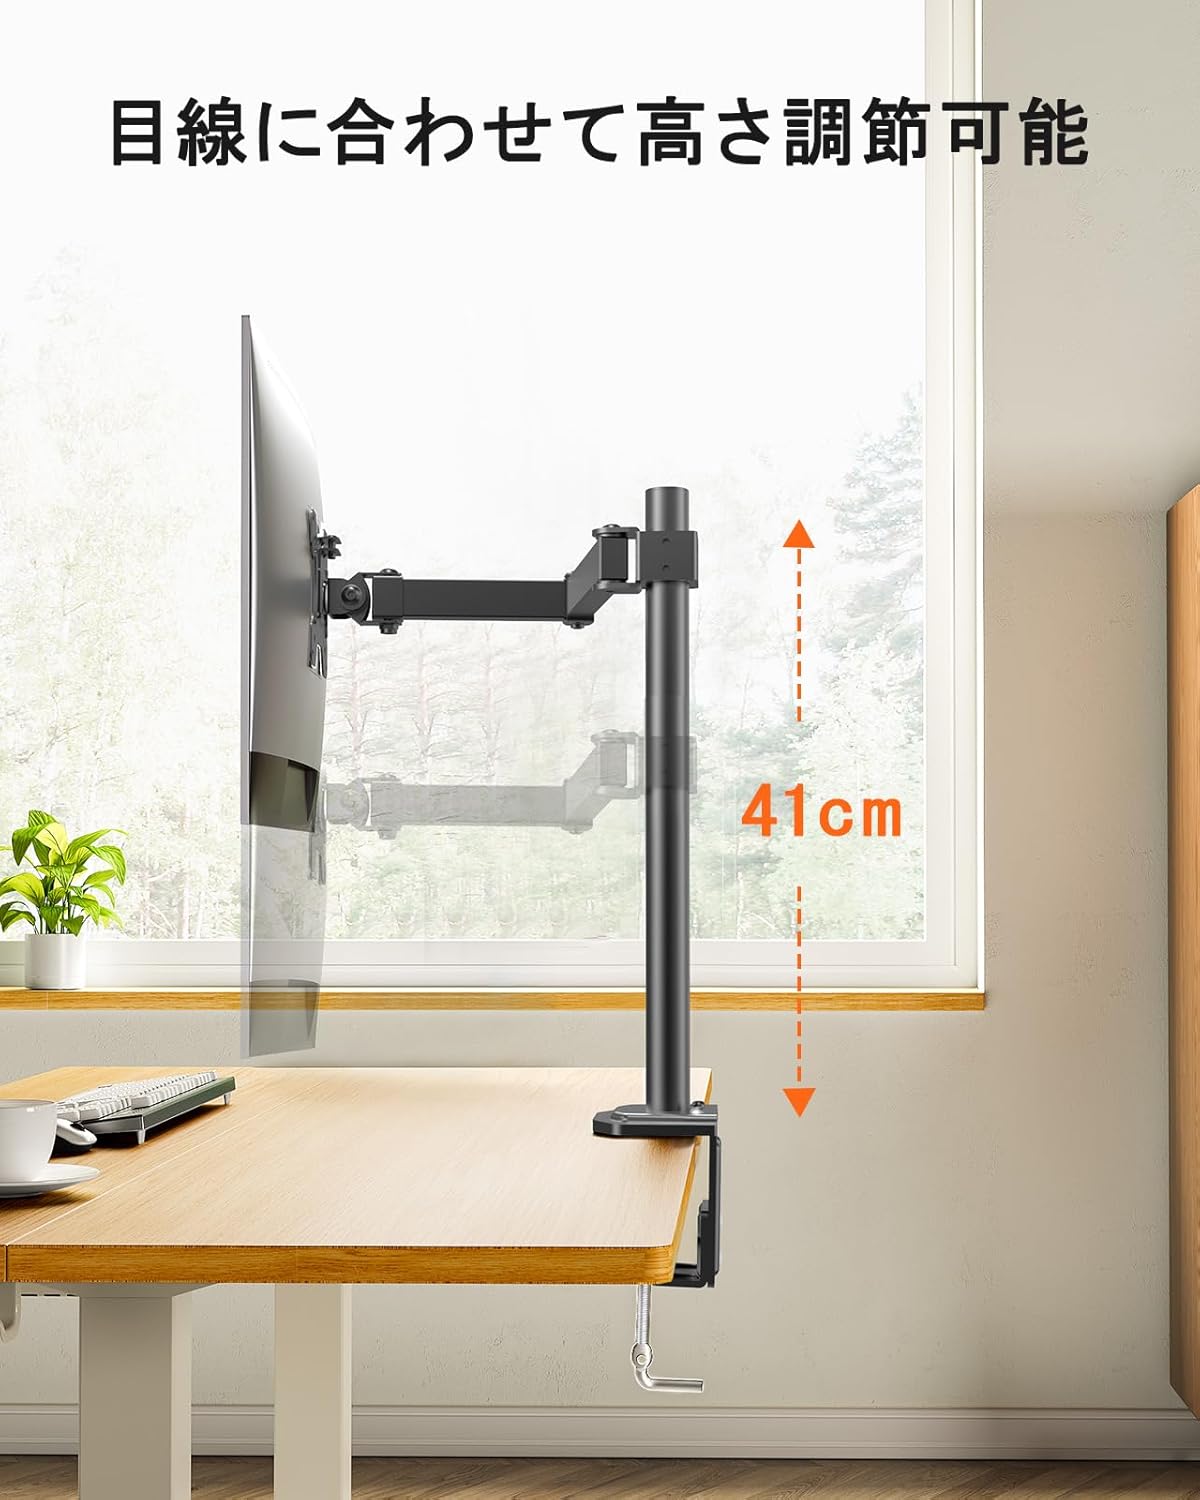
An image highlighting the monitor arm's vertical adjustment capability, allowing for a height range of 41cm to align the monitor with eye level.

A side-by-side comparison demonstrating the ergonomic benefits of using an adjustable monitor arm, showing improved posture compared to a fixed monitor stand.

An overhead view of a person working at a desk, demonstrating how the monitor arm allows for flexible monitor positioning to achieve a comfortable and ergonomic workspace.
Maintenance
- Regularly check all screws and connections to ensure they remain tight. Re-tighten if necessary.
- Clean the monitor arm with a soft, damp cloth. Avoid abrasive cleaners or solvents that could damage the finish.
- Ensure cables are properly routed through the cable management clips to prevent strain or damage.

A view of a desk setup where the monitor arm's integrated cable management system keeps monitor cables organized and out of sight, contributing to a clean workspace.

An image showing a yellow cable neatly routed along the monitor arm using the integrated cable clips, illustrating effective cable management.
Troubleshooting
- Monitor is unstable or sags:
- Ensure all mounting screws (VESA plate to monitor, arm to pole, base to desk) are securely tightened.
- Verify that your monitor's weight does not exceed the 8kg capacity. - Difficulty adjusting arm movement:
- Check if any adjustment screws are overtightened. Loosen slightly if necessary.
- Ensure the arm is not obstructed by other objects on the desk. - Arm does not hold position:
- This model is a pole-mounted arm with fixed position adjustments, not a gas spring arm. Ensure all tightening points are secure after positioning. - Missing parts or damaged components:
- Refer to the Warranty and Support section for assistance.
Warranty and Support
ErGear provides a 5-year quality guarantee from the date of purchase for this product. This warranty covers manufacturing defects and ensures product quality.
In the event of any issues with your product, such as defects, malfunctions, or missing accessories, please contact our customer service team. We are committed to providing a full refund or free exchange to ensure your satisfaction.
For support, please refer to the contact information provided with your purchase or visit the official ErGear website.


