Thermaltake CA-1Q9-00S6WN-00
Thermaltake S100 Tempered Glass Snow Edition Micro-ATX mini-Tower Computer Case User Manual
Model: CA-1Q9-00S6WN-00
1. Introduction
The Thermaltake S100 Tempered Glass Snow Edition Micro-ATX mini-Tower Computer Case is designed for users seeking a compact, elegant, and functional chassis for their PC builds. This manual provides detailed instructions for setting up, operating, and maintaining your computer case, ensuring optimal performance and longevity.
2. Key Features
- Slim and Compact Design: Full metal construction with a sleek front panel, offering a modern and space-saving form factor.
- 4mm Thick Tempered Glass Panel: A durable, tool-free hinged tempered glass side panel provides a clear view of internal components and easy access.
- Built-in Windowed Power Cover: Equipped with a ventilated PSU shroud to improve airflow and conceal cables for a clean build.
- Dust Reduction: Features magnetic fan filters on the top and base for effective dust filtration and particulate protection.
- Drive Bay Flexibility: Includes 2 x 3.5" or 2 x 2.5" HDD Rack and 2 x 2.5" HDD Bracket behind the MB Tray for versatile storage options.
- Pre-installed Fan: Comes with one 120mm standard rear fan for fundamental ventilation.
- Motherboard Compatibility: Supports Mini ITX and Micro ATX motherboards.
- Convenient I/O Ports: Top-mounted I/O panel with 1 x USB 3.0, 2 x USB 2.0, and 1 x HD Audio port.
- Component Clearance: Supports CPU coolers up to 165mm, VGA cards up to 330mm, and PSUs up to 160mm.
3. Setup and Installation
3.1 Unpacking
Carefully remove the computer case from its packaging. Inspect for any damage during transit. Retain the packaging for future transport or storage.
3.2 Component Installation
The S100 case is designed for straightforward component installation. Follow the steps below for a typical build:

Figure 3.1: Overall view of the Thermaltake S100 Snow Edition case.
- Accessing the Interior: The tempered glass side panel is hinged for easy access. Gently open it to begin installation.
- Motherboard Installation: Install your Micro ATX or Mini ITX motherboard onto the pre-installed standoffs. Secure it with the provided screws.
- CPU Cooler Installation: Install your CPU cooler. The case supports CPU coolers up to 165mm in height.
- Graphics Card (VGA) Installation: Install your graphics card into the PCIe slot. The case accommodates GPUs up to 330mm in length.
- Power Supply Unit (PSU) Installation: Install your standard PS2 PSU into the dedicated compartment at the bottom of the case. The PSU shroud helps with cable management and airflow. The case supports PSUs up to 160mm in length.
- Storage Drive Installation: Utilize the versatile drive bays. The case supports 2 x 3.5" or 2 x 2.5" drives in the HDD rack under the PSU shroud, and 2 x 2.5" drives behind the motherboard tray.
- Additional Fan/Radiator Installation: The case supports various fan and radiator configurations.
- Front: 2 x 120mm, 2 x 140mm (Radiator: 1x 240mm, 1 x 280mm)
- Top: 2 x 120mm, 2 x 140mm, 1 x 200mm (Radiator: 1 x 240mm, 1x 280mm)
- Rear: 1 x 120mm (pre-installed) (Radiator: 1 x 120mm)
- Cable Management: Utilize the space behind the motherboard tray and the PSU shroud to route and hide cables for a clean and organized interior, which also improves airflow.
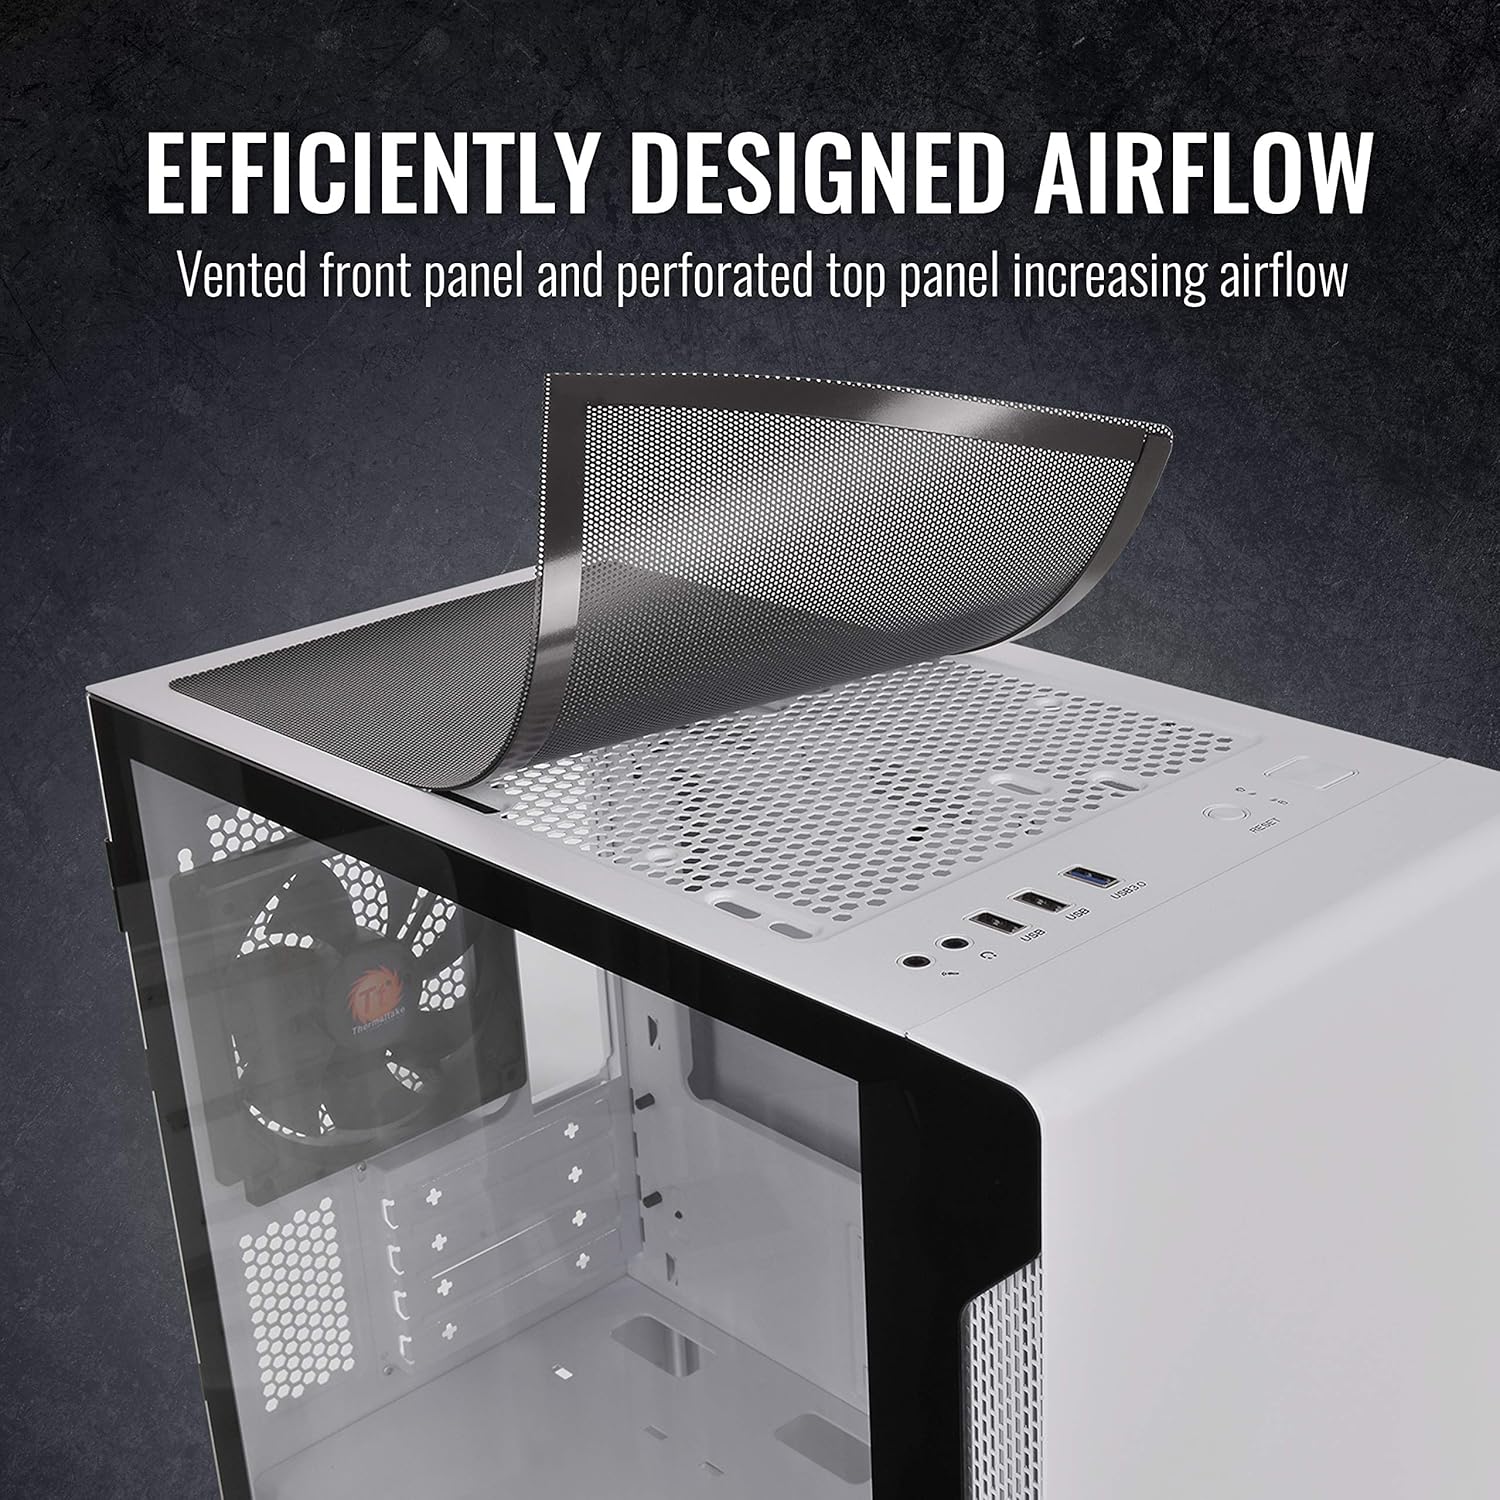
Figure 3.2: Tempered Glass Panel for easy access.

Figure 3.3: Hardware compatibility and clearance limits.
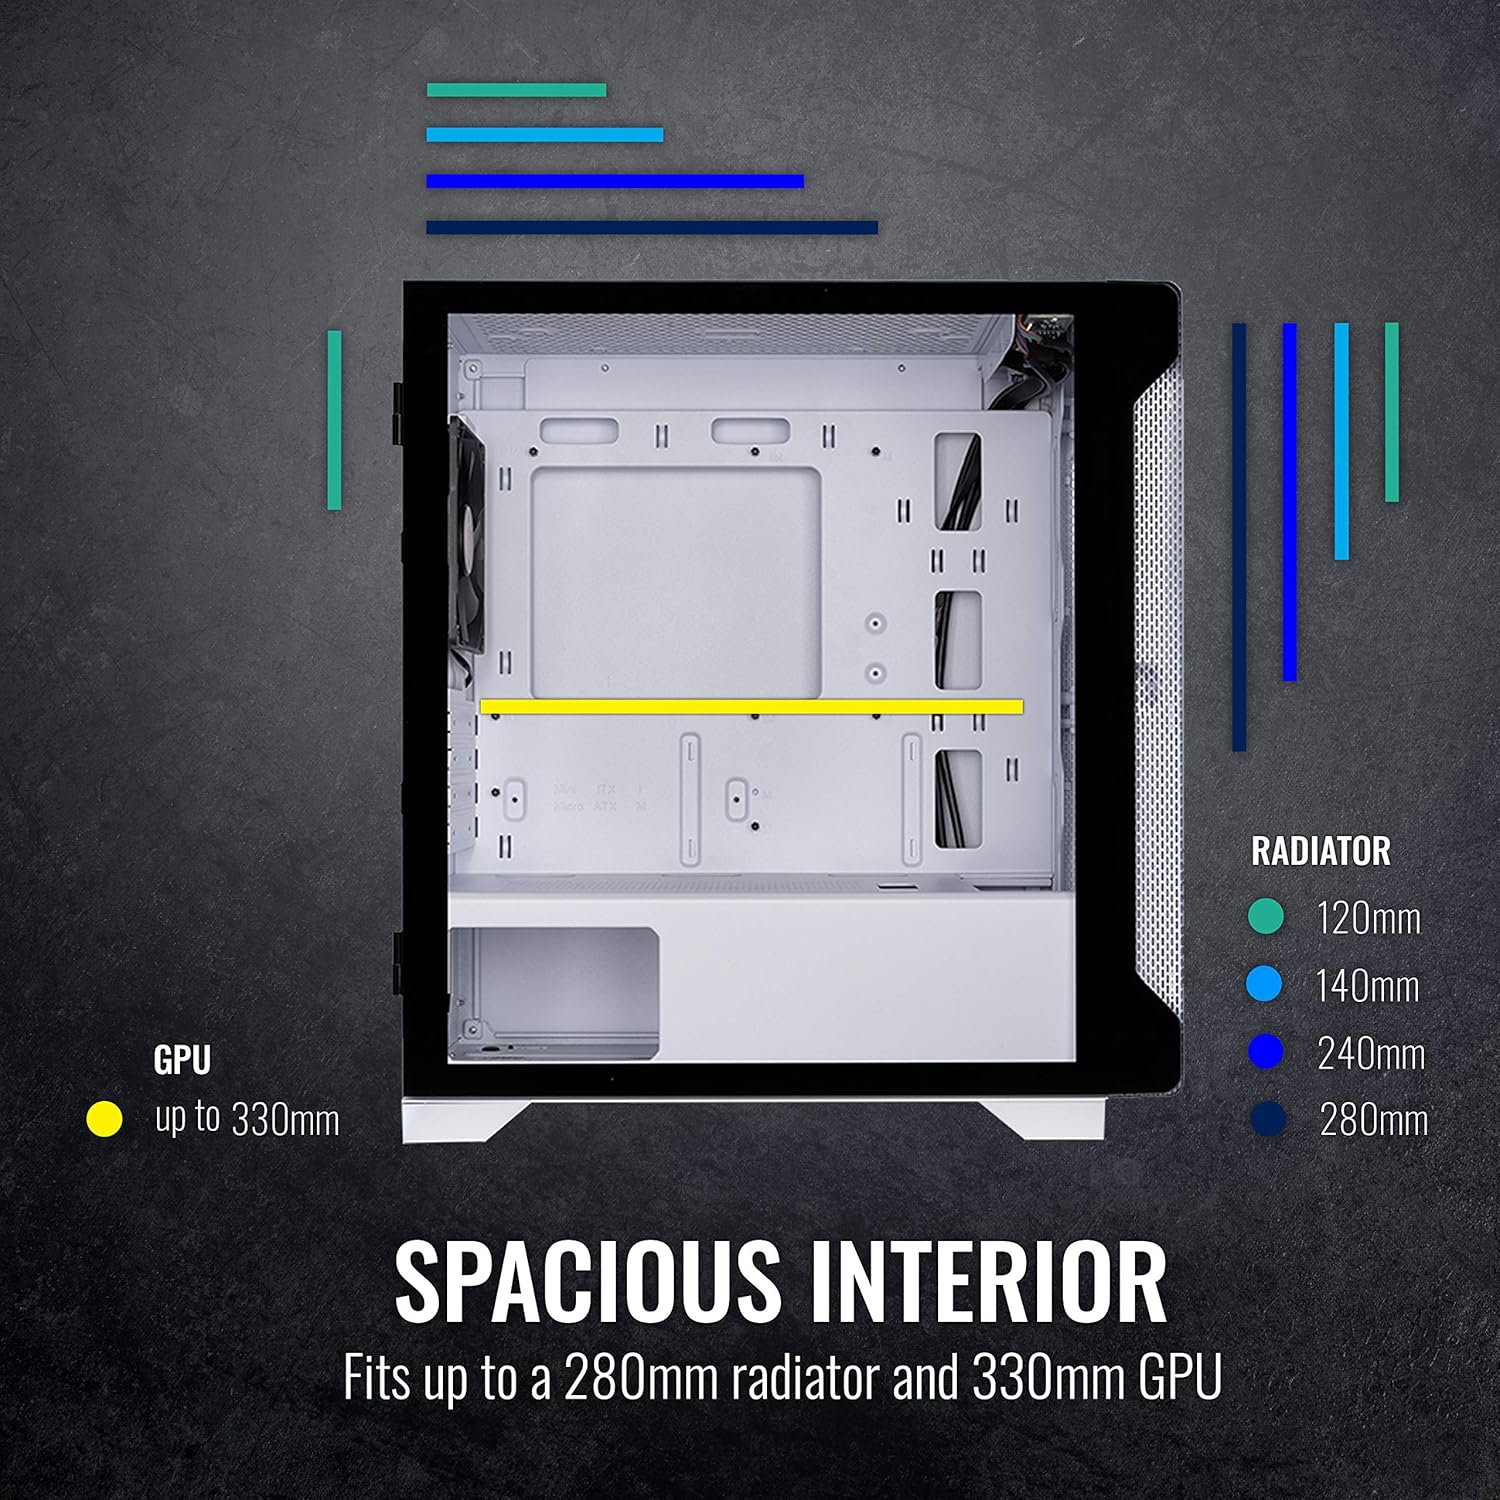
Figure 3.4: Fan support locations.
Video 3.1: Official Thermaltake S100 mini-Tower overview, demonstrating features and build potential.
4. Operating the Case
Once all components are installed and connected, close the tempered glass side panel. Connect your peripherals (monitor, keyboard, mouse) to your system. Use the power button located on the top I/O panel to power on your system.
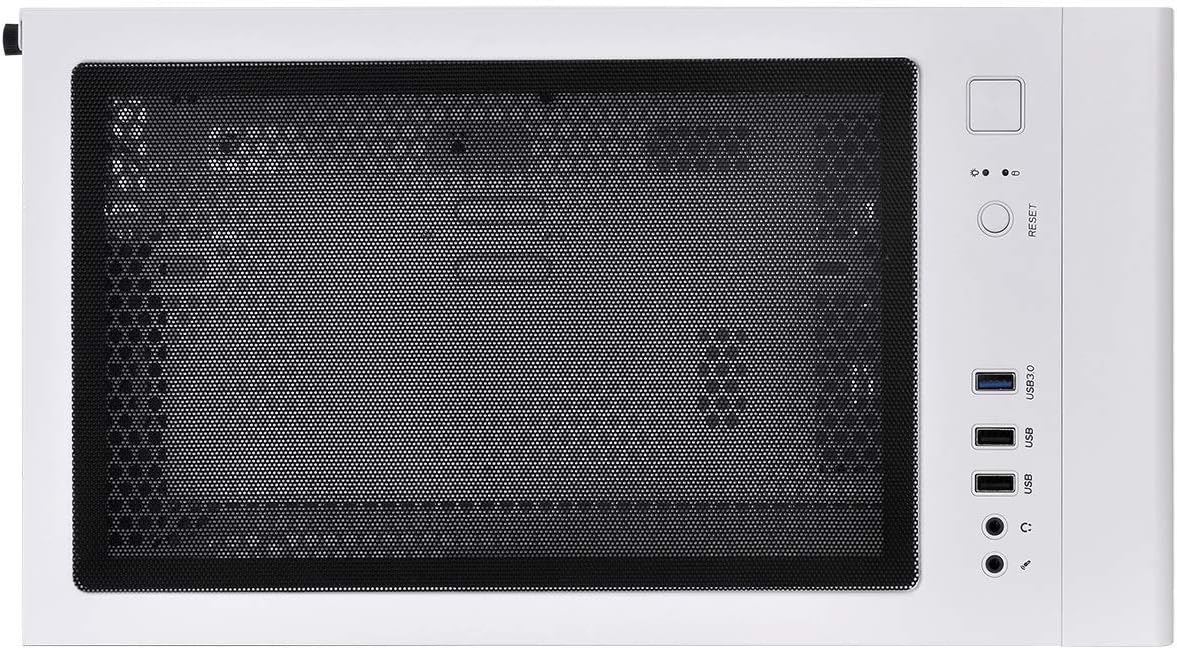
Figure 4.1: Top I/O Panel for easy access.
5. Maintenance
Regular maintenance helps preserve the appearance and functionality of your case.
- Dust Filter Cleaning: The S100 features magnetic dust filters on the top and a removable filter at the bottom. Periodically remove and clean these filters to prevent dust buildup inside the case, which can affect component temperatures.
- Exterior Cleaning: Use a soft, damp cloth to wipe down the exterior surfaces. Avoid abrasive cleaners that could damage the finish or tempered glass.
6. Troubleshooting
If you encounter issues with your PC build within the S100 case, consider the following general troubleshooting steps:
- No Power: Ensure the PSU is properly seated and connected, and the power switch on the PSU is in the 'ON' position. Check all power cables to the motherboard and components.
- No Display: Verify that your monitor is connected to the graphics card (or motherboard integrated graphics) and is powered on. Reseat the graphics card and RAM modules.
- Overheating: Ensure all fans are spinning correctly and are not obstructed. Clean dust filters regularly. Verify proper thermal paste application on the CPU cooler.
- Loose Connections: A common cause of issues is loose cables. Double-check all power, data, and front panel connections.
For specific component-related issues, refer to the respective component manuals.
7. Specifications
| Feature | Specification |
|---|---|
| Model Name | CA-1Q9-00S6WN-00 |
| Case Type | Micro Case (Mini-Tower) |
| Dimensions (H x W x D) | 411 x 220 x 441 mm (16.18 x 8.66 x 17.36 inch) |
| Net Weight | 6.1 kg / 13.45 lbs |
| Side Panel | 4mm Tempered Glass x 1 |
| Color | Exterior & Interior: White (Snow) |
| Material | SPCC, Tempered Glass |
| Cooling System (Rear) | 120 x 120 x 25 mm fan (1000rpm, 16 dBA) |
| Drive Bays (Accessible) | 2 x 3.5" or 2 x 2.5" (HDD Rack) |
| Drive Bays (Hidden) | 2 x 2.5" (HDD Bracket) |
| Expansion Slots | 4 |
| Motherboards Supported | 6.7" x 6.7" (Mini ITX), 9.6" x 9.6" (Micro ATX) |
| I/O Port | 1 x USB 3.0, 2 x USB 2.0, 1 x HD Audio, 1 x Reset Button |
| PSU Type | Standard PS2 PSU (optional) |
| Max CPU Cooler Height | 165mm |
| Max VGA Length | 330mm |
| Max PSU Length | 160mm |
8. Warranty and Support
For detailed warranty information and technical support, please refer to the official Thermaltake website or the comprehensive user manual available for download.
User Manual (PDF): Download Here
Related Documents - CA-1Q9-00S6WN-00
 |
Thermaltake Ceres 500 TG ARGB Mid Tower Chassis User Manual Comprehensive user manual for the Thermaltake Ceres 500 TG ARGB Mid Tower PC Chassis, detailing specifications, installation procedures, cooling support, and component compatibility. |
 |
Thermaltake Core P6 TG PC Case User Manual and Installation Guide Comprehensive user manual for the Thermaltake Core P6 TG PC case, covering specifications, accessories, warnings, and detailed installation instructions for various PC components, cooling solutions, and I/O connections. |
 |
Thermaltake View 270 TG ARGB Snow PC Case User Manual and Installation Guide Comprehensive user manual for the Thermaltake View 270 TG ARGB Snow Mid Tower PC Case (Model CA-1Y7-00M6WN-00). Includes detailed specifications, accessory list, compatibility information, and step-by-step installation instructions for components like PSU, motherboard, drives, VGA cards, cooling systems, and I/O connections. |
 |
Thermaltake Vision 330 CR ARGB PC Case User Manual Comprehensive user manual for the Thermaltake Vision 330 CR ARGB PC case, detailing specifications, dimensions, clearances, and installation guides for components like PSU, motherboard, storage, VGA, and cooling systems. |
 |
Thermaltake VIEW 31 Tempered Glass Mid Tower Computer Case User Manual Comprehensive user manual for the Thermaltake VIEW 31 Tempered Glass Mid Tower Computer Case, covering specifications, installation guides for components like PSU, motherboard, HDDs, PCI cards, cooling systems, and front panel connectors. |
 |
Thermaltake Core P3 TG Pro User Manual and Installation Guide Comprehensive user manual and installation guide for the Thermaltake Core P3 TG Pro ATX Mid Tower computer case. Features include tempered glass side panel, extensive cooling support, and versatile drive bay configurations. Learn how to install components, manage cables, and mount your system. |